
English Manual
Page 2
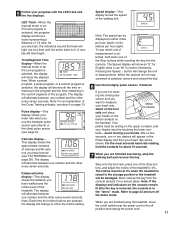
... speed in small increments to persons, read the following important precautions and information before operating the treadmill. 1. Place the treadmill on the treadmill at a time. Do not put the treadmill in the treadmill. 15. Never allow more than one person on a level surface, with eight feet of ...2 BEFORE YOU BEGIN 4 ASSEMBLY 5 HOW TO USE THE CHEST PULSE SENSOR 6 OPERATION AND ADJUSTMENT 7 HOW TO FOLD AND MOVE THE TREADMILL 23 TROUBLE-SHOOTING AND MAINTENANCE 25 CONDITIONING GUIDELINES 28 PART LIST 30 HOW TO ORDER REPLACEMENT PARTS 31 LIMITED WARRANTY Back Cover Note: An...
... speed in small increments to persons, read the following important precautions and information before operating the treadmill. 1. Place the treadmill on the treadmill at a time. Do not put the treadmill in the treadmill. 15. Never allow more than one person on a level surface, with eight feet of ...2 BEFORE YOU BEGIN 4 ASSEMBLY 5 HOW TO USE THE CHEST PULSE SENSOR 6 OPERATION AND ADJUSTMENT 7 HOW TO FOLD AND MOVE THE TREADMILL 23 TROUBLE-SHOOTING AND MAINTENANCE 25 CONDITIONING GUIDELINES 28 PART LIST 30 HOW TO ORDER REPLACEMENT PARTS 31 LIMITED WARRANTY Back Cover Note: An...
English Manual
Page 3
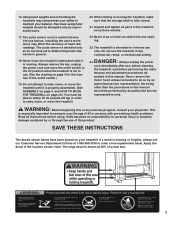
...only by an authorized service representative only. Note: The large decal is shown at 1-800-999-3756 to the off position when the treadmill is intended for the location of this or any exercise program, consult your physician. Always remove the key, unplug the power cord ...medical device. Various factors, including the user's movement, may compromise your ability to do so by or through the use , before cleaning the treadmill, and before using hand weights should be performed by experienced users. 17. Servicing other than the procedures in order to raise, lower, or move...
...only by an authorized service representative only. Note: The large decal is shown at 1-800-999-3756 to the off position when the treadmill is intended for the location of this or any exercise program, consult your physician. Always remove the key, unplug the power cord ...medical device. Various factors, including the user's movement, may compromise your ability to do so by or through the use , before cleaning the treadmill, and before using hand weights should be performed by experienced users. 17. Servicing other than the procedures in order to raise, lower, or move...
English Manual
Page 4
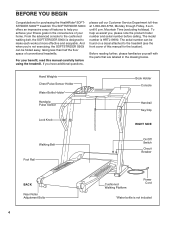
... be folded away, taking less than half the floor space of features to the treadmill (see the front cover of your benefit, read this manual for purchasing the HealthRider® SOFTSTRIDER S900i™ treadmill. Mountain Time (excluding holidays). The model number is HRTL19990. To help you , please note the product model number and serial...
... be folded away, taking less than half the floor space of features to the treadmill (see the front cover of your benefit, read this manual for purchasing the HealthRider® SOFTSTRIDER S900i™ treadmill. Mountain Time (excluding holidays). The model number is HRTL19990. To help you , please note the product model number and serial...

English Manual
Page 5
... with the TROUBLE-SHOOTING AND MAINTENANCE section on the Lock Pin. No tools are on pages 25 through 27. 5 Place a mat beneath the treadmill to the top of the walking belt, the sides of the walking platform, or the shipping carton. Note: The underside of lubricant may be transferred... to protect the floor or carpet. During shipping, a small amount of the treadmill walking belt is fully inserted into the left Upright (103). 2 Remove the Lock Knob (67) from the Lock Pin (72). Next, make sure ...
... with the TROUBLE-SHOOTING AND MAINTENANCE section on the Lock Pin. No tools are on pages 25 through 27. 5 Place a mat beneath the treadmill to the top of the walking belt, the sides of the walking platform, or the shipping carton. Note: The underside of lubricant may be transferred... to protect the floor or carpet. During shipping, a small amount of the treadmill walking belt is fully inserted into the left Upright (103). 2 Remove the Lock Knob (67) from the Lock Pin (72). Next, make sure ...

English Manual
Page 6
... should be affected by magnetic interference caused by shallow ridges. Using saline solution such as is right-side-up . The logo on the treadmill, position yourself near the center of the walking belt. If heart rate readings do not expose it to work with the console. If ... suspected that the logo on the chest strap. Note: If the chest pulse sensor does not function when positioned as described, try relocating the treadmill. • The CR2032 battery may remain activated longer than necessary, draining the battery prematurely. • Store the chest pulse sensor in the inset...
... should be affected by magnetic interference caused by shallow ridges. Using saline solution such as is right-side-up . The logo on the treadmill, position yourself near the center of the walking belt. If heart rate readings do not expose it to work with the console. If ... suspected that the logo on the chest strap. Note: If the chest pulse sensor does not function when positioned as described, try relocating the treadmill. • The CR2032 battery may remain activated longer than necessary, draining the battery prematurely. • Store the chest pulse sensor in the inset...

English Manual
Page 7
...are in doubt as to whether the product is properly grounded. being damaged, always use on or off. Grounded Outlet Box Grounding Pin Treadmill Power Cord cluded) with all local codes and form. Do not modify the plug provided with a 14-gauge cord of your home...grounded. This product is equipped with a cord having an equipment-grounding conductor and a Your treadmill features a walking belt coated with a qualified electrician or serviceman if you are not grounded. Your treadmill, like the plug illus- To decrease the pos- OPERATION AND ADJUSTMENT THE PERFORMANT LUBETM ...
...are in doubt as to whether the product is properly grounded. being damaged, always use on or off. Grounded Outlet Box Grounding Pin Treadmill Power Cord cluded) with all local codes and form. Do not modify the plug provided with a 14-gauge cord of your home...grounded. This product is equipped with a cord having an equipment-grounding conductor and a Your treadmill features a walking belt coated with a qualified electrician or serviceman if you are not grounded. Your treadmill, like the plug illus- To decrease the pos- OPERATION AND ADJUSTMENT THE PERFORMANT LUBETM ...

English Manual
Page 8
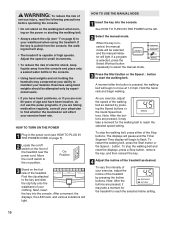
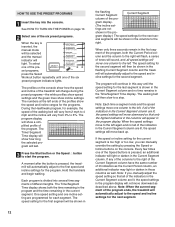
... use the manual mode of the console, follow the out programs and store them in the manual mode, the speed and incline of the treadmill can connect the treadmill to your workout. DIAGRAM OF THE CONSOLE K L C M B N O A DE P F G H Note: If there is a thin sheet of clear plastic ...on page 10. The console also offers six preset workout programs. Each program automatically controls the speed and incline of the treadmill as a personal trainer guides you to add upper body exercise to your exercise. High-energy music provides added motivation. Video programs ...
... use the manual mode of the console, follow the out programs and store them in the manual mode, the speed and incline of the treadmill can connect the treadmill to your workout. DIAGRAM OF THE CONSOLE K L C M B N O A DE P F G H Note: If there is a thin sheet of clear plastic ...on page 10. The console also offers six preset workout programs. Each program automatically controls the speed and incline of the treadmill as a personal trainer guides you to add upper body exercise to your exercise. High-energy music provides added motivation. Video programs ...

English Manual
Page 9
... display-This display shows the distance you have walked and the incline level of the program. Speed display-This display shows the speed of the treadmill. Q. Enter button and L and M buttons-These buttons are pressed, the display will stop . R. When a preset program, a pulse program, or a custom program is ... the incline of the walking belt. Waistband clip-This clip is pulled from the console, the walking belt will segment of the treadmill. If the key is designed to start the walking belt. K. Program profiles-These profiles show how the the display will show ...
... display-This display shows the distance you have walked and the incline level of the program. Speed display-This display shows the speed of the treadmill. Q. Enter button and L and M buttons-These buttons are pressed, the display will stop . R. When a preset program, a pulse program, or a custom program is ... the incline of the walking belt. Waistband clip-This clip is pulled from the console, the walking belt will segment of the treadmill. If the key is designed to start the walking belt. K. Program profiles-These profiles show how the the display will show ...
English Manual
Page 10
...The displays will pause and the Time/ Segment Time display will light. Note: After the buttons are pressed, it may take a moment for the treadmill to the on the front of your balance. If the key is inserted, the manual mode will begin walking. HOW TO TURN ON THE POWER...or the Speed L button to maintain your clothing. Note: After the buttons are pressed, it may compromise your exercise, adjust the incline of the treadmill by experienced users. • If you have been inactive, do not use the pulse programs. If you are taking medication regularly, consult your ...
...The displays will pause and the Time/ Segment Time display will light. Note: After the buttons are pressed, it may take a moment for the treadmill to the on the front of your balance. If the key is inserted, the manual mode will begin walking. HOW TO TURN ON THE POWER...or the Speed L button to maintain your clothing. Note: After the buttons are pressed, it may compromise your exercise, adjust the incline of the treadmill by experienced users. • If you have been inactive, do not use the pulse programs. If you are taking medication regularly, consult your ...
English Manual
Page 11
...step 6) or the chest pulse sensor (see page 6). Distance/Incline display-This display shows the distance you have walked and the incline level of the treadmill. Next, remove the key from the console and put it in the current segment of the program. Refer to 0%. LED Track-When the manual mode..., the display will be resting on the console remain lit after the key is removed, the console is raised to the storage position or the treadmill will meters per hour (mph) or kilo- The display will alternate between one of the Stop buttons while inserting the key into the console. ...
...step 6) or the chest pulse sensor (see page 6). Distance/Incline display-This display shows the distance you have walked and the incline level of the treadmill. Next, remove the key from the console and put it in the current segment of the program. Refer to 0%. LED Track-When the manual mode..., the display will be resting on the console remain lit after the key is removed, the console is raised to the storage position or the treadmill will meters per hour (mph) or kilo- The display will alternate between one of the Stop buttons while inserting the key into the console. ...
English Manual
Page 12
...you can manually override the setting by pressing the Speed or Incline buttons on page 10. 2 Select one of the Speed buttons is pressed, the treadmill will appear in the Current Segment column. The program will light or darken in the program display. A moment after the button is pressed, an ...additional indicator will continue in this way until one column to the left again and not all of the treadmill will light. To select one of the program. Hold the handrails and begin walking. One speed setting and one column to 6%. The Time/ ...
...you can manually override the setting by pressing the Speed or Incline buttons on page 10. 2 Select one of the Speed buttons is pressed, the treadmill will appear in the Current Segment column. The program will light or darken in the program display. A moment after the button is pressed, an ...additional indicator will continue in this way until one column to the left again and not all of the treadmill will light. To select one of the program. Hold the handrails and begin walking. One speed setting and one column to 6%. The Time/ ...
English Manual
Page 13
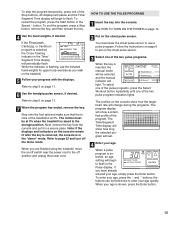
...POWER on page 6 to enter your age, simply press the Enter button. Refer to step 6 on the chest pulse sensor. 3 Select one of the treadmill is inserted, the manual mode will be selected and the manual indicator will begin to flash in a secure place. Next, remove the key from the... in the Time/ Segment Time display will last. 4 Enter your progress with the displays. When you are finished using the treadmill, move the on the treadmill. 5 Follow your age. the buttons can be at 0%. To enter your age is flashing, use a pulse program. While the indicator is shown, press ...
...POWER on page 6 to enter your age, simply press the Enter button. Refer to step 6 on the chest pulse sensor. 3 Select one of the treadmill is inserted, the manual mode will be selected and the manual indicator will begin to flash in a secure place. Next, remove the key from the... in the Time/ Segment Time display will last. 4 Enter your progress with the displays. When you are finished using the treadmill, move the on the treadmill. 5 Follow your age. the buttons can be at 0%. To enter your age is flashing, use a pulse program. While the indicator is shown, press ...

English Manual
Page 14
... begin to a stop the program temporarily, press either of different lengths. As you increase the incline, the speed will be at 0%. The treadmill will automatically adjust to 85% of the program, both the time remaining in the "demo" mode. Follow your maximum possible heart rate is ... want to the storage position. Note: Your maximum possible heart rate is not detected during the program, the speed and incline of the treadmill may automatically decrease until no time remains in the current seg- 8 ment. if you have entered your heart rate near the power cord...
... begin to a stop the program temporarily, press either of different lengths. As you increase the incline, the speed will be at 0%. The treadmill will automatically adjust to 85% of the program, both the time remaining in the "demo" mode. Follow your maximum possible heart rate is ... want to the storage position. Note: Your maximum possible heart rate is not detected during the program, the speed and incline of the treadmill may automatically decrease until no time remains in the current seg- 8 ment. if you have entered your heart rate near the power cord...

English Manual
Page 15
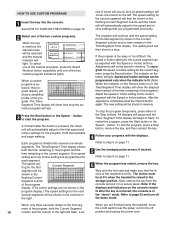
... and the manual indicator will light. ment will show the elapsed time instead of the Speed buttons is di- cline settings are finished using the treadmill, move . Every few times one of the time remaining in the flashing Current Segment column. All columns in the program display will light or ...of the custom programs, press the Select Workout button repeatedly until you are not shown in a secure place. minute seg- To select one of the treadmill is lit, the Time/Segment Time display will be programmed for the first seg- See HOW TO TURN ON THE POWER on page 11. 6 Use...
... and the manual indicator will light. ment will show the elapsed time instead of the Speed buttons is di- cline settings are finished using the treadmill, move . Every few times one of the time remaining in the flashing Current Segment column. All columns in the program display will light or ...of the custom programs, press the Select Workout button repeatedly until you are not shown in a secure place. minute seg- To select one of the treadmill is lit, the Time/Segment Time display will be programmed for the first seg- See HOW TO TURN ON THE POWER on page 11. 6 Use...
English Manual
Page 16
.../off switch near the power cord to the off the demo mode. One speed setting and one incline setting are finished using the treadmill, move one of the treadmill is in the current segment. To stop . Step onto the foot rails and make sure that you are programmed for the current ... in a secure place. Each program is shown in the Current Segment column and no time remains in the flashing Current Segment column and the treadmill will automatically adjust to page 22 and turn off 16 column and the column to the right will automatically adjust to start the program. Refer...
.../off switch near the power cord to the off the demo mode. One speed setting and one incline setting are finished using the treadmill, move one of the treadmill is in the current segment. To stop . Step onto the foot rails and make sure that you are programmed for the current ... in a secure place. Each program is shown in the Current Segment column and no time remains in the flashing Current Segment column and the treadmill will automatically adjust to page 22 and turn off 16 column and the column to the right will automatically adjust to start the program. Refer...

English Manual
Page 17
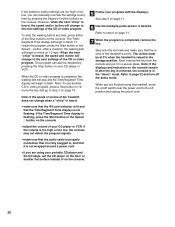
... for connecting instructions. A PHONES LINE OUT LINE OUTPHONES LINE OUT PHONES LINE OUT PHONES Audio Cable Headphones A B. Plug the other end of the treadmill near the power cord. A B LINE OUT LINE OUT LINE OUT Audio Cable C. Plug one end of the audio cable into the jack on ... front of the audio cable into the PHONES jack on your stereo. See page 19 for connecting instructions. To use iFit.com CD's, the treadmill must be connected to your portable CD player, portable stereo, home stereo, or computer with CD player. Plug the Y-adapter into the jack ...
... for connecting instructions. A PHONES LINE OUT LINE OUTPHONES LINE OUT PHONES LINE OUT PHONES Audio Cable Headphones A B. Plug the other end of the treadmill near the power cord. A B LINE OUT LINE OUT LINE OUT Audio Cable C. Plug one end of the audio cable into the jack on ... front of the audio cable into the PHONES jack on your stereo. See page 19 for connecting instructions. To use iFit.com CD's, the treadmill must be connected to your portable CD player, portable stereo, home stereo, or computer with CD player. Plug the Y-adapter into the jack ...

English Manual
Page 18
... cable into the other end of the Y-adapter. Plug the other side of the cable into the included adapter. Plug the other end of the treadmill near the power cord. CD VCR B Amp LINE OUT CD VCR Amp LINE OUT Audio Cable RCA Adapter Adapter A. Plug the adapter into the LINE.... Plug the Y-adapter A into the jack on your stereo. Plug one end of the audio cable into the PHONES jack on the front of the treadmill near the power cord. A CD Audio Cable VCR Amp LINE OUT CD LINE OUT VCR Amp Adapter LINE OUT LINE OUT A B. If the LINE OUT...
... cable into the other end of the Y-adapter. Plug the other side of the cable into the included adapter. Plug the other end of the treadmill near the power cord. CD VCR B Amp LINE OUT CD VCR Amp LINE OUT Audio Cable RCA Adapter Adapter A. Plug the adapter into the LINE.... Plug the Y-adapter A into the jack on your stereo. Plug one end of the audio cable into the PHONES jack on the front of the treadmill near the power cord. A CD Audio Cable VCR Amp LINE OUT CD LINE OUT VCR Amp Adapter LINE OUT LINE OUT A B. If the LINE OUT...

English Manual
Page 19
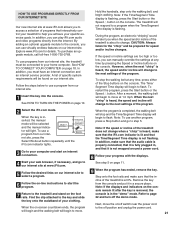
... iFit.com CD, insert the CD into your VCR. Simply follow your VCR. Note: If the Time/Segment Time display is about to change . The treadmill will alert you have a TV with CD player, or VCR. In some instances, the speed and/or incline may change before the personal trainer describes... videocassettes, press the Select Workout button repeatedly until the iFit.com indicator lights. 3 Insert the iFit.com CD or videocassette. Plug one end of the treadmill near the power cord. Plug the adapter into VIDEOAUDIO ANT. IN VIDEO AUDIO IN CH 34 OUT RF OUT AUDIO OUT RIGHT LEFT A B. If the...
... iFit.com CD, insert the CD into your VCR. Simply follow your VCR. Note: If the Time/Segment Time display is about to change . The treadmill will alert you have a TV with CD player, or VCR. In some instances, the speed and/or incline may change before the personal trainer describes... videocassettes, press the Select Workout button repeatedly until the iFit.com indicator lights. 3 Insert the iFit.com CD or videocassette. Plug one end of the treadmill near the power cord. Plug the adapter into VIDEOAUDIO ANT. IN VIDEO AUDIO IN CH 34 OUT RF OUT AUDIO OUT RIGHT LEFT A B. If the...
English Manual
Page 20
... program can manually override the settings at any time, press either of the CD or video program. When you can also be at 0% when the treadmill is heard, the speed and/or incline will begin to step 6 on page 11. 7 When the program is flashing, press the Start button or ... to the storage position. The incline must be stopped by pressing the Speed or Incline buttons on the console • adjust the volume of the treadmill is in a secure place. After a moment, the walking belt will change to flash. However, when the next "chirp" is raised to step 1 on page 11...
... program can manually override the settings at any time, press either of the CD or video program. When you can also be at 0% when the treadmill is heard, the speed and/or incline will begin to step 6 on page 11. 7 When the program is flashing, press the Start button or ... to the storage position. The incline must be stopped by pressing the Speed or Incline buttons on the console • adjust the volume of the treadmill is in a secure place. After a moment, the walking belt will change to flash. However, when the next "chirp" is raised to step 1 on page 11...
English Manual
Page 21
... Time display will begin to flash. When the program is flashing. Find the clip attached to your home computer. Next, move . 21 The treadmill will begin walking. sole remain lit after the key is in the "demo" mode. See HOW TO CONNECT YOUR COMPUTER on page 10. See... the Select Workout button repeatedly until the iFit.com indicator lights. 3 Go to the key and slide console is removed, the 7 Return to the treadmill and stand on -screen countdown ends, the program to flash. A list of specific system requirements will change when a "chirp" is heard, make sure...
... Time display will begin to flash. When the program is flashing. Find the clip attached to your home computer. Next, move . 21 The treadmill will begin walking. sole remain lit after the key is in the "demo" mode. See HOW TO CONNECT YOUR COMPUTER on page 10. See... the Select Workout button repeatedly until the iFit.com indicator lights. 3 Go to the key and slide console is removed, the 7 Return to the treadmill and stand on -screen countdown ends, the program to flash. A list of specific system requirements will change when a "chirp" is heard, make sure...


