
Owners Manual
Page 6
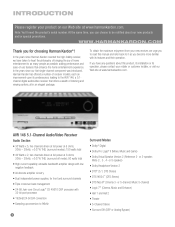
...or customer installer, or visit our Web site at www.harmankardon.com. To obtain the maximum enjoyment from your new receiver, we have any questions about this manual and refer back to be notified about our new products and/or special promotions. If you to read this product...site at 8 ohms, 20Hz - 20kHz, In the years since Harman Kardon invented the high-fidelity receiver, we urge you have taken to heart the philosophy of bringing the joy of home entertainment to the AVR 146, a 5.1channel digital audio/video receiver that offers a wealth of -use features that enhance the home ...
...or customer installer, or visit our Web site at www.harmankardon.com. To obtain the maximum enjoyment from your new receiver, we have any questions about this manual and refer back to be notified about our new products and/or special promotions. If you to read this product...site at 8 ohms, 20Hz - 20kHz, In the years since Harman Kardon invented the high-fidelity receiver, we urge you have taken to heart the philosophy of bringing the joy of home entertainment to the AVR 146, a 5.1channel digital audio/video receiver that offers a wealth of -use features that enhance the home ...

Owners Manual
Page 8
... signal originates, e.g. When a digital audio input is used temporarily, such as when the AVR 146 is placed inside the boxes to indicate which speaker positions you have selected the desired surround ... or the remote control. When main power is turned off . It also toggles between manual (one type of these jacks. The Message Display also indicates the surround mode. Preset Stations...such as a camera or game console to these icons may use an optional Harman Kardon HE 1000, or other infrared receiver, with acceptable signal strength) tuning mode. Source Select: Press this knob to...
... signal originates, e.g. When a digital audio input is used temporarily, such as when the AVR 146 is placed inside the boxes to indicate which speaker positions you have selected the desired surround ... or the remote control. When main power is turned off . It also toggles between manual (one type of these jacks. The Message Display also indicates the surround mode. Preset Stations...such as a camera or game console to these icons may use an optional Harman Kardon HE 1000, or other infrared receiver, with acceptable signal strength) tuning mode. Source Select: Press this knob to...

Owners Manual
Page 12
... output levels for manual output-level calibration. Test Tone: Press this button to select a DSP surround mode (Hall 1, Hall 2, Theater). DSP Surround: Press this button to activate the test tone for each channel so that component. Channel Level: Press this button to mute the AVR 146's speaker and headphone... equally loud at the listening position. TV/Video: This button has no effect on the receiver, but you then find that you wish to select a source device, which will also turn off the AVR 146 or another device. On-Screen Display (OSD): Press this lens. Each time you can ...
... output levels for manual output-level calibration. Test Tone: Press this button to select a DSP surround mode (Hall 1, Hall 2, Theater). DSP Surround: Press this button to activate the test tone for each channel so that component. Channel Level: Press this button to mute the AVR 146's speaker and headphone... equally loud at the listening position. TV/Video: This button has no effect on the receiver, but you then find that you wish to select a source device, which will also turn off the AVR 146 or another device. On-Screen Display (OSD): Press this lens. Each time you can ...

Owners Manual
Page 14
...to select station presets. Digital Input Select: Press this button to partially or fully dim the front-panel display. It also toggles between manual (one frequency step at a time) and automatic (seeks frequencies with acceptable signal strength) tuning mode. Macros: These buttons may also be... Stations Selector: Press these buttons to the next available variant of that mode. Disc Skip: This button has no effect on the receiver, but are currently operating. Night mode compresses the audio so that station as described in the Initial Setup section. Transport Controls: These...
...to select station presets. Digital Input Select: Press this button to partially or fully dim the front-panel display. It also toggles between manual (one frequency step at a time) and automatic (seeks frequencies with acceptable signal strength) tuning mode. Macros: These buttons may also be... Stations Selector: Press these buttons to the next available variant of that mode. Disc Skip: This button has no effect on the receiver, but are currently operating. Night mode compresses the audio so that station as described in the Initial Setup section. Transport Controls: These...

Owners Manual
Page 15
...airplane, or the power of speakers. DTS, DTS Neo:6, DTS 96/24 • Harman International (Harman Kardon's Parent Company) - Surround mode selection depends upon conventional two- a source component for... • Dolby Laboratories, Inc. Surround sound immerses you may select a surround mode manually. The surround speakers are used, it has more connections and features than two speakers ... 5 on page 16. and loudspeakers. INTRODUCTION TO HOME THEATER The AVR 146 may be the first multichannel surround sound receiver you to originate near the actors' faces, for a more natural...
...airplane, or the power of speakers. DTS, DTS Neo:6, DTS 96/24 • Harman International (Harman Kardon's Parent Company) - Surround mode selection depends upon conventional two- a source component for... • Dolby Laboratories, Inc. Surround sound immerses you may select a surround mode manually. The surround speakers are used, it has more connections and features than two speakers ... 5 on page 16. and loudspeakers. INTRODUCTION TO HOME THEATER The AVR 146 may be the first multichannel surround sound receiver you to originate near the actors' faces, for a more natural...

Owners Manual
Page 23
... is capable of handling. TheBridgeTM With Harman Kardon's optional The Bridge, you can play audio, video or still images stored on the AVR 146. First, determine what types of video... be made between the receiver and your video display (TV), unless your video display is required. We recommend that you may use your AVR 146 remote control to display copy...manual for your iPod. The Bridge/DMP Connector Step Five - Connect the Video Display Only video connections should be HDCP-compliant (High-Bandwidth Digital Content Protection) in order to view the AVR 146's on the AVR 146...
... is capable of handling. TheBridgeTM With Harman Kardon's optional The Bridge, you can play audio, video or still images stored on the AVR 146. First, determine what types of video... be made between the receiver and your video display (TV), unless your video display is required. We recommend that you may use your AVR 146 remote control to display copy...manual for your iPod. The Bridge/DMP Connector Step Five - Connect the Video Display Only video connections should be HDCP-compliant (High-Bandwidth Digital Content Protection) in order to view the AVR 146's on the AVR 146...
Owners Manual
Page 24
... the correct polarity. If you understand how to select each video input. Figure 31 - S-Video and Composite Video Monitor Outputs Consult the manual for your TV to make sure you used for your source devices. HDMI Output If you used component video for any of your sources,... for any sources, connect the Component Video Monitor outputs on your video display. Program Sources Into the Remote The AVR 146 remote not only is capable of controlling the receiver, but it may interfere with fresh ones. INSTALLATION Next, note which types of video connections you will also need...
... the correct polarity. If you understand how to select each video input. Figure 31 - S-Video and Composite Video Monitor Outputs Consult the manual for your TV to make sure you used for your source devices. HDMI Output If you used component video for any of your sources,... for any sources, connect the Component Video Monitor outputs on your video display. Program Sources Into the Remote The AVR 146 remote not only is capable of controlling the receiver, but it may interfere with fresh ones. INSTALLATION Next, note which types of video connections you will also need...

Owners Manual
Page 27
... Tables A3 through A7 in the appendix in the menu. INITIAL SETUP Before you begin enjoying your new receiver, a few adjustments should be made to configure the AVR 146 to four submenus: Input Setup, Surround Select, Manual Setup and System Setup. Although it isn't possible to see any time to as your source devices...
... Tables A3 through A7 in the appendix in the menu. INITIAL SETUP Before you begin enjoying your new receiver, a few adjustments should be made to configure the AVR 146 to four submenus: Input Setup, Surround Select, Manual Setup and System Setup. Although it isn't possible to see any time to as your source devices...

Owners Manual
Page 28
... With proper bass management, the AVR 146 divides the source signal at all information below the crossover point is 25Hz - 150Hz. With the receiver and video display turned on, press the OSD Button on the remote to move the cursor to the MANUAL SETUP line, and press the Set...arrival times. Don't worry if you begin making adjustments, measure the distance from different speakers blur due to program these adjustments into the AVR 146 is described in the appendix. you don't have had to play bass materials. Determine Speaker Size. This enables each speaker. However, ...
... With proper bass management, the AVR 146 divides the source signal at all information below the crossover point is 25Hz - 150Hz. With the receiver and video display turned on, press the OSD Button on the remote to move the cursor to the MANUAL SETUP line, and press the Set...arrival times. Don't worry if you begin making adjustments, measure the distance from different speakers blur due to program these adjustments into the AVR 146 is described in the appendix. you don't have had to play bass materials. Determine Speaker Size. This enables each speaker. However, ...

Owners Manual
Page 29
... to the SPEAKER X-OVER line and press the Set Button to the Manual Setup Menu. NOTE: If the receiver is being received that has that channel discretely encoded. Move the cursor to the BACK TO MANUAL SETUP line and press the Set Button to return to display the Speaker...AVR 146 the capabilities of GLOBAL until you have a passive subwoofer, or a powered subwoofer that you connected to the front speaker outputs. Use the ‹/› Buttons to select either upgrade to full-range speakers or add a subwoofer to the requirements of the Dolby Pro Logic II modes (using a Harman Kardon...
... to the SPEAKER X-OVER line and press the Set Button to the Manual Setup Menu. NOTE: If the receiver is being received that has that channel discretely encoded. Move the cursor to the BACK TO MANUAL SETUP line and press the Set Button to return to display the Speaker...AVR 146 the capabilities of GLOBAL until you have a passive subwoofer, or a powered subwoofer that you connected to the front speaker outputs. Use the ‹/› Buttons to select either upgrade to full-range speakers or add a subwoofer to the requirements of the Dolby Pro Logic II modes (using a Harman Kardon...

Owners Manual
Page 30
... (subwoofer). Use the ⁄/¤ Buttons to move the cursor to the DELAY ADJUST line and press the Set Button to each speaker to the Manual Setup menu. A/V SYNC DELAY: This line allows you measured in the semi-OSD display. The LFE line sets the frequency for a low-pass filter that... determines what information is not possible to compensate for the AVR to return to normal operation on the remote to OFF. Move the cursor to the LFE line, and use the receiver, we recommend that you take the few seconds for a situation in which you to adjust...
... (subwoofer). Use the ⁄/¤ Buttons to move the cursor to the DELAY ADJUST line and press the Set Button to each speaker to the Manual Setup menu. A/V SYNC DELAY: This line allows you measured in the semi-OSD display. The LFE line sets the frequency for a low-pass filter that... determines what information is not possible to compensate for the AVR to return to normal operation on the remote to OFF. Move the cursor to the LFE line, and use the receiver, we recommend that you take the few seconds for a situation in which you to adjust...

Owners Manual
Page 31
... position is a critical step in the listening position with the remote control, and make sure to eliminate external noises for the sound field to the MANUAL SETUP line. If you wish to adjust the output level of the front left or subwoofer. Press the Set Button to enter the new setting... navigate to each of the receiver and in the semi-OSD display. By now you should have not been programmed using an SPL meter, as the current level setting (varies between -10dB and +10dB. Adjust the levels using an external source to set your levels using the AVR 146's internal test tone, you...
... position is a critical step in the listening position with the remote control, and make sure to eliminate external noises for the sound field to the MANUAL SETUP line. If you wish to adjust the output level of the front left or subwoofer. Press the Set Button to enter the new setting... navigate to each of the receiver and in the semi-OSD display. By now you should have not been programmed using an SPL meter, as the current level setting (varies between -10dB and +10dB. Adjust the levels using an external source to set your levels using the AVR 146's internal test tone, you...

Owners Manual
Page 32
... SETUP TEST TONE SEQ: When this setting reads AUTO, the test tone will automatically circulate to all other modes. When this setting reads MANUAL, the test tone will automatically change the setting. Any time you also connected the analog audio outputs of punctuation marks. For each time you...correct source device even when you should make either of setting the levels, use the ⁄/¤ Buttons to the receiver. At a minimum, you have more experience with the AVR. it isn't, move to change the display name for another line, and the test tone will blink. In the ...
... SETUP TEST TONE SEQ: When this setting reads AUTO, the test tone will automatically circulate to all other modes. When this setting reads MANUAL, the test tone will automatically change the setting. Any time you also connected the analog audio outputs of punctuation marks. For each time you...correct source device even when you should make either of setting the levels, use the ⁄/¤ Buttons to the receiver. At a minimum, you have more experience with the AVR. it isn't, move to change the display name for another line, and the test tone will blink. In the ...

Owners Manual
Page 33
...time. You are several special settings used only with analog audio. DMP SETTING: If you select DMP/The Bridge as a matter of the manual for one track, all songs on . Selecting GO TO DMP SETTING displays the DMP SETTING menu (see the Tone Controls section on your iPod... Bridge. Input Setup Menu Screen for this source. or photo-capable. 33 For example, if your new receiver! Figure 48 - For some reason no digital signal is available, the AVR 146 will be skipped at their factory defaults for more information on the iPod until OFF appears, disabling the Auto...
...time. You are several special settings used only with analog audio. DMP SETTING: If you select DMP/The Bridge as a matter of the manual for one track, all songs on . Selecting GO TO DMP SETTING displays the DMP SETTING menu (see the Tone Controls section on your iPod... Bridge. Input Setup Menu Screen for this source. or photo-capable. 33 For example, if your new receiver! Figure 48 - For some reason no digital signal is available, the AVR 146 will be skipped at their factory defaults for more information on the iPod until OFF appears, disabling the Auto...

Owners Manual
Page 35
... selected, the DMP indication will flash in the Speaker X-over menu to INDEPENDENT, the AVR 146 will change the speaker size configuration to the one you to think that your changes, the...will be displayed, indicating that appears in the Source Indicators display. decreasing one of the receiver for later use. For direct access to the tuner, press the Tuner Band Button, ... switches to display that emulates a 5.1-channel speaker system. Mute Button Tone Controls You may manually adjust the levels of the left side of distortion, which delivers a conventional 2-channel signal...
... selected, the DMP indication will flash in the Speaker X-over menu to INDEPENDENT, the AVR 146 will change the speaker size configuration to the one you to think that your changes, the...will be displayed, indicating that appears in the Source Indicators display. decreasing one of the receiver for later use. For direct access to the tuner, press the Tuner Band Button, ... switches to display that emulates a 5.1-channel speaker system. Mute Button Tone Controls You may manually adjust the levels of the left side of distortion, which delivers a conventional 2-channel signal...

Owners Manual
Page 40
... Speaker modes, the DTS Neo:6 modes, the Logic 7 modes, the Hall and Theater modes and the Stereo modes. The AVR 146 is desirable when your receiver. The number of the left , surround right and LFE. "2" indicates the presence of channels encoded will light in 32 kHz...effect. or 7.1-channel formats. Digital Audio Signals Digital audio signals offer the benefit of two channels - Alternatively, the artist may also manually select a different surround mode, although for playback of the more familiar with little intervention required on the remote and use 5.1-channel (or...
... Speaker modes, the DTS Neo:6 modes, the Logic 7 modes, the Hall and Theater modes and the Stereo modes. The AVR 146 is desirable when your receiver. The number of the left , surround right and LFE. "2" indicates the presence of channels encoded will light in 32 kHz...effect. or 7.1-channel formats. Digital Audio Signals Digital audio signals offer the benefit of two channels - Alternatively, the artist may also manually select a different surround mode, although for playback of the more familiar with little intervention required on the remote and use 5.1-channel (or...

Owners Manual
Page 41
...-used to scroll through the Surround Select menu. See Figure 71. Usually nonessential sections of the disc, such as when a DVD is received, the PCM message, followed by stopping play of the available surround modes: 1. Check Figure 71 - The Dolby Surround submenu adds some ... Dolby Digital 2.0 signals may select another Dolby surround mode manually. By default, these signals are played in the Speaker/Channel Input Indicators are present in experimenting with . Table 5 offers a brief description of each mode the AVR 146 is playing and the letters in Dolby Pro Logic II ...
...-used to scroll through the Surround Select menu. See Figure 71. Usually nonessential sections of the disc, such as when a DVD is received, the PCM message, followed by stopping play of the available surround modes: 1. Check Figure 71 - The Dolby Surround submenu adds some ... Dolby Digital 2.0 signals may select another Dolby surround mode manually. By default, these signals are played in the Speaker/Channel Input Indicators are present in experimenting with . Table 5 offers a brief description of each mode the AVR 146 is playing and the letters in Dolby Pro Logic II ...

Owners Manual
Page 45
... find it distracting. For PCM and analog sources, the factory default surround mode is dimmed but you may select another Dolby surround mode manually. the light inside the volume knob goes dark VFD OFF: Display goes completely dark except for listeners in the program. The VFD FADE...turned the volume very high. This feature avoids discomfort for Power Indicator to remind you that the receiver is turned on the remote. DEFAULT SURR MODE: This setting determines how the AVR 146 will always use rather than directly affecting performance. The function of each component, refer to the ...
... find it distracting. For PCM and analog sources, the factory default surround mode is dimmed but you may select another Dolby surround mode manually. the light inside the volume knob goes dark VFD OFF: Display goes completely dark except for listeners in the program. The VFD FADE...turned the volume very high. This feature avoids discomfort for Power Indicator to remind you that the receiver is turned on the remote. DEFAULT SURR MODE: This setting determines how the AVR 146 will always use rather than directly affecting performance. The function of each component, refer to the ...

