

Owners Manual
Page 2
... a circle) indicates a rear-panel connection a - (number in an oval) indicates a button or indicator on the remote 2 TABLE OF CONTENTS AVR 130 AUDIO/ VIDEO RECEIVER 3 Introduction 4 Safety Information 4 Unpacking 5 Front-Panel Controls 7 Rear-Panel Connections 9 Remote Control Functions 13 Installation and Connections ...17 Global/Independent Bass Manager Memory 17 Configuring the Surround Off (Stereo) Modes 18 Output Level Adjustment 19 Delay Settings 19 Additional Input Adjustments 21 Operation 21 Basic Operation 21 Source Selection 21 Volume Control 22 Surround Mode...
... a circle) indicates a rear-panel connection a - (number in an oval) indicates a button or indicator on the remote 2 TABLE OF CONTENTS AVR 130 AUDIO/ VIDEO RECEIVER 3 Introduction 4 Safety Information 4 Unpacking 5 Front-Panel Controls 7 Rear-Panel Connections 9 Remote Control Functions 13 Installation and Connections ...17 Global/Independent Bass Manager Memory 17 Configuring the Surround Off (Stereo) Modes 18 Output Level Adjustment 19 Delay Settings 19 Additional Input Adjustments 21 Operation 21 Basic Operation 21 Source Selection 21 Volume Control 22 Surround Mode...

Owners Manual
Page 5
Tuner Band Selector @ Set Button # Digital Input Selector $ Preset Stations Selector % Delay Adjust Selector ^ Input Source Selector & Tuner Mode Selector * Optical 3 Digital Input ( Coaxial 3 Digital Input Ó Bass Control Ô Video 3 Video... press of the button will be pressed in operation, the indicator is blue. 3 Standby/On Switch: When the Main Power Switch 1 is in to the AVR 130's output through the individual modes available. Select Coaxial 3 13 5 7 9 !# % & (Ô Ò 2 4 6 8 ) @) $ ^ *Ó 1 Main Power Switch 2 Power Indicator 3 Standby/...
Tuner Band Selector @ Set Button # Digital Input Selector $ Preset Stations Selector % Delay Adjust Selector ^ Input Source Selector & Tuner Mode Selector * Optical 3 Digital Input ( Coaxial 3 Digital Input Ó Bass Control Ô Video 3 Video... press of the button will be pressed in operation, the indicator is blue. 3 Standby/On Switch: When the Main Power Switch 1 is in to the AVR 130's output through the individual modes available. Select Coaxial 3 13 5 7 9 !# % & (Ô Ò 2 4 6 8 ) @) $ ^ *Ó 1 Main Power Switch 2 Power Indicator 3 Standby/...

Owners Manual
Page 6
...an FM Stereo station is in the "Surround Off" mode. Û Channel Adjust Selector: Press this button to begin the steps required to enter delay settings. (See page 19 for more information on using an external audio source. (For more information on mode selection, see page 26.) Ù ...or cover it again to switch between the Auto and Manual tuning modes, press the Tuner Mode Selector &. ) ‹/› Buttons: When configuring the AVR 130's settings, use . When the tuner receives a strong enough signal for the front left /right channels by as much as shown in the AUTO mode...
...an FM Stereo station is in the "Surround Off" mode. Û Channel Adjust Selector: Press this button to begin the steps required to enter delay settings. (See page 19 for more information on using an external audio source. (For more information on mode selection, see page 26.) Ù ...or cover it again to switch between the Auto and Manual tuning modes, press the Tuner Mode Selector &. ) ‹/› Buttons: When configuring the AVR 130's settings, use . When the tuner receives a strong enough signal for the front left /right channels by as much as shown in the AUTO mode...

Owners Manual
Page 9
...-32 for a list of these functions. • To make it easier to follow the instructions that refer to each button's feature when used with the AVR 130. E MEN SPK GUID CH. TEST T/V SLEEP CH. U R DIGI EXIT SET TAL 1 2 DELAPREV 3 4 5 6 TUN-M 9 7 8 0 MEM DIRECT TUNING CLEAR D.SKIP PRESET M1 M2 M3...Mode Select Button ●30 Disc Skip Button ●31 Preset Up/Down Buttons ●32 Clear Button ●33 Memory Button ●34 Delay Button ●35 Speaker Select Button ●36 Spare Button ●37 Volume Up/Down Button ●38 TV/Video Button ●39 6-...
...-32 for a list of these functions. • To make it easier to follow the instructions that refer to each button's feature when used with the AVR 130. E MEN SPK GUID CH. TEST T/V SLEEP CH. U R DIGI EXIT SET TAL 1 2 DELAPREV 3 4 5 6 TUN-M 9 7 8 0 MEM DIRECT TUNING CLEAR D.SKIP PRESET M1 M2 M3...Mode Select Button ●30 Disc Skip Button ●31 Preset Up/Down Buttons ●32 Clear Button ●33 Memory Button ●34 Delay Button ●35 Speaker Select Button ●36 Spare Button ●37 Volume Up/Down Button ●38 TV/Video Button ●39 6-...

Owners Manual
Page 10
...remote has been programmed. 10 REMOTE CONTROL FUNCTIONS keys when the remote is shipped from the factory to operate the AVR 130 and most recent Harman Kardon products. Before using the Device Control Selectors. The descriptions shown here primarily detail the functions of the remote when it...29 to program the proper codes for delay time, speaker configuration and channel output level adjustment. g AM/FM Tuner Select: Press this button to select the AVR 130's tuner as VMAx, Hall or Theater. REMOTE CONTROL FUNCTIONS IMPORTANT NOTE: The AVR 130's remote may be changed (e.g., press the...
...remote has been programmed. 10 REMOTE CONTROL FUNCTIONS keys when the remote is shipped from the factory to operate the AVR 130 and most recent Harman Kardon products. Before using the Device Control Selectors. The descriptions shown here primarily detail the functions of the remote when it...29 to program the proper codes for delay time, speaker configuration and channel output level adjustment. g AM/FM Tuner Select: Press this button to select the AVR 130's tuner as VMAx, Hall or Theater. REMOTE CONTROL FUNCTIONS IMPORTANT NOTE: The AVR 130's remote may be changed (e.g., press the...

Owners Manual
Page 11
...word AUTO appears in use, press this button is pressed so that player. y Logic 7 Mode Select Button: Press this button, the delay times are entered by the AVR 130 when processing surround sound. When the button is pressed so that DSP SURR OFF appears in the Lower Display Line ¯, the...the numeric keys for setting the delay times used to configure. When a Dolby Digital-encoded source is used. Once the button has been pressed, use , press these buttons to raise or lower the system volume. (See page 29 for more information on the AVR 130, but when used with the type...
...word AUTO appears in use, press this button is pressed so that player. y Logic 7 Mode Select Button: Press this button, the delay times are entered by the AVR 130 when processing surround sound. When the button is pressed so that DSP SURR OFF appears in the Lower Display Line ¯, the...the numeric keys for setting the delay times used to configure. When a Dolby Digital-encoded source is used. Once the button has been pressed, use , press these buttons to raise or lower the system volume. (See page 29 for more information on the AVR 130, but when used with the type...

Owners Manual
Page 15
... or in the listening position. Press the Main Power Switch 1 in place, it in your system, calibrate the output levels, and set the delay times used . If left and right speakers slightly forward of the switch disappears inside the front panel. A few configuration adjustments that occur when ...listening position. No matter which type or brand of speakers is not practical, the speakers may be made , there are to program the AVR 130's bass management system for the type of speakers used in use and your remote control. 4. Once the center channel speaker is installed, ...
... or in the listening position. Press the Main Power Switch 1 in place, it in your system, calibrate the output levels, and set the delay times used . If left and right speakers slightly forward of the switch disappears inside the front panel. A few configuration adjustments that occur when ...listening position. No matter which type or brand of speakers is not practical, the speakers may be made , there are to program the AVR 130's bass management system for the type of speakers used in use and your remote control. 4. Once the center channel speaker is installed, ...
Owners Manual
Page 19
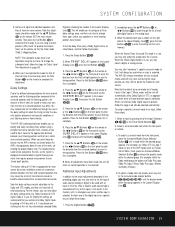
...amount of the digital inputs to preset the modes for each source. To change the subwoofer level, follow these steps: 1. Delay Settings Due to your listening position. The AVR 130's advanced software enables you need not be accurate to the inch, as the system is in the Lower Display Line &#...175;, then press the Set Button o@. 5. When FRONT DELAY appears in use of the Input Selectors e 39 ^ or the Tuner Band Selector !. ...
...amount of the digital inputs to preset the modes for each source. To change the subwoofer level, follow these steps: 1. Delay Settings Due to your listening position. The AVR 130's advanced software enables you need not be accurate to the inch, as the system is in the Lower Display Line &#...175;, then press the Set Button o@. 5. When FRONT DELAY appears in use of the Input Selectors e 39 ^ or the Tuner Band Selector !. ...

Owners Manual
Page 28
... on the remote. Note that each button press as a step. Button number 30 is the Delay button for the AVR 130, but rather that no function is to be used for a Power On command. Punch-Through Programming The AVR 130's remote may contain up to 19 steps, each time you press the Macro 1 Button v, the...
... on the remote. Note that each button press as a step. Button number 30 is the Delay button for the AVR 130, but rather that no function is to be used for a Power On command. Punch-Through Programming The AVR 130's remote may contain up to 19 steps, each time you press the Macro 1 Button v, the...

Owners Manual
Page 31
... Select TV/DVD Volume Down Channel Trim Move/Adjust Up Speaker Adjust Move/Adjust Left Set Move/Adjust Right Digital Input Select Move/Adjust Down Delay Adjust 1 2 3 4 5 6 7 8 Tuner Mode 9 0 Memory Tune Up Title Up Menu Left Enter Right Subtitle Down Return 1 2 3 4 5 6 7 8 9 0 Next Chapter CD/CD-R Power On Power ...Menu Left Enter Right Exit Down Prev Channel 1 2 3 4 5 6 7 8 9 9 0 0 FUNCTION LIST 31 TV/Sat Volume Up Channel - Button Name 1 Power On 2 Power Off 3 Mute 4 AVR 5 DVD 6 CD 7 Tape 8 VID1 9 VID2 10 VID3 11 Dim 12 AM/FM 13 6 CH Input Select 14 Sleep 15 Test 16 T/V 17 Volume Up 18...
... Select TV/DVD Volume Down Channel Trim Move/Adjust Up Speaker Adjust Move/Adjust Left Set Move/Adjust Right Digital Input Select Move/Adjust Down Delay Adjust 1 2 3 4 5 6 7 8 Tuner Mode 9 0 Memory Tune Up Title Up Menu Left Enter Right Subtitle Down Return 1 2 3 4 5 6 7 8 9 0 Next Chapter CD/CD-R Power On Power ...Menu Left Enter Right Exit Down Prev Channel 1 2 3 4 5 6 7 8 9 9 0 0 FUNCTION LIST 31 TV/Sat Volume Up Channel - Button Name 1 Power On 2 Power Off 3 Mute 4 AVR 5 DVD 6 CD 7 Tape 8 VID1 9 VID2 10 VID3 11 Dim 12 AM/FM 13 6 CH Input Select 14 Sleep 15 Test 16 T/V 17 Volume Up 18...

Owners Manual
Page 42
...f • Make certain front-panel sensor is plugged into the remote control. To clear the AVR 130's entire system memory including the tuner presets, output level settings, delay times and speaker configuration data, first put the unit in this problem, first unplug the unit ...the service center nearest to a power outage. If these steps do not solve the problem, consult an authorized Harman Kardon service center. TROUBLESHOOTING GUIDE Your AVR 130 receiver has been designed to reestablish all system configuration settings and tuner presets. or rear-channel information from computers,...
...f • Make certain front-panel sensor is plugged into the remote control. To clear the AVR 130's entire system memory including the tuner presets, output level settings, delay times and speaker configuration data, first put the unit in this problem, first unplug the unit ...the service center nearest to a power outage. If these steps do not solve the problem, consult an authorized Harman Kardon service center. TROUBLESHOOTING GUIDE Your AVR 130 receiver has been designed to reestablish all system configuration settings and tuner presets. or rear-channel information from computers,...

Product Information
Page 13
processing to analog without inducing any artifacts; FL 8385 CD Changer If you want high-quality music playback that includes bass management, delay settings and output-level trims, whatever goes in will come . or for the length of realism that surpasses anything you've ever ...progressive scan video processing and an audio control system for DVD-Audio that can run uninterrupted throughout the day - the FL 8385 is decoded. Harman Kardon DVD players feature advanced circuitry for maximum resolution when used with DVD, MP3, Windows Media® and JPEG discs, the DVD 22 features high...
processing to analog without inducing any artifacts; FL 8385 CD Changer If you want high-quality music playback that includes bass management, delay settings and output-level trims, whatever goes in will come . or for the length of realism that surpasses anything you've ever ...progressive scan video processing and an audio control system for DVD-Audio that can run uninterrupted throughout the day - the FL 8385 is decoded. Harman Kardon DVD players feature advanced circuitry for maximum resolution when used with DVD, MP3, Windows Media® and JPEG discs, the DVD 22 features high...

Product Information
Page 17
...-bit 192kHz/24-bit 192kHz/24-bit 192kHz/24-bit HDTV-Compatible Component Video Inputs 2, Assignable 2, Assignable 3, Assignable 2, Assignable 2, Assignable A/V Sync Delay Yes Yes Yes Yes Yes A-Bus/Ready Yes Yes Yes, x2 Yes Yes System Remote EzSet, 8-device EzSet, 8-device EzSet, 8-device EzSet, 8-...; CS 49300 192kHz/24-bit 2 No No EzSet, 8-device programmable Yes Yes No Color-coded binding posts 6-5/8" x 17-5/16" x 15" 28 lb AVR 130 4 4 4 Rear panel 2/2 Front panel 1/1 Rear panel 1/1 No 6-Channel Subwoofer No Triple crossover No Cirrus® CS 49300 192kHz/24-bit 0 No...
...-bit 192kHz/24-bit 192kHz/24-bit 192kHz/24-bit HDTV-Compatible Component Video Inputs 2, Assignable 2, Assignable 3, Assignable 2, Assignable 2, Assignable A/V Sync Delay Yes Yes Yes Yes Yes A-Bus/Ready Yes Yes Yes, x2 Yes Yes System Remote EzSet, 8-device EzSet, 8-device EzSet, 8-device EzSet, 8-...; CS 49300 192kHz/24-bit 2 No No EzSet, 8-device programmable Yes Yes No Color-coded binding posts 6-5/8" x 17-5/16" x 15" 28 lb AVR 130 4 4 4 Rear panel 2/2 Front panel 1/1 Rear panel 1/1 No 6-Channel Subwoofer No Triple crossover No Cirrus® CS 49300 192kHz/24-bit 0 No...
