User Guide
Page 2
... from mixer before cleaning. 6. Do not use of the appliance by a person responsible for their safety. 3. Call the provided customer service number for information on or taking off parts, and before washing. 8. Keep hands, hair, and clothing, as well as spatulas and other liquid. 5. Do not operate any manner. Read all instructions. 2. Avoid contacting moving parts. IMPORTANT SAFEGUARDS When using electrical...
... from mixer before cleaning. 6. Do not use of the appliance by a person responsible for their safety. 3. Call the provided customer service number for information on or taking off parts, and before washing. 8. Keep hands, hair, and clothing, as well as spatulas and other liquid. 5. Do not operate any manner. Read all instructions. 2. Avoid contacting moving parts. IMPORTANT SAFEGUARDS When using electrical...
User Guide
Page 3
..., reverse the plug. w WARNING Electrical Shock Hazard: This appliance is intended for household use appliance for other than the rating of the appliance. Do not defeat the safety purpose of the cord used . If the plug does not fit fully into wall outlet. If a longer cord is off before inserting or removing beaters. 3 w CAUTION Moving Parts Hazard. The length of...
..., reverse the plug. w WARNING Electrical Shock Hazard: This appliance is intended for household use appliance for other than the rating of the appliance. Do not defeat the safety purpose of the cord used . If the plug does not fit fully into wall outlet. If a longer cord is off before inserting or removing beaters. 3 w CAUTION Moving Parts Hazard. The length of...
User Guide
Page 4
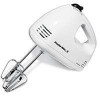
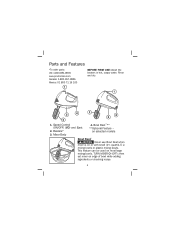
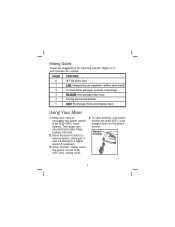
Mixer Body 4. on selected models Bowl Rest™ w CAUTION Never use Bowl Rest when mixer is on edge of bowl while adding ingredients or checking recipe. 4 Beaters* 3. then set mixer on or with small (11⁄2 quart/1.5 L) mixing bowls or plastic mixing bowls. Rinse and dry. 1. TURN MIXER O (OFF); Parts and Features *To order parts: US: 1.800.851.8900 www.proctorsilex.com Canada: 1.800.267.2826 Mexico: 01 800 71 16 100...
Mixer Body 4. on selected models Bowl Rest™ w CAUTION Never use Bowl Rest when mixer is on edge of bowl while adding ingredients or checking recipe. 4 Beaters* 3. then set mixer on or with small (11⁄2 quart/1.5 L) mixing bowls or plastic mixing bowls. Rinse and dry. 1. TURN MIXER O (OFF); Parts and Features *To order parts: US: 1.800.851.8900 www.proctorsilex.com Canada: 1.800.267.2826 Mexico: 01 800 71 16 100...
User Guide
Page 5
... whipping cream Using Your Mixer 1. Insert beaters. Place beaters into electrical outlet. Move the speed control to a higher speed if necessary. 3. To eject beaters, with speed control set to O (OFF) and unplug mixer. 4. Then plug mixer into bowl. 2. Make sure mixer is unplugged and speed control is set at 1 and increasing to desired speed, starting at O (OFF), push straight down on 1 and increase as needed. Begin on the speed control. When finished mixing, move the speed control to O (OFF). Speed Control 5 Mixing Guide...
... whipping cream Using Your Mixer 1. Insert beaters. Place beaters into electrical outlet. Move the speed control to a higher speed if necessary. 3. To eject beaters, with speed control set to O (OFF) and unplug mixer. 4. Then plug mixer into bowl. 2. Make sure mixer is unplugged and speed control is set at 1 and increasing to desired speed, starting at O (OFF), push straight down on 1 and increase as needed. Begin on the speed control. When finished mixing, move the speed control to O (OFF). Speed Control 5 Mixing Guide...
User Guide
Page 6
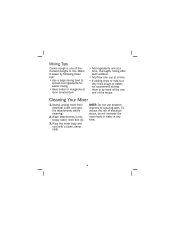
... these tips: • Use a large mixing bowl to mix. Wash attachments in water at the very end of the recipe. Cleaning Your Mixer 1. rinse and dry. 3. Wipe the mixer body and cord with a clean, damp cloth. NOTE: Do not use abrasive cleaners or scouring pads. Always unplug mixer from electrical outlet and eject the attachments before cleaning. 2. Make it easier by hand at any time...
... these tips: • Use a large mixing bowl to mix. Wash attachments in water at the very end of the recipe. Cleaning Your Mixer 1. rinse and dry. 3. Wipe the mixer body and cord with a clean, damp cloth. NOTE: Do not use abrasive cleaners or scouring pads. Always unplug mixer from electrical outlet and eject the attachments before cleaning. 2. Make it easier by hand at any time...
User Guide
Page 7
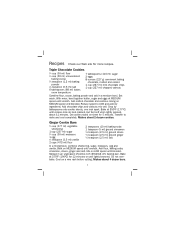
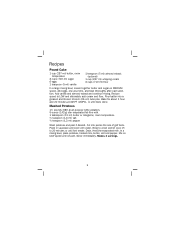
... for more recipes. Transfer to LOW and add dry ingredients. Spread in a medium bowl. Cool on MEDIUM speed until blended. Add melted chocolate and continue mixing on a wire rack before cutting. Beat on LOW speed until blended. Mix on MEDIUM speed until smooth. Recipes Check our Web...and walnuts; Drop by tablespoons onto cookie sheets, one inch apart. Makes about 4 dozen bars. 7 Do not overbake. Reduce speed to racks and cool completely. Let cookies stand on sheet for 5 minutes. Bake at MEDIUM speed until smooth. Ginger Cookie Bars 3⁄4 cup (177 ml...
... for more recipes. Transfer to LOW and add dry ingredients. Spread in a medium bowl. Cool on MEDIUM speed until blended. Add melted chocolate and continue mixing on a wire rack before cutting. Beat on LOW speed until blended. Mix on MEDIUM speed until smooth. Recipes Check our Web...and walnuts; Drop by tablespoons onto cookie sheets, one inch apart. Makes about 4 dozen bars. 7 Do not overbake. Reduce speed to racks and cool completely. Let cookies stand on sheet for 5 minutes. Bake at MEDIUM speed until smooth. Ginger Cookie Bars 3⁄4 cup (177 ml...
User Guide
Page 8
... bowl, combine cake mix, eggs, oranges and oil at LOW speed until butter is melted and mixture is enhanced if left overnight in the refrigerator. Store cake in refrigerator.) 8 stir frequently. Pour into two greased and floured 9-inch (23 cm) round cake pans. beat one additional minute. Reduce speed to LOW and add whipped topping; Let cake cool on wire racks. To make icing...
... bowl, combine cake mix, eggs, oranges and oil at LOW speed until butter is melted and mixture is enhanced if left overnight in the refrigerator. Store cake in refrigerator.) 8 stir frequently. Pour into two greased and floured 9-inch (23 cm) round cake pans. beat one additional minute. Reduce speed to LOW and add whipped topping; Let cake cool on wire racks. To make icing...
User Guide
Page 9
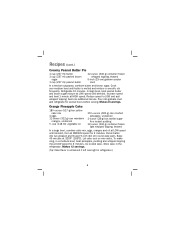
Pour batter into pieces the size of golf balls. Place in saucepan and cover with water. Makes 4 servings. 9 Heat the evaporated milk. Mix on MEDIUM speed. Cut into a greased and floured 10-inch (26-cm) tube pan. In a mixing bowl, place potatoes, heated milk, butter, ...Serve immediately. Recipes Pound Cake 1 cup (237 ml) butter, room temperature 3 cups (710 ml) sugar 6 eggs 1 teaspoon (5 ml) vanilla 1 teaspoon (5 ml) almond extract (optional) 1 cup (237 ml) whipping cream 3 cups (710 ml) flour In a large mixing bowl, cream together butter and sugar on LOW speed until fork...
Pour batter into pieces the size of golf balls. Place in saucepan and cover with water. Makes 4 servings. 9 Heat the evaporated milk. Mix on MEDIUM speed. Cut into a greased and floured 10-inch (26-cm) tube pan. In a mixing bowl, place potatoes, heated milk, butter, ...Serve immediately. Recipes Pound Cake 1 cup (237 ml) butter, room temperature 3 cups (710 ml) sugar 6 eggs 1 teaspoon (5 ml) vanilla 1 teaspoon (5 ml) almond extract (optional) 1 cup (237 ml) whipping cream 3 cups (710 ml) flour In a large mixing bowl, cream together butter and sugar on LOW speed until fork...
User Guide
Page 10
... purchase price. Every implied warranty, including any statutory warranty or condition of this appliance to the store. We exclude all costs associated with returning the product to us and our returning a product or component under this period, your appliance. 10 To make a warranty claim. For faster service, locate the model, type, and series numbers on where you . During this warranty to you specific...
... purchase price. Every implied warranty, including any statutory warranty or condition of this appliance to the store. We exclude all costs associated with returning the product to us and our returning a product or component under this period, your appliance. 10 To make a warranty claim. For faster service, locate the model, type, and series numbers on where you . During this warranty to you specific...


