
Use and Care Manual
Page 2
... hands and utensils out of the jar and away from the power cord. 7. handle carefully-especially when assembling, disassembling, emptying or cleaning blender jar. 15. Do not use broken, cracked, or loose cutting blade assembly. 17. To disconnect, turn the control to persons. 10. CAUTION! Injury can result if moving parts. 8. This appliance is not running. 14. Keep the appliance and its service agent, or similarly qualified persons in collar or...
... hands and utensils out of the jar and away from the power cord. 7. handle carefully-especially when assembling, disassembling, emptying or cleaning blender jar. 15. Do not use broken, cracked, or loose cutting blade assembly. 17. To disconnect, turn the control to persons. 10. CAUTION! Injury can result if moving parts. 8. This appliance is not running. 14. Keep the appliance and its service agent, or similarly qualified persons in collar or...

Use and Care Manual
Page 3
... what a blender motor can result in damage to the cutting blade assembly, jar, blender, and possibly result in any lid openings along the edge intended for a longer period or with mess-free spout, and close any way or by children or accidentally tripped over a longer cord. Contact Customer Service for food or liquid only. The blender as replacement parts. When blending hot liquids, remove filler cap of two-piece lid or open vent opening of the...
... what a blender motor can result in damage to the cutting blade assembly, jar, blender, and possibly result in any lid openings along the edge intended for a longer period or with mess-free spout, and close any way or by children or accidentally tripped over a longer cord. Contact Customer Service for food or liquid only. The blender as replacement parts. When blending hot liquids, remove filler cap of two-piece lid or open vent opening of the...

Use and Care Manual
Page 4
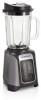
... taken when cleaning inside of Blender Jar as Cutting Blade Assembly is very sharp. 3 4 5 6 7 8 10 14 DO NOT IMMERSE BASE IN WATER. thoroughly. Parts and Features To order parts, visit: hamiltonbeach.com/parts 2 1 Filler Cap 2 Pour Spout 3 Lid Tab 4 Lid 5 Glass Blender Jar 6 Handle 7 Cutting Blade Assembly 8 Jar Collar 9 Base 10 Pulse Button 11 3 Liquify/Smoothie Button 12 2 Puree/Icy Drink Button 13 1 Mix/Shake Button 14 Power ( ) Standby Button 4 9 11 12 13 Before first use: After unpacking Blender, wash everything except Base in hot...
... taken when cleaning inside of Blender Jar as Cutting Blade Assembly is very sharp. 3 4 5 6 7 8 10 14 DO NOT IMMERSE BASE IN WATER. thoroughly. Parts and Features To order parts, visit: hamiltonbeach.com/parts 2 1 Filler Cap 2 Pour Spout 3 Lid Tab 4 Lid 5 Glass Blender Jar 6 Handle 7 Cutting Blade Assembly 8 Jar Collar 9 Base 10 Pulse Button 11 3 Liquify/Smoothie Button 12 2 Puree/Icy Drink Button 13 1 Mix/Shake Button 14 Power ( ) Standby Button 4 9 11 12 13 Before first use: After unpacking Blender, wash everything except Base in hot...

Use and Care Manual
Page 5
..., Blender will turn Blender off , and clean. w WARNING Burn Hazard. Always use . Program Buttons: Select desired program by pressing button for that need oil or other ingredients added slowly. If no button is in operation and to pour. IMPORTANT: Blender Jar and Cutting Blade Assembly are subject to wear during normal use . Visit hamiltonbeach.com/parts to obtain replacement parts. Base: Contains motor. Metal parts under blender jar get hot after use . Parts and Features (cont.) Lid: The Lid...
..., Blender will turn Blender off , and clean. w WARNING Burn Hazard. Always use . Program Buttons: Select desired program by pressing button for that need oil or other ingredients added slowly. If no button is in operation and to pour. IMPORTANT: Blender Jar and Cutting Blade Assembly are subject to wear during normal use . Visit hamiltonbeach.com/parts to obtain replacement parts. Base: Contains motor. Metal parts under blender jar get hot after use . Parts and Features (cont.) Lid: The Lid...

Use and Care Manual
Page 6
... and vegetables may allow ice to operate. If Jar or Cutting Blade Assembly is 1 cup (8 ounces [237 ml]). Add ingredients, liquids first. Press power ( ) standby button, white LED will vary based on other ingredients required for blending. • If blending action stops during normal use . Press current program button to return to standby, a different program to switch programs, or power ( ) standby button to obtain replacement parts. Place Blender Jar on clean, dry surface. Unplug...
... and vegetables may allow ice to operate. If Jar or Cutting Blade Assembly is 1 cup (8 ounces [237 ml]). Add ingredients, liquids first. Press power ( ) standby button, white LED will vary based on other ingredients required for blending. • If blending action stops during normal use . Press current program button to return to standby, a different program to switch programs, or power ( ) standby button to obtain replacement parts. Place Blender Jar on clean, dry surface. Unplug...

Use and Care Manual
Page 7
... Lid. Rotate Jar Collar counterclockwise until Collar and Cutting Blade Assembly come apart from Blender Jar. Parts may indicate an issue with jar bearings. • Contact Customer Service if condition persists. 7 Mixture should run on countertop. • Monitor problem and source. Blender smells like it is uncomfortable to cool. • Although motors are too large. • Jar is grease around bottom of Blender Jar or on slower speeds for best mixing performance. • Set speed...
... Lid. Rotate Jar Collar counterclockwise until Collar and Cutting Blade Assembly come apart from Blender Jar. Parts may indicate an issue with jar bearings. • Contact Customer Service if condition persists. 7 Mixture should run on countertop. • Monitor problem and source. Blender smells like it is uncomfortable to cool. • Although motors are too large. • Jar is grease around bottom of Blender Jar or on slower speeds for best mixing performance. • Set speed...

Use and Care Manual
Page 8
... warranty does not cover glass, filters, wear from normal use, use or subjected to be defective, at our option; Please write Hamilton Beach Brands, Inc., Customer Service Department, 4421 Waterfront Dr., Glen Allen, VA 23060, or visit hamiltonbeach.com/customer-service in Canada. This warranty is void if the product is limited to the product resulting from the date of express or implied warranty. and Canada...
... warranty does not cover glass, filters, wear from normal use, use or subjected to be defective, at our option; Please write Hamilton Beach Brands, Inc., Customer Service Department, 4421 Waterfront Dr., Glen Allen, VA 23060, or visit hamiltonbeach.com/customer-service in Canada. This warranty is void if the product is limited to the product resulting from the date of express or implied warranty. and Canada...


