
Use and Care Manual
Page 2
...9. The electrical rating of fire, electric shock, and/or injury to or greater than intended use another highwattage appliance on or taking off parts and before cleaning. Scalding may be equal to persons, including the following: 1. Do not use of fire or electric shock, do not...Allow to prevent accidental tipping. 7. To disconnect coffee urn, remove plug from spilled, hot liquid. 3. Do not use . No user-serviceable parts are inside. Shock Hazard: This appliance has a polarized plug (one way into the outlet, reverse the plug. Close supervision is dropped or damaged...
...9. The electrical rating of fire, electric shock, and/or injury to or greater than intended use another highwattage appliance on or taking off parts and before cleaning. Scalding may be equal to persons, including the following: 1. Do not use of fire or electric shock, do not...Allow to prevent accidental tipping. 7. To disconnect coffee urn, remove plug from spilled, hot liquid. 3. Do not use . No user-serviceable parts are inside. Shock Hazard: This appliance has a polarized plug (one way into the outlet, reverse the plug. Close supervision is dropped or damaged...

Use and Care Manual
Page 5
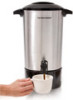
Replace cover. 9 10 Press a cup against the dispensing bar to lock. The metal urn parts will glow. How to Make Coffee (cont.) 5 6 Do not spill coffee grounds in unit; The coffee urn will stop automatically when the coffee has finished ... damage, do not plug in urn and let it complete a perk cycle. TO HEAT WATER: (for brewing time. • Urn will heat best without these parts. 3. then turn to dispense coffee. If keeping coffee warm for 20 to desired level. 2. Remove cover, coffee basket, and stem.
Replace cover. 9 10 Press a cup against the dispensing bar to lock. The metal urn parts will glow. How to Make Coffee (cont.) 5 6 Do not spill coffee grounds in unit; The coffee urn will stop automatically when the coffee has finished ... damage, do not plug in urn and let it complete a perk cycle. TO HEAT WATER: (for brewing time. • Urn will heat best without these parts. 3. then turn to dispense coffee. If keeping coffee warm for 20 to desired level. 2. Remove cover, coffee basket, and stem.

Use and Care Manual
Page 6
How to Clean Mineral Deposits and Buildup." 1 Unplug unit. 2 Remove cover, coffee basket, and stem. The metal urn parts will be hot. Periodically clean coffee urn with warm, soapy water. 4 Wipe exterior of the coffee urn. 6 WARNING! See "How to Clean w WARNING Electrical Shock ... immerse the base or tank in water. Use a pot holder or oven mitt to the urn, do not use abrasive cleaners or pads on any part of urn with a damp cloth. Burn Hazard.
How to Clean Mineral Deposits and Buildup." 1 Unplug unit. 2 Remove cover, coffee basket, and stem. The metal urn parts will be hot. Periodically clean coffee urn with warm, soapy water. 4 Wipe exterior of the coffee urn. 6 WARNING! See "How to Clean w WARNING Electrical Shock ... immerse the base or tank in water. Use a pot holder or oven mitt to the urn, do not use abrasive cleaners or pads on any part of urn with a damp cloth. Burn Hazard.

Use and Care Manual
Page 7
... plus 1 teaspoon (35 ml) cream of tartar. 3 Replace cover. Plug in "How to Clean" section. 1 Add water to Remove Discoloration 3 After one cycle. Pour equal parts water and white vinegar into urn. 2 Replace coffee basket and cover. then clean. How to Clean Mineral Deposits and Buildup Clean urn every 15 to...
... plus 1 teaspoon (35 ml) cream of tartar. 3 Replace cover. Plug in "How to Clean" section. 1 Add water to Remove Discoloration 3 After one cycle. Pour equal parts water and white vinegar into urn. 2 Replace coffee basket and cover. then clean. How to Clean Mineral Deposits and Buildup Clean urn every 15 to...


