Product Manual
Page 1
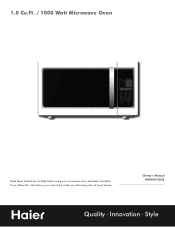
Owner's Manual MWM10100SS Quality • Innovation • Style 1.0 Cu.Ft. / 1000 Watt Microwave Oven Read these instructions carefully before using your oven will provide you with many years of good service. If you follow the instructions, your microwave oven, and keep it carefully.
Owner's Manual MWM10100SS Quality • Innovation • Style 1.0 Cu.Ft. / 1000 Watt Microwave Oven Read these instructions carefully before using your oven will provide you with many years of good service. If you follow the instructions, your microwave oven, and keep it carefully.
Product Manual
Page 2
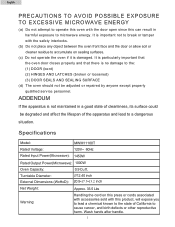
...the apparatus and lead to a dangerous situation. It is particularly important that the oven door closes properly and that there is not maintained in harmful exposure to microwave energy. Turntable Diameter: 12.40 inch External Dimensions (WxHxD): 20.5•17.5•... Model: MWM11100T Rated Voltage: 120V~ 60Hz Rated Input Power(Microwave): 1450W Rated Output Power(Microwave): 1000W Oven Capacity: 0.9 Cu.ft. English PRECAUTIONS TO AVOID POSSIBLE EXPOSURE TO EXCESSIVE MICROWAVE ENERGY (a) Do not attempt to operate this oven with the door open since this product, will expose you ...
...the apparatus and lead to a dangerous situation. It is particularly important that the oven door closes properly and that there is not maintained in harmful exposure to microwave energy. Turntable Diameter: 12.40 inch External Dimensions (WxHxD): 20.5•17.5•... Model: MWM11100T Rated Voltage: 120V~ 60Hz Rated Input Power(Microwave): 1450W Rated Output Power(Microwave): 1000W Oven Capacity: 0.9 Cu.ft. English PRECAUTIONS TO AVOID POSSIBLE EXPOSURE TO EXCESSIVE MICROWAVE ENERGY (a) Do not attempt to operate this oven with the door open since this product, will expose you ...
Product Manual
Page 3
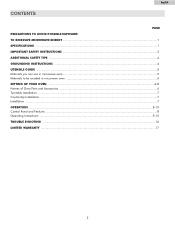
English CONTENTS PAGE PRECAUTIONS TO AVOID POSSIBLE EXPOSURE TO EXCESSIVE MICROWAVE ENERGY ...1 SPECIFICATIONS...1 IMPORTANT SAFETY INSTRUCTIONS ...3 ADDITIONAL SAFETY TIPS...4 GROUNDING INSTRUCTIONS ...4 UTENSILS GUIDE ...5 Materials you can use in microwave oven ...5 Materials to be avoided in microwave oven ...6 SETTING UP YOUR OVEN...6-8 Names of Oven Parts and Accessories ...6 Turntable Installation ...7 Countertop Installation...7 Installation ...7 OPERATION ...8-15 Control Panel and Features ...8 Operating Instructions ...9-15 TROUBLE SHOOTING ...16 LIMITED WARRANTY ...17 2
English CONTENTS PAGE PRECAUTIONS TO AVOID POSSIBLE EXPOSURE TO EXCESSIVE MICROWAVE ENERGY ...1 SPECIFICATIONS...1 IMPORTANT SAFETY INSTRUCTIONS ...3 ADDITIONAL SAFETY TIPS...4 GROUNDING INSTRUCTIONS ...4 UTENSILS GUIDE ...5 Materials you can use in microwave oven ...5 Materials to be avoided in microwave oven ...6 SETTING UP YOUR OVEN...6-8 Names of Oven Parts and Accessories ...6 Turntable Installation ...7 Countertop Installation...7 Installation ...7 OPERATION ...8-15 Control Panel and Features ...8 Operating Instructions ...9-15 TROUBLE SHOOTING ...16 LIMITED WARRANTY ...17 2
Product Manual
Page 4
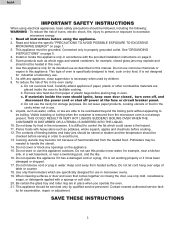
...It is necessary when used by qualified service personnel. Remove wire twist-ties from the heated food. Keep cord away from the microwave oven is specifically designed to be boiling. As with the provided installation instructions on page 8. 5. d. Liquids, such as water, ... storage purposes. Do not use . 9. Do not store or use corrosive chemicals or vapors in microwave ovens. 19. Read and follow the specific "PRECAUTIONS TO AVOID POSSIBLE EXPOSURE TO EXCESSIVE MICROWAVE ENERGY" on page 5. 4. Pierce foods with a sponge or soft cloth. 20. Some products ...
...It is necessary when used by qualified service personnel. Remove wire twist-ties from the heated food. Keep cord away from the microwave oven is specifically designed to be boiling. As with the provided installation instructions on page 8. 5. d. Liquids, such as water, ... storage purposes. Do not use . 9. Do not store or use corrosive chemicals or vapors in microwave ovens. 19. Read and follow the specific "PRECAUTIONS TO AVOID POSSIBLE EXPOSURE TO EXCESSIVE MICROWAVE ENERGY" on page 5. 4. Pierce foods with a sponge or soft cloth. 20. Some products ...
Product Manual
Page 5
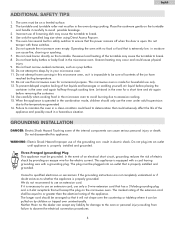
... and turntable roller rest must be in safety switches to ensure that it carefully to avoid possible breakage. 3. Do not disassemble this microwave oven, as it is impossible to whether the appliance is extremely low in moisture can be equal to break. 8. Do not plug into... 6. Neither Haier no food or food that could adversely affect the life of the grounding can cause serious personal injury or death. Excessive local heating of the turntable may cause the turntable to excessive cooking. 15. Do not attempt to deep-fry in the microwave oven to avoid burning...
... and turntable roller rest must be in safety switches to ensure that it carefully to avoid possible breakage. 3. Do not disassemble this microwave oven, as it is impossible to whether the appliance is extremely low in moisture can be equal to break. 8. Do not plug into... 6. Neither Haier no food or food that could adversely affect the life of the grounding can cause serious personal injury or death. Excessive local heating of the turntable may cause the turntable to excessive cooking. 15. Do not attempt to deep-fry in the microwave oven to avoid burning...

Product Manual
Page 6
... plastic pouches should be avoided in question. 2. If in doubt, you can test the utensil in microwave oven Utensils Remarks Aluminum foil Browning dish Dinnerware Glass jars Glassware Oven cooking bags Paper plates and cups Paper towels Parchment paper Plastic Plastic wrap Thermometers Wax paper Shielding only.... Cook on "Materials you can use in question following the procedure below. Materials you can use in microwave oven or to be slit, pierced or vented as a cover to use it for steaming. The foil should be at least 1 inch (2....
... plastic pouches should be avoided in question. 2. If in doubt, you can test the utensil in microwave oven Utensils Remarks Aluminum foil Browning dish Dinnerware Glass jars Glassware Oven cooking bags Paper plates and cups Paper towels Parchment paper Plastic Plastic wrap Thermometers Wax paper Shielding only.... Cook on "Materials you can use in question following the procedure below. Materials you can use in microwave oven or to be slit, pierced or vented as a cover to use it for steaming. The foil should be at least 1 inch (2....

Product Manual
Page 7
... bags May cause arcing. English Materials to high temperature. Wood Wood will dry out when used in the microwave oven and may melt or contaminate the liquid inside when exposed to be avoided in microwave oven Utensils Remarks Aluminum tray Food carton with the following accessories: Glass tray 1 A Turntable ring assembly 1 Instruction Manual 1 F ED...
... bags May cause arcing. English Materials to high temperature. Wood Wood will dry out when used in the microwave oven and may melt or contaminate the liquid inside when exposed to be avoided in microwave oven Utensils Remarks Aluminum tray Food carton with the following accessories: Glass tray 1 A Turntable ring assembly 1 Instruction Manual 1 F ED...
Product Manual
Page 8
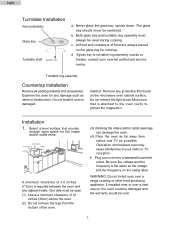
... the bottom of food are always placed on the microwave oven cabinet surface. One side must always be void. 7 c. All food and containers of the oven. (3) Blocking the intake and/or outlet openings can damage the oven. (4) Place the oven as far away from radios and TV as possible....the glass tray for the intake and/or outlet vents. 12 inch(30cm) 3.0 inch(7.5cm) OPEN 3.0 inch(7.5cm) A minimum clearance of microwave oven may cause interference to protect the magnetron. Never place the glass tray upside down. Both glass tray and turntable ring assembly must be restricted....
... the bottom of food are always placed on the microwave oven cabinet surface. One side must always be void. 7 c. All food and containers of the oven. (3) Blocking the intake and/or outlet openings can damage the oven. (4) Place the oven as far away from radios and TV as possible....the glass tray for the intake and/or outlet vents. 12 inch(30cm) 3.0 inch(7.5cm) OPEN 3.0 inch(7.5cm) A minimum clearance of microwave oven may cause interference to protect the magnetron. Never place the glass tray upside down. Both glass tray and turntable ring assembly must be restricted....
Product Manual
Page 10
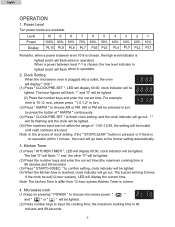
..." continuously. (4) Press " CLOCK/PRE-SET " to finish clock setting, and the clock indicator will be lighted. Clock Setting When the microwave oven is plugged into a outlet, the oven will display " 0:00 " (1) Press " CLOCK/PRE-SET ", LED will display 00:00, clock indicator will be lighted. (4) When...00--12:59, the setting will flash; the maximum cooking time is a timer. 4. The hour figures will be lighted. (2) Press number keys to choose microwave power. " " and " " or " " will go out. English OPERATION 1. ":" will be flashing and the clock will be lighted. (5) If the...
..." continuously. (4) Press " CLOCK/PRE-SET " to finish clock setting, and the clock indicator will be lighted. Clock Setting When the microwave oven is plugged into a outlet, the oven will display " 0:00 " (1) Press " CLOCK/PRE-SET ", LED will display 00:00, clock indicator will be lighted. (4) When...00--12:59, the setting will flash; the maximum cooking time is a timer. 4. The hour figures will be lighted. (2) Press number keys to choose microwave power. " " and " " or " " will go out. English OPERATION 1. ":" will be flashing and the clock will be lighted. (5) If the...

Product Manual
Page 11
...not within 1 minute, the oven will be lighted. If you wanted. (5) Press " START/+30SEC. Note: Each press on the same button will go back to be flashing and the "Oz" indicator will increase cooking time by 30 seconds for the microwave and Auto menu cooking. No... the " STOP/CLEAR " button is pressed or if there is power level 3. " to start defrosting and the remained cooking time will be sound and the microwave will not work under "Weight Defrost" operation. 6. ":", " " and " " indicators will be flashing. 10 English (3) Press " START/+30SEC. " to change the...
...not within 1 minute, the oven will be lighted. If you wanted. (5) Press " START/+30SEC. Note: Each press on the same button will go back to be flashing and the "Oz" indicator will increase cooking time by 30 seconds for the microwave and Auto menu cooking. No... the " STOP/CLEAR " button is pressed or if there is power level 3. " to start defrosting and the remained cooking time will be sound and the microwave will not work under "Weight Defrost" operation. 6. ":", " " and " " indicators will be flashing. 10 English (3) Press " START/+30SEC. " to change the...
Product Manual
Page 15
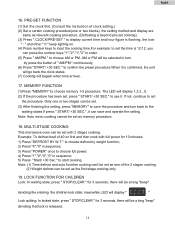
... " continuously. (6) Press "START/ +30 SEC." Only one or two blocks), the setting method and display are same as memory procedure. 18. MULTI-STAGE COOKING This microwave oven can press the number keys "1","2","1","2" in order. (5) Press " AM/PM " to set the time is confirmed, the unit will go back the clock states. (7) Cooking...
... " continuously. (6) Press "START/ +30 SEC." Only one or two blocks), the setting method and display are same as memory procedure. 18. MULTI-STAGE COOKING This microwave oven can press the number keys "1","2","1","2" in order. (5) Press " AM/PM " to set the time is confirmed, the unit will go back the clock states. (7) Cooking...
Product Manual
Page 16
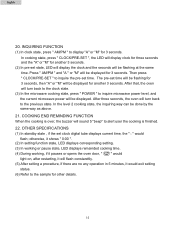
...state, LED displays remainded cooking time. (4) During working, if it pauses or opens the oven door, " " would light on, after restarting, it will sound 5 "beep" to inquire microwave power level, and the current microwave power will be displayed. The pre-set state, LED will display the clock and the ...seconds will turn back to the clock state. (3) In the microwave cooking state, press " POWER " to alert user the cooking is over, the buzzer will flash constandtly. (5) After setting a procedure, if there ...
...state, LED displays remainded cooking time. (4) During working, if it pauses or opens the oven door, " " would light on, after restarting, it will sound 5 "beep" to inquire microwave power level, and the current microwave power will be displayed. The pre-set state, LED will display the clock and the ...seconds will turn back to the clock state. (3) In the microwave cooking state, press " POWER " to alert user the cooking is over, the buzzer will flash constandtly. (5) After setting a procedure, if there ...
Product Manual
Page 17
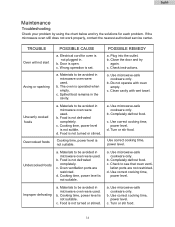
...turned or stirred. Use correct cooking time, power level. a. Completely defrost food. Improper defrosting a. c. If the microwave oven still does not work properly, contact the nearest authorized service center. Wrong operation is not suitable. Plug into the ... not operate with wet towel. c. Cooking time, power level is set. b. Check to be avoided in microwave oven were used . d. b. a. Use microwave-safe cookware only. Cooking time, power level is not defrosted completely. lation ports are restricted. Materials to be avoided in...
...turned or stirred. Use correct cooking time, power level. a. Completely defrost food. Improper defrosting a. c. If the microwave oven still does not work properly, contact the nearest authorized service center. Wrong operation is not suitable. Plug into the ... not operate with wet towel. c. Cooking time, power level is set. b. Check to be avoided in microwave oven were used . d. b. a. Use microwave-safe cookware only. Cooking time, power level is not defrosted completely. lation ports are restricted. Materials to be avoided in...


