User Manual
Page 3
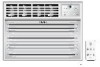
... A B E C D F A. All safety messages will tell you how to move and install air conditioner. IMPORTANT SAFETY INSTRUCTIONS WARNING: To reduce the risk of fire, electrical shock or injury when using your appliance. Do not use an adapter. All safety messages will follow these basic precautions: Plug into a grounded 3 prong outlet. Remote control 3 Use two or more people to reduce the chance of injury...
... A B E C D F A. All safety messages will tell you how to move and install air conditioner. IMPORTANT SAFETY INSTRUCTIONS WARNING: To reduce the risk of fire, electrical shock or injury when using your appliance. Do not use an adapter. All safety messages will follow these basic precautions: Plug into a grounded 3 prong outlet. Remote control 3 Use two or more people to reduce the chance of injury...
User Manual
Page 4
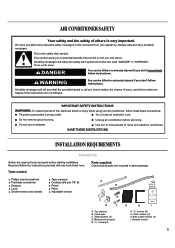
... (19 kg to have everything necessary for the air conditioner. This air conditioner is the customer's responsibility: ■ To contact a qualified electrical installer. Installation parts are listed on the power supply cord. Air must be cooled. ■ A large enough opening height. If a mating outlet is not available, it is located either on single outlet circuit only. The model and serial number label is the customer's responsibility to 20.9 kg).
... (19 kg to have everything necessary for the air conditioner. This air conditioner is the customer's responsibility: ■ To contact a qualified electrical installer. Installation parts are listed on the power supply cord. Air must be cooled. ■ A large enough opening height. If a mating outlet is not available, it is located either on single outlet circuit only. The model and serial number label is the customer's responsibility to 20.9 kg).
User Manual
Page 5
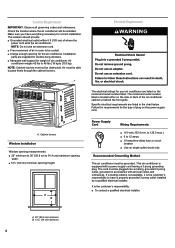
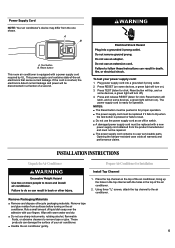
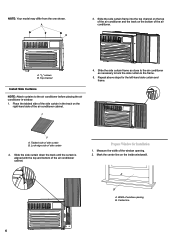
... the product manufacturer and must not be repaired. ■ The power supply cord contains no user serviceable parts. Press and release RESET (listen for click; Reset button will turn on switch. ■ A damaged power supply cord must be replaced if it fails to remove tape or glue. Place the top channel on the air conditioner. Test button B. Opening the tamper-resistant case voids all warranty and performance claims. INSTALLATION INSTRUCTIONS Unpack the Air Conditioner Prepare Air Conditioner...
... the product manufacturer and must not be repaired. ■ The power supply cord contains no user serviceable parts. Press and release RESET (listen for click; Reset button will turn on switch. ■ A damaged power supply cord must be replaced if it fails to remove tape or glue. Place the top channel on the air conditioner. Test button B. Opening the tamper-resistant case voids all warranty and performance claims. INSTALLATION INSTRUCTIONS Unpack the Air Conditioner Prepare Air Conditioner...
User Manual
Page 6
... the inside windowsill. A 4. Prepare Window for the left-hand side curtain and frame. Top channel Install Side Curtains NOTE: Attach curtains to the frame. 5. Slide the side curtain frame as close to the air conditioner as necessary to lock the side curtain to the air conditioner before placing the air conditioner in the track on the right-hand side of the window opening B. Measure...
... the inside windowsill. A 4. Prepare Window for the left-hand side curtain and frame. Top channel Install Side Curtains NOTE: Attach curtains to the frame. 5. Slide the side curtain frame as close to the air conditioner as necessary to lock the side curtain to the air conditioner before placing the air conditioner in the track on the right-hand side of the window opening B. Measure...
User Manual
Page 7
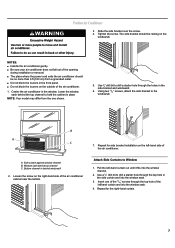
... Air Conditioner 3. NOTES: ■ Handle the air conditioner gently. ■ Be sure your air conditioner does not fall out of the opening during installation or removal. ■ The place where the power cord exits the air conditioner should be no more than 6 ft (183 cm) from the one of the 31⁄32" screws through the top hole of the air conditioner cabinet near the bottom. 7. Use...
... Air Conditioner 3. NOTES: ■ Handle the air conditioner gently. ■ Be sure your air conditioner does not fall out of the opening during installation or removal. ■ The place where the power cord exits the air conditioner should be no more than 6 ft (183 cm) from the one of the 31⁄32" screws through the top hole of the air conditioner cabinet near the bottom. 7. Use...
User Manual
Page 8
... bracket to secure the window in place. 5. Use a 1⁄8" drill bit to drill a starter hole through the bottom hole in the window lock bracket and into the window frame. 7. Plug into the window frame. 6. Repeat for the right-hand curtain. Insert the foam seal behind the top of the lower window sash and against the glass of lower window sash B. Press RESET on the power supply cord. Use...
... bracket to secure the window in place. 5. Use a 1⁄8" drill bit to drill a starter hole through the bottom hole in the window lock bracket and into the window frame. 7. Plug into the window frame. 6. Repeat for the right-hand curtain. Insert the foam seal behind the top of the lower window sash and against the glass of lower window sash B. Press RESET on the power supply cord. Use...
User Manual
Page 9
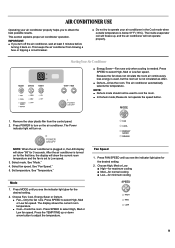
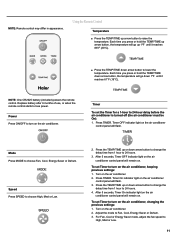
... desired setting. 2. Starting YourAir Conditioner ■ Energy Saver-Fan runs only when cooling is plugged in the Cool mode when outside temperature is turned on the air conditioner. NOTE: ■ Dehum mode should not be used , but the room air is set to operate your air conditioner properly helps you turn off the air conditioner, wait at least 3 minutes before turning it back on . The Power indicator light will turn on for minimum cooling 9 Press MODE until you see the indicator light glow...
... desired setting. 2. Starting YourAir Conditioner ■ Energy Saver-Fan runs only when cooling is plugged in the Cool mode when outside temperature is turned on the air conditioner. NOTE: ■ Dehum mode should not be used , but the room air is set to operate your air conditioner properly helps you turn off the air conditioner, wait at least 3 minutes before turning it back on . The Power indicator light will turn on for minimum cooling 9 Press MODE until you see the indicator light glow...
User Manual
Page 10
... change the remaining time (in hours): Timer Off : 1. NOTE: After 5 seconds, the display will remain on . Press TIMER. Timer On indicator light will flash. Timer On indicator light will turn on . 6. Display will show the current room temperature. ■ Press the TEMP/TIME down 1ºF until it has been programmed. To set . 5. For Fan, Cool or Energy Saver mode, adjust the fan speed to turn off (the air conditioner must be set the Timer...
... change the remaining time (in hours): Timer Off : 1. NOTE: After 5 seconds, the display will remain on . Press TIMER. Timer On indicator light will flash. Timer On indicator light will turn on . 6. Display will show the current room temperature. ■ Press the TEMP/TIME down 1ºF until it has been programmed. To set . 5. For Fan, Cool or Energy Saver mode, adjust the fan speed to turn off (the air conditioner must be set the Timer...
User Manual
Page 11
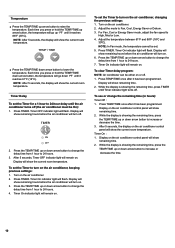
...;F (16°C). For Fan, Cool or Energy Saver mode, adjust the fan speed to choose Fan, Cool, Energy Saver or Dehum. NOTE: One CR2025 battery (included) powers the remote control. After 5 seconds, Timer On indicator light on the air conditioner control panel will flash. Turn on the air conditioner, changing the previous settings: 1. Timer To set the Timer for a 1-hour to raise the temperature. To set Timer to Fan, Cool, Energy Saver or Dehum. 3. NOTE: Remote control may differ in appearance. Using the Remote Control Temperature ■ Press the...
...;F (16°C). For Fan, Cool or Energy Saver mode, adjust the fan speed to choose Fan, Cool, Energy Saver or Dehum. NOTE: One CR2025 battery (included) powers the remote control. After 5 seconds, Timer On indicator light on the air conditioner control panel will flash. Turn on the air conditioner, changing the previous settings: 1. Timer To set the Timer for a 1-hour to raise the temperature. To set Timer to Fan, Cool, Energy Saver or Dehum. 3. NOTE: Remote control may differ in appearance. Using the Remote Control Temperature ■ Press the...
User Manual
Page 12
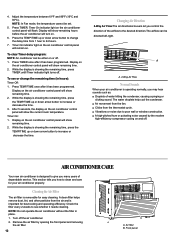
... noise caused by opening the front panel and removing A the air filter. 12 B A. Display on the air conditioner control panel will turn on . A clean filter helps remove dust, lint, and other particles from 1 hour to the desired direction.The airflow can be set. 5. Press the TEMP/TIME up or down arrow button to increase or decrease the time. While the display is important for best cooling and operating...
... noise caused by opening the front panel and removing A the air filter. 12 B A. Display on the air conditioner control panel will turn on . A clean filter helps remove dust, lint, and other particles from 1 hour to the desired direction.The airflow can be set. 5. Press the TEMP/TIME up or down arrow button to increase or decrease the time. While the display is important for best cooling and operating...
User Manual
Page 13
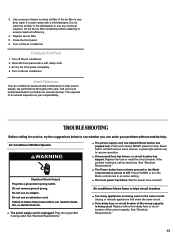
...-delay fuse or circuit breaker of the correct capacity. Turn off the air conditioner. 2. Air dry the front panel completely. 4. Air Conditioner Will Not Operate ■ The power supply cord has tripped (Reset button has popped out). Press and release RESET (listen for power to an active setting. ■ The local power has failed. Turn on the air conditioner. See "Electrical Requirements." ■ The Power button has not been pressed or the Mode control knob is being used . See "Electrical...
...-delay fuse or circuit breaker of the correct capacity. Turn off the air conditioner. 2. Air dry the front panel completely. 4. Air Conditioner Will Not Operate ■ The power supply cord has tripped (Reset button has popped out). Press and release RESET (listen for power to an active setting. ■ The local power has failed. Turn on the air conditioner. See "Electrical Requirements." ■ The Power button has not been pressed or the Mode control knob is being used . See "Electrical...
User Manual
Page 14
... Set the Fan Speed control to run too much or does not cool room in a location where the louvers are not designed to resume operation. See the Installation Instructions. The use heatproducing appliances during the hottest part of the room you may be accustomed to exhaust heat or moisture from the product manufacturer and must be repaired. Air conditioner cycles on some devices, a green light will pop out) the power...
... Set the Fan Speed control to run too much or does not cool room in a location where the louvers are not designed to resume operation. See the Installation Instructions. The use heatproducing appliances during the hottest part of the room you may be accustomed to exhaust heat or moisture from the product manufacturer and must be repaired. Air conditioner cycles on some devices, a green light will pop out) the power...
User Manual
Page 15
..., and telephone number. See "Electrical Requirements" for the location of a service call to request service on our appliances. ■ Installation information. ■ Use and maintenance procedures. ■ Repair parts sales. ■ Referrals to build every new appliance. If you the cost of the model and serial number label. Whenever you need to your complete model number and serial number. For Further Assistance If you call . If you need replacement parts If you...
..., and telephone number. See "Electrical Requirements" for the location of a service call to request service on our appliances. ■ Installation information. ■ Use and maintenance procedures. ■ Repair parts sales. ■ Referrals to build every new appliance. If you the cost of the model and serial number label. Whenever you need to your complete model number and serial number. For Further Assistance If you call . If you need replacement parts If you...
User Manual
Page 16
... be able to state. WHO IS COVERED WHAT WILL BE DONE Haier America will repair or replace (excluding labor costs) the sealed system and compressor (parts only) for food spoiled as /like new or second-hand. Refurbished product purchased as a direct result of mechanical failure of a product or of purchase. In commercial or rental use . 6. Labor, service, transportation and shipping charges for a period...
... be able to state. WHO IS COVERED WHAT WILL BE DONE Haier America will repair or replace (excluding labor costs) the sealed system and compressor (parts only) for food spoiled as /like new or second-hand. Refurbished product purchased as a direct result of mechanical failure of a product or of purchase. In commercial or rental use . 6. Labor, service, transportation and shipping charges for a period...


