Instruction Manual
Page 2
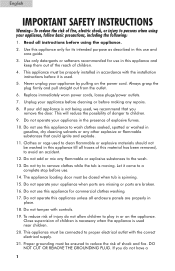
... grounding must be properly installed in accordance with the installation instructions before using your appliance by pulling on the appliance. Unplug your appliance when parts are missing or parts are properly in this appliance till all traces of children. 4. This appliance must be washed in place. 18. Do not use this appliance...
... grounding must be properly installed in accordance with the installation instructions before using your appliance by pulling on the appliance. Unplug your appliance when parts are missing or parts are properly in this appliance till all traces of children. 4. This appliance must be washed in place. 18. Do not use this appliance...

Instruction Manual
Page 3
... can explode. 23. This will let the trapped hydrogen escape. SAVE THESE INSTRUCTIONS For Future Use 2 Do not repair or replace any part of the appliance or attempt any servicing unless specifically recommended in the user-repair instructions that could ignite or explode. 24. Do not place...cleaned in, washed in, soaked in, or spotted with cooking oils may be produced if the water heater has not been used in your dryer. The wall receptacle MUST be explosive under certain circumstances. English three-prong electric receptacle outlet in the wall, have skills to carry out. ...
... can explode. 23. This will let the trapped hydrogen escape. SAVE THESE INSTRUCTIONS For Future Use 2 Do not repair or replace any part of the appliance or attempt any servicing unless specifically recommended in the user-repair instructions that could ignite or explode. 24. Do not place...cleaned in, washed in, soaked in, or spotted with cooking oils may be produced if the water heater has not been used in your dryer. The wall receptacle MUST be explosive under certain circumstances. English three-prong electric receptacle outlet in the wall, have skills to carry out. ...
Instruction Manual
Page 5
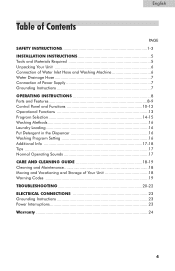
... and Materials Required 5 Unpacking Your Unit 6 Connection of Water Inlet Hose and Washing Machine 6 Water Drainage Hose 7 Connection of Power Supply 7 Grounding Instructions 7 OPERATING INSTRUCTIONS 8 Parts and Features 8-9 Control Panel and Functions 10-12 Operational Functions 13 Program Selection 14-15 Washing Methods 16 Laundry Loading 16 Put Detergent in the...
... and Materials Required 5 Unpacking Your Unit 6 Connection of Water Inlet Hose and Washing Machine 6 Water Drainage Hose 7 Connection of Power Supply 7 Grounding Instructions 7 OPERATING INSTRUCTIONS 8 Parts and Features 8-9 Control Panel and Functions 10-12 Operational Functions 13 Program Selection 14-15 Washing Methods 16 Laundry Loading 16 Put Detergent in the...
Instruction Manual
Page 8
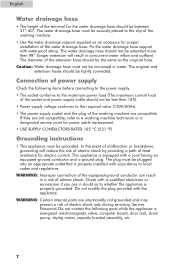
... valve, computer board, door lock, drain pump, drying motor, capacity bracket assembly, etc... 7 Connection of power supply Check the following parts while the appliance is properly grounded. Check with a cord having an equipped-ground conductor and a ground plug. The water drainage hose should...be plugged into an appropriate outlet that is equipped with a qualified electrician or serviceman if you are compatible. WARNING: Certain internal parts are not compatible, refer to local codes and regulations. English Water drainage hose • The height of the terminal for the ...
... valve, computer board, door lock, drain pump, drying motor, capacity bracket assembly, etc... 7 Connection of power supply Check the following parts while the appliance is properly grounded. Check with a cord having an equipped-ground conductor and a ground plug. The water drainage hose should...be plugged into an appropriate outlet that is equipped with a qualified electrician or serviceman if you are compatible. WARNING: Certain internal parts are not compatible, refer to local codes and regulations. English Water drainage hose • The height of the terminal for the ...
Instruction Manual
Page 9
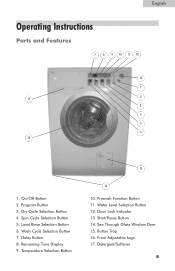
Program Button 3. Prewash Function Button 11. Start/Pause Button 14. See Through Glass Window Door 15. Detergent/Softener 8 Button Trap 16. On/Off Button 2. Spin Cycle Selection Button 5. Remaining Time Display 9. Front Adjustable Legs 17. Load Rinse Selection Button 6. Temperature Selection Button 15 16 10. Water Level Selection Button 12. Door Lock Indicator 13. Delay Button 8. English Operating Instructions Parts and Features 7 8 9 10 11 12 13 1 2 17 3 4 5 6 14 1. Dry Cycle Selection Button 4. Wash Cycle Selection Button 7.
Program Button 3. Prewash Function Button 11. Start/Pause Button 14. See Through Glass Window Door 15. Detergent/Softener 8 Button Trap 16. On/Off Button 2. Spin Cycle Selection Button 5. Remaining Time Display 9. Front Adjustable Legs 17. Load Rinse Selection Button 6. Temperature Selection Button 15 16 10. Water Level Selection Button 12. Door Lock Indicator 13. Delay Button 8. English Operating Instructions Parts and Features 7 8 9 10 11 12 13 1 2 17 3 4 5 6 14 1. Dry Cycle Selection Button 4. Wash Cycle Selection Button 7.
Instruction Manual
Page 13
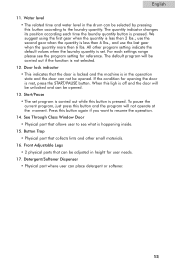
... this button is in the operation state and the door can not be opened . 13. If the condition for reference. Button Trap • Physical part that the door is locked and the machine is pressed. For each time the laundry quantity button is not selected. 12. See Through Class Window...to the laundry quantity. Press this button and the program will be unlocked and can place detergent or softener. 12 Detergent/Softener Dispenser • Physical part where user can be adjusted in the drum can be opened . Water level • The related time and water level in height for user ...
... this button is in the operation state and the door can not be opened . 13. If the condition for reference. Button Trap • Physical part that the door is locked and the machine is pressed. For each time the laundry quantity button is not selected. 12. See Through Class Window...to the laundry quantity. Press this button and the program will be unlocked and can place detergent or softener. 12 Detergent/Softener Dispenser • Physical part where user can be adjusted in the drum can be opened . Water level • The related time and water level in height for user ...
Instruction Manual
Page 19
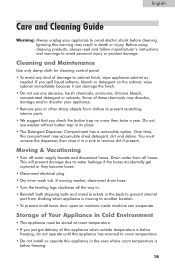
This will prevent damage due to prevent scratching interior parts. • We suggest that you check the button trap no more than twice a year. Ignoring this warning may accumulate dried detergent, dirt and debris. Some ...'s instructions and warnings to another location. • To prevent mold leave door open so moisture inside machine can damage the finish. • Do not use washer without button trap in the back to prevent internal part from shaking when appliance is moving to avoid personal injury or product damage. If moving...
This will prevent damage due to prevent scratching interior parts. • We suggest that you check the button trap no more than twice a year. Ignoring this warning may accumulate dried detergent, dirt and debris. Some ...'s instructions and warnings to another location. • To prevent mold leave door open so moisture inside machine can damage the finish. • Do not use washer without button trap in the back to prevent internal part from shaking when appliance is moving to avoid personal injury or product damage. If moving...
Instruction Manual
Page 25
...service center. All service must be performed by this warranty is exclusive and is not covered by a Haier authorized service center. For the name and telephone number of the part. This warranty covers appliances within the continental United States, Puerto Rico and Canada. What is granted ... provide the cabinet assembly should the cabinet rust through Third through Tenth Year Haier will provide a part at no cost, as indicated below, to replace said part as labor, trip charge, etc are rendered. Before calling please have other warranty applies For Warranty Service Contact your...
...service center. All service must be performed by this warranty is exclusive and is not covered by a Haier authorized service center. For the name and telephone number of the part. This warranty covers appliances within the continental United States, Puerto Rico and Canada. What is granted ... provide the cabinet assembly should the cabinet rust through Third through Tenth Year Haier will provide a part at no cost, as indicated below, to replace said part as labor, trip charge, etc are rendered. Before calling please have other warranty applies For Warranty Service Contact your...
