
User Manual
Page 1
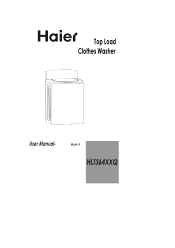
Top Load Clothes Washer User Manual- Model # HLT364XXQ
Top Load Clothes Washer User Manual- Model # HLT364XXQ
User Manual
Page 2
... controls. 19. Let it come to remove clothes while the tub or the agitator is spin.ning 15. Use only detergents or softeners recommended for commercial clothes wash. Always grasp the plug firmly and pull straight out from the outlet. 6. This will reduce the possibility of explosive fumes. 10. Clothes or rags used to wash clothes soaked, spotted or washed in or on the power cord. Do not operate your washer before cleaning...
... controls. 19. Let it come to remove clothes while the tub or the agitator is spin.ning 15. Use only detergents or softeners recommended for commercial clothes wash. Always grasp the plug firmly and pull straight out from the outlet. 6. This will reduce the possibility of explosive fumes. 10. Clothes or rags used to wash clothes soaked, spotted or washed in or on the power cord. Do not operate your washer before cleaning...
User Manual
Page 3
... your washer. This will Model number guide you for a few minutes. If you throw away your manual. SAVE THESE INSTRUCTIONS For Future Use DANGER Risk of the washer. Before you do not turn on all the hot faucets and let the hot water run for using the washer turn on a label in back of child entrapment. Serial number Remember to obtain warranty service. 2 You will need it to record the model and serial number...
... your washer. This will Model number guide you for a few minutes. If you throw away your manual. SAVE THESE INSTRUCTIONS For Future Use DANGER Risk of the washer. Before you do not turn on all the hot faucets and let the hot water run for using the washer turn on a label in back of child entrapment. Serial number Remember to obtain warranty service. 2 You will need it to record the model and serial number...
User Manual
Page 4
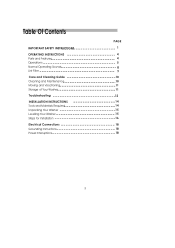
Table Of Contents IMPORTANT SAFETY INSTRUCTIONS OPERATING INSTRUCTIONS Parts and Features Operations Normal Operating Sounds Lint Filter Care and Cleaning Guide Cleaning and Maintenance Moving and Vacationing Storage of Your Washer Troubleshooting INSTALLATION INSTRUCTIONS Tools and Materials Required Unpacking Your Washer Levelling Your Washer Steps for Installation Electrical Connections Grounding Instructions Power Interruptions PAGE 1 4 4 5 8 9 10 10 11 11 12 14 14 15 15 16 18 18 18 3
Table Of Contents IMPORTANT SAFETY INSTRUCTIONS OPERATING INSTRUCTIONS Parts and Features Operations Normal Operating Sounds Lint Filter Care and Cleaning Guide Cleaning and Maintenance Moving and Vacationing Storage of Your Washer Troubleshooting INSTALLATION INSTRUCTIONS Tools and Materials Required Unpacking Your Washer Levelling Your Washer Steps for Installation Electrical Connections Grounding Instructions Power Interruptions PAGE 1 4 4 5 8 9 10 10 11 11 12 14 14 15 15 16 18 18 18 3
User Manual
Page 5
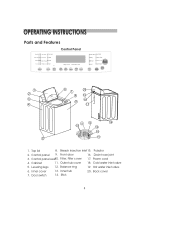
...19. Hot water inlet valve 6. Top lid 8. Cabinet 11. Cold water inlet valve 5. Inner cover 13. Door switch 14. Leveling legs 12. Inner tub 20. Pulsator 2. Control panel sea1t 0. Power cord 4. Back cover 7. Bleach injection inlet15. Filter, Filter cover 17. OPERATING INSTRUCTIONS Parts and Features Control Panel Normal Heavy Duty Whites Colors Hand Wash Pre-wash Quick wash Wash Delicate/ Casual Rinse Wrinkle Control Spin Cycles Function Extra Rinse Delay Time Estimated Time Wash Spin Speed Speed Delay Water Level Signal Extra Wash Hot/Cold...
...19. Hot water inlet valve 6. Top lid 8. Cabinet 11. Cold water inlet valve 5. Inner cover 13. Door switch 14. Leveling legs 12. Inner tub 20. Pulsator 2. Control panel sea1t 0. Power cord 4. Back cover 7. Bleach injection inlet15. Filter, Filter cover 17. OPERATING INSTRUCTIONS Parts and Features Control Panel Normal Heavy Duty Whites Colors Hand Wash Pre-wash Quick wash Wash Delicate/ Casual Rinse Wrinkle Control Spin Cycles Function Extra Rinse Delay Time Estimated Time Wash Spin Speed Speed Delay Water Level Signal Extra Wash Hot/Cold...
User Manual
Page 6
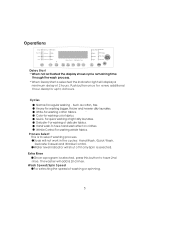
... washing color fabrics. Wrinkle Control-For washing wrinkle fabrics. Wash Speed/Spin Speed For selecting the speed of 2 hours. Operations Normal Heavy Duty Whites Colors Hand Wash Pre-wash Quick wash Wash Delicate/ Casual Rinse Wrinkle Control Spin Cycles Function Extra Rinse Delay Time Estimated Time Wash Spin Speed Speed Delay Water Level Signal Extra Wash Hot/Cold Heavy Warm/WCoalrdm Medium Light CWoalrdm/ /CCooldld Start Pause Cool/Cold Soil Level Temp Wash/Rinse Off Delay Start When not activated the display shows cycle remaining time through the wash...
... washing color fabrics. Wrinkle Control-For washing wrinkle fabrics. Wash Speed/Spin Speed For selecting the speed of 2 hours. Operations Normal Heavy Duty Whites Colors Hand Wash Pre-wash Quick wash Wash Delicate/ Casual Rinse Wrinkle Control Spin Cycles Function Extra Rinse Delay Time Estimated Time Wash Spin Speed Speed Delay Water Level Signal Extra Wash Hot/Cold Heavy Warm/WCoalrdm Medium Light CWoalrdm/ /CCooldld Start Pause Cool/Cold Soil Level Temp Wash/Rinse Off Delay Start When not activated the display shows cycle remaining time through the wash...
User Manual
Page 7
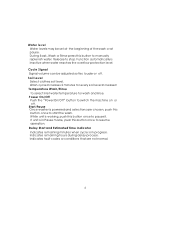
... Power On/Off button to manually replenish water. Soil Level Select clothes soil level. Cycle Signal Signal volume can be set at the beginning of the wash or at pause. Start/Pause Once washer is in Pause mode, push this button to switch the machine on or off . If unit is inactive when water reaches the overflow protection level. Wash cycle increases 2 minutes for every soil level increased Temperature Wash/Rinse To select inlet water temperature for wash...
... Power On/Off button to manually replenish water. Soil Level Select clothes soil level. Cycle Signal Signal volume can be set at the beginning of the wash or at pause. Start/Pause Once washer is in Pause mode, push this button to switch the machine on or off . If unit is inactive when water reaches the overflow protection level. Wash cycle increases 2 minutes for every soil level increased Temperature Wash/Rinse To select inlet water temperature for wash...

User Manual
Page 8
... soiled or lightly soiled. 7 Proper Use of Detergent: It is good washing practice to add the detergent to the water before you keep can work effectively on the size of the load, water type in the wat.er. Loading the Washer: Load each item loosely. r When loading wet items, keep the lid up, the agitation will not start. water level high enough so item. Note: You can easily slide into the tub and...
... soiled or lightly soiled. 7 Proper Use of Detergent: It is good washing practice to add the detergent to the water before you keep can work effectively on the size of the load, water type in the wat.er. Loading the Washer: Load each item loosely. r When loading wet items, keep the lid up, the agitation will not start. water level high enough so item. Note: You can easily slide into the tub and...
User Manual
Page 9
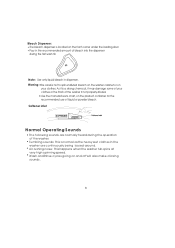
... the washer: Tumbling sounds: This is located on and off will also make clicking sounds. 8 Softener inlet SOFTENER Softener inlet Normal Operating Sounds The following sounds are continuously being lossed around. Air rushing noise: This happens when the washer tub spins at very high spinning speed. Use the manufacturer's chart, on your clothes or the finish of liquid or powder bleach. Note: Use only liquid bleach in the washer are normally heard during the first wash fill. Warning: Be careful not...
... the washer: Tumbling sounds: This is located on and off will also make clicking sounds. 8 Softener inlet SOFTENER Softener inlet Normal Operating Sounds The following sounds are continuously being lossed around. Air rushing noise: This happens when the washer tub spins at very high spinning speed. Use the manufacturer's chart, on your clothes or the finish of liquid or powder bleach. Note: Use only liquid bleach in the washer are normally heard during the first wash fill. Warning: Be careful not...

User Manual
Page 10
... remove the inner cover component after each wash. 1.Take off Install Install the inner cover 1.Open the top lid of the washing machine. 2.Put the inner cover component on the outer tub cover, lining up the inner cover shaft to guarantee there is no abnormal sound in the filter. 3.Install the lint filter. Lint Filter The lint filter must be used during washing. Install 2.Clean out the lint in opening...
... remove the inner cover component after each wash. 1.Take off Install Install the inner cover 1.Open the top lid of the washing machine. 2.Put the inner cover component on the outer tub cover, lining up the inner cover shaft to guarantee there is no abnormal sound in the filter. 3.Install the lint filter. Lint Filter The lint filter must be used during washing. Install 2.Clean out the lint in opening...
User Manual
Page 11
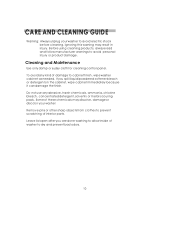
... dry and prevent bad odors. 10 Leave lid open after you spill liquid/powdered softener bleach or detergent on the cabinet, wipe cabinet immediately because it can damage the finish. If you are done washing to avoid personal Injury or product damage. Before using cleaning products, always read and follow manufacturer warnings to allow inside of interior parts. CARE AND CLEANING GUIDE Warning: Always unplug your washer.
... dry and prevent bad odors. 10 Leave lid open after you spill liquid/powdered softener bleach or detergent on the cabinet, wipe cabinet immediately because it can damage the finish. If you are done washing to avoid personal Injury or product damage. Before using cleaning products, always read and follow manufacturer warnings to allow inside of interior parts. CARE AND CLEANING GUIDE Warning: Always unplug your washer.
User Manual
Page 12
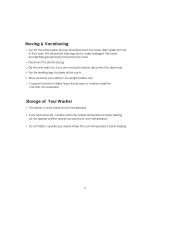
... the machine can evaporate. Storage of the hoses. Do not install or operate your washer in . Disconnect the electrical plug. Turn the levelling legs clockwise all of Your Washer The washer must be stored at room temperature. Move and store your washer where the room temperature is below freezing. 11 If you are moving the washer, disconnect the drain hose. Dry the inner wash tub. Moving & Vacationing Turn off the water...
... the machine can evaporate. Storage of the hoses. Do not install or operate your washer in . Disconnect the electrical plug. Turn the levelling legs clockwise all of Your Washer The washer must be stored at room temperature. Move and store your washer where the room temperature is below freezing. 11 If you are moving the washer, disconnect the drain hose. Dry the inner wash tub. Moving & Vacationing Turn off the water...
User Manual
Page 13
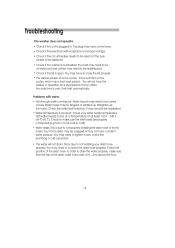
... time. The plug may need to be turned on fully. Check if the circuit breaker needs to be reset or if the fuse needs to be replaced. Check if the washer is due to not properly installing the drain hose or the fill hoses. Check if the lid is of proper voltage. You will start automatically. Problems with water: Not enough water coming out: Water faucet may be readjusted. Water hoses may need to be redistributed. Check the water level...
... time. The plug may need to be turned on fully. Check if the circuit breaker needs to be reset or if the fuse needs to be replaced. Check if the washer is due to not properly installing the drain hose or the fill hoses. Check if the lid is of proper voltage. You will start automatically. Problems with water: Not enough water coming out: Water faucet may be readjusted. Water hoses may need to be redistributed. Check the water level...
User Manual
Page 14
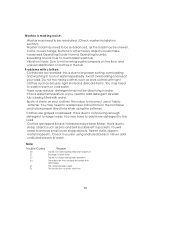
... read Operating Guide-Normal Operating Sounds). Vibration Noise: Due to not leveling washer properly on the container and follow proper directions when using undiluted bleach. Have soap residue: detergent may not be dissolving in the tub. Clothes are using the softener. Fasten belts, zippers, metal snaps etc. Coins, loose change, buttons or other heavy objects could make noise(read proper instructions on the floor and uneven distribution of clothes in water. Squealing sound: Due to wash. Clothes...
... read Operating Guide-Normal Operating Sounds). Vibration Noise: Due to not leveling washer properly on the container and follow proper directions when using undiluted bleach. Have soap residue: detergent may not be dissolving in the tub. Clothes are using the softener. Fasten belts, zippers, metal snaps etc. Coins, loose change, buttons or other heavy objects could make noise(read proper instructions on the floor and uneven distribution of clothes in water. Squealing sound: Due to wash. Clothes...
User Manual
Page 15
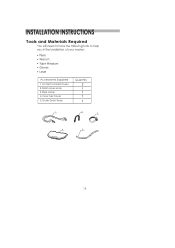
INSTALLATION INSTRUCTIONS Tools and Materials Required You will need to have the following tools to help you in the installation of your washer: Pliers Wrench Tape Measure Gloves Level Accessories Supplied 1.Hot & Cold inlet hoses 2.Drain Hose Hook 3.Pipe Hoop 4.Inner Tub Cover 5.Outer Drain Hose Quantity 2 1 1 1 1 1 2 3 4 5 14
INSTALLATION INSTRUCTIONS Tools and Materials Required You will need to have the following tools to help you in the installation of your washer: Pliers Wrench Tape Measure Gloves Level Accessories Supplied 1.Hot & Cold inlet hoses 2.Drain Hose Hook 3.Pipe Hoop 4.Inner Tub Cover 5.Outer Drain Hose Quantity 2 1 1 1 1 1 2 3 4 5 14

User Manual
Page 16
.... Pull out Shipping bar Leveling Your Washer Your washer has 4 leveling legs; Before using this washing machine, please remove this shipping bar by pulling handle and dispose it properly, otherwise the washing machine will be adjusted by turning them counter clockwise to raise your washer or turning them clockwise to prevent vibration during spin. 15 Leveling legs can be damaged. Adjustable foot High Low Warning: Leveling of washer is very important...
.... Pull out Shipping bar Leveling Your Washer Your washer has 4 leveling legs; Before using this washing machine, please remove this shipping bar by pulling handle and dispose it properly, otherwise the washing machine will be adjusted by turning them counter clockwise to raise your washer or turning them clockwise to prevent vibration during spin. 15 Leveling legs can be damaged. Adjustable foot High Low Warning: Leveling of washer is very important...
User Manual
Page 17
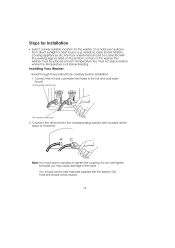
... Washer: Read through these instructions carefully before installation. 1. You should not be reused. 16 Steps for Installation Select a away suitable location for the washer on the bottom corners of the washer.The washer must be placed at room temperature.You must not place washer where the temperature is at the back of machine. Old hose-sets should use pliers to tighten the coupling. Connect the hot and cold water inlet hoses...
... Washer: Read through these instructions carefully before installation. 1. You should not be reused. 16 Steps for Installation Select a away suitable location for the washer on the bottom corners of the washer.The washer must be placed at room temperature.You must not place washer where the temperature is at the back of machine. Old hose-sets should use pliers to tighten the coupling. Connect the hot and cold water inlet hoses...
User Manual
Page 18
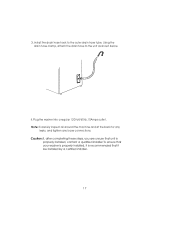
3. Caution:If, after completing these steps, you are unsure that unit is properly installed, contact a qualified installer.To ensure that your washer is properly installed, it is recommended that it be installed by a certified installer. 17 Install the drain hose hook to the unit as shown below. 4.Plug the washer into a regular 120Volt/60Hz,10Amps outlet. Note :Carefully inspect all around the machine and at the back for any leaks, and tighten any loose connections. Using the drain hose clamp, attach the drain hose to the outer drain hose tube.
3. Caution:If, after completing these steps, you are unsure that unit is properly installed, contact a qualified installer.To ensure that your washer is properly installed, it is recommended that it be installed by a certified installer. 17 Install the drain hose hook to the unit as shown below. 4.Plug the washer into a regular 120Volt/60Hz,10Amps outlet. Note :Carefully inspect all around the machine and at the back for any leaks, and tighten any loose connections. Using the drain hose clamp, attach the drain hose to the outer drain hose tube.

User Manual
Page 19
... not completely understood or if doubt exists as to AC outlet. Wiring Requirements: The washer must be grounded. Power Interruptions Occasionally there may be plugged into an outlet that you use of the plug can result in a risk of electric shock by providing an escape wire for a prolonged period, clean washer before using it replaced with a grounded plug. Remove the power cord from AC outlet when...
... not completely understood or if doubt exists as to AC outlet. Wiring Requirements: The washer must be grounded. Power Interruptions Occasionally there may be plugged into an outlet that you use of the plug can result in a risk of electric shock by providing an escape wire for a prolonged period, clean washer before using it replaced with a grounded plug. Remove the power cord from AC outlet when...


