User Manual
Page 1
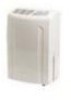
Dehumidifier Déhumidificateur Dehumidificador User Manual HDN455E/HDN655E Guide de l'Utilisateur HDN455E/HDN655E Manual del Usuario HDN455E/HDN655E Before operating this dehumidifier, please read these instructions completely. Quality ■ Innovation ■ Style
Dehumidifier Déhumidificateur Dehumidificador User Manual HDN455E/HDN655E Guide de l'Utilisateur HDN455E/HDN655E Manual del Usuario HDN455E/HDN655E Before operating this dehumidifier, please read these instructions completely. Quality ■ Innovation ■ Style
User Manual
Page 2
...; Contact a professional for service and repair. 1 English Safety Precautions • Do not fold or knot the power cord. • Make sure the plug is inserted firmly and properly into the outlet. • Do insert multiple plugs into the electrical socket. • Make sure the plug is clean. • Before turning off the dehumidifier, unplug the power cord. • Do...
...; Contact a professional for service and repair. 1 English Safety Precautions • Do not fold or knot the power cord. • Make sure the plug is inserted firmly and properly into the outlet. • Do insert multiple plugs into the electrical socket. • Make sure the plug is clean. • Before turning off the dehumidifier, unplug the power cord. • Do...
User Manual
Page 3
English Table Of Contents page Safety Precautions 1 Important Safety Information 3-4 Features Diagram 5-6 Part Names ...5 Control Panel 6 Operation ...7 Specifications 7 Operation Instructions 8 Start Operation 8 When Tank is Full 8 Continuous Drainage 8 Installing Drainage PVC Hose 8 Caution ...9 Maintenance/Emergency 9 Troubleshooting 10 Warranty Information 11 2
English Table Of Contents page Safety Precautions 1 Important Safety Information 3-4 Features Diagram 5-6 Part Names ...5 Control Panel 6 Operation ...7 Specifications 7 Operation Instructions 8 Start Operation 8 When Tank is Full 8 Continuous Drainage 8 Installing Drainage PVC Hose 8 Caution ...9 Maintenance/Emergency 9 Troubleshooting 10 Warranty Information 11 2
User Manual
Page 4
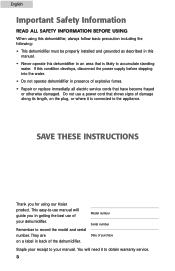
... dehumidifier in getting the best use manual will need it is likely to the appliance. They are on the plug, or where it to record the model and serial number. English Important Safety Information READ ALL SAFETY INFORMATION BEFORE USING When using our Haier product. Remember to obtain warranty service. 3 This easy-to-use of explosive fumes. • Repair or replace immediatly all electric service cords that is connected...
... dehumidifier in getting the best use manual will need it is likely to the appliance. They are on the plug, or where it to record the model and serial number. English Important Safety Information READ ALL SAFETY INFORMATION BEFORE USING When using our Haier product. Remember to obtain warranty service. 3 This easy-to-use of explosive fumes. • Repair or replace immediatly all electric service cords that is connected...
User Manual
Page 5
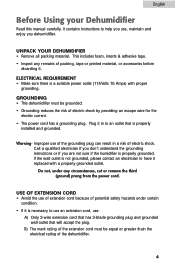
... you dehumidifier. USE OF EXTENSION CORD • Avoid the use of extension cord because of the dehumidifier. 4 English Before Using your Dehumidifier Read this manual carefully. Warning- Call a qualified electrician if you don't understand the grounding instructions or if you use of the grounding plug can result in to help you are not sure if the humidifier is a suitable power outlet (115Volts 15 Amps...
... you dehumidifier. USE OF EXTENSION CORD • Avoid the use of extension cord because of the dehumidifier. 4 English Before Using your Dehumidifier Read this manual carefully. Warning- Call a qualified electrician if you don't understand the grounding instructions or if you use of the grounding plug can result in to help you are not sure if the humidifier is a suitable power outlet (115Volts 15 Amps...
User Manual
Page 7
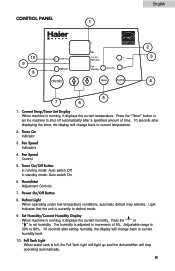
...Speed Indicators 4. Set Humidity/Current Humidity Display When machine is full, the Full Tank Light will light up and the dehumidifier will stop operating automatically. 6 Humidistat Adjustment Controls 7. Defrost Light When operating under low temperature conditions, automatic defrost may activate. The humidity is currently in increments of time. 10 seconds after setting humidity, the display will change back to current humidity level. 10. Timer On Indicator 3. Fan Speed Control 5. Timer On/Off Button In running , it displays the current temperature. Light indicates that the...
...Speed Indicators 4. Set Humidity/Current Humidity Display When machine is full, the Full Tank Light will light up and the dehumidifier will stop operating automatically. 6 Humidistat Adjustment Controls 7. Defrost Light When operating under low temperature conditions, automatic defrost may activate. The humidity is currently in increments of time. 10 seconds after setting humidity, the display will change back to current humidity level. 10. Timer On Indicator 3. Fan Speed Control 5. Timer On/Off Button In running , it displays the current temperature. Light indicates that the...
User Manual
Page 8
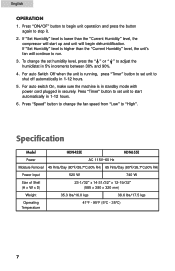
... the button again to run. 3. For auto switch On, make sure the machine is higher than the "Current Humidity" level, the compressor will start automatically in securely. Press "ON/OF" button to begin dehumidification. To change the fan speed from "Low" to adjust the humidistat in 1-12 hours. 5. Specification Model HDN455E HDN655E Power AC 115V~60 Hz Moisture Removal 45 Pints/Day (80°F/26.7°C,60% RH) 65 Pints/Day...
... the button again to run. 3. For auto switch On, make sure the machine is higher than the "Current Humidity" level, the compressor will start automatically in securely. Press "ON/OF" button to begin dehumidification. To change the fan speed from "Low" to adjust the humidistat in 1-12 hours. 5. Specification Model HDN455E HDN655E Power AC 115V~60 Hz Moisture Removal 45 Pints/Day (80°F/26.7°C,60% RH) 65 Pints/Day...
User Manual
Page 9
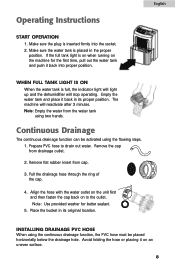
... indicator light will light up and the dehumidifier will reactivate after 3 minutes. English WHEN FULL TANK LIGHT IS ON When the water tank is placed in the proper position. Avoid folding the hose or placing it on to drain out water. Pull the drainage hose through the ring of the cap. 4. INSTALLING DRAINAGE PVC HOSE When using two hands. Prepare PVC hose to the outlet. Continuous Drainage The continuous drainage function can...
... indicator light will light up and the dehumidifier will reactivate after 3 minutes. English WHEN FULL TANK LIGHT IS ON When the water tank is placed in the proper position. Avoid folding the hose or placing it on to drain out water. Pull the drainage hose through the ring of the cap. 4. INSTALLING DRAINAGE PVC HOSE When using two hands. Prepare PVC hose to the outlet. Continuous Drainage The continuous drainage function can...

User Manual
Page 10
... not disassemble the dehumidifier yourself. 9 If the dehumidifier is unplugged before servicing or cleaning. 1. Do not wash the machine with a damp cloth. For optimal moisture removal efficiency, clean the filter every two weeks. Clean the filter with a vacuum cleaner or wash it sideways or upside down. C. This can cause damage to the plastic parts or start a fire. • To avoid shaking, noise and water...
... not disassemble the dehumidifier yourself. 9 If the dehumidifier is unplugged before servicing or cleaning. 1. Do not wash the machine with a damp cloth. For optimal moisture removal efficiency, clean the filter every two weeks. Clean the filter with a vacuum cleaner or wash it sideways or upside down. C. This can cause damage to the plastic parts or start a fire. • To avoid shaking, noise and water...
User Manual
Page 11
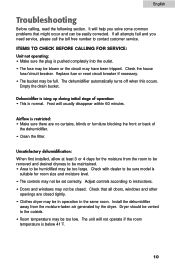
... fuse may be blown or the circuit may be set correctly. Replace fuse or reset circuit breaker if necessary. • The bucket may not be in operation in the same room. Unsatisfactory dehumidification: When first installed, allow at least 3 or 4 days for room size and moisture level. • The controls may be easily corrected. Empty the drain bucket. Check that all attempts fail and you solve some common problems...
... fuse may be blown or the circuit may be set correctly. Replace fuse or reset circuit breaker if necessary. • The bucket may not be in operation in the same room. Unsatisfactory dehumidification: When first installed, allow at least 3 or 4 days for room size and moisture level. • The controls may be easily corrected. Empty the drain bucket. Check that all attempts fail and you solve some common problems...
User Manual
Page 12
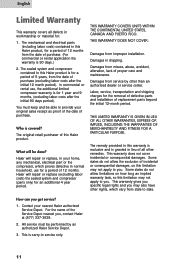
... replace, in your home, any mechanical, electrical part or the compressor, which vary from service by an authorized Haier Service Depot. 3. Damages in service only. 11 This warranty does not cover incidental or consequential damages. All service must keep and be performed by other than an authorized dealer or service center. English Limited Warranty This warranty covers all other remedies. Who is 90 days.) 2. This warranty gives you specific...
... replace, in your home, any mechanical, electrical part or the compressor, which vary from service by an authorized Haier Service Depot. 3. Damages in service only. 11 This warranty does not cover incidental or consequential damages. All service must keep and be performed by other than an authorized dealer or service center. English Limited Warranty This warranty covers all other remedies. Who is 90 days.) 2. This warranty gives you specific...


