User Manual
Page 1
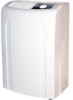
Quality ■ Innovation ■ Style Dehumidifier Déhumidificateur Dehumidificador User Manual HDN305/HDN455/HDN655 Guide de l'Utilisateur HDN305/HDN455/HDN655 Manual del Usuario HDN305/HDN455/HDN655 Before operating this dehumidifier, please read these instructions completely.
Quality ■ Innovation ■ Style Dehumidifier Déhumidificateur Dehumidificador User Manual HDN305/HDN455/HDN655 Guide de l'Utilisateur HDN305/HDN455/HDN655 Manual del Usuario HDN305/HDN455/HDN655 Before operating this dehumidifier, please read these instructions completely.
User Manual
Page 2
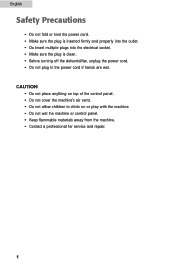
...• Make sure the plug is clean. • Before turning off the dehumidifier, unplug the power cord. • Do not plug in the power cord if hands are wet. CAUTION • Do not place anything on top of the control panel. • Do not cover the machine's air vents. • Do not allow ...children to climb on or play with the machine. • Do not wet the machine or control panel. • Keep flammable materials away from the machine. • Contact a professional for service and repair. 1
...• Make sure the plug is clean. • Before turning off the dehumidifier, unplug the power cord. • Do not plug in the power cord if hands are wet. CAUTION • Do not place anything on top of the control panel. • Do not cover the machine's air vents. • Do not allow ...children to climb on or play with the machine. • Do not wet the machine or control panel. • Keep flammable materials away from the machine. • Contact a professional for service and repair. 1
User Manual
Page 3
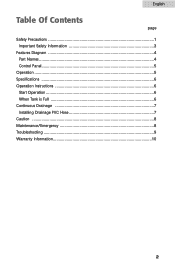
English Table Of Contents page Safety Precautions 1 Important Safety Information 3 Features Diagram 4 Part Names ...4 Control Panel 5 Operation ...5 Specifications 6 Operation Instructions 6 Start Operation 6 When Tank is Full 6 Continuous Drainage 7 Installing Drainage PVC Hose 7 Caution ...8 Maintenance/Emergency 8 Troubleshooting 9 Warranty Information 10 2
English Table Of Contents page Safety Precautions 1 Important Safety Information 3 Features Diagram 4 Part Names ...4 Control Panel 5 Operation ...5 Specifications 6 Operation Instructions 6 Start Operation 6 When Tank is Full 6 Continuous Drainage 7 Installing Drainage PVC Hose 7 Caution ...8 Maintenance/Emergency 8 Troubleshooting 9 Warranty Information 10 2
User Manual
Page 4
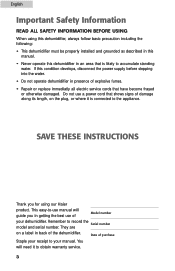
... installed and grounded as described in this manual. • Never operate this condition develops, disconnect the power supply before stepping into the water. • Do not operate dehumidifier in an area that have become frayed or otherwise damaged. Date of Model number your manual. SAVE THESE INSTRUCTIONS Thank you in back of explosive fumes. • Repair or replace immediatly all electric service cords that is connected...
... installed and grounded as described in this manual. • Never operate this condition develops, disconnect the power supply before stepping into the water. • Do not operate dehumidifier in an area that have become frayed or otherwise damaged. Date of Model number your manual. SAVE THESE INSTRUCTIONS Thank you in back of explosive fumes. • Repair or replace immediatly all electric service cords that is connected...
User Manual
Page 5
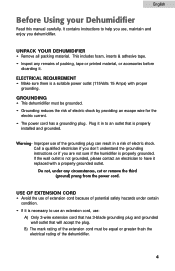
... current. • The power cord has a grounding plug. Warning- It contains instructions to use an extension cord, use: A) Only 3-wire extension cord that has 3-blade grounding plug and grounded wall outlet that is properly grounded. UNPACK YOUR DEHUMIDIFIER • Remove all packing material. Improper use , maintain and enjoy you dehumidifier. If the wall outlet is a suitable power outlet (115Volts 15 Amps) with a properly grounded...
... current. • The power cord has a grounding plug. Warning- It contains instructions to use an extension cord, use: A) Only 3-wire extension cord that has 3-blade grounding plug and grounded wall outlet that is properly grounded. UNPACK YOUR DEHUMIDIFIER • Remove all packing material. Improper use , maintain and enjoy you dehumidifier. If the wall outlet is a suitable power outlet (115Volts 15 Amps) with a properly grounded...
User Manual
Page 7
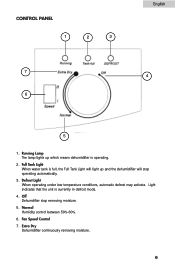
Light indicates that the unit is operating. 2. Off Dehumdifier stop operating automatically. 3. Normal Humidity control between 50%-60%. 6. Running Lamp The lamp lights up and the dehumidifier will stop removing moisture. 5. Defrost Light When operating under low temperature conditions, automatic defrost may activate. Fan Speed Control 7. Full Tank Light When water tank is full, the Full Tank Light will light up which means dehumidifier is currently in defrost mode. 4. CONTROL PANEL 1 2 3 7 6 English 4 5 1. Extra Dry Dehumidifier continuously removing moisture. 6
Light indicates that the unit is operating. 2. Off Dehumdifier stop operating automatically. 3. Normal Humidity control between 50%-60%. 6. Running Lamp The lamp lights up and the dehumidifier will stop removing moisture. 5. Defrost Light When operating under low temperature conditions, automatic defrost may activate. Fan Speed Control 7. Full Tank Light When water tank is full, the Full Tank Light will light up which means dehumidifier is currently in defrost mode. 4. CONTROL PANEL 1 2 3 7 6 English 4 5 1. Extra Dry Dehumidifier continuously removing moisture. 6
User Manual
Page 8
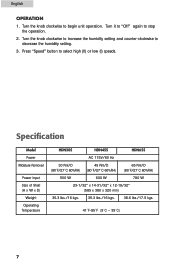
Specification Model Power Moisture Removal Power Input Size of Shell (H x W x D) Weight Operating Temperature HDN305 HDN455 HDN655 AC 115V/60 Hz 30 Pint/D (80˚F/27˚C 60%RH) 45 Pint/D (80˚F/27˚C 60%RH) 65 Pint/D (80˚F/27˚C 60%RH) 500 W 600 W 780 W 23-1/32" x ...~ 35˚C) 7 Turn it to "Off" again to select high (II) or low (I) speeds. Press "Speed" button to stop the operation. 2. Turn the knob clockwise to decrease the humidity setting. 3. English OPERATION 1. Turn the knob clockwise to increase the humidity setting and counter-clockwise to ...
Specification Model Power Moisture Removal Power Input Size of Shell (H x W x D) Weight Operating Temperature HDN305 HDN455 HDN655 AC 115V/60 Hz 30 Pint/D (80˚F/27˚C 60%RH) 45 Pint/D (80˚F/27˚C 60%RH) 65 Pint/D (80˚F/27˚C 60%RH) 500 W 600 W 780 W 23-1/32" x ...~ 35˚C) 7 Turn it to "Off" again to select high (II) or low (I) speeds. Press "Speed" button to stop the operation. 2. Turn the knob clockwise to decrease the humidity setting. 3. English OPERATION 1. Turn the knob clockwise to increase the humidity setting and counter-clockwise to ...
User Manual
Page 9
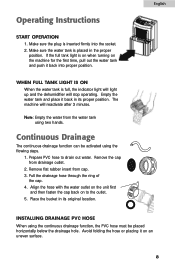
... continuous drainage function can be placed horizontally below the drainage hole. Remove flat rubber insert from cap. 3. English INSTALLING DRAINAGE PVC HOSE When using the continuous drainage function, the PVC hose must be activated using two hands. Prepare PVC hose to the outlet. 5. If the full tank light is placed in the proper position. Operating Instructions START OPERATION 1. Place the bucket in its original location. Make sure the water tank is on when turning...
... continuous drainage function can be placed horizontally below the drainage hole. Remove flat rubber insert from cap. 3. English INSTALLING DRAINAGE PVC HOSE When using the continuous drainage function, the PVC hose must be activated using two hands. Prepare PVC hose to the outlet. 5. If the full tank light is placed in the proper position. Operating Instructions START OPERATION 1. Place the bucket in its original location. Make sure the water tank is on when turning...
User Manual
Page 10
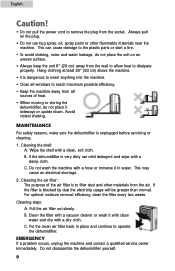
... a problem occurs, unplug the machine and contact a qualified service center immediately. MAINTENANCE For safety reasons, make sure the dehumidifier is very dirty use bug spray, oil, spray paint or other materials from all windows to reach maximum possible efficiency. • Keep the machine away from the air. B. If the dehumidifier is unplugged before servicing or cleaning. 1. If the filter is blocked by...
... a problem occurs, unplug the machine and contact a qualified service center immediately. MAINTENANCE For safety reasons, make sure the dehumidifier is very dirty use bug spray, oil, spray paint or other materials from all windows to reach maximum possible efficiency. • Keep the machine away from the air. B. If the dehumidifier is unplugged before servicing or cleaning. 1. If the filter is blocked by...
User Manual
Page 11
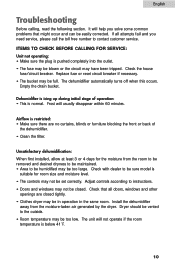
... the dehumidifier. • Clean the filter. Dryer should be set correctly. It will help you need service, please call the toll free number to the outside. • Room temperature may be too low. Airflow is normal. Unsatisfactory dehumidification: When first installed, allow at least 3 or 4 days for room size and moisture level. • The controls may be easily corrected. Check the house fuse/circuit breaker. Empty the drain bucket. Replace fuse or reset circuit breaker...
... the dehumidifier. • Clean the filter. Dryer should be set correctly. It will help you need service, please call the toll free number to the outside. • Room temperature may be too low. Airflow is normal. Unsatisfactory dehumidification: When first installed, allow at least 3 or 4 days for room size and moisture level. • The controls may be easily corrected. Check the house fuse/circuit breaker. Empty the drain bucket. Replace fuse or reset circuit breaker...

User Manual
Page 12
... service center. This warranty gives you specific legal rights and you may not apply to provide your nearest Haier authorized Service Depot. What will repair or replace (excluding labor costs) the sealed system and compressor (parts only) for a period of all defects in shipping. This is for the removal of defective parts and installation of purchase. The mechanical and electrical parts (including labor costs) contained in this Haier product...
... service center. This warranty gives you specific legal rights and you may not apply to provide your nearest Haier authorized Service Depot. What will repair or replace (excluding labor costs) the sealed system and compressor (parts only) for a period of all defects in shipping. This is for the removal of defective parts and installation of purchase. The mechanical and electrical parts (including labor costs) contained in this Haier product...


