
User Manual
Page 2
...supervision is necessary when the appliance is not operating. 8. A spatula may be used, but only when the blender is used near children. Blades are sharp. Never pull on the motor base without the jar properly attached. 13. Contact the Customer Service Center for use , before putting on the plug. The use... recommended for instructions. 6. When blending hot liquids, remove the measuring cup from the wall outlet by turning counter-clockwise. 16. Always operate the blender with the cover in place. 14. To disconnect, turn all instructions carefully. 2. Read all controls to the...
...supervision is necessary when the appliance is not operating. 8. A spatula may be used, but only when the blender is used near children. Blades are sharp. Never pull on the motor base without the jar properly attached. 13. Contact the Customer Service Center for use , before putting on the plug. The use... recommended for instructions. 6. When blending hot liquids, remove the measuring cup from the wall outlet by turning counter-clockwise. 16. Always operate the blender with the cover in place. 14. To disconnect, turn all instructions carefully. 2. Read all controls to the...
User Manual
Page 3
... Polarized Plug This appliance is intended to modify this polarized plug. Thank you in contact with metal scouring pads. Model number Date of your blender. They are on a label on children or tripped over. If it to reduce the hazards resulting from entanglement or tripping over the counter...does not drape over a longer cord. Do not use this unit when not in this appliance for using our Haier product. Do not clean with electrical parts, creating a risk of the blender. This is necessary to your receipt to use . 19. If the plug does not fit fully into a ...
... Polarized Plug This appliance is intended to modify this polarized plug. Thank you in contact with metal scouring pads. Model number Date of your blender. They are on a label on children or tripped over. If it to reduce the hazards resulting from entanglement or tripping over the counter...does not drape over a longer cord. Do not use this unit when not in this appliance for using our Haier product. Do not clean with electrical parts, creating a risk of the blender. This is necessary to your receipt to use . 19. If the plug does not fit fully into a ...
User Manual
Page 4
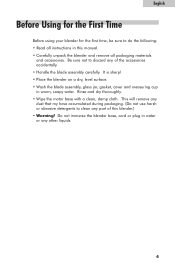
English Table of Contents PAGE Important Safeguards 1 Before Using for the First Time 4 Parts and Accessories 5 Assembling the Blender 6 Using the Blender 6 Useful Tips 8 Cleaning and Maintenance 9 Quick Cleaning 9 Thorough Cleaning 9 Storage 9 Limited Warranty 10 3
English Table of Contents PAGE Important Safeguards 1 Before Using for the First Time 4 Parts and Accessories 5 Assembling the Blender 6 Using the Blender 6 Useful Tips 8 Cleaning and Maintenance 9 Quick Cleaning 9 Thorough Cleaning 9 Storage 9 Limited Warranty 10 3
User Manual
Page 5
... packaging materials and accessories. It is sharp! • Place the blender on a dry, level surface. • Wash the blade assembly, glass jar, gasket, cover and measuring cup in this blender.) • Warning! Do not immerse the blender base, cord or plug in water or any of this manual. ...• Carefully unpack the blender and remove all instructions in warm, soapy water....
... packaging materials and accessories. It is sharp! • Place the blender on a dry, level surface. • Wash the blade assembly, glass jar, gasket, cover and measuring cup in this blender.) • Warning! Do not immerse the blender base, cord or plug in water or any of this manual. ...• Carefully unpack the blender and remove all instructions in warm, soapy water....

User Manual
Page 7
... in place. 7. Check that the power switch is set in the "0" off position. Place the blender on top of the glass jar (3) and turn clockwise to the jar before food or liquid is set in the "0" off position. 9. Before removing the jar assembly from the blender base after use ! 11. Uncoil the required length of the...
... in place. 7. Check that the power switch is set in the "0" off position. Place the blender on top of the glass jar (3) and turn clockwise to the jar before food or liquid is set in the "0" off position. 9. Before removing the jar assembly from the blender base after use ! 11. Uncoil the required length of the...
User Manual
Page 8
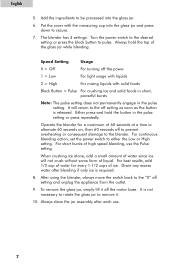
... after blending if only ice is not necessary to rotate the glass jar to remove it off to prevent overheating or consequent damage to the off setting as soon as the button is released. After using the blender, always move the switch back to secure. 7. English 5. For continuous... blending action, set the power switch to pulse. For best results, add 1/2 cup of water for a maximum of high speed blending, use . 7 To remove the glass jar, simply lift it . 10....
... after blending if only ice is not necessary to rotate the glass jar to remove it off to prevent overheating or consequent damage to the off setting as soon as the button is released. After using the blender, always move the switch back to secure. 7. English 5. For continuous... blending action, set the power switch to pulse. For best results, add 1/2 cup of water for a maximum of high speed blending, use . 7 To remove the glass jar, simply lift it . 10....

User Manual
Page 9
... into pieces no larger than 1" before blending frozen drinks. • When removing the jar from the opening in the jar while the blender is needed to redistribute the ingredients. • Always place liquid ingredients into the glass jar. • Blend no more than 1/2 cup of solid foods at one piece at... becomes clumped, turn the power to the "0" off and use any utensils, including spatulas, in the cover. If this happens, turn the blender off position and remove a portion of water. • Smaller ice cubes can properly blend the ice. • Remember to release steam and...
... into pieces no larger than 1" before blending frozen drinks. • When removing the jar from the opening in the jar while the blender is needed to redistribute the ingredients. • Always place liquid ingredients into the glass jar. • Blend no more than 1/2 cup of solid foods at one piece at... becomes clumped, turn the power to the "0" off and use any utensils, including spatulas, in the cover. If this happens, turn the blender off position and remove a portion of water. • Smaller ice cubes can properly blend the ice. • Remember to release steam and...
User Manual
Page 10
...warm water to remove large food particles. • Fill the glass jar with 1-1/2 cups of warm, soapy water and cover tightly. English Cleaning and Maintenance Warning! Note: Never use harsh or abrasive cleaners on any part of the blender. Never immerse the motor base, power cord and plug in... • Dry thoroughly. Thorough Cleaning • Make sure that the power switch is in the "0" off position. • Always unplug the blender before cleaning. • Remove the glass jar from the motor base and rinse with warm water to remove large food particles. • Disassemble the...
...warm water to remove large food particles. • Fill the glass jar with 1-1/2 cups of warm, soapy water and cover tightly. English Cleaning and Maintenance Warning! Note: Never use harsh or abrasive cleaners on any part of the blender. Never immerse the motor base, power cord and plug in... • Dry thoroughly. Thorough Cleaning • Make sure that the power switch is in the "0" off position. • Always unplug the blender before cleaning. • Remove the glass jar from the motor base and rinse with warm water to remove large food particles. • Disassemble the...

