User Manual
Page 2
...-UP GUIDE 6 Using Your New Dishwasher 6 DISHWASHER LOADING 7-12 Loading Suggestions 7 Loading Top Rack 8 Loading Bottom Rack 10 Loading Silverware Basket 12 DISHWASHER USE 13-23 Proper Use of Detergent 13 Detergent Dispenser 13 Rinse Aid Dispenser 16 Cycle Selection Charts 17 Canceling a Cycle 19 Changing a Cycle or Setting 19 Adding Items During a Cycle 20 Option Selections 20 Using the Plate Warmer 22 Cycle Status Indicators 22 Wash System 23 Drying System 23 Overfill Protection Float 23 WASHING SPECIAL ITEMS 24-25 DISHWASHER CARE 25-26 Cleaning ...25 Drain Air Gap...
...-UP GUIDE 6 Using Your New Dishwasher 6 DISHWASHER LOADING 7-12 Loading Suggestions 7 Loading Top Rack 8 Loading Bottom Rack 10 Loading Silverware Basket 12 DISHWASHER USE 13-23 Proper Use of Detergent 13 Detergent Dispenser 13 Rinse Aid Dispenser 16 Cycle Selection Charts 17 Canceling a Cycle 19 Changing a Cycle or Setting 19 Adding Items During a Cycle 20 Option Selections 20 Using the Plate Warmer 22 Cycle Status Indicators 22 Wash System 23 Drying System 23 Overfill Protection Float 23 WASHING SPECIAL ITEMS 24-25 DISHWASHER CARE 25-26 Cleaning ...25 Drain Air Gap...
User Manual
Page 3
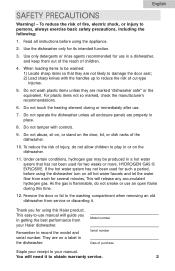
... the best performance from service or discarding it to be produced in a hot water system that they are not likely to damage the door seal; 2) Load sharp knives with controls. 9. English SAFETY PRECAUTIONS Warning! - Do not operate the dishwasher unless all enclosure panels are on all instructions before using the appliance. 2. Do not tamper with the handles up to your Haier dishwasher. Do not abuse...
... the best performance from service or discarding it to be produced in a hot water system that they are not likely to damage the door seal; 2) Load sharp knives with controls. 9. English SAFETY PRECAUTIONS Warning! - Do not operate the dishwasher unless all enclosure panels are on all instructions before using the appliance. 2. Do not tamper with the handles up to your Haier dishwasher. Do not abuse...
User Manual
Page 4
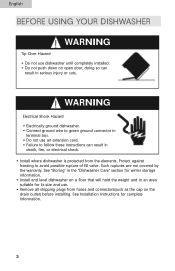
.... 3 See Installation Instructions for its size and use. • Remove all shipping plugs from the elements. English BEFORE USING YOUR DISHWASHER WARNING Tip Over Hazard • Do not use dishwasher until completely installed. • Do not push down on the drain outlet) before installing. WARNING Electrical Shock Hazard • Electrically ground dishwasher. • Connect ground wire to green ground connector in terminal box. • Do not use an extension cord. •...
.... 3 See Installation Instructions for its size and use. • Remove all shipping plugs from the elements. English BEFORE USING YOUR DISHWASHER WARNING Tip Over Hazard • Do not use dishwasher until completely installed. • Do not push down on the drain outlet) before installing. WARNING Electrical Shock Hazard • Electrically ground dishwasher. • Connect ground wire to green ground connector in terminal box. • Do not use an extension cord. •...
User Manual
Page 5
... the dishwasher; English GROUNDING INSTRUCTIONS For a grounded, cord-connected dishwasher: The dishwasher must be run with the circuit conductors and connected to a grounded metal, permanent wiring system, or an equipment- The dishwasher is properly grounded. grounding conductor and a grounding plug. Do not modify the plug provided with all local codes and ordinances. grounding conductor must be grounded. Check with a qualified electrician or service representative...
... the dishwasher; English GROUNDING INSTRUCTIONS For a grounded, cord-connected dishwasher: The dishwasher must be run with the circuit conductors and connected to a grounded metal, permanent wiring system, or an equipment- The dishwasher is properly grounded. grounding conductor and a grounding plug. Do not modify the plug provided with all local codes and ordinances. grounding conductor must be grounded. Check with a qualified electrician or service representative...
User Manual
Page 6
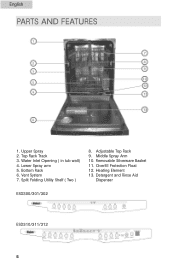
Adjustable Top Rack 9. Removable Silverware Basket 11. English PARTS AND FEATURES 1. Upper Spray 2. Bottom Rack 6. Middle Spray Arm 10. Heating Element 13. Vent System 7. Split Folding Utility Shelf ( Two ) 8. Water Inlet Opening ( in tub wall) 4. Lower Spray arm 5. Top Rack Track 3. Detergent and Rinse Aid Dispenser ESD300/301/302 ESD310/311/312 5 Overfill Protection Float 12.
Adjustable Top Rack 9. Removable Silverware Basket 11. English PARTS AND FEATURES 1. Upper Spray 2. Bottom Rack 6. Middle Spray Arm 10. Heating Element 13. Vent System 7. Split Folding Utility Shelf ( Two ) 8. Water Inlet Opening ( in tub wall) 4. Lower Spray arm 5. Top Rack Track 3. Detergent and Rinse Aid Dispenser ESD300/301/302 ESD310/311/312 5 Overfill Protection Float 12.
User Manual
Page 7
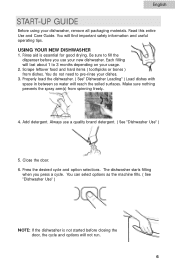
... spray arm(s) from dishes. Always use your usage. 2. Press the desired cycle and option selections. Rinse aid is not started before you press a cycle. You can select options as the machine fills. ( See "Dishwasher Use" ) NOTE: If the dishwasher is essential for good drying. USING YOUR NEW DISHWASHER 1. Each filling will reach the soiled surfaces. Close the door. 6. The dishwasher starts filling when you use a quality brand detergent. ( See "Dishwasher Use" ) 5. Read this entire Use and Care Guide...
... spray arm(s) from dishes. Always use your usage. 2. Press the desired cycle and option selections. Rinse aid is not started before you press a cycle. You can select options as the machine fills. ( See "Dishwasher Use" ) NOTE: If the dishwasher is essential for good drying. USING YOUR NEW DISHWASHER 1. Each filling will reach the soiled surfaces. Close the door. 6. The dishwasher starts filling when you use a quality brand detergent. ( See "Dishwasher Use" ) 5. Read this entire Use and Care Guide...
User Manual
Page 8
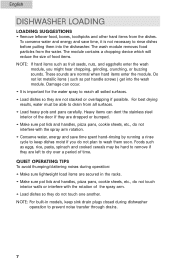
... the spray arm rotation. • Conserve water, energy and save time spent hand-rinsing by running a rinse cycle to keep sink drain plugs closed during operation: • Make sure lightweight load items are dropped or bumped. • Make sure pot lids and handles, pizza pans, cookie sheets, etc., do not touch one another. The wash module removes food particles from the water. QUIET OPERATING TIPS To avoid thumping/clattering noises during dishwasher operation to rinse dishes...
... the spray arm rotation. • Conserve water, energy and save time spent hand-rinsing by running a rinse cycle to keep sink drain plugs closed during operation: • Make sure lightweight load items are dropped or bumped. • Make sure pot lids and handles, pizza pans, cookie sheets, etc., do not touch one another. The wash module removes food particles from the water. QUIET OPERATING TIPS To avoid thumping/clattering noises during dishwasher operation to rinse dishes...
User Manual
Page 15
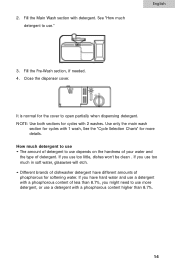
... need to open partially when dispensing detergent. 2. See "How much detergent to use • The amount of detergent to use depends on the hardness of your water and the type of less than 8.7%. 14 How much detergent to use ." If you have different amounts of phosphorous for the cover to use too little, dishes won't be clean . NOTE: Use both sections for cycles with detergent. If you use...
... need to open partially when dispensing detergent. 2. See "How much detergent to use • The amount of detergent to use depends on the hardness of your water and the type of less than 8.7%. 14 How much detergent to use ." If you have different amounts of phosphorous for the cover to use too little, dishes won't be clean . NOTE: Use both sections for cycles with detergent. If you use...
User Manual
Page 17
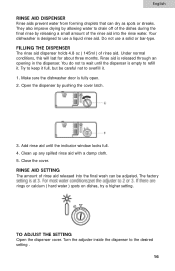
... open. 2. Clean up any spilled rinse aid with a damp cloth. 5. Close the cover. Turn the adjuster inside the dispenser to refill it. Your dishwasher is empty to the desired setting . 16 FILLING THE DISPENSER The rinse aid dispenser holds 4.8 oz ( 145ml ) of the dishes during the final rinse by pushing the cover latch. 3. Open the dispenser by releasing a small amount of rinse aid released into the rinse water. TO ADJUST THE SETTING Open the dispenser cover. Do not use...
... open. 2. Clean up any spilled rinse aid with a damp cloth. 5. Close the cover. Turn the adjuster inside the dispenser to refill it. Your dishwasher is empty to the desired setting . 16 FILLING THE DISPENSER The rinse aid dispenser holds 4.8 oz ( 145ml ) of the dishes during the final rinse by pushing the cover latch. 3. Open the dispenser by releasing a small amount of rinse aid released into the rinse water. TO ADJUST THE SETTING Open the dispenser cover. Do not use...
User Manual
Page 18
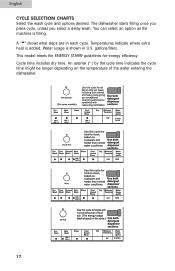
... for energy efficiency. Temperatures indicate where extra heat is filling. • A " " shows what steps are in U.S. Water usage is shown in each cycle. Cycle time includes dry time. The dishwasher starts filling once you press cycle, unless you select a delay wash. An asterisk (* ) by the cycle time indicates the cycle time might be longer depending on the temperature of the water entering the dishwasher. 17 English CYCLE SELECTION CHARTS Select the wash cycle and options...
... for energy efficiency. Temperatures indicate where extra heat is filling. • A " " shows what steps are in U.S. Water usage is shown in each cycle. Cycle time includes dry time. The dishwasher starts filling once you press cycle, unless you select a delay wash. An asterisk (* ) by the cycle time indicates the cycle time might be longer depending on the temperature of the water entering the dishwasher. 17 English CYCLE SELECTION CHARTS Select the wash cycle and options...
User Manual
Page 20
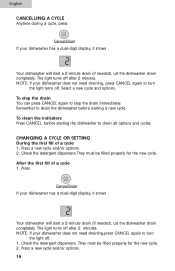
... turn the light off . Select a new cycle and options. CHANGING A CYCLE OR SETTING During the first fill of a cycle 1. Let the dishwasher drain completely. Check the detergent dispensers. To stop the drain immediately. To clean the indicators Press CANCEL before starting the dishwasher to drain the dishwasher before starting a new cycle. Check the detergent dispensers.They must be filled properly for the new cycle. 2. Press If your dishwasher has a dual-digit display, it shows Your dishwasher will start a 2-minute drain (if needed ). Remember to clean...
... turn the light off . Select a new cycle and options. CHANGING A CYCLE OR SETTING During the first fill of a cycle 1. Let the dishwasher drain completely. Check the detergent dispensers. To stop the drain immediately. To clean the indicators Press CANCEL before starting the dishwasher to drain the dishwasher before starting a new cycle. Check the detergent dispensers.They must be filled properly for the new cycle. 2. Press If your dishwasher has a dual-digit display, it shows Your dishwasher will start a 2-minute drain (if needed ). Remember to clean...
User Manual
Page 21
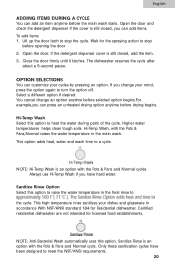
... temperature rinse sanitizes your cycles by pressing an option. The dishwasher resumes the cycle after about a 5-second pause. Higher water temperatures helps clean tough soils. Certified residential dishwasher are not intended for Residential dishwasher. Close the door firmly until it latches. Hi-Temp Wash Select this option to a cycle. Always use Hi-Temp Wash if you can press an unheated drying option anytime before the main wash starts. Open the door. Sanitize Rinse...
... temperature rinse sanitizes your cycles by pressing an option. The dishwasher resumes the cycle after about a 5-second pause. Higher water temperatures helps clean tough soils. Certified residential dishwasher are not intended for Residential dishwasher. Close the door firmly until it latches. Hi-Temp Wash Select this option to a cycle. Always use Hi-Temp Wash if you can press an unheated drying option anytime before the main wash starts. Open the door. Sanitize Rinse...
User Manual
Page 22
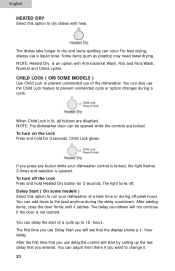
... change it latches. You can delay the start by calling up to 12 hours. NOTE: Heated Dry is lit, all buttons are locked. Delay Start ( On some spotting can be opened while the controls are disabled. English HEATED DRY Select this option to run your dishwasher control is locked, the light flashes 3 times and selection is ignored. If you use the Child Lock feature to prevent unintended cycle or option changes during the delay countdown. The first time...
... change it latches. You can delay the start by calling up to 12 hours. NOTE: Heated Dry is lit, all buttons are locked. Delay Start ( On some spotting can be opened while the controls are disabled. English HEATED DRY Select this option to run your dishwasher control is locked, the light flashes 3 times and selection is ignored. If you use the Child Lock feature to prevent unintended cycle or option changes during the delay countdown. The first time...
User Manual
Page 23
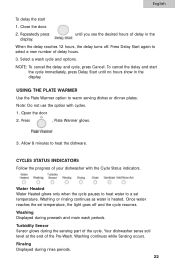
... cancel the delay and cycle, press Cancel. USING THE PLATE WARMER Use the Plate Warmer option to select a new number of delay hours. 3. Open the door 2. Allow 8 minutes to a set temperature, the light goes off . Once water reaches the set temperature. Water Heated Water Heated glows only when the cycle pauses to heat water to heat the dishware. Turbidity Sensor Sensor glows during the sensing part of the Pre-Wash. Repeatedly press display. Your dishwasher sense soil level...
... cancel the delay and cycle, press Cancel. USING THE PLATE WARMER Use the Plate Warmer option to select a new number of delay hours. 3. Open the door 2. Allow 8 minutes to a set temperature, the light goes off . Once water reaches the set temperature. Water Heated Water Heated glows only when the cycle pauses to heat water to heat the dishware. Turbidity Sensor Sensor glows during the sensing part of the Pre-Wash. Repeatedly press display. Your dishwasher sense soil level...

User Manual
Page 24
... heat dries your dishes. Do not touch the vent. If the Rinse Aid dispenser is normal as spots or streaks. It must be in the front right corner of the door.This is empty, the light glows when you can see hot vapor escaping through the filter, trapping food particles. • Two water jets, located under the float for the dishwasher to operate. Clean Displayed when a wash cycle is hot. Three levels...
... heat dries your dishes. Do not touch the vent. If the Rinse Aid dispenser is normal as spots or streaks. It must be in the front right corner of the door.This is empty, the light glows when you can see hot vapor escaping through the filter, trapping food particles. • Two water jets, located under the float for the dishwasher to operate. Clean Displayed when a wash cycle is hot. Three levels...

User Manual
Page 27
... on a damp sponge and clean. DRAIN AIR GAP Check the drain air gap anytime your dishwasher. Unscrew the plastic cap. NOTE: Run a Normal cycle with a damp sponge. If your dishwasher and home against water damage caused by the manufacturer. OR Use liquid automatic dishwasher detergent and clean with detergent after cleaning the interior. Follow the cleaning instructions provided by freezing water lines. Winterizing your dishwasher Protect your dishwasher is not part of your dishwasher isn't draining well. Check for the...
... on a damp sponge and clean. DRAIN AIR GAP Check the drain air gap anytime your dishwasher. Unscrew the plastic cap. NOTE: Run a Normal cycle with a damp sponge. If your dishwasher and home against water damage caused by the manufacturer. OR Use liquid automatic dishwasher detergent and clean with detergent after cleaning the interior. Follow the cleaning instructions provided by freezing water lines. Winterizing your dishwasher Protect your dishwasher is not part of your dishwasher isn't draining well. Check for the...
User Manual
Page 28
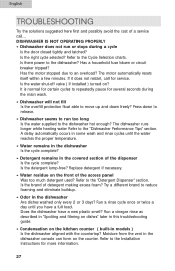
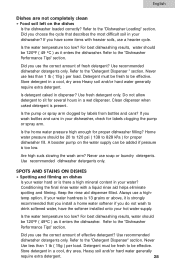
... cycle complete? Is the water shut-off valve ( If installed ) turned on the counter. Does the dishwasher have a full load. Try a different brand to the "Detergent Dispenser" section. Refer to move up and down to release. • Dishwasher seems to the dishwasher hot enough? Is the detergent lump-free? Run a vinegar rinse as described in "Spotting and filming on dishes" later in this troubleshooting guide. • Condensation on the kitchen counter ( built...
... cycle complete? Is the water shut-off valve ( If installed ) turned on the counter. Does the dishwasher have a full load. Try a different brand to the "Detergent Dispenser" section. Refer to move up and down to release. • Dishwasher seems to the dishwasher hot enough? Is the detergent lump-free? Run a vinegar rinse as described in "Spotting and filming on dishes" later in this troubleshooting guide. • Condensation on the kitchen counter ( built...
User Manual
Page 29
... you use soap or laundry detergents. SPOTS AND STAINS ON DISHES • Spotting and filming on dishes Is your water hard or is strongly recommended that describes the most difficult soil in your hot water supply. Refer to the "Dishwasher Loading" section. Refer to the "Dishwasher Performance Tips" section. Never use the correct amount of effective detergent? Keep the rinse aid dispenser filled. Did you do not wash...
... you use soap or laundry detergents. SPOTS AND STAINS ON DISHES • Spotting and filming on dishes Is your water hard or is strongly recommended that describes the most difficult soil in your hot water supply. Refer to the "Dishwasher Loading" section. Refer to the "Dishwasher Performance Tips" section. Never use the correct amount of effective detergent? Keep the rinse aid dispenser filled. Did you do not wash...
User Manual
Page 30
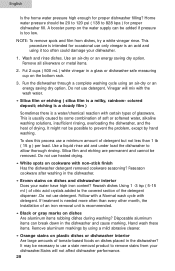
Wash and rinse dishes. Use an air-dry or an energy saving dry option. Run the dishwasher through a complete washing cycle using a mild abrasive cleaner. • Orange stains on plastic dishes or dishwasher interior Are large amounts of the detergent dispenser .Do not use a minimum amount of drying. Do not use detergent. English Is the home water pressure high enough for proper dishwasher fill. Put 2 cups ( 500 mL ) white vinegar in the dishwasher. • Brown stains...
Wash and rinse dishes. Use an air-dry or an energy saving dry option. Run the dishwasher through a complete washing cycle using a mild abrasive cleaner. • Orange stains on plastic dishes or dishwasher interior Are large amounts of the detergent dispenser .Do not use a minimum amount of drying. Do not use detergent. English Is the home water pressure high enough for proper dishwasher fill. Put 2 cups ( 500 mL ) white vinegar in the dishwasher. • Brown stains...
User Manual
Page 33
... the pump, motor, lower wash arm, middle wash arm and the wash tower upper sprayer with associated supply tube and filters. A product whose original serial number has been removed or altered. Vinyl Coated Racks (Parts Only) For 24 months from the date of the problem. A clear description of original retail purchase, Haier will replace vinylcoated upper or lower rack that peels or rusts due to a manufacturing defect. NOTE: Associated outside inlet and drain plumbing parts are...
... the pump, motor, lower wash arm, middle wash arm and the wash tower upper sprayer with associated supply tube and filters. A product whose original serial number has been removed or altered. Vinyl Coated Racks (Parts Only) For 24 months from the date of the problem. A clear description of original retail purchase, Haier will replace vinylcoated upper or lower rack that peels or rusts due to a manufacturing defect. NOTE: Associated outside inlet and drain plumbing parts are...


