User Manual
Page 3
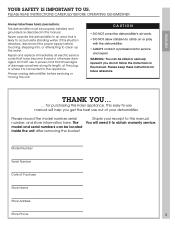
... power supply before servicing or moving the unit. If this manual. You will help you do not follow the instructions in this Haier appliance. This easy-to-use manual will need it is likely to obtain warranty service. CAUTION • DO NOT cover the dehumidifier's air vents. • DO NOT allow children to the...
... power supply before servicing or moving the unit. If this manual. You will help you do not follow the instructions in this Haier appliance. This easy-to-use manual will need it is likely to obtain warranty service. CAUTION • DO NOT cover the dehumidifier's air vents. • DO NOT allow children to the...
User Manual
Page 4
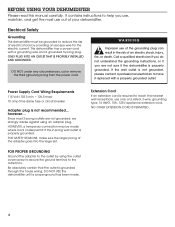
...an adapter plug. Since most use , maintain, and get the most 2-prong outlets are not sure if the dehumidifier is properly grounded. BEFORE USING YOUR DEHUMIDIFIER Please read this manual carefully. however... HOWEVER, a temporary connection may be grounded to reach the nearest wall receptacle, use of the ... screw to secure the ground terminal to have it replaced with a grounding wire and a grounded 3-prong plug. DO NOT USE the dehumidifier until a proper ground has been made where local codes permit if the 2-prong wall outlet is properly grounded. It contains instructions to ...
...an adapter plug. Since most use , maintain, and get the most 2-prong outlets are not sure if the dehumidifier is properly grounded. BEFORE USING YOUR DEHUMIDIFIER Please read this manual carefully. however... HOWEVER, a temporary connection may be grounded to reach the nearest wall receptacle, use of the ... screw to secure the ground terminal to have it replaced with a grounding wire and a grounded 3-prong plug. DO NOT USE the dehumidifier until a proper ground has been made where local codes permit if the 2-prong wall outlet is properly grounded. It contains instructions to ...
User Manual
Page 6
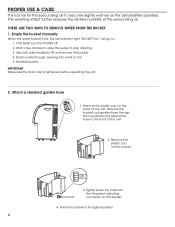
This warming effect further reduces the relative humidity of the unit. Use both side handles to become slightly warmer as the dehumidifier operates. Reinstall bucket. Tightly screw the hose into a sink or tub. 5. THERE ARE TWO WAYS TO REMOVE WATER FROM THE BUCKET: 1. YOU MUST turn the .... 6 Attach a standard garden hose 1. Empty water through the round hole and extend the hose to stop dripping. 3. Remove the plastic cap on . 1. Empty the bucket manually When the water bucket is tightened before operating the unit. 2.
This warming effect further reduces the relative humidity of the unit. Use both side handles to become slightly warmer as the dehumidifier operates. Reinstall bucket. Tightly screw the hose into a sink or tub. 5. THERE ARE TWO WAYS TO REMOVE WATER FROM THE BUCKET: 1. YOU MUST turn the .... 6 Attach a standard garden hose 1. Empty water through the round hole and extend the hose to stop dripping. 3. Remove the plastic cap on . 1. Empty the bucket manually When the water bucket is tightened before operating the unit. 2.
User Manual
Page 7
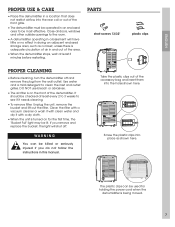
... the bucket and lift out the filter. If you do not follow the instructions in this manual. PARTS short screws 13/32" plastic clips PROPER CLEANING • Before cleaning, turn the dehumidifier off . Screw the plastic clips into place as a closet, unless there is turned on for... holding the power cord when the dehumidifier is on the front of the dehumidifier. It should be lit. Close...
... the bucket and lift out the filter. If you do not follow the instructions in this manual. PARTS short screws 13/32" plastic clips PROPER CLEANING • Before cleaning, turn the dehumidifier off . Screw the plastic clips into place as a closet, unless there is turned on for... holding the power cord when the dehumidifier is on the front of the dehumidifier. It should be lit. Close...


