User Manual
Page 2
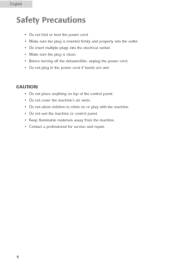
Do not cover the machine's air vents. Contact a professional for service and repair. Before turning off the dehumidifier, unplug the power cord. Make sure the plug is inserted firmly and properly into the electrical socket. Do not ailow children to climb on top of the control panet. Do not plug in the power cord if hands are ...wet. CAUTION Do not @ace anything on or play with the machine. Make sure the plug is dean. Do not wet the machine or control panel. Do insert multiple plugs ...
Do not cover the machine's air vents. Contact a professional for service and repair. Before turning off the dehumidifier, unplug the power cord. Make sure the plug is inserted firmly and properly into the electrical socket. Do not ailow children to climb on top of the control panet. Do not plug in the power cord if hands are ...wet. CAUTION Do not @ace anything on or play with the machine. Make sure the plug is dean. Do not wet the machine or control panel. Do insert multiple plugs ...

User Manual
Page 3
Table Of CoHte ts Safety Precautions Important Safety Information Features Diagram Part Names ...Control Panel Operation ...Specifications Operation Instructions Start Operation When Tank is Full Continuous Drainage Installing Drainage PVC Hose Caution ... Maintenance/Emergency Troubleshooting Warranty Information page 1 3 4 4 5 5 6 6 6 6 7 7 8 8 9 10
Table Of CoHte ts Safety Precautions Important Safety Information Features Diagram Part Names ...Control Panel Operation ...Specifications Operation Instructions Start Operation When Tank is Full Continuous Drainage Installing Drainage PVC Hose Caution ... Maintenance/Emergency Troubleshooting Warranty Information page 1 3 4 4 5 5 6 6 6 6 7 7 8 8 9 10
User Manual
Page 4
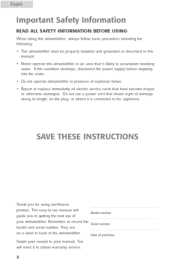
... not operate dehumidifier in back of the dehumidifier. You will guide you for using this dehumidifier in getting the best use manual will need it is likely to the appliance. SRVE THESE IHSTRUETIOHS Thank you in an area that have become frayed or otherwise damaged. Repair or replace immedialy alI electric service cords that is connected to accumulate standing water. Remember to obtain warranty service. must be properly installed...
... not operate dehumidifier in back of the dehumidifier. You will guide you for using this dehumidifier in getting the best use manual will need it is likely to the appliance. SRVE THESE IHSTRUETIOHS Thank you in an area that have become frayed or otherwise damaged. Repair or replace immedialy alI electric service cords that is connected to accumulate standing water. Remember to obtain warranty service. must be properly installed...
User Manual
Page 5
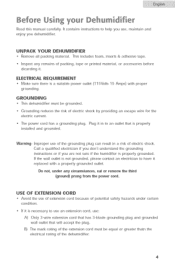
... instructions to use an extension cord, use of the dehumidifier. ELECTRICAL REQUIREMENT • Make sure there is properly grounded. o Grounding reduces the risk of electric shock. Plug it replaced with proper GROUNDING ° This dehumidifier must be grounded. UNPACK YOUR DEHUMIDIFIER • Remove all packing material. o Inspect any cimumstances, cut or remove the third (ground) prong from the power cord. Improper use : A) Only 3-wire...
... instructions to use an extension cord, use of the dehumidifier. ELECTRICAL REQUIREMENT • Make sure there is properly grounded. o Grounding reduces the risk of electric shock. Plug it replaced with proper GROUNDING ° This dehumidifier must be grounded. UNPACK YOUR DEHUMIDIFIER • Remove all packing material. o Inspect any cimumstances, cut or remove the third (ground) prong from the power cord. Improper use : A) Only 3-wire...
User Manual
Page 6
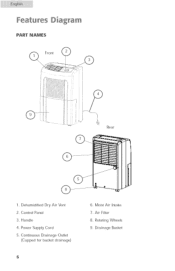
Control Panel 3. Dehumidified Dry Air Vent 2. Handle 4 Power Supply Cord 5 Continuous Drainage Outlet (Capped for bucket drainage) 6. Air Filter 8. Moist Air Intake 7. i i i i i i Features Diagram PART NAMES Front \ Rear 1. Rotating Wheels 9. Drainage Bucket iiiiiiiiiiiiiiiiiiiiiiiiiiiiiiiiiiiiiiiiiiiiiiiiiiiiii!
Control Panel 3. Dehumidified Dry Air Vent 2. Handle 4 Power Supply Cord 5 Continuous Drainage Outlet (Capped for bucket drainage) 6. Air Filter 8. Moist Air Intake 7. i i i i i i Features Diagram PART NAMES Front \ Rear 1. Rotating Wheels 9. Drainage Bucket iiiiiiiiiiiiiiiiiiiiiiiiiiiiiiiiiiiiiiiiiiiiiiiiiiiiii!

User Manual
Page 7
... unit is operating. 2. Normal Humidity contro_ between 50%-60%. (_. Off 11 / Li__J I ', "\ / fJ_ © 1. Extra Dry Dehumidifier continuously removing moisture, automatic defrost may activate. Fan Speed Control 7. Light 4. CONTROL PANEL 0 Running 0 Tank-full DEFROST 7_ Extra Dry db, --_. Running Lamp The lamp _ights up and the dehumidifier operating automatically, will stop removing moisture, 5. FallTank Light When water tank is fu}}, the Full Tank Light wi}} }ight up which means dehumidifier is currently in defrost mode. Off Dehumdifier stop 3.
... unit is operating. 2. Normal Humidity contro_ between 50%-60%. (_. Off 11 / Li__J I ', "\ / fJ_ © 1. Extra Dry Dehumidifier continuously removing moisture, automatic defrost may activate. Fan Speed Control 7. Light 4. CONTROL PANEL 0 Running 0 Tank-full DEFROST 7_ Extra Dry db, --_. Running Lamp The lamp _ights up and the dehumidifier operating automatically, will stop removing moisture, 5. FallTank Light When water tank is fu}}, the Full Tank Light wi}} }ight up which means dehumidifier is currently in defrost mode. Off Dehumdifier stop 3.

User Manual
Page 8
Model D53OM D545M D565M Power AC 115V/60 Hz Moisture Remova_ Power Input Size of Shell (H x W x D) 30 Pint/D (80_F/27 C 60%RH) 45 Pin{/D (80_F/27 C 60%RH) 65 Pint/D (80°F/27_C 60%RH) 500 W 600 W 780 W 23-1/32" x 14-31/32" x 12-19/32" (585 x 380 x 320 ram) Weight Operating Temperature 35.3 Ibs./16 kgs, 35.3 Ibs,/16...
Model D53OM D545M D565M Power AC 115V/60 Hz Moisture Remova_ Power Input Size of Shell (H x W x D) 30 Pint/D (80_F/27 C 60%RH) 45 Pin{/D (80_F/27 C 60%RH) 65 Pint/D (80°F/27_C 60%RH) 500 W 600 W 780 W 23-1/32" x 14-31/32" x 12-19/32" (585 x 380 x 320 ram) Weight Operating Temperature 35.3 Ibs./16 kgs, 35.3 Ibs,/16...
User Manual
Page 9
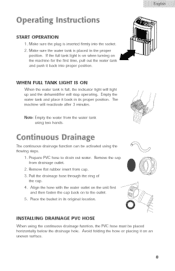
.... O INSTAL|.ING DRAINAGE PVC HOSE When using the continuous drainage function, the PVC hose must be activated using two hands. If the full tank light is inserted firmly into proper position. Make sure the water tank is full, the indicator light wilI light up and the dehumidifier will stop operating. CoHti ' o s B aiHage The continuous drainage function can be placed horizontally below the drainage hole. Remove Flat rubber insert from the water tank using the...
.... O INSTAL|.ING DRAINAGE PVC HOSE When using the continuous drainage function, the PVC hose must be activated using two hands. If the full tank light is inserted firmly into proper position. Make sure the water tank is full, the indicator light wilI light up and the dehumidifier will stop operating. CoHti ' o s B aiHage The continuous drainage function can be placed horizontally below the drainage hole. Remove Flat rubber insert from the water tank using the...
User Manual
Page 10
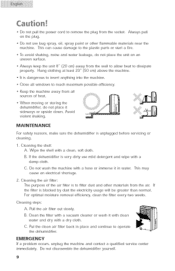
... down. Put the dean air filter back in water. i ! ! !! :! Avoid violent shaking. If the filter is to operate the dehumidifier. Cleaning steps: A. C. iiiiiiiiiiiiiiiiiiiiiiiiiiiiiiiiiiiiiiiiiiiiiiiiiiiiii! i i i i i , Do not pull the power cord to reach maximum possible efficiency. • Keep the machine away from the air. This can cause damage to the piastic parts or start a fire. • To avoid shaking, noise and water leakage, do not place...
... down. Put the dean air filter back in water. i ! ! !! :! Avoid violent shaking. If the filter is to operate the dehumidifier. Cleaning steps: A. C. iiiiiiiiiiiiiiiiiiiiiiiiiiiiiiiiiiiiiiiiiiiiiiiiiiiiii! i i i i i , Do not pull the power cord to reach maximum possible efficiency. • Keep the machine away from the air. This can cause damage to the piastic parts or start a fire. • To avoid shaking, noise and water leakage, do not place...
User Manual
Page 11
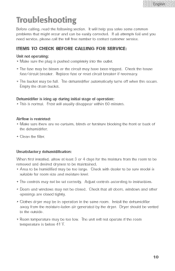
... 41 'E 1o Install the dehumidifier away from the room to be removed and desired dryness to be maintained. • Area to the outside. • Room temperature may be in operation in the same room. Replace fuse or reset circuit breaker if necessary. automatically turns off when this occurs. The dehumidifier Empty the drain bucket. Acljust controls according to be too low. Check the house fuse/circuit breaker. Dryer should be...
... 41 'E 1o Install the dehumidifier away from the room to be removed and desired dryness to be maintained. • Area to the outside. • Room temperature may be in operation in the same room. Replace fuse or reset circuit breaker if necessary. automatically turns off when this occurs. The dehumidifier Empty the drain bucket. Acljust controls according to be too low. Check the house fuse/circuit breaker. Dryer should be...
User Manual
Page 12
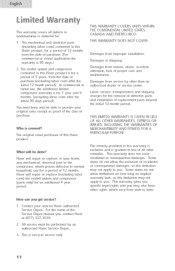
... nearest Haler authorized Service Depot. Haler wi[[ repair or re@ace, in your home, an:>, mechanical, electrical part or the compressor, which vary from state to state. THIS WARRANTY DOES NOT COVER: Damages from service by an authorized Haler Service Depot, 3. This warranty gives you get service? 1. How can you specific [ega! retail purchaser of [ncidentaJ or consequent[aJ damages, so this Haier product, What will be...
... nearest Haler authorized Service Depot. Haler wi[[ repair or re@ace, in your home, an:>, mechanical, electrical part or the compressor, which vary from state to state. THIS WARRANTY DOES NOT COVER: Damages from service by an authorized Haler Service Depot, 3. This warranty gives you get service? 1. How can you specific [ega! retail purchaser of [ncidentaJ or consequent[aJ damages, so this Haier product, What will be...


