User Manual
Page 2
... operate your refrigerator before cleaning or before it is not being used . Leave the shelves in place so that a certified technician performs the service. 6) Do not use any electrical device or any repairs. See grounding instructions in the installation section. 3) Never unplug your old refrigerator is used , we strongly recommend that children may adhere to children. 8) After your old refrigerator or freezer, take off the doors...
... operate your refrigerator before cleaning or before it is not being used . Leave the shelves in place so that a certified technician performs the service. 6) Do not use any electrical device or any repairs. See grounding instructions in the installation section. 3) Never unplug your old refrigerator is used , we strongly recommend that children may adhere to children. 8) After your old refrigerator or freezer, take off the doors...
User Manual
Page 3
This easy-to-use of purchase Staple your receipt to your refrigerator. Remember to obtain warranty service. English Thank you in the refrigerator. They are on a label in getting the best use manual will need it to record the model and serial number. EEnngglliisshh 2 2 Model number Serial number Date of your manual. You will guide you for using our Haier product.
This easy-to-use of purchase Staple your receipt to your refrigerator. Remember to obtain warranty service. English Thank you in the refrigerator. They are on a label in getting the best use manual will need it to record the model and serial number. EEnngglliisshh 2 2 Model number Serial number Date of your manual. You will guide you for using our Haier product.
User Manual
Page 4
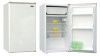
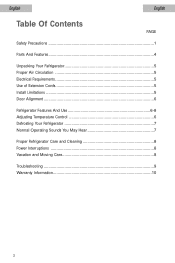
EEnngglilsihsh English Table Of Contents PAGE Safety Precautions 1 Parts And Features 4 Unpacking Your Refrigerator 5 Proper Air Circulation 5 Electrical Requirements 5 Use of Extension Cords 5 Install Limitations 5 Door Alignment 6 Refrigerator Features And Use 6-8 Adjusting Temperature Control 6 Defrosting Your Refrigerator 7 Normal Operating Sounds You May Hear 7 Proper Refrigerator Care and Cleaning 8 Power Interruptions 8 Vacation and Moving Care 8 Troubleshooting 9 Warranty Information 10 3 3
EEnngglilsihsh English Table Of Contents PAGE Safety Precautions 1 Parts And Features 4 Unpacking Your Refrigerator 5 Proper Air Circulation 5 Electrical Requirements 5 Use of Extension Cords 5 Install Limitations 5 Door Alignment 6 Refrigerator Features And Use 6-8 Adjusting Temperature Control 6 Defrosting Your Refrigerator 7 Normal Operating Sounds You May Hear 7 Proper Refrigerator Care and Cleaning 8 Power Interruptions 8 Vacation and Moving Care 8 Troubleshooting 9 Warranty Information 10 3 3
User Manual
Page 6
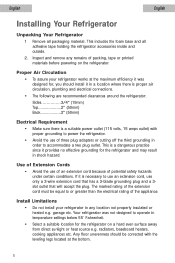
... in a location where there is proper air circulation, plumbing and electrical connections. • The following are recommended clearances around the refrigerator: Sides 3/4" (19mm) Top 2" (50mm) Back 2" (50mm) Electrical Requirement • Make sure there is necessary to operate in order to or greater than the electrical rating of Extension Cords • Avoid the use only a 3-wire extension cord that has a 3-blade grounding plug and...
... in a location where there is proper air circulation, plumbing and electrical connections. • The following are recommended clearances around the refrigerator: Sides 3/4" (19mm) Top 2" (50mm) Back 2" (50mm) Electrical Requirement • Make sure there is necessary to operate in order to or greater than the electrical rating of Extension Cords • Avoid the use only a 3-wire extension cord that has a 3-blade grounding plug and...
User Manual
Page 7
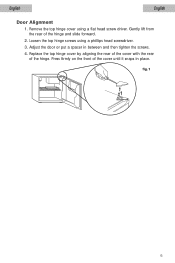
Loosen the top hinge screws using a flat head screw driver. Gently lift from the rear of the hinge. Remove the top hinge cover using a phillips head screwdriver. 3. Adjust the door or put a spacer in place. English EEnngglliisshh Door Alignment 1. Replace the top hinge cover by aligning the rear of the cover with the rear of the hinge and slide forward. 2. Press firmly on the front of the cover until it snaps in between and then tighten the screws. 4. fig.1 6 6
Loosen the top hinge screws using a flat head screw driver. Gently lift from the rear of the hinge. Remove the top hinge cover using a phillips head screwdriver. 3. Adjust the door or put a spacer in place. English EEnngglliisshh Door Alignment 1. Replace the top hinge cover by aligning the rear of the cover with the rear of the hinge and slide forward. 2. Press firmly on the front of the cover until it snaps in between and then tighten the screws. 4. fig.1 6 6
User Manual
Page 8
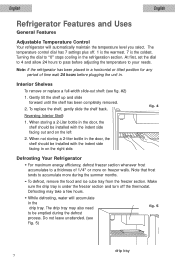
... defrost process. Reversing Interior Shelf: 1. Make sure the drip tray is under the freezer section and turn off . 1 is the warmest. 7 is the coldest. The temperature control dial has 7 settings plus off the thermostat. Note that frost tends to "0" stops cooling in the refrigeration section. Defrosting may also need to your needs. Gently tilt the shelf up and slide forward until the shelf has been completely removed. 2. To replace the shelf, gently slide the shelf...
... defrost process. Reversing Interior Shelf: 1. Make sure the drip tray is under the freezer section and turn off . 1 is the warmest. 7 is the coldest. The temperature control dial has 7 settings plus off the thermostat. Note that frost tends to "0" stops cooling in the refrigeration section. Defrosting may also need to your needs. Gently tilt the shelf up and slide forward until the shelf has been completely removed. 2. To replace the shelf, gently slide the shelf...
User Manual
Page 9
Normal Operating Sounds You May Hear • Boiling water, gurgling sounds or slight vibrations that are the result of the refrigerator. English EEnngglliisshh • After defrosting, empty and wipe down the drip tray, as well as the interior of the refrigerant circulating through the cooling coils. • The thermostat control will click when it cycles on and off. 8 8
Normal Operating Sounds You May Hear • Boiling water, gurgling sounds or slight vibrations that are the result of the refrigerator. English EEnngglliisshh • After defrosting, empty and wipe down the drip tray, as well as the interior of the refrigerant circulating through the cooling coils. • The thermostat control will click when it cycles on and off. 8 8
User Manual
Page 10
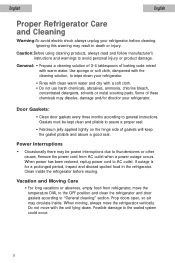
... using cleaning products, always read and follow manufacturer's instructions and warnings to AC outlet. Door Gaskets: • Clean door gaskets every three months according to the sealed system could occur. 9 9 Vacation and Moving Care • For long vacations or absences, empty food from AC outlet when a power outage occurs. Prop doors open, so air may dissolve, damage and/or discolor your refrigerator. Gaskets must be power...
... using cleaning products, always read and follow manufacturer's instructions and warnings to AC outlet. Door Gaskets: • Clean door gaskets every three months according to the sealed system could occur. 9 9 Vacation and Moving Care • For long vacations or absences, empty food from AC outlet when a power outage occurs. Prop doors open, so air may dissolve, damage and/or discolor your refrigerator. Gaskets must be power...
User Manual
Page 11
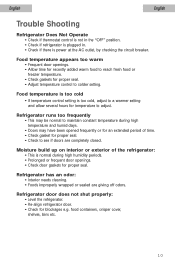
... refrigerator is plugged in. • Check if there is too cold, adjust to a warmer setting and allow several hours for temperature to adjust. Refrigerator door does not shut properly: • Level the refrigerator. • Re-align refrigerator door. • Check for proper seal. • Adjust temperature control to colder setting. Refrigerator has an odor: • Interior needs cleaning. • Foods improperly wrapped or sealed are completely closed. Food temperature appears too warm • Frequent door openings...
... refrigerator is plugged in. • Check if there is too cold, adjust to a warmer setting and allow several hours for temperature to adjust. Refrigerator door does not shut properly: • Level the refrigerator. • Re-align refrigerator door. • Check for proper seal. • Adjust temperature control to colder setting. Refrigerator has an odor: • Interior needs cleaning. • Foods improperly wrapped or sealed are completely closed. Food temperature appears too warm • Frequent door openings...
User Manual
Page 12
... the authorized service center before warranty repairs are covered in normal usage during the initial 12 month period. Contact your nearest authorized service center. Haier America New York, NY 10018 Printed in shipping. Decorative trims or replaceable light bulbs. This warranty does not cover incidental or consequential damages, so the above limitations may have other remedies. EXCEPTIONS: Commercial or Rental Use warranty 90 days...
... the authorized service center before warranty repairs are covered in normal usage during the initial 12 month period. Contact your nearest authorized service center. Haier America New York, NY 10018 Printed in shipping. Decorative trims or replaceable light bulbs. This warranty does not cover incidental or consequential damages, so the above limitations may have other remedies. EXCEPTIONS: Commercial or Rental Use warranty 90 days...


