
Manual
Page 4
Features ...5 1.2. Board Layout ...6 2.2. Driver and Utility Installation 11 3.1.1. Regulatory Statements 30 - 4 - Taskbar Icon ...13 3.3. Appendix ...29 5.1. Table of Contents 1. Minimum System Requirements 5 2. Hardware Installation ...10 3. Software Installation 11 3.1. Display Properties Pages 15 4. Resolutions and Color Depth Tables 29 5.2. Hardware Installation 6 2.1. Introduction ...5 1.1. Driver Installation ...11 3.2. Troubleshooting Tips 28 5.
Features ...5 1.2. Board Layout ...6 2.2. Driver and Utility Installation 11 3.1.1. Regulatory Statements 30 - 4 - Taskbar Icon ...13 3.3. Appendix ...29 5.1. Table of Contents 1. Minimum System Requirements 5 2. Hardware Installation ...10 3. Software Installation 11 3.1. Display Properties Pages 15 4. Resolutions and Color Depth Tables 29 5.2. Hardware Installation 6 2.1. Introduction ...5 1.1. Driver Installation ...11 3.2. Troubleshooting Tips 28 5.

Manual
Page 5
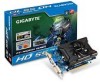
...supply that provides at least 400-watt is required. Windows® 7 - Two GV-R557D5-1GI/GV-R557OC-1GI/GV-R557-1GH - Minimum System Requirements • Hardware - A CrossFireX certified motherboard with 1 GB DDR3 memory(For GV-R557OC-1GI/GV-R557-1GH only) • Supports DirectX 11 • Supports CrossFireXTM • ...• Supports PCI Express 2.1 • Integrated with 1 GB GDDR5 memory(For GV-R557D5-1GI only) • Integrated with two PCI Express x16 slots and correct chipset driver - Introduction 1.1. Windows® XP with a known brand and certified to conform ...
...supply that provides at least 400-watt is required. Windows® 7 - Two GV-R557D5-1GI/GV-R557OC-1GI/GV-R557-1GH - Minimum System Requirements • Hardware - A CrossFireX certified motherboard with 1 GB DDR3 memory(For GV-R557OC-1GI/GV-R557-1GH only) • Supports DirectX 11 • Supports CrossFireXTM • ...• Supports PCI Express 2.1 • Integrated with 1 GB GDDR5 memory(For GV-R557D5-1GI only) • Integrated with two PCI Express x16 slots and correct chipset driver - Introduction 1.1. Windows® XP with a known brand and certified to conform ...

Manual
Page 10
...on the computer and monitor. To connect a flat panel display to fasten the card in firmly until the card is securely inserted. GV-R557 Series Graphics Accelerator - 10 - Step 2. Step 1. To connect a DisplayPort monitor to next chapter for detailed instructions. Hardware ...Installation Now that the gold edge connector of the graphics card driver. then align your graphics card, use the HDMI connector. Plug the display cable into your graphics card, use the DisplayPort connector. Locate...
...on the computer and monitor. To connect a flat panel display to fasten the card in firmly until the card is securely inserted. GV-R557 Series Graphics Accelerator - 10 - Step 2. Step 1. To connect a DisplayPort monitor to next chapter for detailed instructions. Hardware ...Installation Now that the gold edge connector of the graphics card driver. then align your graphics card, use the HDMI connector. Plug the display cable into your graphics card, use the DisplayPort connector. Locate...

Manual
Page 11
... Notice the following guidelines before installing the drivers: 1. Make sure your optical drive. Driver Installation After installing the operating system, insert the driver disk into your system has installed the appropriate motherboard drivers (for the motherboard drivers, please contact the motherboard manufacturer.) 3.1. ...the optical drive and execute the setup.exe program.) Step 1: Click the Install Display Driver item. For software MPEG support in the screen shot below. (If the driver Autorun screen does not appear automatically, go to install DirectX separately. - 11 -...
... Notice the following guidelines before installing the drivers: 1. Make sure your optical drive. Driver Installation After installing the operating system, insert the driver disk into your system has installed the appropriate motherboard drivers (for the motherboard drivers, please contact the motherboard manufacturer.) 3.1. ...the optical drive and execute the setup.exe program.) Step 1: Click the Install Display Driver item. For software MPEG support in the screen shot below. (If the driver Autorun screen does not appear automatically, go to install DirectX separately. - 11 -...

Manual
Page 12
Step 5: Click the Accept button. Step 6: Click the Finish button to restart the computer. GV-R557 Series Graphics Accelerator - 12 - Then the driver installation is installing the components. Setp 4: Click the Express or Custom icon and then click Next. The system is completed.
Step 5: Click the Accept button. Step 6: Click the Finish button to restart the computer. GV-R557 Series Graphics Accelerator - 12 - Then the driver installation is installing the components. Setp 4: Click the Express or Custom icon and then click Next. The system is completed.

Manual
Page 13
The ATI Catalyst Control Center is used to enter the ATI Catalyst Control Center. Right-click the ATI icon to configure all your graphics card settings. Software Installation Right-click the icon to enter the ATI Catalyst Control Center. Taskbar Icon After installation of the display driver, you can right-click on the desktop and select Catalyst(TM) Control Center. - 13 - 3.2. Or you will find an ATI icon in the notification area.
The ATI Catalyst Control Center is used to enter the ATI Catalyst Control Center. Right-click the ATI icon to configure all your graphics card settings. Software Installation Right-click the icon to enter the ATI Catalyst Control Center. Taskbar Icon After installation of the display driver, you can right-click on the desktop and select Catalyst(TM) Control Center. - 13 - 3.2. Or you will find an ATI icon in the notification area.

Manual
Page 18
GV-R557 Series Graphics Accelerator - 18 - Quick Settings: The Quick Settings page provides access to three main settings. „ 3D Quality 3D Performance and Quality Settings ... optimize video playback in Basic and Advanced View provides hardware and software information about the installed graphics card. „ Graphics Software Provides software information including driver version, CATALYST version, Direct 3D version and so on. „ Graphics Hardware Provides hardware information including graphics chipset, BIOS version, memory size, core clock and...
GV-R557 Series Graphics Accelerator - 18 - Quick Settings: The Quick Settings page provides access to three main settings. „ 3D Quality 3D Performance and Quality Settings ... optimize video playback in Basic and Advanced View provides hardware and software information about the installed graphics card. „ Graphics Software Provides software information including driver version, CATALYST version, Direct 3D version and so on. „ Graphics Hardware Provides hardware information including graphics chipset, BIOS version, memory size, core clock and...
Manual
Page 28
...Tips The following troubleshooting tips may help if you experience problems. Contact your dealer or GIGABYTE for more advanced troubleshooting information. „ Check that the card is seated properly in... assistance, use the Troubleshooting Guide located in graphics capabilities on your computer manufacturer. „ If you install the graphics driver. „ For more troubleshooting information, please right-click the ATI icon in the notification area. „ Restart your... and graphics card when you are not able to the monitor's manual.) GV-R557 Series Graphics Accelerator - 28 - 4.
...Tips The following troubleshooting tips may help if you experience problems. Contact your dealer or GIGABYTE for more advanced troubleshooting information. „ Check that the card is seated properly in... assistance, use the Troubleshooting Guide located in graphics capabilities on your computer manufacturer. „ If you install the graphics driver. „ For more troubleshooting information, please right-click the ATI icon in the notification area. „ Restart your... and graphics card when you are not able to the monitor's manual.) GV-R557 Series Graphics Accelerator - 28 - 4.

