
Manual
Page 4
Minimum System Requirements 5 2. Hardware Installation 6 2.1. Hardware Installation ...9 3. Windows® XP Driver and Utilities Installation 13 3.1.1. GIGABYTE Gamer HUD on Driver CD 17 3.1.5. Troubleshooting Tips 36 5. Taskbar Icon ...19 3.1.6. Display Properties Pages 20 3.1.7. Table of ...connect two monitors. - 4 - Board Layout ...6 2.2. DirectX Installation ...14 3.1.3. nView Properties Pages (Note 31 4. How to Reflash the BIOS in MS-DOS Mode 37 5.2. Introduction ...5 1.1. Features ...5 1.2. Software Installation 13 3.1. Appendix ...37 5.1.
Minimum System Requirements 5 2. Hardware Installation 6 2.1. Hardware Installation ...9 3. Windows® XP Driver and Utilities Installation 13 3.1.1. GIGABYTE Gamer HUD on Driver CD 17 3.1.5. Troubleshooting Tips 36 5. Taskbar Icon ...19 3.1.6. Display Properties Pages 20 3.1.7. Table of ...connect two monitors. - 4 - Board Layout ...6 2.2. DirectX Installation ...14 3.1.3. nView Properties Pages (Note 31 4. How to Reflash the BIOS in MS-DOS Mode 37 5.2. Introduction ...5 1.1. Features ...5 1.2. Software Installation 13 3.1. Appendix ...37 5.1.

Manual
Page 8
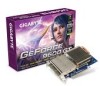
... handling computer components. The card contains sensitive electric components, which can work on your card. If you work correctly, please use official GIGABYTE BIOS only. Place components on a grounded antistatic pad or on a grounded anti-static mat. Turn off your graphics card can be easily ...should follow some precautions whenever you do not have one, touch both of your hands to a safely grounded object or to your computer. 1. GV-NX96T Series Graphics Accelerator - 8 - Shipping and handling may cause damage to a metal object, such as the anti-static mat. Be sure...
... handling computer components. The card contains sensitive electric components, which can work on your card. If you work correctly, please use official GIGABYTE BIOS only. Place components on a grounded antistatic pad or on a grounded anti-static mat. Turn off your graphics card can be easily ...should follow some precautions whenever you do not have one, touch both of your hands to a safely grounded object or to your computer. 1. GV-NX96T Series Graphics Accelerator - 8 - Shipping and handling may cause damage to a metal object, such as the anti-static mat. Be sure...
Manual
Page 37
... name] (example: gvf18 -p X96T5HP.f2) and press Enter. 6. 5. This procedure assumes drive A. 2. To back up the current BIOS, at the A:\> prompt, type[ B I O S f l a s h u t i l i t y n a m e ] - Appendix Change the command prompt to your computer. - 37 - Extract the downloaded Zip... file to A:\>. 4. Wait until it's done, then restart your hard disk(s) or floppy disk. To flash BIOS, at the A:\> prompt, type[BIOS flash utility name] -s [BIOS file name] (example: gvf18 -s X96T5HP.f1) and press Enter. 5. Appendix 5.1. How to restart the computer in MS-...
... name] (example: gvf18 -p X96T5HP.f2) and press Enter. 6. 5. This procedure assumes drive A. 2. To back up the current BIOS, at the A:\> prompt, type[ B I O S f l a s h u t i l i t y n a m e ] - Appendix Change the command prompt to your computer. - 37 - Extract the downloaded Zip... file to A:\>. 4. Wait until it's done, then restart your hard disk(s) or floppy disk. To flash BIOS, at the A:\> prompt, type[BIOS flash utility name] -s [BIOS file name] (example: gvf18 -s X96T5HP.f1) and press Enter. 5. Appendix 5.1. How to restart the computer in MS-...

