
User Guide
Page 1
...fire, flood) Products with the motherboard used Damage of product as a result of product not for reference use only. overclocking) Inability to install the product as a result of incompatibility with a warranty sticker that le ads to harm or damage to other product components Any form of... alteration to original product A faulty product that is connected to the PCB of the cooler, please secure the partly transparent cover of the cooler prior to verify actual fan speed levels. The cooler fan speed levels provided are for intended use Operational use beyond the advised standards (eg....
...fire, flood) Products with the motherboard used Damage of product as a result of product not for reference use only. overclocking) Inability to install the product as a result of incompatibility with a warranty sticker that le ads to harm or damage to other product components Any form of... alteration to original product A faulty product that is connected to the PCB of the cooler, please secure the partly transparent cover of the cooler prior to verify actual fan speed levels. The cooler fan speed levels provided are for intended use Operational use beyond the advised standards (eg....

User Guide
Page 7
Table of Content Checklist ...8 Specification ...9 Feature...9 Installation Instructions forP4 LGA775RM & Cooler 10 Installation Instructions for Intel Pentium 4 478 Clips 11 Installation Instructions forAMD Athlon64 Clip 12 InstallationInstructions forAMD AthlonXP Clip 13 Power Installation and 3.5"Fan Speed Controller Installation 14 Power Installation and PCI Fan Speed Controller Installation 15
Table of Content Checklist ...8 Specification ...9 Feature...9 Installation Instructions forP4 LGA775RM & Cooler 10 Installation Instructions for Intel Pentium 4 478 Clips 11 Installation Instructions forAMD Athlon64 Clip 12 InstallationInstructions forAMD AthlonXP Clip 13 Power Installation and 3.5"Fan Speed Controller Installation 14 Power Installation and PCI Fan Speed Controller Installation 15

User Guide
Page 8
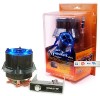
GH-PCU22-VG - 8 - Please make sure the computer is turned off and its power disconnected prior to installation. English Checklist (1) GH-PCU22-VG Cooler (2) GH-PCU22-VG user's manual (3)HeatSink Paste (4) SpeedControl& 3.5"bracket (5)PCI bracket (6) Power cable (7) LGA775 RM (8)P4 Clips (9) K7 Clip (10) K8 Clip (11)Screw Before use, please remove the bottom protective layer of the cooler.
GH-PCU22-VG - 8 - Please make sure the computer is turned off and its power disconnected prior to installation. English Checklist (1) GH-PCU22-VG Cooler (2) GH-PCU22-VG user's manual (3)HeatSink Paste (4) SpeedControl& 3.5"bracket (5)PCI bracket (6) Power cable (7) LGA775 RM (8)P4 Clips (9) K7 Clip (10) K8 Clip (11)Screw Before use, please remove the bottom protective layer of the cooler.

User Guide
Page 9
Specification - Noise:24~36dBA - SmartFan Controller On board circuit maximizes fan performance while reducing fan noise - GH-PCU22-VG English Unique Design forIntel® Pentium®4 LGA775 /478 and AMD AthlonTM64 / AthlonTMXPPlatform - EasyClip Installation - HeatSink Dimension: 105x105 x 119mm - CopperHeatPipe Design Provides ultimate thermal conductivity - RatedSpeed:2500~4000rpm - Fan speed control module¡Asuitable for superior cooling...
Specification - Noise:24~36dBA - SmartFan Controller On board circuit maximizes fan performance while reducing fan noise - GH-PCU22-VG English Unique Design forIntel® Pentium®4 LGA775 /478 and AMD AthlonTM64 / AthlonTMXPPlatform - EasyClip Installation - HeatSink Dimension: 105x105 x 119mm - CopperHeatPipe Design Provides ultimate thermal conductivity - RatedSpeed:2500~4000rpm - Fan speed control module¡Asuitable for superior cooling...

User Guide
Page 10
...-1).Connectthe yellow3-pin connector cable ofthe cooler to the CPU fan connector located on the motherboard. (Figure 3-2).Installation is parallelwith CAM. Figure 2 From the underside of the motherboard,use screws (4) and plastic washers (4) together to "Installation Instructions for P4 LGA775RM & Cooler Side A Side B ARM CAM Figure 1 Plastic Washers Figure 2 Figure3- 1 GH-PCU22-VG Figure3-2 Figure3-3 Figure 1 Place the LGA775RM...
...-1).Connectthe yellow3-pin connector cable ofthe cooler to the CPU fan connector located on the motherboard. (Figure 3-2).Installation is parallelwith CAM. Figure 2 From the underside of the motherboard,use screws (4) and plastic washers (4) together to "Installation Instructions for P4 LGA775RM & Cooler Side A Side B ARM CAM Figure 1 Plastic Washers Figure 2 Figure3- 1 GH-PCU22-VG Figure3-2 Figure3-3 Figure 1 Place the LGA775RM...

User Guide
Page 11
Do the same for power installation and installation of the cooler to the CPUfan connectorlocated on the surface ofthe CPU. GH-PCU22-VG Figure 4 Connectthe yellow3-pin connectorcable ofthe cooler to secure cooler in place. Figure 2 Figure showing the correctinstallation ofthe cooler atop the CPU. Figure 4 Note: Please refer to clip the cooler end in place. English Installation Instructions for Intel Pentium 4 478 Clips Figure...
Do the same for power installation and installation of the cooler to the CPUfan connectorlocated on the surface ofthe CPU. GH-PCU22-VG Figure 4 Connectthe yellow3-pin connectorcable ofthe cooler to secure cooler in place. Figure 2 Figure showing the correctinstallation ofthe cooler atop the CPU. Figure 4 Note: Please refer to clip the cooler end in place. English Installation Instructions for Intel Pentium 4 478 Clips Figure...

User Guide
Page 12
Figure 4 Push the lever on the side of the cooler towards the lever position on the CPU socket and then push firmly downwards to secure the cooler atop the CPU. Figure 2 Figure 4 Figure 3 GH-PCU22-VG Figure 3 Align the three insertspaces of the clip with ... yellow 3-pin connector cable ofthe coolerto the CPU fan connector located on the surface ofthe CPU. Clip Installation is now complete. Figure 2 Figure showing the correctinstallation ofthe cooler atop the CPU. English Installation Instructions for power installation and installation of the CPU to hold the clip in space.
Figure 4 Push the lever on the side of the cooler towards the lever position on the CPU socket and then push firmly downwards to secure the cooler atop the CPU. Figure 2 Figure 4 Figure 3 GH-PCU22-VG Figure 3 Align the three insertspaces of the clip with ... yellow 3-pin connector cable ofthe coolerto the CPU fan connector located on the surface ofthe CPU. Clip Installation is now complete. Figure 2 Figure showing the correctinstallation ofthe cooler atop the CPU. English Installation Instructions for power installation and installation of the CPU to hold the clip in space.

User Guide
Page 13
...Installation is placed on pointBatthe bottom ofthe cooler(Figure 2-2)and push down on the cooler bracketwhere the CPUclips attach. Figure 4 Figure 4 Connect the yellow 3-pin connector wire of the cooler to page 14 &15 for AMD Athlon XP Clip Figure 1 Figure 1 Please add an adequate layerofheatsink paste on the motherboard. English Installation Instructions for power installation and installation... of the cooler(Figure2-2).AaFigure 2-3. GH-PCU22-VG The picture on the rightshows...
...Installation is placed on pointBatthe bottom ofthe cooler(Figure 2-2)and push down on the cooler bracketwhere the CPUclips attach. Figure 4 Figure 4 Connect the yellow 3-pin connector wire of the cooler to page 14 &15 for AMD Athlon XP Clip Figure 1 Figure 1 Please add an adequate layerofheatsink paste on the motherboard. English Installation Instructions for power installation and installation... of the cooler(Figure2-2).AaFigure 2-3. GH-PCU22-VG The picture on the rightshows...

User Guide
Page 14
Connectthe 3-pin connector cable of the controllerto the PCB3-pin connectoron the cooler. (Figure3-2) Figure 4 Installation is complete. - 14 - Figure 2-1 Figure 2-2 Figure 3-1 Figure 3-2 GH-PCU22-VG Figure 4 Figure 3 Securelyhold the 3.5"fan speed controllerbracket in place with the screws provided(Figure 3-1). English Power Installation and 3.5" Fan Speed Controller Installation Figure 1 Connectthe powercable ofthe power supply to the PCB 4-pin...
Connectthe 3-pin connector cable of the controllerto the PCB3-pin connectoron the cooler. (Figure3-2) Figure 4 Installation is complete. - 14 - Figure 2-1 Figure 2-2 Figure 3-1 Figure 3-2 GH-PCU22-VG Figure 4 Figure 3 Securelyhold the 3.5"fan speed controllerbracket in place with the screws provided(Figure 3-1). English Power Installation and 3.5" Fan Speed Controller Installation Figure 1 Connectthe powercable ofthe power supply to the PCB 4-pin...

User Guide
Page 15
... on the cooler. GH-PCU22-VG Figure 4 Figure 4 Installation is complete. - 15 - Then connectthe 3-pin power connector on the fan speed controller to the end ofthe 4-pin connectorcable provided. English Power Installation and PCI Fan Speed Controller Installation Figure 2 Figure 1 Figure 1 Disassemble the turn knob, bolt and fan speed controller from the 3.5"bracketand reassemble these parts onto a PCIbracket...
... on the cooler. GH-PCU22-VG Figure 4 Figure 4 Installation is complete. - 15 - Then connectthe 3-pin power connector on the fan speed controller to the end ofthe 4-pin connectorcable provided. English Power Installation and PCI Fan Speed Controller Installation Figure 2 Figure 1 Figure 1 Disassemble the turn knob, bolt and fan speed controller from the 3.5"bracketand reassemble these parts onto a PCIbracket...

User Guide
Page 19
GH-PCU22-VG LED - - 3.5 PCI - - 19 - - : 105 x 105 x 119 mm - : 2500 ~ 4000 rpm - : 6.3 ~ 12V - : 24 ~36 dBA - : 2 Ball Bearing - P4 LGA775 P4 478 K8 K7 - - - -
GH-PCU22-VG LED - - 3.5 PCI - - 19 - - : 105 x 105 x 119 mm - : 2500 ~ 4000 rpm - : 6.3 ~ 12V - : 24 ~36 dBA - : 2 Ball Bearing - P4 LGA775 P4 478 K8 K7 - - - -

User Guide
Page 27
规格 (1) GH-PCU22-VG散热器 (2) GH-PCU22-VG 3 4 3.5"挡板 (5) PCI挡板 (6 7) LGA775 RM (8) P4扣具 (9) K7扣具 (10) K8扣具 (11) 螺丝 105 x 105 x 119 mm 2500~4000 rpm 6.3~12V 23.7~37.2 dBA 2球轴承(Ball Bearing) 特性 • 符合Intel® Pentium® 4 LGA775 / mPGA478和AMD K8 / K7 Platform LED 3.5 PCI 简体中文 GH-PCU22-VG -2-
规格 (1) GH-PCU22-VG散热器 (2) GH-PCU22-VG 3 4 3.5"挡板 (5) PCI挡板 (6 7) LGA775 RM (8) P4扣具 (9) K7扣具 (10) K8扣具 (11) 螺丝 105 x 105 x 119 mm 2500~4000 rpm 6.3~12V 23.7~37.2 dBA 2球轴承(Ball Bearing) 特性 • 符合Intel® Pentium® 4 LGA775 / mPGA478和AMD K8 / K7 Platform LED 3.5 PCI 简体中文 GH-PCU22-VG -2-