
Manual
Page 38
... to the system and BIOS Setup. First enter the profile name (to erase the default profile name, use this menu to configure the TPM function. GA-EP45-DS3R/DS3 Motherboard - 38 - „ The Functions of the and keys (For the Main Menu Only) ` F11 : Save CMOS to BIOS This function allows you ... Setup. You can also carry out this task.) „ Security Chip Configuration Use this function to make changes in effect. It allows you to view the BIOS settings but not to load the BIOS settings from a profile created before, without the hassles of reconfiguring the BIOS settings.
... to the system and BIOS Setup. First enter the profile name (to erase the default profile name, use this menu to configure the TPM function. GA-EP45-DS3R/DS3 Motherboard - 38 - „ The Functions of the and keys (For the Main Menu Only) ` F11 : Save CMOS to BIOS This function allows you ... Setup. You can also carry out this task.) „ Security Chip Configuration Use this function to make changes in effect. It allows you to view the BIOS settings but not to load the BIOS settings from a profile created before, without the hassles of reconfiguring the BIOS settings.
Manual
Page 61
... entering BIOS Setup and making BIOS changes. When the Password Check item is set to System, you must enter the supervisor password if you to view the BIOS settings but not to continue system boot. You will appear, indicating the password has been cancelled. In BIOS Setup, you must enter the... & Exit Setup F11: Save CMOS to BIOS F12: Load CMOS from BIOS Change/Set/Disable Password Press on the password item and when requested for GA-EP45-DS3R. - 61 -
... entering BIOS Setup and making BIOS changes. When the Password Check item is set to System, you must enter the supervisor password if you to view the BIOS settings but not to continue system boot. You will appear, indicating the password has been cancelled. In BIOS Setup, you must enter the... & Exit Setup F11: Save CMOS to BIOS F12: Load CMOS from BIOS Change/Set/Disable Password Press on the password item and when requested for GA-EP45-DS3R. - 61 -
Manual
Page 83
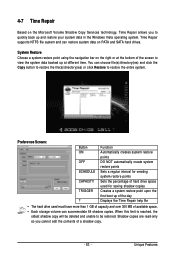
...) and click the Copy button to restore the file(s)/directory(ies) or click Restore to be restored. Shadow copies are read-only so you to view the system data backed up of the day Displays the Time Repair help file • The hard drive used must have more than 1 GB of...
...) and click the Copy button to restore the file(s)/directory(ies) or click Restore to be restored. Shadow copies are read-only so you to view the system data backed up of the day Displays the Time Repair help file • The hard drive used must have more than 1 GB of...
Manual
Page 85
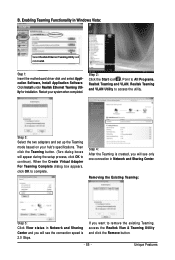
... the Teaming is 2.0 Gbps. Unique Features Click Install under Realtek Ethernet Teaming Utility for installation. Restart your hub's specifications. Removing the Existing Teaming: Step 5: Click View status in Network and Sharing Center and you will see only one connection in Windows Vista: Select Realtek Ethernet Teaming Utility and click Install. Step...
... the Teaming is 2.0 Gbps. Unique Features Click Install under Realtek Ethernet Teaming Utility for installation. Restart your hub's specifications. Removing the Existing Teaming: Step 5: Click View status in Network and Sharing Center and you will see only one connection in Windows Vista: Select Realtek Ethernet Teaming Utility and click Install. Step...

