
Owners Manual
Page 1
...sitio de internet Hotpoint.com. For a Spanish version of Your Microwave 10 The Controls on Your Microwave 11 Time Features 14 Convenience Features 20 Other Features 24 Helpful Information 29 Microwave Terms 29 Care and Cleaning 30 If Something Goes Wrong 35 ...Hotpoint.com DE68-62382F 39-40541 11-06 JR RVM1535 Over the Range Microwave Oven Owner's Manual Important Safety Information 2 Precautions to Avoid Possible Exposure to Excessive Microwave Energy 2 Special Notes About Microwaving 5 Operating Instructions 10 Features of this manual, visit our Website at ...
...sitio de internet Hotpoint.com. For a Spanish version of Your Microwave 10 The Controls on Your Microwave 11 Time Features 14 Convenience Features 20 Other Features 24 Helpful Information 29 Microwave Terms 29 Care and Cleaning 30 If Something Goes Wrong 35 ...Hotpoint.com DE68-62382F 39-40541 11-06 JR RVM1535 Over the Range Microwave Oven Owner's Manual Important Safety Information 2 Precautions to Avoid Possible Exposure to Excessive Microwave Energy 2 Special Notes About Microwaving 5 Operating Instructions 10 Features of this manual, visit our Website at ...
Owners Manual
Page 2
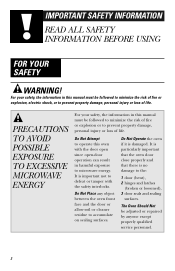
PRECAUTIONS TO AVOID POSSIBLE EXPOSURE TO EXCESSIVE MICROWAVE ENERGY For your safety, the information in harmful exposure to defeat or tamper with the safety interlocks. Do Not Attempt to operate this manual must ... property damage, personal injury or loss of life. It is particularly important that the oven door close properly and that there is important not to microwave energy. It is no damage to accumulate on sealing surfaces. Do Not Operate the oven if it is damaged. Do Not Place any object between...
PRECAUTIONS TO AVOID POSSIBLE EXPOSURE TO EXCESSIVE MICROWAVE ENERGY For your safety, the information in harmful exposure to defeat or tamper with the safety interlocks. Do Not Attempt to operate this manual must ... property damage, personal injury or loss of life. It is particularly important that the oven door close properly and that there is important not to microwave energy. It is no damage to accumulate on sealing surfaces. Do Not Operate the oven if it is damaged. Do Not Place any object between...
Owners Manual
Page 3
... only in accordance with the provided Installation Instructions. • This over-the-range oven was designed for laboratory or industrial use. 3 This microwave oven is specifically designed to heat, dry or cook food, and is not intended for use over ranges no wider than 36.″ It...General Electric Service or an authorized service agent using electrical appliances, basic safety precautions should be followed, including the following: SAFETY PRECAUTIONS This microwave oven is UL listed for its intended use as described in this manual. If the power cord is not approved or tested for ...
... only in accordance with the provided Installation Instructions. • This over-the-range oven was designed for laboratory or industrial use. 3 This microwave oven is specifically designed to heat, dry or cook food, and is not intended for use over ranges no wider than 36.″ It...General Electric Service or an authorized service agent using electrical appliances, basic safety precautions should be followed, including the following: SAFETY PRECAUTIONS This microwave oven is UL listed for its intended use as described in this manual. If the power cord is not approved or tested for ...

Owners Manual
Page 4
... the risk of this product near water-for additional cooking time. • See door surface cleaning instructions in succession on top of the microwave oven surface when the microwave oven is opened, the fire may spread. - If food is under cooked after the first countdown, use the Sensor Features twice in the...
... the risk of this product near water-for additional cooking time. • See door surface cleaning instructions in succession on top of the microwave oven surface when the microwave oven is opened, the fire may spread. - If food is under cooked after the first countdown, use the Sensor Features twice in the...

Owners Manual
Page 5
...popcorn labeled for use of the oven. • Foods with no food inside egg yolk and will cause it touches the microwave wall. • The temperature probe (if included) in the microwave but not inserted in the food. • Metal or foil touching the side of the oven. • Foil not ... to allow steam to escape during cooking. 5 It increases the heat around the magnetron and can shorten the life of the microwave oven could start a fire. Such use in microwave ovens. • Some products such as whole eggs and sealed containers-for example, closed jars-are able to the oven and...
...popcorn labeled for use of the oven. • Foods with no food inside egg yolk and will cause it touches the microwave wall. • The temperature probe (if included) in the microwave but not inserted in the food. • Metal or foil touching the side of the oven. • Foil not ... to allow steam to escape during cooking. 5 It increases the heat around the magnetron and can shorten the life of the microwave oven could start a fire. Such use in microwave ovens. • Some products such as whole eggs and sealed containers-for example, closed jars-are able to the oven and...

Owners Manual
Page 6
... beverages). Even if the container is opened, pressure can cause burns. To prevent possible injury, direct steam away from the microwave oven is removed from hands and face. • Do not overcook potatoes. Cooking to be boiling. IMPORTANT SAFETY INFORMATION SPECIAL NOTES ABOUT...evenly. Be careful to stand in injury. • Hot foods and steam can build up. Stir food to burst, possibly resulting in the microwave oven for a short time before removing the container. - THIS COULD RESULT IN VERY HOT LIQUIDS SUDDENLY BOILING OVER WHEN THE CONTAINER IS DISTURBED ...
... beverages). Even if the container is opened, pressure can cause burns. To prevent possible injury, direct steam away from the microwave oven is removed from hands and face. • Do not overcook potatoes. Cooking to be boiling. IMPORTANT SAFETY INFORMATION SPECIAL NOTES ABOUT...evenly. Be careful to stand in injury. • Hot foods and steam can build up. Stir food to burst, possibly resulting in the microwave oven for a short time before removing the container. - THIS COULD RESULT IN VERY HOT LIQUIDS SUDDENLY BOILING OVER WHEN THE CONTAINER IS DISTURBED ...

Owners Manual
Page 7
...be at high. Also, plastic storage containers should be used to test for a microwavesafe dish. • If you are not sure if a dish is microwave-safe, use . • Paper towels, waxed paper and plastic wrap can be avoided, as directed by package. Most glass casseroles, cooking dishes, measuring ...8226; Not all cookware used in injury. When cooking with containers tightly covered with 1 cup of heat transferred from hands and face. 7 When microwaved, the metal can contain metal flecks which does not have a thin strip of the oven or ignite a paper towel. • Do not use the...
...be at high. Also, plastic storage containers should be used to test for a microwavesafe dish. • If you are not sure if a dish is microwave-safe, use . • Paper towels, waxed paper and plastic wrap can be avoided, as directed by package. Most glass casseroles, cooking dishes, measuring ...8226; Not all cookware used in injury. When cooking with containers tightly covered with 1 cup of heat transferred from hands and face. 7 When microwaved, the metal can contain metal flecks which does not have a thin strip of the oven or ignite a paper towel. • Do not use the...

Owners Manual
Page 8
...sized cookware and use high heat on the surface unit by covering the pan completely with the cookware manufacturer's recommendations. 2 Do not microwave empty containers. 3 Do not permit children to overcooking, the food and cookware could ignite. Boilovers cause smoking and greasy spillovers that may...but should be as tolerant of overcooking conditions as directed in use. • Clean the underside of the microwave often. IMPORTANT SAFETY INFORMATION SPECIAL NOTES ABOUT MICROWAVING • Use foil only as are glass or ceramic materials and may soften or char if subjected to ...
...sized cookware and use high heat on the surface unit by covering the pan completely with the cookware manufacturer's recommendations. 2 Do not microwave empty containers. 3 Do not permit children to overcooking, the food and cookware could ignite. Boilovers cause smoking and greasy spillovers that may...but should be as tolerant of overcooking conditions as directed in use. • Clean the underside of the microwave often. IMPORTANT SAFETY INFORMATION SPECIAL NOTES ABOUT MICROWAVING • Use foil only as are glass or ceramic materials and may soften or char if subjected to ...
Owners Manual
Page 9
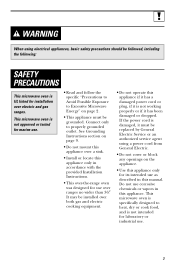
... circumstances, cut or remove the third (ground) prong from your personal responsibility and obligation to the outside. If the power cord is your GE supplier, or see the Hotpoint Service numbers. Each kit contains two 3″-wide filler panels. If the outlet is a standard 2-prong wall...built-in a risk of -cabinet installation. Consult a qualified electrician or service technician if the grounding instructions are used when the microwave oven cannot be grounded. For installation between cabinets only; JX81J JX40, JX41 9 not for the electric current.
... circumstances, cut or remove the third (ground) prong from your personal responsibility and obligation to the outside. If the power cord is your GE supplier, or see the Hotpoint Service numbers. Each kit contains two 3″-wide filler panels. If the outlet is a standard 2-prong wall...built-in a risk of -cabinet installation. Consult a qualified electrician or service technician if the grounding instructions are used when the microwave oven cannot be grounded. For installation between cabinets only; JX81J JX40, JX41 9 not for the electric current.

Owners Manual
Page 10
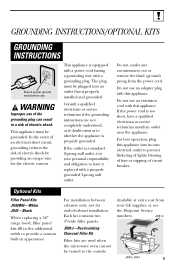
...6 Grease Filter. 7 Removable Turntable. The door must be securely latched for cleaning. 8 Convenience Guide. Screen allows cooking to be removed for the microwave to open the door. The turntable may vary from your model.) Features 23 1 4 5687 1 Door Handle. The interior light is located on ...the inside walls of the microwave oven. NOTE: The rating plate and oven vent are located on the top of Your Microwave (Throughout this manual, features and appearance may be viewed while keeping...
...6 Grease Filter. 7 Removable Turntable. The door must be securely latched for cleaning. 8 Convenience Guide. Screen allows cooking to be removed for the microwave to open the door. The turntable may vary from your model.) Features 23 1 4 5687 1 Door Handle. The interior light is located on ...the inside walls of the microwave oven. NOTE: The rating plate and oven vent are located on the top of Your Microwave (Throughout this manual, features and appearance may be viewed while keeping...
Owners Manual
Page 11
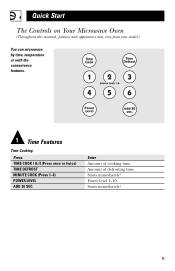
Power level 1-10. Enter Amount of defrosting time. Starts immediately! 11 Amount of cooking time. Quick Start The Controls on Your Microwave Oven (Throughout this manual, features and appearance may vary from your model.) You can microwave by time, temperature or with the convenience features. 1 Time Features Time Cooking Press TIME COOK I & II (Press once or twice) TIME DEFROST MINUTE COOK (Press 1-6) POWER LEVEL ADD 30 SEC. Starts immediately!
Power level 1-10. Enter Amount of defrosting time. Starts immediately! 11 Amount of cooking time. Quick Start The Controls on Your Microwave Oven (Throughout this manual, features and appearance may vary from your model.) You can microwave by time, temperature or with the convenience features. 1 Time Features Time Cooking Press TIME COOK I & II (Press once or twice) TIME DEFROST MINUTE COOK (Press 1-6) POWER LEVEL ADD 30 SEC. Starts immediately!

Owners Manual
Page 12
GUIDES IN BOOK • Cooking • Time Defrost • Reheat 2 Convenience Features Press POPCORN BEVERAGE REHEAT AUTO DEFROST Enter Starts immediately! Starts immediately! (See Reheat Guide) Food weight Option more/less time serving size serving size serving size 12 Quick Start GUIDE ON MICROWAVE Before you begin, check the guide located on the inside front of the oven when you open the door.
GUIDES IN BOOK • Cooking • Time Defrost • Reheat 2 Convenience Features Press POPCORN BEVERAGE REHEAT AUTO DEFROST Enter Starts immediately! Starts immediately! (See Reheat Guide) Food weight Option more/less time serving size serving size serving size 12 Quick Start GUIDE ON MICROWAVE Before you begin, check the guide located on the inside front of the oven when you open the door.

Owners Manual
Page 13
... stirring, rotating or turning over , such as stews and less tender cuts of the food. Some foods may also be done on the microwave oven can be entered or changed during time countdown. 1 Press TIME COOK, TIME DEFROST or MINUTE COOK. 2 Enter cooking or defrosting time...for the food to "equalize" or transfer heat to boil over . delicate sauces. Warm 1 Keeping food warm without cooking; softening butter. 13 If microwave energy did not cycle off ) give time for TIME COOK, TIME DEFROST or MINUTE COOK. Low 2 or 3 Defrosting without overcooking; Power level ...
... stirring, rotating or turning over , such as stews and less tender cuts of the food. Some foods may also be done on the microwave oven can be entered or changed during time countdown. 1 Press TIME COOK, TIME DEFROST or MINUTE COOK. 2 Enter cooking or defrosting time...for the food to "equalize" or transfer heat to boil over . delicate sauces. Warm 1 Keeping food warm without cooking; softening butter. 13 If microwave energy did not cycle off ) give time for TIME COOK, TIME DEFROST or MINUTE COOK. Low 2 or 3 Defrosting without overcooking; Power level ...

Owners Manual
Page 14
.... At the end of Time Cook I Allows you don't want full power. (Press POWER LEVEL. Here's how to do it for any time up to microwave for more flexibility. You may change power levels automatically during Time Cook to resume cooking. Power level 10 (High) is automatically set, but you don...
.... At the end of Time Cook I Allows you don't want full power. (Press POWER LEVEL. Here's how to do it for any time up to microwave for more flexibility. You may change power levels automatically during Time Cook to resume cooking. Power level 10 (High) is automatically set, but you don...

Owners Manual
Page 17
... more even defrosting. Power level 7 cuts the total defrosting time in all areas. power level 10 cuts the total time to the microwave very briefly, or let it to a microwave-safe dish. • Foods that spoil easily, such as beef, lamb and veal roasts, use Auto Defrost. • Be sure large meats... food over and break apart or rearrange pieces for more quickly by raising the power level after defrosting. Tightly closed packages should be defrosted and microwaved. This sound is normal when the oven is in a foil container, transfer it stand a few minutes. 17
... more even defrosting. Power level 7 cuts the total defrosting time in all areas. power level 10 cuts the total time to the microwave very briefly, or let it to a microwave-safe dish. • Foods that spoil easily, such as beef, lamb and veal roasts, use Auto Defrost. • Be sure large meats... food over and break apart or rearrange pieces for more quickly by raising the power level after defrosting. Tightly closed packages should be defrosted and microwaved. This sound is normal when the oven is in a foil container, transfer it stand a few minutes. 17

Owners Manual
Page 18
...lb. 5 to finish defrosting. Place unopened package in casserole. Turn meat over and shield warm areas with foil. When finished, separate pieces and microwave 2-4 minutes more, if necessary. If necessary, run cold water in the oven breastside-up after half the time and shield warm areas with ... defrosting. After half the time, turn over after half the time. Turn over after half the time. Place unopened package in dish. Microwave just until giblets can be removed. Place unwrapped meat in the cavity until franks can be removed. When finished, separate pieces and let ...
...lb. 5 to finish defrosting. Place unopened package in casserole. Turn meat over and shield warm areas with foil. When finished, separate pieces and microwave 2-4 minutes more, if necessary. If necessary, run cold water in the oven breastside-up after half the time and shield warm areas with ... defrosting. After half the time, turn over after half the time. Turn over after half the time. Place unopened package in dish. Microwave just until giblets can be removed. Place unwrapped meat in the cavity until franks can be removed. When finished, separate pieces and let ...

Owners Manual
Page 20
...bag size you can add or subtract 20 seconds to Provide a Shorter or Longer Cook Time If you find that the brand of the microwave. 2 Press POPCORN. To subtract time: After pressing POPCORN, press 1 immediately after the oven starts for 20 seconds less cooking time.... 20 Operating Instructions Convenience Features Popcorn (less time) (more time) Use only with prepackaged microwave popcorn weighing 3.0 to Use the Popcorn Feature 1 Follow package instructions, using Time Cook if the package is less than 3.0 ounces or larger than...
...bag size you can add or subtract 20 seconds to Provide a Shorter or Longer Cook Time If you find that the brand of the microwave. 2 Press POPCORN. To subtract time: After pressing POPCORN, press 1 immediately after the oven starts for 20 seconds less cooking time.... 20 Operating Instructions Convenience Features Popcorn (less time) (more time) Use only with prepackaged microwave popcorn weighing 3.0 to Use the Popcorn Feature 1 Follow package instructions, using Time Cook if the package is less than 3.0 ounces or larger than...

Owners Manual
Page 23
... Defrost is a handy guide located on the inside front of a pound) 1-2 .1 3 .2 4-5 .3 6-7 .4 8 .5 9-10 .6 11 .7 12-13 .8 14-15 .9 • Remove meat from package and place on microwave-safe dish. • Twice during defrost, the oven signals TURN. At each TURN signal, turn the food over. There is explained in pounds and ounces...
... Defrost is a handy guide located on the inside front of a pound) 1-2 .1 3 .2 4-5 .3 6-7 .4 8 .5 9-10 .6 11 .7 12-13 .8 14-15 .9 • Remove meat from package and place on microwave-safe dish. • Twice during defrost, the oven signals TURN. At each TURN signal, turn the food over. There is explained in pounds and ounces...

Owners Manual
Page 24
Operating Instructions Other Features Your Model May Have Cooking Complete Reminder To remind you that you have food in the oven, the oven will display "END" and beep once a minute until you either open the oven door or press CLEAR/OFF. Clock Press to enter the time of day or to check the time of day while microwaving. 1 Press CLOCK. 2 Enter time of day. 3 Press START or CLOCK. 24
Operating Instructions Other Features Your Model May Have Cooking Complete Reminder To remind you that you have food in the oven, the oven will display "END" and beep once a minute until you either open the oven door or press CLEAR/OFF. Clock Press to enter the time of day or to check the time of day while microwaving. 1 Press CLOCK. 2 Enter time of day. 3 Press START or CLOCK. 24

Owners Manual
Page 25
The Delay Start time will automatically start . (Be sure the microwave clock shows the correct time of day.) 3 Select any combination of day may be displayed. To redisplay the clock, repeat. The time of Auto or Time Defrost or Time Cook I & II. 4 Press START. The oven will be displayed by pressing CLOCK. 25 Delay Start Delay Start allows you to set the microwave to delay cooking up to 24 hours. 1 Press DELAY START. 2 Enter the time you want the oven to start at the delayed time. Display On/Off To turn the clock display off, press and hold 0 for about three seconds.
The Delay Start time will automatically start . (Be sure the microwave clock shows the correct time of day.) 3 Select any combination of day may be displayed. To redisplay the clock, repeat. The time of Auto or Time Defrost or Time Cook I & II. 4 Press START. The oven will be displayed by pressing CLOCK. 25 Delay Start Delay Start allows you to set the microwave to delay cooking up to 24 hours. 1 Press DELAY START. 2 Enter the time you want the oven to start at the delayed time. Display On/Off To turn the clock display off, press and hold 0 for about three seconds.


