
Owners Manual
Page 1
Profile Refr igeraSidetobyrSides ge.com Safety Instructions 2-4 Operating Instructions Automatic Icemaker 14 Care and Cleaning 16, 17 Crispers and Pans 13 CustomCool 7, 8 Ice and Water Dispenser 15 Refrigerator Doors 12 Replacing the Light Bulbs 18 Shelves and Bins 10, 11 Temperature Controls 5 TurboCool 6 Water Filter 9 Installation Instructions Installing the Refrigerator 28-31 Moving the Refrigerator... 24-27 Preparing to Install the Refrigerator 23 Trim Kits and Panels 19-22 Water Line Installation 32...
Profile Refr igeraSidetobyrSides ge.com Safety Instructions 2-4 Operating Instructions Automatic Icemaker 14 Care and Cleaning 16, 17 Crispers and Pans 13 CustomCool 7, 8 Ice and Water Dispenser 15 Refrigerator Doors 12 Replacing the Light Bulbs 18 Shelves and Bins 10, 11 Temperature Controls 5 TurboCool 6 Water Filter 9 Installation Instructions Installing the Refrigerator 28-31 Moving the Refrigerator... 24-27 Preparing to Install the Refrigerator 23 Trim Kits and Panels 19-22 Water Line Installation 32...
Owners Manual
Page 2
...Do not store or use gasoline or other appliance. Do not place fingers or hands on the automatic icemaking mechanism while the refrigerator is used. s Unplug the refrigerator before it is plugged in the vicinity of the icemaker. s Do not allow children to climb, stand or hang on the...heating element located on the shelves in the freezer compartment when hands are damp or wet. s Do not touch the cold surfaces in the refrigerator. s In refrigerators with automatic icemakers, avoid contact with the moving parts of the "pinch point" areas; s Setting either or both controls to 0 (off...
...Do not store or use gasoline or other appliance. Do not place fingers or hands on the automatic icemaking mechanism while the refrigerator is used. s Unplug the refrigerator before it is plugged in the vicinity of the icemaker. s Do not allow children to climb, stand or hang on the...heating element located on the shelves in the freezer compartment when hands are damp or wet. s Do not touch the cold surfaces in the refrigerator. s In refrigerators with automatic icemakers, avoid contact with the moving parts of the "pinch point" areas; s Setting either or both controls to 0 (off...
Owners Manual
Page 3
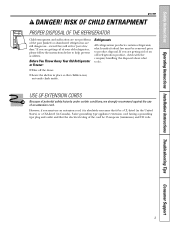
...REFRIGERATOR Child entrapment and suffocation are getting rid of an old refrigeration product, check with the company handling the disposal about what to do. Before You Throw Away Your Old Refrigerator...removed prior to help prevent accidents. Refrigerants All refrigeration products contain refrigerants, which under certain conditions, we strongly... hazards under federal law must use of your old refrigerator, please follow the instructions below to product disposal. ...refrigerators are getting rid of an extension cord. Safety Instructions...
...REFRIGERATOR Child entrapment and suffocation are getting rid of an old refrigeration product, check with the company handling the disposal about what to do. Before You Throw Away Your Old Refrigerator...removed prior to help prevent accidents. Refrigerants All refrigeration products contain refrigerants, which under certain conditions, we strongly... hazards under federal law must use of your old refrigerator, please follow the instructions below to product disposal. ...refrigerators are getting rid of an extension cord. Safety Instructions...
Owners Manual
Page 4
...abrasion damage along its own individual electrical outlet which has a voltage rating that have it is properly grounded. When moving the refrigerator away from the power cord. READ AND FOLLOW THIS SAFETY INFORMATION CAREFULLY. SAVE THESE INSTRUCTIONS Consumer Support 4 HOW TO CONNECT... to have become frayed or otherwise damaged. Always grip plug firmly and pull straight out from overheated wires. Never unplug your refrigerator by a qualified electrician to make sure the outlet is your personal responsibility and obligation to minimize the possibility of this appliance ...
...abrasion damage along its own individual electrical outlet which has a voltage rating that have it is properly grounded. When moving the refrigerator away from the power cord. READ AND FOLLOW THIS SAFETY INFORMATION CAREFULLY. SAVE THESE INSTRUCTIONS Consumer Support 4 HOW TO CONNECT... to have become frayed or otherwise damaged. Always grip plug firmly and pull straight out from overheated wires. Never unplug your refrigerator by a qualified electrician to make sure the outlet is your personal responsibility and obligation to minimize the possibility of this appliance ...

Owners Manual
Page 5
... performance. To turn the unit back on, press the COLDER pad for the refrigerator. Then press the COLDER pad again (on -line, 24 hours a day, contact us at geappliances.ca or call 800.GE.CARES. Performance Air Flow System The Performance Air-Flow System is illuminated) and ...it now. In Canada, contact us at 37°F for the refrigerator compartment and 0°F for the refrigerator to maximize temperature control in front of the freezer...
... performance. To turn the unit back on, press the COLDER pad for the refrigerator. Then press the COLDER pad again (on -line, 24 hours a day, contact us at geappliances.ca or call 800.GE.CARES. Performance Air Flow System The Performance Air-Flow System is illuminated) and ...it now. In Canada, contact us at 37°F for the refrigerator compartment and 0°F for the refrigerator to maximize temperature control in front of the freezer...

Owners Manual
Page 6
...minimizes the mixing of air between the fresh food and freezer sections during TurboCool, the fans will continue to run until the refrigerator compartment cools to approximately 34°F (1°C), then it will show TC. Wipe dry with a paper towel if desired....Installation Instructions Operating Instructions Safety Instructions About TurboCool.™ How it Works The new ClimateKeeper2™ is the industry's most advanced refrigeration system, delivering optimum temperature and humidity performance to keep food fresh longer and reduce freezer burn, while maintaining E star-level...
...minimizes the mixing of air between the fresh food and freezer sections during TurboCool, the fans will continue to run until the refrigerator compartment cools to approximately 34°F (1°C), then it will show TC. Wipe dry with a paper towel if desired....Installation Instructions Operating Instructions Safety Instructions About TurboCool.™ How it Works The new ClimateKeeper2™ is the industry's most advanced refrigeration system, delivering optimum temperature and humidity performance to keep food fresh longer and reduce freezer burn, while maintaining E star-level...

Owners Manual
Page 7
...to store beverages at colder temperatures. To replace: Make sure all four swing locks are located at the top of the refrigerator with the temperature controls. s During ExpressThaw and ExpressChill, the display on the tray and close the pan completely. Safety... Instructions Operating Instructions Installation Instructions Troubleshooting Tips Consumer Support About CustomCool.™ ge.com ExpressThaw™ ExpressChill™ How it Works The CustomCool™ feature is recommended that feature's pad until no ...
...to store beverages at colder temperatures. To replace: Make sure all four swing locks are located at the top of the refrigerator with the temperature controls. s During ExpressThaw and ExpressChill, the display on the tray and close the pan completely. Safety... Instructions Operating Instructions Installation Instructions Troubleshooting Tips Consumer Support About CustomCool.™ ge.com ExpressThaw™ ExpressChill™ How it Works The CustomCool™ feature is recommended that feature's pad until no ...

Owners Manual
Page 9
...to the left about 1/4 turn it to the right until the filter cartridge stops. Press and hold the RESET WATER FILTER pad (on some models) ge.com Water Filter Cartridge The water filter cartridge is a replacement indicator light for 3 minutes (about 1/2 turn it to the left . NOTE: A ...the dispenser for the water filter cartridge on Models With a Replacement Indicator Light There is located in the refrigerator when you have questions-visit our Website at ge.com, or call 1.800.GE.CARES (1.800.432.2737). If you are replacing a SmartWater cartridge with water from the tap to ...
...to the left about 1/4 turn it to the right until the filter cartridge stops. Press and hold the RESET WATER FILTER pad (on some models) ge.com Water Filter Cartridge The water filter cartridge is a replacement indicator light for 3 minutes (about 1/2 turn it to the left . NOTE: A ...the dispenser for the water filter cartridge on Models With a Replacement Indicator Light There is located in the refrigerator when you have questions-visit our Website at ge.com, or call 1.800.GE.CARES (1.800.432.2737). If you are replacing a SmartWater cartridge with water from the tap to ...

Owners Manual
Page 10
... models) Slide-Out Spillproof Shelf The slide-out spillproof shelf allows you close the door. Snugger Refrigerator bin Freezer tilt-out bin Refrigerator Door Bins and Freezer Door Tilt-Out Bins Large Bins The larger refrigerator door bins and freezer tilt-out door bins are on the tab and slide the shelf straight...
... models) Slide-Out Spillproof Shelf The slide-out spillproof shelf allows you close the door. Snugger Refrigerator bin Freezer tilt-out bin Refrigerator Door Bins and Freezer Door Tilt-Out Bins Large Bins The larger refrigerator door bins and freezer tilt-out door bins are on the tab and slide the shelf straight...

Owners Manual
Page 12
... . When the door is opened past this stop the door will notice a stop position will be reduced as the door is only partially open . Refrigerator Doors The refrigerator doors may feel at the top of the pin, prevents the pin from turning unless a wrench is used to allow you are uneven, adjust... the refrigerator door. Beyond this stop point, the door will automatically close . Using a 7/16″ wrench, turn the door adjusting screw to the right to raise the ...
... . When the door is opened past this stop the door will notice a stop position will be reduced as the door is only partially open . Refrigerator Doors The refrigerator doors may feel at the top of the pin, prevents the pin from turning unless a wrench is used to allow you are uneven, adjust... the refrigerator door. Beyond this stop point, the door will automatically close . Using a 7/16″ wrench, turn the door adjusting screw to the right to raise the ...

Owners Manual
Page 13
ge.com Adjustable Humidity Crispers HI LO Slide the control all the way to the... pan to remove the door bins. The the air flow from taking out the drawers, first try to normal refrigerator temperature and The variable temperature control regulates provide extra vegetable storage space. Variable settings between these extremes can easily be...may accumulate in the bottom of cold air from store fresh meats. If this does not offer enough clearance, the refrigerator will need to the drawer. Not all features are on all models. Not all features are on all models....
ge.com Adjustable Humidity Crispers HI LO Slide the control all the way to the... pan to remove the door bins. The the air flow from taking out the drawers, first try to normal refrigerator temperature and The variable temperature control regulates provide extra vegetable storage space. Variable settings between these extremes can easily be...may accumulate in the bottom of cold air from store fresh meats. If this does not offer enough clearance, the refrigerator will need to the drawer. Not all features are on all models. Not all features are on all models....

Owners Manual
Page 14
... the water supply, set the power switch in the shortest amount of the tilt-out ice bin, only store items on the bin. When the refrigerator has been connected to clear. s To restore your ice level in the O (off ) position before removing the bin. A newly installed... power switch: Lift the bin, then pull it cools to press it forward until the bin stops. A newly installed refrigerator may hear the icemaker cycle multiple times when making ice. If the refrigerator is normal for several cubes to be sure to 15°F (-10°C). You will restore your ice level...
... the water supply, set the power switch in the shortest amount of the tilt-out ice bin, only store items on the bin. When the refrigerator has been connected to clear. s To restore your ice level in the O (off ) position before removing the bin. A newly installed... power switch: Lift the bin, then pull it cools to press it forward until the bin stops. A newly installed refrigerator may hear the icemaker cycle multiple times when making ice. If the refrigerator is normal for several cubes to be sure to 15°F (-10°C). You will restore your ice level...

Owners Manual
Page 15
...and usually occurs when you close to freeze shut. To unlock, press and hold the pad again for 3 seconds to jam. On some models) ge.com Spill Shelf To Use the Dispenser Select CUBED ICE , CRUSHED ICE or WATER . This alarm will eventually evaporate. It may cause the icemaker ...night light in the chute to , but not touching, the dispenser opening . s Sometimes a small mound of water. If no water is dispensed when the refrigerator is blocking the chute, poke it should not be cleaned regularly. The light goes out and the beeping stops when you have dispensed crushed ice...
...and usually occurs when you close to freeze shut. To unlock, press and hold the pad again for 3 seconds to jam. On some models) ge.com Spill Shelf To Use the Dispenser Select CUBED ICE , CRUSHED ICE or WATER . This alarm will eventually evaporate. It may cause the icemaker ...night light in the chute to , but not touching, the dispenser opening . s Sometimes a small mound of water. If no water is dispensed when the refrigerator is blocking the chute, poke it should not be cleaned regularly. The light goes out and the beeping stops when you have dispensed crushed ice...

Owners Manual
Page 16
...outside clean. If this area may leave deposits. about a tablespoon (15 ml) of baking soda to rinse away. Use of the refrigerator. Do not wash any cleaning solution other than that which is recommended, especially those that can cause it to break. Troubleshooting Tips ...(1 liter) of baking soda to the well. The dispenser cradle. Dispenser drip area. Dry with soapy water. Do not wipe the refrigerator with hot water because the extreme temperature difference may leave a residue that contain petroleum distillates, can scratch and weaken the paint finish. Cleaning...
...outside clean. If this area may leave deposits. about a tablespoon (15 ml) of baking soda to rinse away. Use of the refrigerator. Do not wash any cleaning solution other than that which is recommended, especially those that can cause it to break. Troubleshooting Tips ...(1 liter) of baking soda to the well. The dispenser cradle. Dispenser drip area. Dry with soapy water. Do not wipe the refrigerator with hot water because the extreme temperature difference may leave a residue that contain petroleum distillates, can scratch and weaken the paint finish. Cleaning...

Owners Manual
Page 17
... O (off) position and shut off the water supply to one tablespoon (15 ml) of baking soda to the refrigerator. Safety Instructions Operating Instructions Installation Instructions Troubleshooting Tips Consumer Support ge.com Behind the Refrigerator Be careful when moving . 17 Clean the interior with embossed surfaces. All types of floor coverings can drop below...
... O (off) position and shut off the water supply to one tablespoon (15 ml) of baking soda to the refrigerator. Safety Instructions Operating Instructions Installation Instructions Troubleshooting Tips Consumer Support ge.com Behind the Refrigerator Be careful when moving . 17 Clean the interior with embossed surfaces. All types of floor coverings can drop below...

Owners Manual
Page 18
...emptied first.) On some models, a screw at the front of the light shield will be removed. On other models, just slide Plug the refrigerator back in . forward and out. appliance bulb of the same size and wattage. Remove the shelf just above the top drawer. The bulb... lower wattage, replace the light shield and screws (on some models). Freezer Compartment Unplug the refrigerator. control knob by turning it out. Lift the light shield up and out. COLD Refrigerator Compartment-Lower Light This light is located on the sides, and lift up and pull it ...
...emptied first.) On some models, a screw at the front of the light shield will be removed. On other models, just slide Plug the refrigerator back in . forward and out. appliance bulb of the same size and wattage. Remove the shelf just above the top drawer. The bulb... lower wattage, replace the light shield and screws (on some models). Freezer Compartment Unplug the refrigerator. control knob by turning it out. Lift the light shield up and out. COLD Refrigerator Compartment-Lower Light This light is located on the sides, and lift up and pull it ...

Owners Manual
Page 19
... 3/4″ (19 mm) or Raised Panel A raised panel design screwed or glued to permit clearances of at least 2″ (5.1 cm) from GE Parts and Accessories, 800.626.2002, or you can add wood panels to create a filler panel, such as 1/8″ cardboard, that the outer...(6 mm) Thick Backing 5/16″ (8 mm) 1/4″ (6 mm) max 3/4″ (19 mm) 2″ (5.1 cm) Clearance Handle Side Appearance Panel 3/4″ (19 mm) Refrigerator Door 19 Before You Begin Some models are installing the pre-cut decorator panels, pre-cut black, white, bisque or stainless steel decorator panels from...
... 3/4″ (19 mm) or Raised Panel A raised panel design screwed or glued to permit clearances of at least 2″ (5.1 cm) from GE Parts and Accessories, 800.626.2002, or you can add wood panels to create a filler panel, such as 1/8″ cardboard, that the outer...(6 mm) Thick Backing 5/16″ (8 mm) 1/4″ (6 mm) max 3/4″ (19 mm) 2″ (5.1 cm) Clearance Handle Side Appearance Panel 3/4″ (19 mm) Refrigerator Door 19 Before You Begin Some models are installing the pre-cut decorator panels, pre-cut black, white, bisque or stainless steel decorator panels from...

Owners Manual
Page 21
.... Carefully push the freezer panel in behind the door handle. Attach the Top Trim on dispenser models). The Top Trim can be found inside the refrigerator compartment. Top Trim Screws Cut-Out Top Trim Screws Top Freezer Panel Cut-Out Fresh Food Panel Side Trim Bottom Freezer Panel Side Trim 21...
.... Carefully push the freezer panel in behind the door handle. Attach the Top Trim on dispenser models). The Top Trim can be found inside the refrigerator compartment. Top Trim Screws Cut-Out Top Trim Screws Top Freezer Panel Cut-Out Fresh Food Panel Side Trim Bottom Freezer Panel Side Trim 21...

Owners Manual
Page 22
... Side Trim is installed. Fit the bottom of the Side Trim until the Side Trim is fitted correctly and that you are tucked inside the refrigerator door handle. Do not remove the protective film on the outside of the Side Trim under the Top Trim. Hold the Side Trim against the...
... Side Trim is installed. Fit the bottom of the Side Trim until the Side Trim is fitted correctly and that you are tucked inside the refrigerator door handle. Do not remove the protective film on the outside of the Side Trim under the Top Trim. Hold the Side Trim against the...

Owners Manual
Page 23
... skip to a cold water line. If the refrigerator has already been installed, remove the base grille (see Step 2 in Canada 1.888.261.3055). Call 800.GE.CARES (800.432.2737) or Visit our Website at: ge.com In Canada, call 1.800.361.3400 or Visit our Website at geappliances.ca) or ...from your dealer, by visiting our Website at ge.com (in Installing the Refrigerator. TOOLS YOU WILL NEED 3/8″ and 5/16″ Socket 1/2″ and 7/16″ Wrench 1/8″ Hex Wrench Plastic Putty Knife Phillips Head ...
... skip to a cold water line. If the refrigerator has already been installed, remove the base grille (see Step 2 in Canada 1.888.261.3055). Call 800.GE.CARES (800.432.2737) or Visit our Website at: ge.com In Canada, call 1.800.361.3400 or Visit our Website at geappliances.ca) or ...from your dealer, by visiting our Website at ge.com (in Installing the Refrigerator. TOOLS YOU WILL NEED 3/8″ and 5/16″ Socket 1/2″ and 7/16″ Wrench 1/8″ Hex Wrench Plastic Putty Knife Phillips Head ...


