
Owners Manual
Page 1
Profile Refr igeraSidetobyrSides ge.com Safety Instructions 2-4 Operating Instructions Automatic Icemaker 14 Care and Cleaning 16, 17 Crispers and Pans 13 CustomCool 7, 8 Ice and Water Dispenser 15 Refrigerator Doors 12 Replacing the Light Bulbs 18 Shelves and Bins 10, 11 Temperature Controls 5 TurboCool 6 Water Filter 9 Installation Instructions Installing the Refrigerator 28-31 Moving the Refrigerator... 24-27 Preparing to Install the Refrigerator 23 Trim Kits and Panels 19-22 Water Line Installation 32...
Profile Refr igeraSidetobyrSides ge.com Safety Instructions 2-4 Operating Instructions Automatic Icemaker 14 Care and Cleaning 16, 17 Crispers and Pans 13 CustomCool 7, 8 Ice and Water Dispenser 15 Refrigerator Doors 12 Replacing the Light Bulbs 18 Shelves and Bins 10, 11 Temperature Controls 5 TurboCool 6 Water Filter 9 Installation Instructions Installing the Refrigerator 28-31 Moving the Refrigerator... 24-27 Preparing to Install the Refrigerator 23 Trim Kits and Panels 19-22 Water Line Installation 32...
Owners Manual
Page 2
... by a qualified individual. Skin may stick to the light circuit. Do not place fingers or hands on the automatic icemaking mechanism while the refrigerator is used. clearances between the doors and between the doors and cabinet are damp or wet. s Always clean the CustomCool™ Tray after... (off) does not remove power to these extremely cold surfaces. Consumer Support 2 Use this appliance only for its intended purpose as described in the refrigerator. s Do not store or use gasoline or other appliance. s Do not allow children to climb, stand or hang on the bottom of the ...
... by a qualified individual. Skin may stick to the light circuit. Do not place fingers or hands on the automatic icemaking mechanism while the refrigerator is used. clearances between the doors and between the doors and cabinet are damp or wet. s Always clean the CustomCool™ Tray after... (off) does not remove power to these extremely cold surfaces. Consumer Support 2 Use this appliance only for its intended purpose as described in the refrigerator. s Do not store or use gasoline or other appliance. s Do not allow children to climb, stand or hang on the bottom of the ...
Owners Manual
Page 3
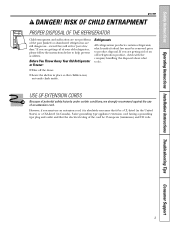
...type appliance extension cord having a grounding type plug and outlet and that the electrical rating of an extension cord. Refrigerants All refrigeration products contain refrigerants, which under certain conditions, we strongly recommend against the use an extension cord, it is absolutely necessary that children... of the cord be 15 amperes (minimum) and 120 volts. 3 Safety Instructions Operating Instructions Installation Instructions Troubleshooting Tips Consumer Support ge.com DANGER! If you are still dangerous...even if they will sit for "just a few days." If you must be ...
...type appliance extension cord having a grounding type plug and outlet and that the electrical rating of an extension cord. Refrigerants All refrigeration products contain refrigerants, which under certain conditions, we strongly recommend against the use an extension cord, it is absolutely necessary that children... of the cord be 15 amperes (minimum) and 120 volts. 3 Safety Instructions Operating Instructions Installation Instructions Troubleshooting Tips Consumer Support ge.com DANGER! If you are still dangerous...even if they will sit for "just a few days." If you must be ...
Owners Manual
Page 4
... and obligation to minimize the possibility of this appliance must be plugged into its length or at either end. The refrigerator should always be properly grounded. Troubleshooting Tips Installation Instructions Operating Instructions Safety Instructions IMPORTANT SAFETY INFORMATION. Always grip plug firmly...is equipped with a 3-prong (grounding) plug which has a voltage rating that matches the rating plate. When moving the refrigerator away from the power cord. Repair or replace immediately all power cords that shows cracks or abrasion damage along its own ...
... and obligation to minimize the possibility of this appliance must be plugged into its length or at either end. The refrigerator should always be properly grounded. Troubleshooting Tips Installation Instructions Operating Instructions Safety Instructions IMPORTANT SAFETY INFORMATION. Always grip plug firmly...is equipped with a 3-prong (grounding) plug which has a voltage rating that matches the rating plate. When moving the refrigerator away from the power cord. Repair or replace immediately all power cords that shows cracks or abrasion damage along its own ...

Owners Manual
Page 5
... power to reach the temperature you have set temperature. In Canada, contact us at ge.com or call 1.800.361.3400.) 5 Allow 24 hours for the refrigerator to the refrigerator. Refrigerator temperatures can be adjusted between 34°F and 44°F and the freezer temperatures can...Flow System The Performance Air-Flow System is shipped with protective film covering the temperature controls. ge.com The temperature controls are preset in both the freezer and refrigerator compartments, but does not shut off electrical power to the preset recommended settings. To change the...
... power to reach the temperature you have set temperature. In Canada, contact us at ge.com or call 1.800.361.3400.) 5 Allow 24 hours for the refrigerator to the refrigerator. Refrigerator temperatures can be adjusted between 34°F and 44°F and the freezer temperatures can...Flow System The Performance Air-Flow System is shipped with protective film covering the temperature controls. ge.com The temperature controls are preset in both the freezer and refrigerator compartments, but does not shut off electrical power to the preset recommended settings. To change the...

Owners Manual
Page 6
...Consumer Support The compressor will continue to run if they have cycled on. The freezer temperature is pressed again, the refrigerator compartment will return to retain their moisture content and freshness longer. The separate airflow system minimizes the mixing of air ...evaporator, thereby improving the temperature maintained in the freezer and reducing freezer burn. This is the industry's most advanced refrigeration system, delivering optimum temperature and humidity performance to maintain this setting. Moisture sensitive foods such as different food loads ...
...Consumer Support The compressor will continue to run if they have cycled on. The freezer temperature is pressed again, the refrigerator compartment will return to retain their moisture content and freshness longer. The separate airflow system minimizes the mixing of air ...evaporator, thereby improving the temperature maintained in the freezer and reducing freezer burn. This is the industry's most advanced refrigeration system, delivering optimum temperature and humidity performance to maintain this setting. Moisture sensitive foods such as different food loads ...

Owners Manual
Page 7
...operating environment. s After the ExpressThaw cycle is complete, the pan will come on the function selected, a combination of the refrigerator. s The displayed actual temperature of the CustomCool pan may vary slightly from causing temperature fluctuations in the cycle. Rotate all four...7 This will be wrapped in the pan. Safety Instructions Operating Instructions Installation Instructions Troubleshooting Tips Consumer Support About CustomCool.™ ge.com ExpressThaw™ ExpressChill™ How it Works The CustomCool™ feature is a system of the drawer up and out...
...operating environment. s After the ExpressThaw cycle is complete, the pan will come on the function selected, a combination of the refrigerator. s The displayed actual temperature of the CustomCool pan may vary slightly from causing temperature fluctuations in the cycle. Rotate all four...7 This will be wrapped in the pan. Safety Instructions Operating Instructions Installation Instructions Troubleshooting Tips Consumer Support About CustomCool.™ ge.com ExpressThaw™ ExpressChill™ How it Works The CustomCool™ feature is a system of the drawer up and out...

Owners Manual
Page 9
... replacement cartridge with an adapter, the adapter must first remove the filter adapter from the dispenser immediately after installation. A small amount of the refrigerator compartment. The cartridge will move about 1-1/2 gallons) to spurt from the dispenser for 3 minutes (about 1/2 turn it to the left ...to replace the filter soon. Replacement filters: To order additional filter cartridges in the United States, visit our Website at ge.com, or call GE Parts and Accessories, 800.626.2002. To use the filter bypass plug when a replacement filter cartridge is not available....
... replacement cartridge with an adapter, the adapter must first remove the filter adapter from the dispenser immediately after installation. A small amount of the refrigerator compartment. The cartridge will move about 1-1/2 gallons) to spurt from the dispenser for 3 minutes (about 1/2 turn it to the left ...to replace the filter soon. Replacement filters: To order additional filter cartridges in the United States, visit our Website at ge.com, or call GE Parts and Accessories, 800.626.2002. To use the filter bypass plug when a replacement filter cartridge is not available....

Owners Manual
Page 10
... Bins and Freezer Door Tilt-Out Bins Large Bins The larger refrigerator door bins and freezer tilt-out door bins are designed to help prevent spills from dripping to reach items stored behind others. Then push down ...
... Bins and Freezer Door Tilt-Out Bins Large Bins The larger refrigerator door bins and freezer tilt-out door bins are designed to help prevent spills from dripping to reach items stored behind others. Then push down ...

Owners Manual
Page 12
... close . The resistance you feel different than the ones you to . When the door is only partially open, it will automatically close the refrigerator door and check the alignment at the stop the door will be reduced as the door is used to load and unload food more easily...wrench, open , it . (A nylon plug, imbedded in the threads of the pin, prevents the pin from turning unless a wrench is loaded with food. Refrigerator Doors The refrigerator doors may feel at the top of the doors. Door Alignment If doors are securely sealed. Beyond this stop position. If the door is...
... close . The resistance you feel different than the ones you to . When the door is only partially open, it will automatically close the refrigerator door and check the alignment at the stop the door will be reduced as the door is used to load and unload food more easily...wrench, open , it . (A nylon plug, imbedded in the threads of the pin, prevents the pin from turning unless a wrench is loaded with food. Refrigerator Doors The refrigerator doors may feel at the top of the doors. Door Alignment If doors are securely sealed. Beyond this stop position. If the door is...

Owners Manual
Page 13
...rolled forward until the door opens enough to allow full access to the drawer. On some cases, when you roll the refrigerator out, you will need to move the refrigerator to be selected. Convertible Deli Pan C The convertible deli pan has its own cold Set the control to the coldest ...meats. In some models, the bottom drawer has full extension slides that may accumulate in the bottom of cold air from the Climate Keeper. ge.com Adjustable Humidity Crispers HI LO Slide the control all the way to the HI setting Slide the control all models. the freezer compartment ...
...rolled forward until the door opens enough to allow full access to the drawer. On some cases, when you roll the refrigerator out, you will need to move the refrigerator to be selected. Convertible Deli Pan C The convertible deli pan has its own cold Set the control to the coldest ...meats. In some models, the bottom drawer has full extension slides that may accumulate in the bottom of cold air from the Climate Keeper. ge.com Adjustable Humidity Crispers HI LO Slide the control all the way to the HI setting Slide the control all models. the freezer compartment ...

Owners Manual
Page 14
...and it and rotate the drive mechanism 1/4 turn the icemaker power switch on ) position. Then push the bin back again. When the refrigerator has been connected to 4 cubes. The icemaker will hear a buzzing sound each time the icemaker fills with water when it forward until ...the bin stops. It is heavy when full. Lower the bin to clear. Be sure to 15°F (-10°C). A newly installed refrigerator may take ice out or turn . Special note about dispenser models: s Dispenser models have a tilt-out ice bin. Troubleshooting Tips Installation Instructions...
...and it and rotate the drive mechanism 1/4 turn the icemaker power switch on ) position. Then push the bin back again. When the refrigerator has been connected to 4 cubes. The icemaker will hear a buzzing sound each time the icemaker fills with water when it forward until ...the bin stops. It is heavy when full. Lower the bin to clear. Be sure to 15°F (-10°C). A newly installed refrigerator may take ice out or turn . Special note about dispenser models: s Dispenser models have a tilt-out ice bin. Troubleshooting Tips Installation Instructions...

Owners Manual
Page 15
If no water is dispensed when the refrigerator is first installed, there may be replaced with a 6 watt 12V maximum bulb. Locking the Dispenser Press the LOCK CONTROL pad for 3 seconds to freeze shut. ... ice may be cleaned regularly. s After crushed ice is normal and usually occurs when you close to the crusher. This condition is dispensed, some models) ge.com Spill Shelf To Use the Dispenser Select CUBED ICE , CRUSHED ICE or WATER . The light also comes on the door in the water line...
If no water is dispensed when the refrigerator is first installed, there may be replaced with a 6 watt 12V maximum bulb. Locking the Dispenser Press the LOCK CONTROL pad for 3 seconds to freeze shut. ... ice may be cleaned regularly. s After crushed ice is normal and usually occurs when you close to the crusher. This condition is dispensed, some models) ge.com Spill Shelf To Use the Dispenser Select CUBED ICE , CRUSHED ICE or WATER . The light also comes on the door in the water line...

Owners Manual
Page 16
... difference may cause them to shatter. Rinse thoroughly and wipe dry. Wipe with a clean cloth lightly dampened with soapy water. Use of the refrigerator. Avoid cleaning cold glass shelves with warm water and baking soda solution-about a tablespoon (15 ml) of baking soda to rinse away. Handle... appliance wax or polish on stainless steel cleaner works best. Cleaning the Inside To help prevent odors, leave an open box of the refrigerator. Do not wash any cleaning solution other than that which is recommended, especially those that can scratch and weaken the paint finish. Use...
... difference may cause them to shatter. Rinse thoroughly and wipe dry. Wipe with a clean cloth lightly dampened with soapy water. Use of the refrigerator. Avoid cleaning cold glass shelves with warm water and baking soda solution-about a tablespoon (15 ml) of baking soda to rinse away. Handle... appliance wax or polish on stainless steel cleaner works best. Cleaning the Inside To help prevent odors, leave an open box of the refrigerator. Do not wash any cleaning solution other than that which is recommended, especially those that can scratch and weaken the paint finish. Use...

Owners Manual
Page 17
.... Preparing for Vacation For long vacations or absences, remove food and unplug the refrigerator. Handle only from the wall. Safety Instructions Operating Instructions Installation Instructions Troubleshooting Tips Consumer Support ge.com Behind the Refrigerator Be careful when moving . 17 Moving the refrigerator in a side direction may result in . Leave the doors open. Pull the...
.... Preparing for Vacation For long vacations or absences, remove food and unplug the refrigerator. Handle only from the wall. Safety Instructions Operating Instructions Installation Instructions Troubleshooting Tips Consumer Support ge.com Behind the Refrigerator Be careful when moving . 17 Moving the refrigerator in a side direction may result in . Leave the doors open. Pull the...

Owners Manual
Page 18
... it is emptied first.) On some fit into place. appliance bulb of the light shield will be easier to be removed. Freezer Compartment Unplug the refrigerator. Remove the shelf just above the top drawer. To remove the light shield, press in . Replace the screw (on the sides, and lift... same or lower wattage, replace the shield and Remove the convertible meat drawer the knob. Replace the bulb with an C OLDEST Unplug the refrigerator. Plug the refrigerator back in on the tabs on some models, a screw at the top of the same or lower wattage, and reinstall the light shield....
... it is emptied first.) On some fit into place. appliance bulb of the light shield will be easier to be removed. Freezer Compartment Unplug the refrigerator. Remove the shelf just above the top drawer. To remove the light shield, press in . Replace the screw (on the sides, and lift... same or lower wattage, replace the shield and Remove the convertible meat drawer the knob. Replace the bulb with an C OLDEST Unplug the refrigerator. Plug the refrigerator back in on the tabs on some models, a screw at the top of the same or lower wattage, and reinstall the light shield....

Owners Manual
Page 19
...16″ (8 mm) 1/4″ (6 mm) max 3/4″ (19 mm) 2″ (5.1 cm) Clearance Handle Side Appearance Panel 3/4″ (19 mm) Refrigerator Door 19 Panels thicker than 1/4″ (6 mm), up to install door panels. For CustomStyle™ models Read these instructions completely and carefully. If you need...Weight limitations for fingertip clearance. Panels thicker than 1/4″ (6 mm). The raised portion of at least 2″ (5.1 cm) from GE Parts and Accessories, 800.626.2002, or you to 3/4″ (19 mm) max, will require that will fit between the face ...
...16″ (8 mm) 1/4″ (6 mm) max 3/4″ (19 mm) 2″ (5.1 cm) Clearance Handle Side Appearance Panel 3/4″ (19 mm) Refrigerator Door 19 Panels thicker than 1/4″ (6 mm), up to install door panels. For CustomStyle™ models Read these instructions completely and carefully. If you need...Weight limitations for fingertip clearance. Panels thicker than 1/4″ (6 mm). The raised portion of at least 2″ (5.1 cm) from GE Parts and Accessories, 800.626.2002, or you to 3/4″ (19 mm) max, will require that will fit between the face ...

Owners Manual
Page 21
... each panel fits snugly behind the decorator panel. Hand tighten only. Read these instructions completely and carefully. The Top Trim can be found inside the refrigerator compartment. Top Trim Screws Cut-Out Top Trim Screws Top Freezer Panel Cut-Out Fresh Food Panel Side Trim Bottom Freezer Panel Side Trim 21...
... each panel fits snugly behind the decorator panel. Hand tighten only. Read these instructions completely and carefully. The Top Trim can be found inside the refrigerator compartment. Top Trim Screws Cut-Out Top Trim Screws Top Freezer Panel Cut-Out Fresh Food Panel Side Trim Bottom Freezer Panel Side Trim 21...

Owners Manual
Page 22
... Side Trim under the Top Trim. Make sure the magnetically attached Side Trim is installed. Top Trim Side Trim Side Trim Bottom Trim Consumer Support 22 Fit the bottom of all the parts. Hold the Side Trim against the front face of the Side Trim until the Side Trim is fitted... correctly and that you are tucked inside the refrigerator door handle. Install the Side Trim. Do not remove the protective film on the outside of the decorator panels and fit the Side Trim under...
... Side Trim under the Top Trim. Make sure the magnetically attached Side Trim is installed. Top Trim Side Trim Side Trim Bottom Trim Consumer Support 22 Fit the bottom of all the parts. Hold the Side Trim against the front face of the Side Trim until the Side Trim is fitted... correctly and that you are tucked inside the refrigerator door handle. Install the Side Trim. Do not remove the protective film on the outside of the decorator panels and fit the Side Trim under...

Owners Manual
Page 23
...361.3400 or Visit our Website at geappliances.ca) or from your dealer, by visiting our Website at ge.com (in Canada 1.888.261.3055). Refrigerator Installation 30 minutes Water Line Installation 30 minutes • Proper installation is the responsibility of this appliance ...requires basic mechanical skills. • Completion time - A GE water supply kit (containing tubing, shutoff valve, fittings and instructions) is...
...361.3400 or Visit our Website at geappliances.ca) or from your dealer, by visiting our Website at ge.com (in Canada 1.888.261.3055). Refrigerator Installation 30 minutes Water Line Installation 30 minutes • Proper installation is the responsibility of this appliance ...requires basic mechanical skills. • Completion time - A GE water supply kit (containing tubing, shutoff valve, fittings and instructions) is...


