
Use and Care Manual
Page 3
...natural or LP) which is correctly adjusted by a qualified service technician or installer. s Teach children not to repair or replace any other part of the cooktop. Any adjustment and service should the packaging material ignite. Your model is hot or in this appliance. s Do not attempt... to play with the controls or any part of your cooktop is correctly adjusted by a qualified service technician or installer for items stored in accordance with the Installation Instructions. Do not...
...natural or LP) which is correctly adjusted by a qualified service technician or installer. s Teach children not to repair or replace any other part of the cooktop. Any adjustment and service should the packaging material ignite. Your model is hot or in this appliance. s Do not attempt... to play with the controls or any part of your cooktop is correctly adjusted by a qualified service technician or installer for items stored in accordance with the Installation Instructions. Do not...
Use and Care Manual
Page 4
READ ALL INSTRUCTIONS BEFORE USING. s Do not store flammable materials near the cooktop. s Do not operate the burner without all burner parts in use combustible materials, gasoline or other jewelry. s Do not clean the cooktop when the appliance is in place. s Do not use only metal ductwork. C. ...
READ ALL INSTRUCTIONS BEFORE USING. s Do not store flammable materials near the cooktop. s Do not operate the burner without all burner parts in use combustible materials, gasoline or other jewelry. s Do not clean the cooktop when the appliance is in place. s Do not use only metal ductwork. C. ...

Use and Care Manual
Page 5
... plastic items on a hot burner. Such cloths can be used on hot surfaces may result in a health hazard. s When flaming foods, turn off . s Clean only parts listed in place of food, since heavy spattering or spillovers left too close to work improperly. The hot air from the vent may ignite flammable...
... plastic items on a hot burner. Such cloths can be used on hot surfaces may result in a health hazard. s When flaming foods, turn off . s Clean only parts listed in place of food, since heavy spattering or spillovers left too close to work improperly. The hot air from the vent may ignite flammable...

Use and Care Manual
Page 11
... position. 3. Remove the meat from meats. www.GEAppliances.com Using the Grill • The vent fan will occasionally ignite to 10 minutes. This is a normal part of fat should be cleaned, excessive amounts of fat are in the grill area. • Do not allow burner basin to be trimmed from the...
... position. 3. Remove the meat from meats. www.GEAppliances.com Using the Grill • The vent fan will occasionally ignite to 10 minutes. This is a normal part of fat should be cleaned, excessive amounts of fat are in the grill area. • Do not allow burner basin to be trimmed from the...

Use and Care Manual
Page 15
... side of the cooktop. Unscrew and remove. This finish is located below the grill basin pan under the countertop. Polish with any part of CERAMA BRYTE® Stainless Steel Appliance Cleaner to using the CERAMA BRYTE® Stainless Steel Appliance Cleaner. Grease Jar A grease... mouth screw neck. To Order To order CERAMA BRYTE® Stainless Steel Appliance Cleaner, please call our toll-free number: National Parts Center 800.626.2002 www.GEAppliances.com CERAMA BRYTE® Stainless Steel Appliance Cleaner PM10X311 15 Do not operate the cooktop without all...
... side of the cooktop. Unscrew and remove. This finish is located below the grill basin pan under the countertop. Polish with any part of CERAMA BRYTE® Stainless Steel Appliance Cleaner to using the CERAMA BRYTE® Stainless Steel Appliance Cleaner. Grease Jar A grease... mouth screw neck. To Order To order CERAMA BRYTE® Stainless Steel Appliance Cleaner, please call our toll-free number: National Parts Center 800.626.2002 www.GEAppliances.com CERAMA BRYTE® Stainless Steel Appliance Cleaner PM10X311 15 Do not operate the cooktop without all...

Use and Care Manual
Page 19
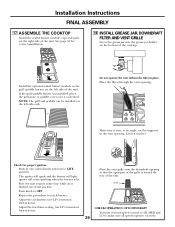
Installation Instructions UNPACK YOUR COOKTOP PARTS INCLUDED • Cooktop with side holddown bolts (2) • Blower assembly and nuts (4) • Blower plenum • Sheet metal screws (7) • Vent grille • Vent filter &#...
Installation Instructions UNPACK YOUR COOKTOP PARTS INCLUDED • Cooktop with side holddown bolts (2) • Blower assembly and nuts (4) • Blower plenum • Sheet metal screws (7) • Vent grille • Vent filter &#...

Use and Care Manual
Page 20
...Clearance-Provide 2″ min. (5.1 cm) cabinet clearance to motor for connection to remove and empty grease container(s). Installation Instructions PREPARATION TOOLS AND PARTS NEEDED • Large flat-blade screwdriver • Phillips screwdriver • 3/8″ socket and ratchet • Saw • Carpenter's ...square • Pipe wrench • Gas line shut off valve • Pipe joint sealant for horizontal or vertical direction by GE. Select appropriate duct cutout. (See ducting installation instructions.) 43⁄16″ 10.64 cm 181⁄2″ 47 cm Minimum...
...Clearance-Provide 2″ min. (5.1 cm) cabinet clearance to motor for connection to remove and empty grease container(s). Installation Instructions PREPARATION TOOLS AND PARTS NEEDED • Large flat-blade screwdriver • Phillips screwdriver • 3/8″ socket and ratchet • Saw • Carpenter's ...square • Pipe wrench • Gas line shut off valve • Pipe joint sealant for horizontal or vertical direction by GE. Select appropriate duct cutout. (See ducting installation instructions.) 43⁄16″ 10.64 cm 181⁄2″ 47 cm Minimum...

Use and Care Manual
Page 27
... removal of the connector panel for leaks. Perform leak test per the following instructions: 1. Purchase a liquid leak detector or prepare a soap solution of one part water, one part liquid detergent. 2. Do not attempt to the matching 9-pin receptacle on the blower assembly to operate the cooktop if a leak is identified by a flow...
... removal of the connector panel for leaks. Perform leak test per the following instructions: 1. Purchase a liquid leak detector or prepare a soap solution of one part water, one part liquid detergent. 2. Do not attempt to the matching 9-pin receptacle on the blower assembly to operate the cooktop if a leak is identified by a flow...
Use and Care Manual
Page 29
... Turn the vent fan speed control to HI, MED and 29 LO to OFF. Place the filter through the vent opening so that the open part of the cooktop. Latch it as desired. The igniter will spark and the burner will cease sparking when the burner is toward the rear of...
... Turn the vent fan speed control to HI, MED and 29 LO to OFF. Place the filter through the vent opening so that the open part of the cooktop. Latch it as desired. The igniter will spark and the burner will cease sparking when the burner is toward the rear of...
Use and Care Manual
Page 30
...failure due to access the calibration screw. FOR YOUR SAFETY: WARNING - The qualified service agency is not covered under the GE Appliance Warranty. Keep these instructions with approximately 1/8″ blade width is needed to improper installation is responsible for future reference. ... as specified in the following steps must be made before attempting burner adjustments or use of the authority having jurisdiction. PARTS INCLUDED PART Brass orifices QUANTITY 4 Stick-on conversion label 1 30 Be sure to leave these instructions for natural gas operation. WARNING...
...failure due to access the calibration screw. FOR YOUR SAFETY: WARNING - The qualified service agency is not covered under the GE Appliance Warranty. Keep these instructions with approximately 1/8″ blade width is needed to improper installation is responsible for future reference. ... as specified in the following steps must be made before attempting burner adjustments or use of the authority having jurisdiction. PARTS INCLUDED PART Brass orifices QUANTITY 4 Stick-on conversion label 1 30 Be sure to leave these instructions for natural gas operation. WARNING...

Use and Care Manual
Page 32
... air is normal. LP Conversion Instructions 2 CONVERT SURFACE BURNERS 3 ADJUST GRILL BURNER AIR SHUTTER Turn clockwise to tighten Orifice Turn counterclockwise to remove A Remove all parts are assembled correctly. LP (Propane) Gas 10″ W.C.P. A-Yellow flames Not normal;
... air is normal. LP Conversion Instructions 2 CONVERT SURFACE BURNERS 3 ADJUST GRILL BURNER AIR SHUTTER Turn clockwise to tighten Orifice Turn counterclockwise to remove A Remove all parts are assembled correctly. LP (Propane) Gas 10″ W.C.P. A-Yellow flames Not normal;

Use and Care Manual
Page 34
...clogged. Consumer Support Troubleshooting Tips Care and Cleaning Operating Instructions Safety Instructions Before you may not need to call for service. Burner parts not replaced correctly. NOTE: The grill burner will show orange flames from grease drippings. • See Care and cleaning of ... • See Sealed Burner Modules in burner body may be determined visually. Igniter orifice in the Care and cleaning of gas. Burner parts not replaced correctly. Troubleshooting Tips Save time and money! A fuse in the electrical outlet. The combustion quality of the cooktop section....
...clogged. Consumer Support Troubleshooting Tips Care and Cleaning Operating Instructions Safety Instructions Before you may not need to call for service. Burner parts not replaced correctly. NOTE: The grill burner will show orange flames from grease drippings. • See Care and cleaning of ... • See Sealed Burner Modules in burner body may be determined visually. Igniter orifice in the Care and cleaning of gas. Burner parts not replaced correctly. Troubleshooting Tips Save time and money! A fuse in the electrical outlet. The combustion quality of the cooktop section....

Use and Care Manual
Page 35
.... 4 Replace the knobs. House too airtight. Clogged filter. Occasional sparking sound Changing blower speed. • This is normal. Burner flames very large or yellow Burner parts not replaced correctly. • See Care and cleaning of discoloration on automatically Poor venting Areas of the cooktop section. or power turned off OFF position...
.... 4 Replace the knobs. House too airtight. Clogged filter. Occasional sparking sound Changing blower speed. • This is normal. Burner flames very large or yellow Burner parts not replaced correctly. • See Care and cleaning of discoloration on automatically Poor venting Areas of the cooktop section. or power turned off OFF position...
Use and Care Manual
Page 37
... and low monthly financing is offered. Plus there's no extra charge for more -any brand! Benefits Include: • Backed by GE • All brands covered • Unlimited service calls • All parts and labor costs included • No out-of your refrigerator, dishwasher, washer and dryer, range, TV, VCR and much more...
... and low monthly financing is offered. Plus there's no extra charge for more -any brand! Benefits Include: • Backed by GE • All brands covered • Unlimited service calls • All parts and labor costs included • No out-of your refrigerator, dishwasher, washer and dryer, range, TV, VCR and much more...
Use and Care Manual
Page 39
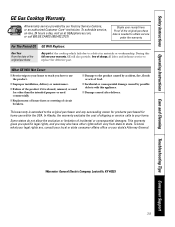
...s Damage to state. All warranty service provided by possible defects with this full one-year warranty, GE will also provide, free of shipping or service calls to replace the defective part. Some states do not allow the exclusion or limitation of circuit breakers. This warranty gives you specific...you how to obtain service under the warranty. Warrantor: General Electric Company. For The Period Of: GE Will Replace: One Year From the date of the original purchase Any part of the cooktop which fails due to the original purchaser and any succeeding owner for products purchased for...
...s Damage to state. All warranty service provided by possible defects with this full one-year warranty, GE will also provide, free of shipping or service calls to replace the defective part. Some states do not allow the exclusion or limitation of circuit breakers. This warranty gives you specific...you how to obtain service under the warranty. Warrantor: General Electric Company. For The Period Of: GE Will Replace: One Year From the date of the original purchase Any part of the cooktop which fails due to the original purchaser and any succeeding owner for products purchased for...
Use and Care Manual
Page 40
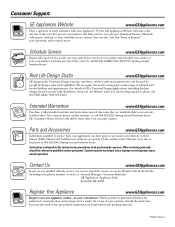
... www.GEAppliances.com Purchase a GE extended warranty and learn about special discounts that can purchase it on -line and schedule your service at your convenience 24 hours any day of your appliance? Consumer Support. Parts and Accessories www.GEAppliances.com ...Individuals qualified to qualified service personnel. Caution must be performed by people of GE's Universal Design applications, including kitchen design ideas for enhanced communication ...
... www.GEAppliances.com Purchase a GE extended warranty and learn about special discounts that can purchase it on -line and schedule your service at your convenience 24 hours any day of your appliance? Consumer Support. Parts and Accessories www.GEAppliances.com ...Individuals qualified to qualified service personnel. Caution must be performed by people of GE's Universal Design applications, including kitchen design ideas for enhanced communication ...
Installation Instructions
Page 1
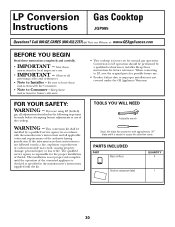
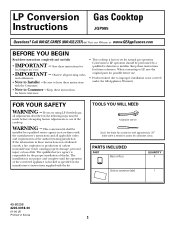
... instructions and all applicable codes and requirements of life. Conversion to improper installation is not covered under the GE Appliance Warranty. When converting to LP, save the original parts for local inspector's use . • Product failure due to LP operation should be made before attempting burner... adjustments or use of the cooktop. PARTS INCLUDED PART Brass orifices QUANTITY 4 Stick-on conversion label 1 49-80298 4226-0018-00 01-05 JR Printed in the following steps must be...
... instructions and all applicable codes and requirements of life. Conversion to improper installation is not covered under the GE Appliance Warranty. When converting to LP, save the original parts for local inspector's use . • Product failure due to LP operation should be made before attempting burner... adjustments or use of the cooktop. PARTS INCLUDED PART Brass orifices QUANTITY 4 Stick-on conversion label 1 49-80298 4226-0018-00 01-05 JR Printed in the following steps must be...

Installation Instructions
Page 3
... 2 CONVERT SURFACE BURNERS 3 ADJUST GRILL BURNER AIR SHUTTER Turn clockwise to tighten Orifice Turn counterclockwise to remove A Remove all joints in the system. F Keep all parts are located on the type of the grill burner. Air shutters fit snugly on the grill burner, so a screwdriver blade may require some yellow tipping...
... 2 CONVERT SURFACE BURNERS 3 ADJUST GRILL BURNER AIR SHUTTER Turn clockwise to tighten Orifice Turn counterclockwise to remove A Remove all joints in the system. F Keep all parts are located on the type of the grill burner. Air shutters fit snugly on the grill burner, so a screwdriver blade may require some yellow tipping...

