Owners Manual
Page 1
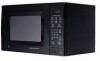
700 Watts Models: JES638 JES738 Microwave Oven Owner's Manual Important Safety Information 2 Precautions to Avoid Possible Exposure to Excessive Microwave Energy 2 Special Notes About Microwaving 6 Operating Instructions 11 Features of Your Microwave 11 The Controls on Your Microwave 12 Time Cooking 15 Automatic Cooking 18 Other Features 22 Helpful Information 25 Microwave Terms 25 Care and Cleaning 26 If Something Goes Wrong 28 Troubleshooting Tips 28 GE Service Numbers 31 Warranty Back Cover GE Appliances
700 Watts Models: JES638 JES738 Microwave Oven Owner's Manual Important Safety Information 2 Precautions to Avoid Possible Exposure to Excessive Microwave Energy 2 Special Notes About Microwaving 6 Operating Instructions 11 Features of Your Microwave 11 The Controls on Your Microwave 12 Time Cooking 15 Automatic Cooking 18 Other Features 22 Helpful Information 25 Microwave Terms 25 Care and Cleaning 26 If Something Goes Wrong 28 Troubleshooting Tips 28 GE Service Numbers 31 Warranty Back Cover GE Appliances
Owners Manual
Page 3
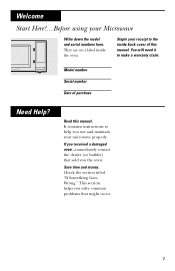
... inside back cover of purchase Need Help? It contains instructions to help you solve common problems that sold you the oven. This section helps you use and maintain your microwave properly. If you received a damaged oven...immediately contact the dealer (or builder) that might occur. 3 Welcome Start Here!...Before using your receipt to make a warranty claim. Model number Serial number Date of this manual. Staple your Microwave Write...
... inside back cover of purchase Need Help? It contains instructions to help you solve common problems that sold you the oven. This section helps you use and maintain your microwave properly. If you received a damaged oven...immediately contact the dealer (or builder) that might occur. 3 Welcome Start Here!...Before using your receipt to make a warranty claim. Model number Serial number Date of this manual. Staple your Microwave Write...
Owners Manual
Page 4
... locate this appliance only in accordance with the provided Installation Instructions. • Be certain to place the front surface of the door three inches or more back from the countertop edge to properly grounded outlet. This microwave oven is specifically designed to Excessive Microwave Energy" on top of the microwave oven surface when the oven is in operation. • Do not operate any heating or cooking...
... locate this appliance only in accordance with the provided Installation Instructions. • Be certain to place the front surface of the door three inches or more back from the countertop edge to properly grounded outlet. This microwave oven is specifically designed to Excessive Microwave Energy" on top of the microwave oven surface when the oven is in operation. • Do not operate any heating or cooking...

Owners Manual
Page 5
... opened, the fire may spread. • See door surface cleaning instructions in the oven. - Remove wire twist-ties and metal handles from heated surfaces. • Do not immerse power cord or plug in water. • Do not let power cord hang over edge of table or counter. • To reduce the risk of fire in use this appliance outdoors. Do not leave paper products, cooking utensils or food...
... opened, the fire may spread. • See door surface cleaning instructions in the oven. - Remove wire twist-ties and metal handles from heated surfaces. • Do not immerse power cord or plug in water. • Do not let power cord hang over edge of table or counter. • To reduce the risk of fire in use this appliance outdoors. Do not leave paper products, cooking utensils or food...
Owners Manual
Page 6
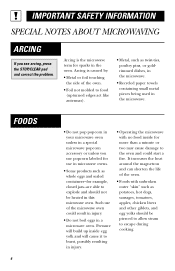
...to escape during cooking. Arcing is caused by: • Metal or foil touching the side of the microwave oven could start a fire. IMPORTANT SAFETY INFORMATION SPECIAL NOTES ABOUT MICROWAVING ARCING If you use popcorn labeled for use of the oven. • Foil not molded to food (upturned edges act... explode and should be heated in a special microwave popcorn accessory or unless you see arcing, press the STOP/CLEAR pad and correct the problem. FOODS 6 • Do not pop popcorn in your microwave oven unless in this microwave oven. Pressure will build up inside for more than a ...
...to escape during cooking. Arcing is caused by: • Metal or foil touching the side of the microwave oven could start a fire. IMPORTANT SAFETY INFORMATION SPECIAL NOTES ABOUT MICROWAVING ARCING If you use popcorn labeled for use of the oven. • Foil not molded to food (upturned edges act... explode and should be heated in a special microwave popcorn accessory or unless you see arcing, press the STOP/CLEAR pad and correct the problem. FOODS 6 • Do not pop popcorn in your microwave oven unless in this microwave oven. Pressure will build up inside for more than a ...
Owners Manual
Page 7
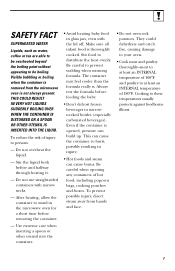
.... • Avoid heating baby food in the microwave oven for a short time before removing the container. - Stir food to be boiling. SAFETY FACT SUPERHEATED WATER Liquids, such as water, coffee or tea are able to be overheated beyond the boiling point without appearing to distribute the heat evenly. To reduce the risk of hot food, including popcorn bags, cooking pouches and boxes...
.... • Avoid heating baby food in the microwave oven for a short time before removing the container. - Stir food to be boiling. SAFETY FACT SUPERHEATED WATER Liquids, such as water, coffee or tea are able to be overheated beyond the boiling point without appearing to distribute the heat evenly. To reduce the risk of hot food, including popcorn bags, cooking pouches and boxes...
Owners Manual
Page 8
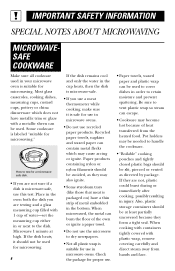
... because they are testing and a glass measuring cup filled with plastic wrap, remove covering carefully and direct steam away from the heated food. When microwaved, the metal can be used for microwaving. 8 If the dish remains cool and only the water in the cup heats, then the dish is microwave-safe. • If you use a meat thermometer while cooking, make sure it should be...
... because they are testing and a glass measuring cup filled with plastic wrap, remove covering carefully and direct steam away from the heated food. When microwaved, the metal can be used for microwaving. 8 If the dish remains cool and only the water in the cup heats, then the dish is microwave-safe. • If you use a meat thermometer while cooking, make sure it should be...
Owners Manual
Page 9
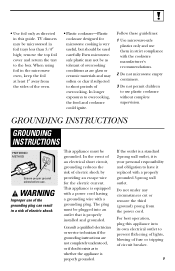
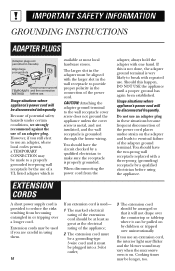
... be plugged into its own electrical outlet to prevent flickering of lights, blowing of fuse or tripping of circuit breaker. 9 For best operation, plug this guide. GROUNDING INSTRUCTIONS GROUNDING INSTRUCTIONS PREFERRED METHOD Ensure proper ground exists before use of the grounding plug can result in the microwave oven, keep the foil at least 1″ away from the power cord. TV dinners may soften...
... be plugged into its own electrical outlet to prevent flickering of lights, blowing of fuse or tripping of circuit breaker. 9 For best operation, plug this guide. GROUNDING INSTRUCTIONS GROUNDING INSTRUCTIONS PREFERRED METHOD Ensure proper ground exists before use of the grounding plug can result in the microwave oven, keep the foil at least 1″ away from the power cord. TV dinners may soften...
Owners Manual
Page 10
... hold the adapter with repeated use an extension cord, the interior light may flicker and the blower sound may be used - 1 The marked electrical rating of the extension cord should have the two-prong wall receptacle replaced with the larger slot in the wall receptacle to provide proper polarity in these situations because frequent disconnection of the power cord places undue strain on...
... hold the adapter with repeated use an extension cord, the interior light may flicker and the blower sound may be used - 1 The marked electrical rating of the extension cord should have the two-prong wall receptacle replaced with the larger slot in the wall receptacle to provide proper polarity in these situations because frequent disconnection of the power cord places undue strain on...
Owners Manual
Page 11
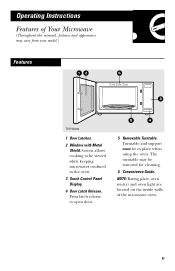
...vary from your model.) Features 12 6 3 700 Watts 1 Door Latches. 2 Window with Metal Shield. Screen allows cooking to open door. 5 4 5 Removable Turntable. Turntable and support must be in the oven. 3 Touch Control Panel Display. 4 Door Latch Release. Press latch release to be viewed while keeping microwaves confined in place when using the oven. NOTE: Rating plate, oven vent(s) and oven light are located on the inside walls of Your Microwave (Throughout this manual, features and appearance may be removed for cleaning. 6 Convenience Guide. Operating Instructions Features of...
...vary from your model.) Features 12 6 3 700 Watts 1 Door Latches. 2 Window with Metal Shield. Screen allows cooking to open door. 5 4 5 Removable Turntable. Turntable and support must be in the oven. 3 Touch Control Panel Display. 4 Door Latch Release. Press latch release to be viewed while keeping microwaves confined in place when using the oven. NOTE: Rating plate, oven vent(s) and oven light are located on the inside walls of Your Microwave (Throughout this manual, features and appearance may be removed for cleaning. 6 Convenience Guide. Operating Instructions Features of...
Owners Manual
Page 12
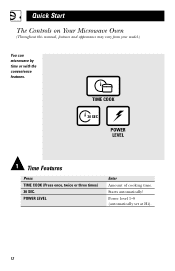
Starts automatically! POWER LEVEL Enter Amount of cooking time. Power level 1-9 (automatically set at Hi). 12 TIME COOK 30 SEC POWER LEVEL 1 Time Features Press TIME COOK (Press once, twice or three times) 30 SEC. Quick Start The Controls on Your Microwave Oven (Throughout this manual, features and appearance may vary from your model.) You can microwave by time or with the convenience features.
Starts automatically! POWER LEVEL Enter Amount of cooking time. Power level 1-9 (automatically set at Hi). 12 TIME COOK 30 SEC POWER LEVEL 1 Time Features Press TIME COOK (Press once, twice or three times) 30 SEC. Quick Start The Controls on Your Microwave Oven (Throughout this manual, features and appearance may vary from your model.) You can microwave by time or with the convenience features.
Owners Manual
Page 14
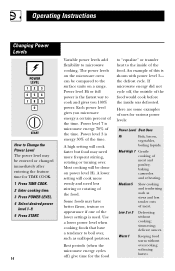
... on a range. softening butter. Some foods may have a tendency to cook and gives you microwave energy a certain percent of the food. baking casseroles and reheating. Rest periods (when the microwave energy cycles off , the outside of the food would cook before the inside of the time. the defrost cycle. Warm 1 Keeping food warm without cooking; The power levels on power level Hi. A high setting will cook faster but food may need less...
... on a range. softening butter. Some foods may have a tendency to cook and gives you microwave energy a certain percent of the food. baking casseroles and reheating. Rest periods (when the microwave energy cycles off , the outside of the food would cook before the inside of the time. the defrost cycle. Warm 1 Keeping food warm without cooking; The power levels on power level Hi. A high setting will cook faster but food may need less...

Owners Manual
Page 15
Time Cook I Allows you to microwave for instructions on how to set a third cooking stage, repeat steps 4-6 and press START. Select a desired power level 1-9.) 4 Press START. Select a power level 1-9.) 7 Press START, or, to check the food. Power level Hi is automatically set, but you may open the door during cooking. Select a desired power level 1-9.) 4 Press TIME COOK again. 5 Enter the second cook time. 6 Change the power level if you change it for a total of four stages. In addition, you can also...
Time Cook I Allows you to microwave for instructions on how to set a third cooking stage, repeat steps 4-6 and press START. Select a desired power level 1-9.) 4 Press START. Select a power level 1-9.) 7 Press START, or, to check the food. Power level Hi is automatically set, but you may open the door during cooking. Select a desired power level 1-9.) 4 Press TIME COOK again. 5 Enter the second cook time. 6 Change the power level if you change it for a total of four stages. In addition, you can also...

Owners Manual
Page 16
... 9 to 13 min. 5 to 14 min. casserole, place 1/4 cup (about 2 lbs.) water. (wedges) 7 to 8 min. package 5 to 10 min. Operating Instructions Cooking Guide for Time Cook NOTE: Use power level Hi unless otherwise noted. In 1-qt. In 1-qt. Broccoli (fresh cut in half 12 to 8 min. casserole. (frozen spears) 10-oz. package 5 to 9 min. (frozen) 10-oz. Carrots (fresh, sliced...
... 9 to 13 min. 5 to 14 min. casserole, place 1/4 cup (about 2 lbs.) water. (wedges) 7 to 8 min. package 5 to 10 min. Operating Instructions Cooking Guide for Time Cook NOTE: Use power level Hi unless otherwise noted. In 1-qt. In 1-qt. Broccoli (fresh cut in half 12 to 8 min. casserole. (frozen spears) 10-oz. package 5 to 9 min. (frozen) 10-oz. Carrots (fresh, sliced...

Owners Manual
Page 19
....). Remove the container with the Beverage feature may be changed by pressing POTATO a second time for 2 potatoes, a third time for 3 potatoes or a fourth time for 4 potatoes. The serving size is at 1, but can be very hot. Beverage BEVERAGE Potato POTATO The Beverage feature works best for heating a beverage that is automatically set at room temperature. The oven starts automatically. 19 Beverages heated with care...
....). Remove the container with the Beverage feature may be changed by pressing POTATO a second time for 2 potatoes, a third time for 3 potatoes or a fourth time for 4 potatoes. The serving size is at 1, but can be very hot. Beverage BEVERAGE Potato POTATO The Beverage feature works best for heating a beverage that is automatically set at room temperature. The oven starts automatically. 19 Beverages heated with care...

Owners Manual
Page 21
... Food Weight (tenths of the oven. Remove defrosted meat or shield warm areas with small pieces of food is a handy guide located on the inside front of a pound) 1-2 .1 3 .2 4-5 .3 6-7 .4 8 .5 9-10 .6 11 .7 12-13 .8 14-15 .9 • Remove meat from package and place on microwave-safe dish. • Twice during defrost, the oven signals. At each signal, turn the food over. Auto Defrost * * * AUTO DEFROST 123 456 789 0 START 1 Press AUTO DEFROST 1-3 times to complete defrosting...
... Food Weight (tenths of the oven. Remove defrosted meat or shield warm areas with small pieces of food is a handy guide located on the inside front of a pound) 1-2 .1 3 .2 4-5 .3 6-7 .4 8 .5 9-10 .6 11 .7 12-13 .8 14-15 .9 • Remove meat from package and place on microwave-safe dish. • Twice during defrost, the oven signals. At each signal, turn the food over. Auto Defrost * * * AUTO DEFROST 123 456 789 0 START 1 Press AUTO DEFROST 1-3 times to complete defrosting...

Owners Manual
Page 25
... or foil touching the side of wings and legs on a cooling rack. Note that is not molded to shield thin parts, such as roasts or cakes are allowed to stand to finish cooking or to set. Helpful Information Microwave Terms Term Arcing Covering Shielding Standing Time Venting Definition Arcing is the microwave term for more even heating and reduce cooking time. After covering a dish...
... or foil touching the side of wings and legs on a cooling rack. Note that is not molded to shield thin parts, such as roasts or cakes are allowed to stand to finish cooking or to set. Helpful Information Microwave Terms Term Arcing Covering Shielding Standing Time Venting Definition Arcing is the microwave term for more even heating and reduce cooking time. After covering a dish...
Owners Manual
Page 26
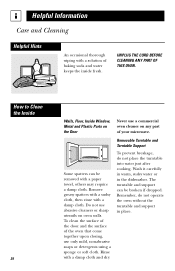
How to Clean the Inside 26 Walls, Floor, Inside Window, Metal and Plastic Parts on the Door Never use a commercial oven cleaner on oven walls. Do not use only mild, nonabrasive soaps or detergents using a sponge or soft cloth. Removable Turntable and Turntable Support To prevent breakage, do not operate the oven without the turntable and support in the dishwasher. To clean the surface of the door and the surface of the oven that...
How to Clean the Inside 26 Walls, Floor, Inside Window, Metal and Plastic Parts on the Door Never use a commercial oven cleaner on oven walls. Do not use only mild, nonabrasive soaps or detergents using a sponge or soft cloth. Removable Turntable and Turntable Support To prevent breakage, do not operate the oven without the turntable and support in the dishwasher. To clean the surface of the door and the surface of the oven that...

Owners Manual
Page 28
...; Replace fuse or reset circuit breaker. • Unplug the microwave oven, then plug it . STOP/CLEAR was pressed accidentally. Cooking time not entered after pressing AUTO DEFROST. 28 If Something Goes Wrong Troubleshooting Tips Problem Oven will not start Possible Cause What to cancel it back in your home may be blown or the circuit breaker tripped. Plug not fully inserted into wall outlet. Control panel lighted, yet oven will not start Door...
...; Replace fuse or reset circuit breaker. • Unplug the microwave oven, then plug it . STOP/CLEAR was pressed accidentally. Cooking time not entered after pressing AUTO DEFROST. 28 If Something Goes Wrong Troubleshooting Tips Problem Oven will not start Possible Cause What to cancel it back in your home may be blown or the circuit breaker tripped. Plug not fully inserted into wall outlet. Control panel lighted, yet oven will not start Door...
Owners Manual
Page 32
You are responsible for providing adequate electrical, exhausting and other than the intended maintenance. To know what your state's Attorney General. What Is Not Covered • Customer instruction. This owner's manual • Replacement of house fuses or resetting provides information regarding operating of God. • Incidental or consequential damage caused by accident, fire, floods or acts of circuit breakers. If you have other...
You are responsible for providing adequate electrical, exhausting and other than the intended maintenance. To know what your state's Attorney General. What Is Not Covered • Customer instruction. This owner's manual • Replacement of house fuses or resetting provides information regarding operating of God. • Incidental or consequential damage caused by accident, fire, floods or acts of circuit breakers. If you have other...


