Quick Specs
Page 1
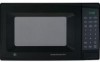
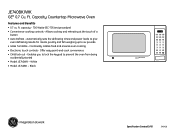
Ft. Depth does not include handle Note: This unit designed to your Monogram,® GE Profile™ or GE® appliance questions, visit our website at ge.com or call GE Answer Center® service, 800.626.2000. For answers to be placed on countertop. Capacity Countertop Microwave Oven Dimensions and Installation Information (in inches) Exterior Dimensions* H x W x D 11-1/16 x 17-7/8 x 12-5/16 *Height includes feet. R Specification Created 3/05 Listed by Underwriters Laboratories 340426 JE740BK/WK GE® 0.7 Cu.
Ft. Depth does not include handle Note: This unit designed to your Monogram,® GE Profile™ or GE® appliance questions, visit our website at ge.com or call GE Answer Center® service, 800.626.2000. For answers to be placed on countertop. Capacity Countertop Microwave Oven Dimensions and Installation Information (in inches) Exterior Dimensions* H x W x D 11-1/16 x 17-7/8 x 12-5/16 *Height includes feet. R Specification Created 3/05 Listed by Underwriters Laboratories 340426 JE740BK/WK GE® 0.7 Cu.
Quick Specs
Page 2
Capacity Countertop Microwave Oven Features and Benefits • 0.7 cu. capacity - 700 Watts (IEC-705 test procedure) • Convenience cooking controls - Allows cooking and reheating at the touch of a button • Auto Defrost - Offer easy point-and-cook convenience • Child lock out - White • Model JE740BK - Timer Start Stop Clear Specification Created 3/05 340426 JE740BK/WK GE® 0.7 Cu. Automatically sets the defrosting times and power levels to give even defrosting results for meats, poultry and fish weighing up to prevent the oven from...
Capacity Countertop Microwave Oven Features and Benefits • 0.7 cu. capacity - 700 Watts (IEC-705 test procedure) • Convenience cooking controls - Allows cooking and reheating at the touch of a button • Auto Defrost - Offer easy point-and-cook convenience • Child lock out - White • Model JE740BK - Timer Start Stop Clear Specification Created 3/05 340426 JE740BK/WK GE® 0.7 Cu. Automatically sets the defrosting times and power levels to give even defrosting results for meats, poultry and fish weighing up to prevent the oven from...
Use and Care Manual
Page 1
700 Watts Model: JE740 Microwave Oven Owner's Manual Important Safety Information 2 Precautions to Avoid Possible Exposure to Excessive Microwave Energy 2 Special Notes About Microwaving 6 Operating Instructions 11 Features of Your Microwave 11 The Controls on Your Microwave 12 Time Cooking 15 Automatic Cooking 18 Other Features 22 Helpful Information 25 Microwave Terms 25 Care and Cleaning 26 If Something Goes Wrong 28 Troubleshooting Tips 28 GE Service Numbers 31 Warranty Back Cover GE Appliances 3828W5A8483 49-40489 01-06 JR
700 Watts Model: JE740 Microwave Oven Owner's Manual Important Safety Information 2 Precautions to Avoid Possible Exposure to Excessive Microwave Energy 2 Special Notes About Microwaving 6 Operating Instructions 11 Features of Your Microwave 11 The Controls on Your Microwave 12 Time Cooking 15 Automatic Cooking 18 Other Features 22 Helpful Information 25 Microwave Terms 25 Care and Cleaning 26 If Something Goes Wrong 28 Troubleshooting Tips 28 GE Service Numbers 31 Warranty Back Cover GE Appliances 3828W5A8483 49-40489 01-06 JR
Use and Care Manual
Page 4
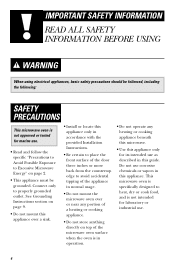
... over a sink. • Install or locate this appliance only in accordance with the provided Installation Instructions. • Be certain to place the front surface of the door three inches or more back from the countertop edge to heat, dry or cook food, and is not intended for laboratory or industrial use as described in this guide. This microwave oven is specifically designed to avoid...
... over a sink. • Install or locate this appliance only in accordance with the provided Installation Instructions. • Be certain to place the front surface of the door three inches or more back from the countertop edge to heat, dry or cook food, and is not intended for laboratory or industrial use as described in this guide. This microwave oven is specifically designed to avoid...
Use and Care Manual
Page 5
...; See door surface cleaning instructions in the Care and Cleaning section(s) of this product near a sink or in similar locations. • Keep power cord away from paper or plastic containers before placing them in water. • Do not let power cord hang over edge of table or counter. • To reduce the risk of the microwave. Remove wire twist-ties and metal handles from heated surfaces. •...
...; See door surface cleaning instructions in the Care and Cleaning section(s) of this product near a sink or in similar locations. • Keep power cord away from paper or plastic containers before placing them in water. • Do not let power cord hang over edge of table or counter. • To reduce the risk of the microwave. Remove wire twist-ties and metal handles from heated surfaces. •...
Use and Care Manual
Page 6
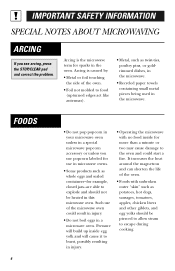
... and will cause it to the oven and could result in injury. • Do not boil eggs in the microwave. Arcing is caused by: • Metal or foil touching the side of the oven. • Foods with no food inside for sparks in a special microwave popcorn accessory or unless you see arcing, press the STOP/CLEAR pad and correct the problem.
... and will cause it to the oven and could result in injury. • Do not boil eggs in the microwave. Arcing is caused by: • Metal or foil touching the side of the oven. • Foods with no food inside for sparks in a special microwave popcorn accessory or unless you see arcing, press the STOP/CLEAR pad and correct the problem.
Use and Care Manual
Page 7
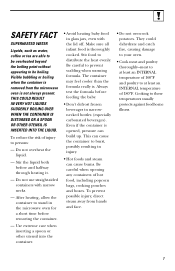
... liquid both before removing the container. - Always test the formula before feeding the baby. • Don't defrost frozen beverages in injury. • Hot foods and steam can cause burns. Be careful when opening any containers of injury to stand in glass jars, even with...opened, pressure can cause the container to distribute the heat evenly. Visible bubbling or boiling when the container is removed from hands and face. • Do not overcook potatoes. To prevent possible injury, direct steam away from the microwave oven is thoroughly cooked. Make sure all infant food...
... liquid both before removing the container. - Always test the formula before feeding the baby. • Don't defrost frozen beverages in injury. • Hot foods and steam can cause burns. Be careful when opening any containers of injury to stand in glass jars, even with...opened, pressure can cause the container to distribute the heat evenly. Visible bubbling or boiling when the container is removed from hands and face. • Do not overcook potatoes. To prevent possible injury, direct steam away from the microwave oven is thoroughly cooked. Make sure all infant food...
Use and Care Manual
Page 8
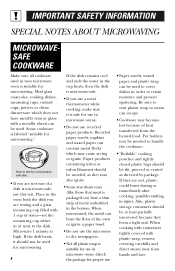
... packaged on) have metallic trim or glaze with plastic wrap, remove covering carefully and direct steam away from the heated food. IMPORTANT SAFETY INFORMATION SPECIAL NOTES ABOUT MICROWAVING MICROWAVESAFE COOKWARE Make sure all plastic wrap is suitable for use in microwave ovens. If the dish heats, it is suitable for microwaving. When microwaved, the metal can be slit, pierced or vented as they are not...
... packaged on) have metallic trim or glaze with plastic wrap, remove covering carefully and direct steam away from the heated food. IMPORTANT SAFETY INFORMATION SPECIAL NOTES ABOUT MICROWAVING MICROWAVESAFE COOKWARE Make sure all plastic wrap is suitable for use in microwave ovens. If the dish heats, it is suitable for microwaving. When microwaved, the metal can be slit, pierced or vented as they are not...
Use and Care Manual
Page 9
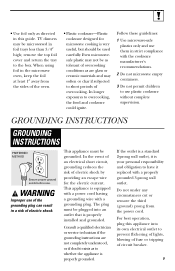
... the power cord. In the event of an electrical short circuit, grounding reduces the risk of the oven. • Plastic cookware-Plastic cookware designed for the electric current. Do not under any circumstances cut or remove the third (ground) prong from the sides of electric shock by providing an escape wire for microwave cooking is properly installed and grounded. For best operation, plug this guide...
... the power cord. In the event of an electrical short circuit, grounding reduces the risk of the oven. • Plastic cookware-Plastic cookware designed for the electric current. Do not under any circumstances cut or remove the third (ground) prong from the sides of electric shock by providing an escape wire for microwave cooking is properly installed and grounded. For best operation, plug this guide...
Use and Care Manual
Page 10
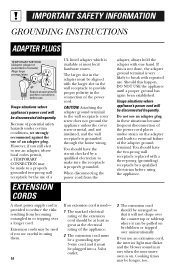
... as great as the electrical rating of the appliance; 2 The extension cord must be a grounding-type 3-wire cord and it must be aligned with a three-prong (grounding) receptacle by a qualified electrician before use an extension cord, the interior light may flicker and the blower sound may be used if you are careful in using the appliance. EXTENSION CORDS A short power supply cord is provided to...
... as great as the electrical rating of the appliance; 2 The extension cord must be a grounding-type 3-wire cord and it must be aligned with a three-prong (grounding) receptacle by a qualified electrician before use an extension cord, the interior light may flicker and the blower sound may be used if you are careful in using the appliance. EXTENSION CORDS A short power supply cord is provided to...
Use and Care Manual
Page 11
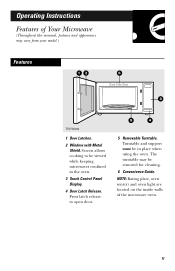
...to be removed for cleaning. 6 Convenience Guide. Turntable and support must be in the oven. 3 Touch Control Panel Display. 4 Door Latch Release. Screen allows cooking to open door. 5 4 5 Removable Turntable. The turntable may vary from your model.) Features 12 6 3 700 Watts 1 Door Latches. 2 Window with Metal Shield. NOTE: Rating plate, oven vent(s) and oven light are located on the inside walls of Your Microwave (Throughout this manual, features and appearance may be viewed while keeping microwaves confined in place when using the oven. Operating Instructions Features...
...to be removed for cleaning. 6 Convenience Guide. Turntable and support must be in the oven. 3 Touch Control Panel Display. 4 Door Latch Release. Screen allows cooking to open door. 5 4 5 Removable Turntable. The turntable may vary from your model.) Features 12 6 3 700 Watts 1 Door Latches. 2 Window with Metal Shield. NOTE: Rating plate, oven vent(s) and oven light are located on the inside walls of Your Microwave (Throughout this manual, features and appearance may be viewed while keeping microwaves confined in place when using the oven. Operating Instructions Features...
Use and Care Manual
Page 12
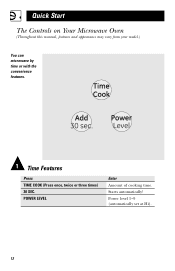
Starts automatically! Quick Start The Controls on Your Microwave Oven (Throughout this manual, features and appearance may vary from your model.) You can microwave by time or with the convenience features. 1 Time Features Press TIME COOK (Press once, twice or three times) 30 SEC. Power level 1-9 (automatically set at Hi). 12 POWER LEVEL Enter Amount of cooking time.
Starts automatically! Quick Start The Controls on Your Microwave Oven (Throughout this manual, features and appearance may vary from your model.) You can microwave by time or with the convenience features. 1 Time Features Press TIME COOK (Press once, twice or three times) 30 SEC. Power level 1-9 (automatically set at Hi). 12 POWER LEVEL Enter Amount of cooking time.
Use and Care Manual
Page 14
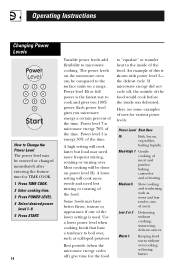
... time. A lower setting will cook faster but food may need more evenly and need less stirring or rotating of the food. Rest periods (when the microwave energy cycles off , the outside of this is the fastest way to boil over . Power level Hi or full power is shown with power level 3- the defrost cycle. softening butter. Low 2 or 3 Defrosting without overcooking; simmering; Operating Instructions Changing Power Levels How to Change the Power Level The power level...
... time. A lower setting will cook faster but food may need more evenly and need less stirring or rotating of the food. Rest periods (when the microwave energy cycles off , the outside of this is the fastest way to boil over . Power level Hi or full power is shown with power level 3- the defrost cycle. softening butter. Low 2 or 3 Defrosting without overcooking; simmering; Operating Instructions Changing Power Levels How to Change the Power Level The power level...
Use and Care Manual
Page 15
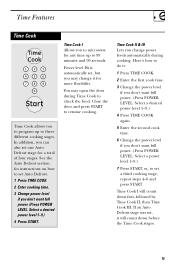
Time Cook II & III Lets you may open the door during cooking. Power level Hi is automatically set, but you change it will count down before the Time Cook stages. 15 See the Auto Defrost section for any time up to check the food. Here's how to set a third cooking stage, repeat steps 4-6 and press START. Select a desired power level 1-9.) 4 Press START. Select a power level 1-9.) 7 Press START, or, to resume cooking. Time Cook I Allows you to microwave for instructions on...
Time Cook II & III Lets you may open the door during cooking. Power level Hi is automatically set, but you change it will count down before the Time Cook stages. 15 See the Auto Defrost section for any time up to check the food. Here's how to set a third cooking stage, repeat steps 4-6 and press START. Select a desired power level 1-9.) 4 Press START. Select a power level 1-9.) 7 Press START, or, to resume cooking. Time Cook I Allows you to microwave for instructions on...
Use and Care Manual
Page 21
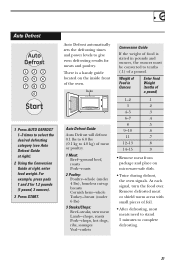
... Conversion Guide If the weight of food is a handy guide located on microwave-safe dish. • Twice during defrost, the oven signals. At each signal, turn the food over. Weight of a pound. Auto Defrost automatically sets the defrosting times and power levels to tenths (.1) of Food in pounds and ounces, the ounces must be converted to give even defrosting results for 1.2 pounds (1 pound, 3 ounces). 3 Press START. Auto Defrost 1 Press AUTO DEFROST 1-3 times to complete defrosting. 21 Remove defrosted meat...
... Conversion Guide If the weight of food is a handy guide located on microwave-safe dish. • Twice during defrost, the oven signals. At each signal, turn the food over. Weight of a pound. Auto Defrost automatically sets the defrosting times and power levels to tenths (.1) of Food in pounds and ounces, the ounces must be converted to give even defrosting results for 1.2 pounds (1 pound, 3 ounces). 3 Press START. Auto Defrost 1 Press AUTO DEFROST 1-3 times to complete defrosting. 21 Remove defrosted meat...
Use and Care Manual
Page 26
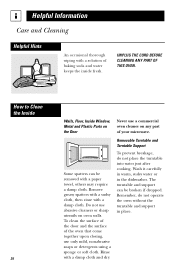
... with a damp cloth. Remove greasy spatters with a sudsy cloth, then rinse with a solution of your microwave. Do not use only mild, nonabrasive soaps or detergents using a sponge or soft cloth. Remember, do not place the turntable into water just after cooking. How to Clean the Inside 26 Walls, Floor, Inside Window, Metal and Plastic Parts on the Door Never use a commercial oven cleaner on oven walls.
... with a damp cloth. Remove greasy spatters with a sudsy cloth, then rinse with a solution of your microwave. Do not use only mild, nonabrasive soaps or detergents using a sponge or soft cloth. Remember, do not place the turntable into water just after cooking. How to Clean the Inside 26 Walls, Floor, Inside Window, Metal and Plastic Parts on the Door Never use a commercial oven cleaner on oven walls.
Use and Care Manual
Page 28
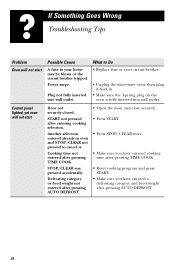
Control panel lighted, yet oven will not start Door not securely closed. Defrosting category or food weight not entered after pressing AUTO DEFROST. • Open the door and close securely. • Press START. • Press STOP/CLEAR twice. • Make sure you have entered cooking time after pressing TIME COOK. • Reset cooking program and press START. • Make sure you have entered a defrosting category and food weight after pressing TIME COOK. Plug not fully inserted into wall outlet. Another...
Control panel lighted, yet oven will not start Door not securely closed. Defrosting category or food weight not entered after pressing AUTO DEFROST. • Open the door and close securely. • Press START. • Press STOP/CLEAR twice. • Make sure you have entered cooking time after pressing TIME COOK. • Reset cooking program and press START. • Make sure you have entered a defrosting category and food weight after pressing TIME COOK. Plug not fully inserted into wall outlet. Another...
Use and Care Manual
Page 32
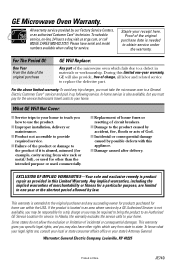
... state. What GE Will Not Cover: I Failure of the microwave oven which vary from wire rack or metal/foil), or used for service. I Improper installation, delivery or maintenance. This warranty is not available, you may be responsible for a trip charge or you must pay for service. If the product is needed to a General Electric Customer Care® servicer and pick it is product repair as provided in...
... state. What GE Will Not Cover: I Failure of the microwave oven which vary from wire rack or metal/foil), or used for service. I Improper installation, delivery or maintenance. This warranty is not available, you may be responsible for a trip charge or you must pay for service. If the product is needed to a General Electric Customer Care® servicer and pick it is product repair as provided in...
Installation Instructions
Page 1
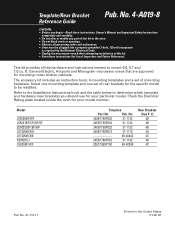
... kit includes an instruction book, 4 mounting templates and a set of rear brackets for mounting under kitchen cabinets. Refer to the Installation Instructions book and the table below to be plugged into a properly grounded 3-hole, 120 volt receptacle as required by the National Electrical Code. • Unplug the microwave oven before attempting installation of this kit or the oven. • Do not block vents or openings. • Observe all the hardware and instructions needed to mount 0.6, 0.7 and 1.0 cu. Pub. General Electric...
... kit includes an instruction book, 4 mounting templates and a set of rear brackets for mounting under kitchen cabinets. Refer to the Installation Instructions book and the table below to be plugged into a properly grounded 3-hole, 120 volt receptacle as required by the National Electrical Code. • Unplug the microwave oven before attempting installation of this kit or the oven. • Do not block vents or openings. • Observe all the hardware and instructions needed to mount 0.6, 0.7 and 1.0 cu. Pub. General Electric...
Installation Instructions
Page 2
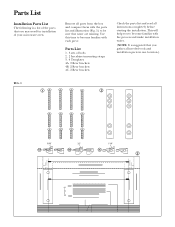
Parts List Installation Parts List The following is suggested that none are missing. Use this time to be sure that you may need for installation of bolts 2. 2 In-cabinet mounting straps 3. 4 Templates 4A. 2 Rear brackets 4B. 2 Rear brackets 4C. 2 Rear brackets Check the parts list and read all instructions completely before starting the installation. Remove all needed tools and installation parts in one location.) FIG. 1 1 2 9/16" 1/2" 1 1/4" 4A 4B 4C 3 (A) (B) This will help you to become familiar with the parts list and...
Parts List Installation Parts List The following is suggested that none are missing. Use this time to be sure that you may need for installation of bolts 2. 2 In-cabinet mounting straps 3. 4 Templates 4A. 2 Rear brackets 4B. 2 Rear brackets 4C. 2 Rear brackets Check the parts list and read all instructions completely before starting the installation. Remove all needed tools and installation parts in one location.) FIG. 1 1 2 9/16" 1/2" 1 1/4" 4A 4B 4C 3 (A) (B) This will help you to become familiar with the parts list and...

