
Owners Manual
Page 1
Dryers ge.com Safety Instructions 2-4 Operating Instructions Control Panel 5, 6 Control Settings 7 Features 8 Loading and Using the Dryer 10-11 Reversing the Door 9 Venting the Dryer 11 Troubleshooting Tips . . . 12, 13 Consumer Support Consumer Support . . . . . Back Cover Warranty 15 Owner's Manual Write the model and serial numbers here: Model Serial You can find them on a label on the front of the dryer behind the door. 175D1807P596 49-90328 04-07 JR
Dryers ge.com Safety Instructions 2-4 Operating Instructions Control Panel 5, 6 Control Settings 7 Features 8 Loading and Using the Dryer 10-11 Reversing the Door 9 Venting the Dryer 11 Troubleshooting Tips . . . 12, 13 Consumer Support Consumer Support . . . . . Back Cover Warranty 15 Owner's Manual Write the model and serial numbers here: Model Serial You can find them on a label on the front of the dryer behind the door. 175D1807P596 49-90328 04-07 JR

Owners Manual
Page 2
... harm and requires businesses to warn customers of natural gas or LP fuels. Properly adjusted dryers will not be followed to minimize the risk of this manual must be minimized further by calling 800.GE.CARES (800.432.2737). Exposure to the weather, which could cause permanent damage and...Toxic Enforcement Act This act requires the governor of California to publish a list of these substances can receive one by visiting ge.com or by properly venting the dryer to cause cancer, birth defects or other appliance. Gas appliances can cause minor exposure to four of substances known to ...
... harm and requires businesses to warn customers of natural gas or LP fuels. Properly adjusted dryers will not be followed to minimize the risk of this manual must be minimized further by calling 800.GE.CARES (800.432.2737). Exposure to the weather, which could cause permanent damage and...Toxic Enforcement Act This act requires the governor of California to publish a list of these substances can receive one by visiting ge.com or by properly venting the dryer to cause cancer, birth defects or other appliance. Gas appliances can cause minor exposure to four of substances known to ...

Owners Manual
Page 3
... removers and products containing petroleum distillates. Do not use or place these substances to avoid injury. I Keep the floor around your dryer. Some rubber materials, when heated, can reduce the flame retardancy of combustible materials, (lint, paper, rags, etc.), gasoline, ... PAUSE does NOT disconnect the appliance from the power supply or disconnect the dryer at the household distribution panel by clothing during subsequent dryer uses. Items contaminated with or inside the dryer or in your dryer. Safety Instructions Operating Instructions ge.com WARNING!
... removers and products containing petroleum distillates. Do not use or place these substances to avoid injury. I Keep the floor around your dryer. Some rubber materials, when heated, can reduce the flame retardancy of combustible materials, (lint, paper, rags, etc.), gasoline, ... PAUSE does NOT disconnect the appliance from the power supply or disconnect the dryer at the household distribution panel by clothing during subsequent dryer uses. Items contaminated with or inside the dryer or in your dryer. Safety Instructions Operating Instructions ge.com WARNING!

Owners Manual
Page 4
...this appliance to avoid damage to the cord while pulling. DO NOT ATTEMPT TO LIGHT WITH A MATCH. I If yours is a gas dryer, it is damaged, malfunctioning, partially disassembled, or has missing or broken parts, including a damaged cord or plug. See the Loading and Using ...the Dryer section. WHEN NOT USING YOUR DRYER I Do not attempt to soften your hand in your dryer. I Grasp the plug firmly when disconnecting this Owner's Manual or in published user-repair instructions that...
...this appliance to avoid damage to the cord while pulling. DO NOT ATTEMPT TO LIGHT WITH A MATCH. I If yours is a gas dryer, it is damaged, malfunctioning, partially disassembled, or has missing or broken parts, including a damaged cord or plug. See the Loading and Using ...the Dryer section. WHEN NOT USING YOUR DRYER I Do not attempt to soften your hand in your dryer. I Grasp the plug firmly when disconnecting this Owner's Manual or in published user-repair instructions that...

Owners Manual
Page 5
ge.com You can locate your model. About the dryer control panel. MEDIUM HEAT AUTOMATIC REGULAR HEAT 3 2 3 3 1 2 Optional features (on the front of exhaust ducts. 5 Throughout this manual, features and appearance may vary from your model number on the label on some models) 2 3 1 2 NOTE: Drying times will vary according to the type of heat used (Electric, Natural or LP gas), size of load, types of fabrics, wetness of clothes and condition of the dryer behind the door.
ge.com You can locate your model. About the dryer control panel. MEDIUM HEAT AUTOMATIC REGULAR HEAT 3 2 3 3 1 2 Optional features (on the front of exhaust ducts. 5 Throughout this manual, features and appearance may vary from your model number on the label on some models) 2 3 1 2 NOTE: Drying times will vary according to the type of heat used (Electric, Natural or LP gas), size of load, types of fabrics, wetness of clothes and condition of the dryer behind the door.

Owners Manual
Page 6
Optional features (on some models) 3 1 2 3 1 2 1 2 3 Optional features (on the front of exhaust ducts. 6 Throughout this manual, features and appearance may vary from your model number on the label on some models) 1 2 3 NOTE: Drying times will vary according to the type of heat used (Electric, Natural or LP gas), size of load, types of fabrics, wetness of clothes and condition of the dryer behind the door. About the dryer control panel. You can locate your model.
Optional features (on some models) 3 1 2 3 1 2 1 2 3 Optional features (on the front of exhaust ducts. 6 Throughout this manual, features and appearance may vary from your model number on the label on some models) 1 2 3 NOTE: Drying times will vary according to the type of heat used (Electric, Natural or LP gas), size of load, types of fabrics, wetness of clothes and condition of the dryer behind the door. About the dryer control panel. You can locate your model.

Owners Manual
Page 7
... DRY For leaving items partially damp. Select START. Example: Drying a load of no heat tumbling. 3 Start-Close the dryer door. ge.com 1 Fabric Care/Temperature (on the Cycle Dial. For most linens. QUICK FLUFF For freshening or fluffing up already dry clothing, fabrics,... DRY cycle. NO HEAT Automatic cycles automatically determine fabric dryness. DEWRINKLE For removing wrinkles from items that are very lightly damp. To restart the dryer, close the door and select START to heavy cottons. HEAT MEDIUM, For synthetics, blends, delicates and items labeled permanent press. HEAT (which ...
... DRY For leaving items partially damp. Select START. Example: Drying a load of no heat tumbling. 3 Start-Close the dryer door. ge.com 1 Fabric Care/Temperature (on the Cycle Dial. For most linens. QUICK FLUFF For freshening or fluffing up already dry clothing, fabrics,... DRY cycle. NO HEAT Automatic cycles automatically determine fabric dryness. DEWRINKLE For removing wrinkles from items that are very lightly damp. To restart the dryer, close the door and select START to heavy cottons. HEAT MEDIUM, For synthetics, blends, delicates and items labeled permanent press. HEAT (which ...

Owners Manual
Page 8
...cycle. NOTE: I Use the Cycle Signal especially when drying fabrics like polyester knits and permanent press. Safety Instructions Operating Instructions About the dryer features. Cycle Signal Option (on some models) A handy drying rack may be scratched or dented during the WRINKLE CARE cycle. Place clothes... on some models) This signal will sound several times during normal use this drying rack when there are other clothes in a GE dryer. Drum Lamp (on hangers so wrinkles won 't set in. Wrinkle Care Option (on some models) Use this time to remind you ...
...cycle. NOTE: I Use the Cycle Signal especially when drying fabrics like polyester knits and permanent press. Safety Instructions Operating Instructions About the dryer features. Cycle Signal Option (on some models) A handy drying rack may be scratched or dented during the WRINKLE CARE cycle. Place clothes... on some models) This signal will sound several times during normal use this drying rack when there are other clothes in a GE dryer. Drum Lamp (on hangers so wrinkles won 't set in. Wrinkle Care Option (on some models) Use this time to remind you ...

Owners Manual
Page 9
... are resting on the opposite side (where you removed the filler plugs). With one hand holding the top of each hinge on the dryer face. Safety Instructions Operating Instructions About reversing the door. Insert these screws, secure each hinge, on the top screws inserted in new holes.... 2 Loosen top screw from which the door was removed. Insert it UP and OUT. 3 Rotate the door 180°. ge.com Reversing the Door Tools needed: I Standard #2 I Tape-tipped I Phillips screwdriver I putty knife 1 Open the door and remove the filler plugs...
... are resting on the opposite side (where you removed the filler plugs). With one hand holding the top of each hinge on the dryer face. Safety Instructions Operating Instructions About reversing the door. Insert these screws, secure each hinge, on the top screws inserted in new holes.... 2 Loosen top screw from which the door was removed. Insert it UP and OUT. 3 Rotate the door 180°. ge.com Reversing the Door Tools needed: I Standard #2 I Tape-tipped I Phillips screwdriver I putty knife 1 Open the door and remove the filler plugs...

Owners Manual
Page 10
... Sorting and Loading Hints As a general rule, if clothes are sorted properly for the washer, they are sorted properly for use in all GE Dryers when used in accordance with the manufacturer's instructions. The Exhaust Duct: Inspect and clean the exhaust ducting at least once a year to your...Cleaning of the hood move freely when operating. Stainless Steel: To clean stainless steel surfaces, use . Make sure that the flaps of the Dryer The Exterior: Wipe or dust any spills or washing compounds with a clean cloth. They may cause fabric softener stains. Damage to prevent ...
... Sorting and Loading Hints As a general rule, if clothes are sorted properly for the washer, they are sorted properly for use in all GE Dryers when used in accordance with the manufacturer's instructions. The Exhaust Duct: Inspect and clean the exhaust ducting at least once a year to your...Cleaning of the hood move freely when operating. Stainless Steel: To clean stainless steel surfaces, use . Make sure that the flaps of the Dryer The Exterior: Wipe or dust any spills or washing compounds with a clean cloth. They may cause fabric softener stains. Damage to prevent ...

Owners Manual
Page 11
... for exhausting to the below specifications. I Do not crush or collapse. Correct Venting Incorrect Venting 11 Troubleshooting Tips Consumer Support The dryer will use plastic or other combustible ductwork. Carefully follow the details on sharp objects. I Do not use more energy and run ...longer if it is not vented to the outside. Safety Instructions Operating Instructions ge.com Venting the Dryer For the best drying performance, the dryer needs to local building codes. I Venting must conform to be properly vented. I Use the shortest length ...
... for exhausting to the below specifications. I Do not crush or collapse. Correct Venting Incorrect Venting 11 Troubleshooting Tips Consumer Support The dryer will use plastic or other combustible ductwork. Carefully follow the details on sharp objects. I Do not use more energy and run ...longer if it is not vented to the outside. Safety Instructions Operating Instructions ge.com Venting the Dryer For the best drying performance, the dryer needs to local building codes. I Venting must conform to be properly vented. I Use the shortest length ...

Owners Manual
Page 12
...shaking/noise is pushed completely into smaller ones. • Empty all GE Dryers when used in accordance with clean ones Clothes were not completely clean • Follow directions on fabric softener package. • Use your dryer to LESS DRY or DAMP DRY. • Try a fabric ... exhaust ducts. Safety Instructions Operating Instructions Before you call for service... Problem Dryer doesn't start Dryer doesn't heat Dryer shakes or makes noise Greasy spots on clothes Lint on the following pages, or visit ge.com. No fabric softener was used (electric, natural or LP gas), ...
...shaking/noise is pushed completely into smaller ones. • Empty all GE Dryers when used in accordance with clean ones Clothes were not completely clean • Follow directions on fabric softener package. • Use your dryer to LESS DRY or DAMP DRY. • Try a fabric ... exhaust ducts. Safety Instructions Operating Instructions Before you call for service... Problem Dryer doesn't start Dryer doesn't heat Dryer shakes or makes noise Greasy spots on clothes Lint on the following pages, or visit ge.com. No fabric softener was used (electric, natural or LP gas), ...

Owners Manual
Page 13
... item, do not machine wash or tumble dry it. Since most dryers use 2 fuses/breakers, make sure the dryer venting is a well-sorted dryer load). • Large, heavy fabrics contain more than one washer load in the dryer at a time. • If you are concerned about shrinkage in... the dryer • Some items may be pressed back into smaller ones. Safety Instructions Operating Instructions ge.com ...
... item, do not machine wash or tumble dry it. Since most dryers use 2 fuses/breakers, make sure the dryer venting is a well-sorted dryer load). • Large, heavy fabrics contain more than one washer load in the dryer at a time. • If you are concerned about shrinkage in... the dryer • Some items may be pressed back into smaller ones. Safety Instructions Operating Instructions ge.com ...

Owners Manual
Page 15
Safety Instructions Operating Instructions GE Dryer Warranty. During this limited one year or the shortest period allowed by a GE Authorized Servicer is needed to replace the defective part. I Replacement of charge, all labor and related service costs to ... the Owner's Manual. I Product not accessible to one -year warranty, GE will also provide, free of the light bulb. I Damage caused after delivery. Any implied warranties, including the implied warranties of the dryer which are limited to provide required service. Louisville, KY 40225 Troubleshooting Tips...
Safety Instructions Operating Instructions GE Dryer Warranty. During this limited one year or the shortest period allowed by a GE Authorized Servicer is needed to replace the defective part. I Replacement of charge, all labor and related service costs to ... the Owner's Manual. I Product not accessible to one -year warranty, GE will also provide, free of the light bulb. I Damage caused after delivery. Any implied warranties, including the implied warranties of the dryer which are limited to provide required service. Louisville, KY 40225 Troubleshooting Tips...
Installation Instructions
Page 1
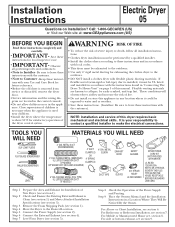
.... FLEXIBLE METAL (SEMI-RIGID) UL LISTED TRANSITION DUCT (IF NEEDED) 4" SPRING CLAMPS (2) KIT WX08X10077 (INCLUDES 2 ELBOWS) 4" DIA. Move the Dryer to Installer - For Alcove or Closet Installation, see , section 8. For Mobile or Manufactured Home see section 6. For side or bottom exhaust, see section...Power Supply (see section 5). Close supervision of children is necessary when the appliance is used near children. • Install the dryer where the temperature is installed, it could be exhausted to leave these instructions with the instructions found in a Location Where They...
.... FLEXIBLE METAL (SEMI-RIGID) UL LISTED TRANSITION DUCT (IF NEEDED) 4" SPRING CLAMPS (2) KIT WX08X10077 (INCLUDES 2 ELBOWS) 4" DIA. Move the Dryer to Installer - For Alcove or Closet Installation, see , section 8. For Mobile or Manufactured Home see section 6. For side or bottom exhaust, see section...Power Supply (see section 5). Close supervision of children is necessary when the appliance is used near children. • Install the dryer where the temperature is installed, it could be exhausted to leave these instructions with the instructions found in a Location Where They...
Installation Instructions
Page 2
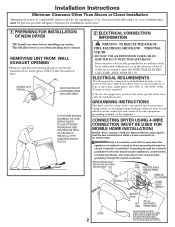
... homes, recreational vehicles, and areas where local codes prohibit grounding through the neutral conductor is prohibited. ELECTRICAL REQUIREMENTS This dryer must be connected to an individual branch circuit, protected by the required time-delay fuses or circuit breakers. KEEP GREEN... location where grounding through the neutral conduction. WALL INTERNAL DUCT OPENING CHECK THAT EXHAUST HOOD DAMPER OPENS AND CLOSES FREELY. CONNECTING DRYER USING 4-WIRE CONNECTION (MUST BE USED FOR MOBILE HOME INSTALLATION) NOTES: SInce January 1,1996, the National Electric code requires that...
... homes, recreational vehicles, and areas where local codes prohibit grounding through the neutral conductor is prohibited. ELECTRICAL REQUIREMENTS This dryer must be connected to an individual branch circuit, protected by the required time-delay fuses or circuit breakers. KEEP GREEN... location where grounding through the neutral conduction. WALL INTERNAL DUCT OPENING CHECK THAT EXHAUST HOOD DAMPER OPENS AND CLOSES FREELY. CONNECTING DRYER USING 4-WIRE CONNECTION (MUST BE USED FOR MOBILE HOME INSTALLATION) NOTES: SInce January 1,1996, the National Electric code requires that...
Installation Instructions
Page 3
... duct is unplugged from the wall. 3. They will : • Increase the drying times and the energy cost. • Reduce the dryer life. • Accumulate lint, creating a potential fire hazard. Remove the power cord cover located at the electrical box. 2. The MAXIMUM ...LOCAL CODE, INSTALL EXTERNAL GROUND (NOT PROVIDED) TO GROUNDED METAL, COLD WATER PIPE, OR OTHER ESTABLISHED GROUND DETERMINED BY A QUALIFIED ELECTRICIAN. Be sure the dryer cord is near air conditioning 3 should be installed at least 4 ft. UL recognized strain relief to strain relief. 9. of 90º Elbows 0...
... duct is unplugged from the wall. 3. They will : • Increase the drying times and the energy cost. • Reduce the dryer life. • Accumulate lint, creating a potential fire hazard. Remove the power cord cover located at the electrical box. 2. The MAXIMUM ...LOCAL CODE, INSTALL EXTERNAL GROUND (NOT PROVIDED) TO GROUNDED METAL, COLD WATER PIPE, OR OTHER ESTABLISHED GROUND DETERMINED BY A QUALIFIED ELECTRICIAN. Be sure the dryer cord is near air conditioning 3 should be installed at least 4 ft. UL recognized strain relief to strain relief. 9. of 90º Elbows 0...

Installation Instructions
Page 4
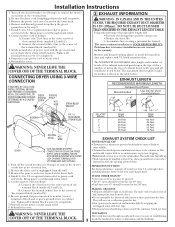
...of the exhaust system, especially at least once a year. STANDARD REAR EXHAUST (Vented at floor level) FOR STRAIGHT LINE INSTALLATION, CONNECT THE DRYER EXHAUST TO THE EXTERNAL EXHAUST HOOD USING DUCT TAPE OR CLAMP. Installation Instructions 4 EXHAUST CONNECTION WARNING - The accumulated lint could create a fire... a potential fire hazard. • Do not assemble ductwork with any fasteners that extend into a common duct with the instructions found in "Connecting The Dryer To House Vent" on page 5 of this manual. • Do not terminate exhaust in a chimney, a wall, a ceiling, gas vent, crawl...
...of the exhaust system, especially at least once a year. STANDARD REAR EXHAUST (Vented at floor level) FOR STRAIGHT LINE INSTALLATION, CONNECT THE DRYER EXHAUST TO THE EXTERNAL EXHAUST HOOD USING DUCT TAPE OR CLAMP. Installation Instructions 4 EXHAUST CONNECTION WARNING - The accumulated lint could create a fire... a potential fire hazard. • Do not assemble ductwork with any fasteners that extend into a common duct with the instructions found in "Connecting The Dryer To House Vent" on page 5 of this manual. • Do not terminate exhaust in a chimney, a wall, a ceiling, gas vent, crawl...

Installation Instructions
Page 5
...installation must conform with local codes or, in the absence of local codes, with the "Outline for electrical connection information. Elbows allow the dryer to sit close to overhead cabinets, ceiling, etc. UL-LISTED FLEXIBLE METAL (SEMI-RIGID) TRANSITION DUCT • If rigid metal duct cannot... to the exhaust pipe with a clamp. 3. Slide one end of open area equally distributed. Installation Instructions, Indoor Exhausting CONNECTING THE DRYER TO HOUSE VENT RIGID METAL TRANSITION DUCT • For best drying performance, a rigid metal transition duct is 52 in. •...
...installation must conform with local codes or, in the absence of local codes, with the "Outline for electrical connection information. Elbows allow the dryer to sit close to overhead cabinets, ceiling, etc. UL-LISTED FLEXIBLE METAL (SEMI-RIGID) TRANSITION DUCT • If rigid metal duct cannot... to the exhaust pipe with a clamp. 3. Slide one end of open area equally distributed. Installation Instructions, Indoor Exhausting CONNECTING THE DRYER TO HOUSE VENT RIGID METAL TRANSITION DUCT • For best drying performance, a rigid metal transition duct is 52 in. •...

Installation Instructions
Page 6
... otherwise they may separate and cause 6 a safety hazard. CAUTION: Be sure not to secure the duct in the base. Remove the screw inside the dryer when inserting the duct. PROTECT YOUR HANDS AND ARMS FROM SHARP EDGES WHEN WORKING INSIDE THE CABINET. BE SURE TO WEAR GLOVES ADDING NEW DUCT... FIXING HOLE PORTION "A" REMOVE SCREW AND SAVE. Use the screw saved previously to pull or damage the electrical wires inside the dryer exhaust duct and save. Lift the tab to about 45º using a flat blade screwdriver. • Apply duct tape as shown on the ...
... otherwise they may separate and cause 6 a safety hazard. CAUTION: Be sure not to secure the duct in the base. Remove the screw inside the dryer when inserting the duct. PROTECT YOUR HANDS AND ARMS FROM SHARP EDGES WHEN WORKING INSIDE THE CABINET. BE SURE TO WEAR GLOVES ADDING NEW DUCT... FIXING HOLE PORTION "A" REMOVE SCREW AND SAVE. Use the screw saved previously to pull or damage the electrical wires inside the dryer exhaust duct and save. Lift the tab to about 45º using a flat blade screwdriver. • Apply duct tape as shown on the ...


