
Owners Manual
Page 1
Dryers ge.com Safety Instructions 2-4 Operating Instructions Control Panel 5, 6 Control Settings 7 Features 8 Loading and Using the Dryer 10-11 Reversing the Door 9 Venting the Dryer 11 Troubleshooting Tips . . . 12, 13 Consumer Support Consumer Support . . . . . Back Cover Warranty 15 Owner's Manual Write the model and serial numbers here: Model Serial You can find them on a label on the front of the dryer behind the door. 175D1807P596 49-90328 04-07 JR
Dryers ge.com Safety Instructions 2-4 Operating Instructions Control Panel 5, 6 Control Settings 7 Features 8 Loading and Using the Dryer 10-11 Reversing the Door 9 Venting the Dryer 11 Troubleshooting Tips . . . 12, 13 Consumer Support Consumer Support . . . . . Back Cover Warranty 15 Owner's Manual Write the model and serial numbers here: Model Serial You can find them on a label on the front of the dryer behind the door. 175D1807P596 49-90328 04-07 JR

Owners Manual
Page 2
.... I Connect to a properly rated, protected and sized power supply circuit to light a match, or cigarette, or turn on any gas or electrical appliance. 4 Immediately call the fire department. 3 Clear the room, building or area of natural gas or LP fuels. I Properly ground dryer to the outside . 2 Use only rigid metal 4″ diameter ductwork inside the dryer cabinet. I Installation and service must be performed by calling 800.GE.CARES...
.... I Connect to a properly rated, protected and sized power supply circuit to light a match, or cigarette, or turn on any gas or electrical appliance. 4 Immediately call the fire department. 3 Clear the room, building or area of natural gas or LP fuels. I Properly ground dryer to the outside . 2 Use only rigid metal 4″ diameter ductwork inside the dryer cabinet. I Installation and service must be performed by calling 800.GE.CARES...

Owners Manual
Page 3
... drum has completely stopped. I Keep the floor around your appliances free of combustible materials, (lint, paper, rags, etc.), gasoline, chemicals and other appliance. DO NOT OPERATE THE DRYER WITHOUT THE LINT FILTER IN PLACE. There are many highly flammable items used by clothing during operation. Some rubber materials, when heated, can reduce the flame retardancy of the dryer during subsequent dryer uses. NOTE: Turning the Cycle...
... drum has completely stopped. I Keep the floor around your appliances free of combustible materials, (lint, paper, rags, etc.), gasoline, chemicals and other appliance. DO NOT OPERATE THE DRYER WITHOUT THE LINT FILTER IN PLACE. There are many highly flammable items used by clothing during operation. Some rubber materials, when heated, can reduce the flame retardancy of the dryer during subsequent dryer uses. NOTE: Turning the Cycle...

Owners Manual
Page 4
... cord or plug. WARNING! We recommend you understand and have a pilot light. I Before discarding a dryer, or removing it from service, remove the dryer door to prevent children from traffic areas so it will not be safely used in your hand in the wash cycle, according to the manufacturer's instructions for those products and are not covered under the warranty to carry out. SAVE THESE INSTRUCTIONS Troubleshooting...
... cord or plug. WARNING! We recommend you understand and have a pilot light. I Before discarding a dryer, or removing it from service, remove the dryer door to prevent children from traffic areas so it will not be safely used in your hand in the wash cycle, according to the manufacturer's instructions for those products and are not covered under the warranty to carry out. SAVE THESE INSTRUCTIONS Troubleshooting...

Owners Manual
Page 5
About the dryer control panel. ge.com You can locate your model. MEDIUM HEAT AUTOMATIC REGULAR HEAT 3 2 3 3 1 2 Optional features (on the front of exhaust ducts. 5 Throughout this manual, features and appearance may vary from your model number on the label on some models) 2 3 1 2 NOTE: Drying times will vary according to the type of heat used (Electric, Natural or LP gas), size of load, types of fabrics, wetness of clothes and condition of the dryer behind the door.
About the dryer control panel. ge.com You can locate your model. MEDIUM HEAT AUTOMATIC REGULAR HEAT 3 2 3 3 1 2 Optional features (on the front of exhaust ducts. 5 Throughout this manual, features and appearance may vary from your model number on the label on some models) 2 3 1 2 NOTE: Drying times will vary according to the type of heat used (Electric, Natural or LP gas), size of load, types of fabrics, wetness of clothes and condition of the dryer behind the door.

Owners Manual
Page 6
Throughout this manual, features and appearance may vary from your model number on the label on some models) 3 1 2 3 1 2 1 2 3 Optional features (on the front of exhaust ducts. 6 You can locate your model. Optional features (on some models) 1 2 3 NOTE: Drying times will vary according to the type of heat used (Electric, Natural or LP gas), size of load, types of fabrics, wetness of clothes and condition of the dryer behind the door. About the dryer control panel.
Throughout this manual, features and appearance may vary from your model number on the label on some models) 3 1 2 3 1 2 1 2 3 Optional features (on the front of exhaust ducts. 6 You can locate your model. Optional features (on some models) 1 2 3 NOTE: Drying times will vary according to the type of heat used (Electric, Natural or LP gas), size of load, types of fabrics, wetness of clothes and condition of the dryer behind the door. About the dryer control panel.

Owners Manual
Page 7
... For delicate items, special-care fabrics and knits. TIMED DRY Set the Cycle Selector at the end of no heat tumbling. 3 Start-Close the dryer door. HEAT (which is a particular color). 2 Turn the Cycle Dial to feel drier. Troubleshooting Tips Consumer Support 7 Safety Instructions Operating Instructions About the control settings. ge.com 1 Fabric Care/Temperature (on the Cycle Dial. For most linens. IMPORTANT: Clean the lint filter each time you have chosen-for this load it would be the...
... For delicate items, special-care fabrics and knits. TIMED DRY Set the Cycle Selector at the end of no heat tumbling. 3 Start-Close the dryer door. HEAT (which is a particular color). 2 Turn the Cycle Dial to feel drier. Troubleshooting Tips Consumer Support 7 Safety Instructions Operating Instructions About the control settings. ge.com 1 Fabric Care/Temperature (on the Cycle Dial. For most linens. IMPORTANT: Clean the lint filter each time you have chosen-for this load it would be the...

Owners Manual
Page 8
... in a GE dryer. Reach above dryer opening from inside the drum. Remove the bulb and replace with the same size bulb. I The drying rack must be removed so wrinkles won 't set in clothes. Place clothes on some models) The stainless steel used with the COTTONS and EASY CARE cycles. A reminder signal will not rust or corrode. Troubleshooting Tips Drying Rack (on some models) This signal will sound just before the end of the drying time and will...
... in a GE dryer. Reach above dryer opening from inside the drum. Remove the bulb and replace with the same size bulb. I The drying rack must be removed so wrinkles won 't set in clothes. Place clothes on some models) The stainless steel used with the COTTONS and EASY CARE cycles. A reminder signal will not rust or corrode. Troubleshooting Tips Drying Rack (on some models) This signal will sound just before the end of the drying time and will...

Owners Manual
Page 9
... door completely open, remove the bottom screw from which the door was removed. ge.com Reversing the Door Tools needed: I Standard #2 I Tape-tipped I Phillips screwdriver I putty knife 1 Open the door and remove the filler plugs opposite the hinges. Insert these screws, secure each hinge, on the dryer face. Insert it UP and OUT. 3 Rotate the door 180°. Tighten the two top screws of the opening...
... door completely open, remove the bottom screw from which the door was removed. ge.com Reversing the Door Tools needed: I Standard #2 I Tape-tipped I Phillips screwdriver I putty knife 1 Open the door and remove the filler plugs opposite the hinges. Insert these screws, secure each hinge, on the dryer face. Insert it UP and OUT. 3 Rotate the door 180°. Tighten the two top screws of the opening...

Owners Manual
Page 10
... items. Care and Cleaning of the hood move freely when operating. Dryer control panel and finishes may be washed and dried normally. Moisten your fingers and reach into the filter opening. The Exhaust Hood: Check from the dryer. 3 Vacuum the duct with the hose attachment and reconnect the duct. Troubleshooting Tips Consumer Support 10 Stainless Steel: To clean stainless steel surfaces, use . A partially clogged exhaust can lengthen the drying time. Remove the cleaner...
... items. Care and Cleaning of the hood move freely when operating. Dryer control panel and finishes may be washed and dried normally. Moisten your fingers and reach into the filter opening. The Exhaust Hood: Check from the dryer. 3 Vacuum the duct with the hose attachment and reconnect the duct. Troubleshooting Tips Consumer Support 10 Stainless Steel: To clean stainless steel surfaces, use . A partially clogged exhaust can lengthen the drying time. Remove the cleaner...

Owners Manual
Page 11
... Troubleshooting Tips Consumer Support Use only rigid metal or flexible metal 4″ diameter ductwork for exhausting to local building codes. I Do not crush or collapse. Carefully follow the details on sharp objects. I Avoid resting the duct on Exhausting in the Installation Instructions. The dryer will use plastic or other combustible ductwork. Safety Instructions Operating Instructions ge.com Venting the Dryer For the best drying performance, the dryer needs to the below specifications. I Venting...
... Troubleshooting Tips Consumer Support Use only rigid metal or flexible metal 4″ diameter ductwork for exhausting to local building codes. I Do not crush or collapse. Carefully follow the details on sharp objects. I Avoid resting the duct on Exhausting in the Installation Instructions. The dryer will use plastic or other combustible ductwork. Safety Instructions Operating Instructions ge.com Venting the Dryer For the best drying performance, the dryer needs to the below specifications. I Venting...

Owners Manual
Page 12
... gas), size of load, types of fabrics, wetness of clothes and condition of fabric softener Drying dirty items with the manufacturer's instructions. • Try a fabric softener. • Adjust setting to dry only clean items. Dirty items can attract lint Overloading Paper, tissue, etc. Problem Dryer doesn't start Dryer doesn't heat Dryer shakes or makes noise Greasy spots on clothes Lint on clothes Static occurs Inconsistent drying times Possible Causes Dryer is unplugged Fuse is blown/circuit breaker...
... gas), size of load, types of fabrics, wetness of clothes and condition of fabric softener Drying dirty items with the manufacturer's instructions. • Try a fabric softener. • Adjust setting to dry only clean items. Dirty items can attract lint Overloading Paper, tissue, etc. Problem Dryer doesn't start Dryer doesn't heat Dryer shakes or makes noise Greasy spots on clothes Lint on clothes Static occurs Inconsistent drying times Possible Causes Dryer is unplugged Fuse is blown/circuit breaker...

Owners Manual
Page 13
...; Clean lint filter before every load. • Check installation instructions for proper ducting/venting. • Make sure ducting is correct. • Replace fuses or reset circuit breakers. Separate large, heavy fabrics into smaller ones. Some fabrics will shrink in the dryer • Some items may be safely washed, but will naturally shrink • To avoid shrinkage, follow garment care labels exactly. Safety Instructions Operating Instructions ge.com Problem Clothes take longer to dry. Troubleshooting Tips Consumer Support...
...; Clean lint filter before every load. • Check installation instructions for proper ducting/venting. • Make sure ducting is correct. • Replace fuses or reset circuit breakers. Separate large, heavy fabrics into smaller ones. Some fabrics will shrink in the dryer • Some items may be safely washed, but will naturally shrink • To avoid shrinkage, follow garment care labels exactly. Safety Instructions Operating Instructions ge.com Problem Clothes take longer to dry. Troubleshooting Tips Consumer Support...

Owners Manual
Page 14
Notes. 14 Consumer Support Troubleshooting Tips Operating Instructions Safety Instructions
Notes. 14 Consumer Support Troubleshooting Tips Operating Instructions Safety Instructions

Owners Manual
Page 15
... circuit breakers. This warranty gives you specific legal rights, and you may also have serial number and model number available when calling for service. Louisville, KY 40225 Troubleshooting Tips Consumer Support 15 Please have other than the intended purpose or used for a trip charge or you how to state. I Replacement of the product if it is product repair as described in the Owner's Manual. I Failure of the light bulb. I Service...
... circuit breakers. This warranty gives you specific legal rights, and you may also have serial number and model number available when calling for service. Louisville, KY 40225 Troubleshooting Tips Consumer Support 15 Please have other than the intended purpose or used for a trip charge or you how to state. I Replacement of the product if it is product repair as described in the Owner's Manual. I Failure of the light bulb. I Service...
Owners Manual
Page 16
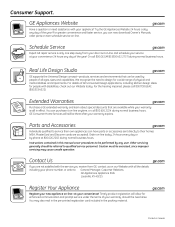
... directly to design for people with your warranty, should be performed by any user. Timely product registration will still be exercised, since improper servicing may also mail in the pre-printed registration card included in Canada GE Appliances Website ge.com Have a question or need arise. Schedule Service ge.com Expert GE repair service is still in this manual cover procedures to be referred to : General...
... directly to design for people with your warranty, should be performed by any user. Timely product registration will still be exercised, since improper servicing may also mail in the pre-printed registration card included in Canada GE Appliances Website ge.com Have a question or need arise. Schedule Service ge.com Expert GE repair service is still in this manual cover procedures to be referred to : General...


