User Guide
Page 4
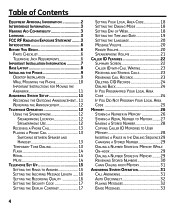
...Desktop Installation 9 Wall Mounting the Phone 10 Important Instructions for Moving the Answerer 11 Answering System Setup 11 Recording the Outgoing Announcement... 11 Reviewing the Announcement 12 Telephone Operation 12 Using the Speakerphone 12 Speakerphone Location 12 Speakerphone Use 12 Receiving a Phone Call 13 Placing a Phone...20 Speakerphone Volume 21 Caller ID Features 22 Summary Screen 22 Caller ID with Call Waiting 23 Receiving and Storing Calls 23 Reviewing Call Records 23 Deleting CID Records 24 Dialing Back 24 If You Programmed Your Local Area Code 24 If You Did ...
...Desktop Installation 9 Wall Mounting the Phone 10 Important Instructions for Moving the Answerer 11 Answering System Setup 11 Recording the Outgoing Announcement... 11 Reviewing the Announcement 12 Telephone Operation 12 Using the Speakerphone 12 Speakerphone Location 12 Speakerphone Use 12 Receiving a Phone Call 13 Placing a Phone...20 Speakerphone Volume 21 Caller ID Features 22 Summary Screen 22 Caller ID with Call Waiting 23 Receiving and Storing Calls 23 Reviewing Call Records 23 Deleting CID Records 24 Dialing Back 24 If You Programmed Your Local Area Code 24 If You Did ...
User Guide
Page 11
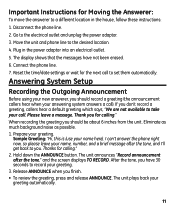
Go to the desired location. 4. Connect the phone line. 7. If you finish. • To review the greeting, press and release ANNOUNCE. Eliminate as much background noise as possible. 1. Sample Greeting: "Hi, this is (use your greeting automatically. 11 The unit ...
Go to the desired location. 4. Connect the phone line. 7. If you finish. • To review the greeting, press and release ANNOUNCE. Eliminate as much background noise as possible. 1. Sample Greeting: "Hi, this is (use your greeting automatically. 11 The unit ...
User Guide
Page 12
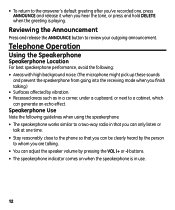
...mode when you hear the tone, or press and hold DELETE when the greeting is in a corner, under a cupboard, or next to review your outgoing announcement. Telephone Operation Using the Speakerphone Speakerphone Location For best speakerphone performance, avoid the following guidelines when using the speakerphone: •...to whom you are talking. • You can adjust the speaker volume by vibration. • Recessed areas such as in use. 12 Reviewing the Announcement Press and release the ANNOUNCE button to a cabinet, which can only listen or talk at one , press ANNOUNCE and release ...
...mode when you hear the tone, or press and hold DELETE when the greeting is in a corner, under a cupboard, or next to review your outgoing announcement. Telephone Operation Using the Speakerphone Speakerphone Location For best speakerphone performance, avoid the following guidelines when using the speakerphone: •...to whom you are talking. • You can adjust the speaker volume by vibration. • Recessed areas such as in use. 12 Reviewing the Announcement Press and release the ANNOUNCE button to a cabinet, which can only listen or talk at one , press ANNOUNCE and release ...
User Guide
Page 20
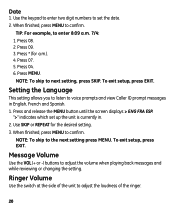
... and view Caller ID prompt messages in . 2. Use SKIP or REPEAT for a.m.). 4. NOTE: To skip to adjust the volume when playing back messages and while reviewing or changing the setting. Message Volume Use the VOL (+ or -) buttons to the next setting press MENU.
... and view Caller ID prompt messages in . 2. Use SKIP or REPEAT for a.m.). 4. NOTE: To skip to adjust the volume when playing back messages and while reviewing or changing the setting. Message Volume Use the VOL (+ or -) buttons to the next setting press MENU.
User Guide
Page 22
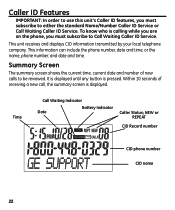
... Waiting Indicator Date Battery Indicator Caller Status; This information can include the phone number, date and time; Within 10 seconds of new calls to be reviewed. Summary Screen The summary screen shows the current time, current date and number of receiving a new call, the summary screen is displayed. NEW or REPEAT...
... Waiting Indicator Date Battery Indicator Caller Status; This information can include the phone number, date and time; Within 10 seconds of new calls to be reviewed. Summary Screen The summary screen shows the current time, current date and number of receiving a new call, the summary screen is displayed. NEW or REPEAT...
User Guide
Page 23
... the handset receiver, press the FLASH/EXIT button to put the current call on the line. NEW appears in the display for later review. Only the handset that have not been reviewed. This information can store up to 60 CID memories for calls received more than once which have not been... reviewed. Reviewing Call Records Use either the SKIP or REPEAT button to review your Caller ID records. • Press REPEAT to scroll through the call records from the most recent to the oldest. • ...
... the handset receiver, press the FLASH/EXIT button to put the current call on the line. NEW appears in the display for later review. Only the handset that have not been reviewed. This information can store up to 60 CID memories for calls received more than once which have not been... reviewed. Reviewing Call Records Use either the SKIP or REPEAT button to review your Caller ID records. • Press REPEAT to scroll through the call records from the most recent to the oldest. • ...
User Guide
Page 24
... dial button. Deleting CID Records • To delete the record shown in the display, press the DELETE button once. • To delete all records while reviewing, press and hold the DELETE button for dialing back (used only in very limited areas). If You Programmed Your Local Area Code 1. Dialing Back When...
... dial button. Deleting CID Records • To delete the record shown in the display, press the DELETE button once. • To delete all records while reviewing, press and hold the DELETE button for dialing back (used only in very limited areas). If You Programmed Your Local Area Code 1. Dialing Back When...
User Guide
Page 30
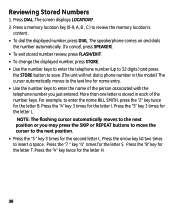
... 1. The speakerphone comes on and dials the number automatically. (To cancel, press SPEAKER). • To exit stored number review, press FLASH/EXIT. • To change the displayed number, press STORE. • Use the number keys to enter the telephone number (up to 32 digits ) ... a phone number in each of the person associated with the telephone number you may press the SKIP or REPEAT buttons to move the cursor to review the memory location's content. • To dial the displayed number, press DIAL. Press the arrow key (4) two times to enter the name BILL SMITH, press...
... 1. The speakerphone comes on and dials the number automatically. (To cancel, press SPEAKER). • To exit stored number review, press FLASH/EXIT. • To change the displayed number, press STORE. • Use the number keys to enter the telephone number (up to 32 digits ) ... a phone number in each of the person associated with the telephone number you may press the SKIP or REPEAT buttons to move the cursor to review the memory location's content. • To dial the displayed number, press DIAL. Press the arrow key (4) two times to enter the name BILL SMITH, press...
User Guide
Page 34
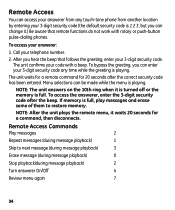
... hear the beep that remote functions do not work with a beep. Remote Access Commands Play messages 2 Repeat messages (during message playback) 2 Turn answerer On/Off 4 Review menu again 7 34 To access your telephone number. 2. Remote Access You can access your answerer from another location by entering your 3-digit security code (the...
... hear the beep that remote functions do not work with a beep. Remote Access Commands Play messages 2 Repeat messages (during message playback) 2 Turn answerer On/Off 4 Review menu again 7 34 To access your telephone number. 2. Remote Access You can access your answerer from another location by entering your 3-digit security code (the...
User Guide
Page 43
... a Phone Call 13 Receiving and Storing Calls 23 Recording the Outgoing Announcement 11 Redial 14 Remote Access 34 Remote Access Commands 34 Reviewing Call Records 23 Reviewing Stored Numbers 30 Reviewing the Announcement 12 Ringer Volume 20 S Setting Day of Week 18 Setting the Dialing Mode 18 Setting the Display Contrast 17 Setting...
... a Phone Call 13 Receiving and Storing Calls 23 Recording the Outgoing Announcement 11 Redial 14 Remote Access 34 Remote Access Commands 34 Reviewing Call Records 23 Reviewing Stored Numbers 30 Reviewing the Announcement 12 Ringer Volume 20 S Setting Day of Week 18 Setting the Dialing Mode 18 Setting the Display Contrast 17 Setting...