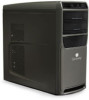
8512041 - Gateway Hardware Reference Guide (5-bay uATX Case)
Page 4
Contents Chapter 4: Upgrading Your Computer 29 Preventing static electricity discharge 30 Opening the case 31 Removing the side panel 31 Removing the front bezel 32 Closing the case 33 Replacing the front bezel 33 Replacing the side panel 34 Replacing the color panel 34 Installing memory 37 Adding or... replacing an optical disc drive 39 Replacing the memory card reader 41 Adding or replacing a hard drive 43 Replacing the heat sink and processor 45 Adding...
8512041 - Gateway Hardware Reference Guide (5-bay uATX Case)
Page 35
CHAPTER4 Upgrading Your Computer • Preventing static electricity discharge • Opening the case • Closing the case • Replacing the color panel • Installing memory • Replacing the system battery • Adding or replacing an optical disc drive • Replacing the memory card reader • Adding or replacing a hard drive • Replacing the heat sink and processor • Adding or replacing an expansion card • Replacing the system board 29
8512041 - Gateway Hardware Reference Guide (5-bay uATX Case)
Page 43
...from the sides of the memory module and remove it on a towel or other non-abrasive surface. 3 Find the memory module banks on its side. www.gateway.com Installing memory When you upgrade the computer memory, make sure that you install the correct type of the memory module bank. 37 To... install or replace DIMM memory: 1 Remove the side panel by following the instructions...
8512041 - Gateway Hardware Reference Guide (5-bay uATX Case)
Page 44
... the side panel" on page 34. 7 Return your computer to its upright position. 8 Reconnect the cables and the power cord. 9 Turn on the memory module bank and press the module firmly into the bank. When the module is secure, you hear a click. 6 Replace the side panel by following the... instructions in your computer is displayed. 38 The amount of the memory module should secure the memory module automatically. CHAPTER 4: Upgrading Your Computer 5 Align the notches on the new DIMM with the notches on your computer.
8512041 - Gateway Hardware Reference Guide (5-bay uATX Case)
Page 58
CHAPTER 4: Upgrading Your Computer 9 If your replacement system board does not include a processor remove the processor from the old system board by following the directions in "Replacing ... four screws to secure the power supply to the case. 11 Connect all power and data cables using your notes from Step 4. 12 Reinstall any memory modules you removed previously. 13 Reinstall any expansion cards you removed previously. 14 Replace the side panel by following the instructions in "Replacing the side...