8512417 - Gateway Setup Guide
Page 2
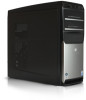
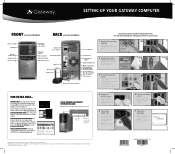
... that came with them. 2 Connect the monitor (depending on using your Gateway computer, see the User Guide or Reference Guide that came with many powerful features. SERIAL NUMBER AND CONTACT INFORMATION LABEL Gateway Customer Care telephone numbers vary by #. WARNING: To protect your computer as... as a printer or scanner, after setting up your computer during electrical storms, unplug the power cord and the modem and network cables. Actual product may vary with options) Your Gateway computer is packed with it ® into one of their respective companies. 5 Connect the...
... that came with them. 2 Connect the monitor (depending on using your Gateway computer, see the User Guide or Reference Guide that came with many powerful features. SERIAL NUMBER AND CONTACT INFORMATION LABEL Gateway Customer Care telephone numbers vary by #. WARNING: To protect your computer as... as a printer or scanner, after setting up your computer during electrical storms, unplug the power cord and the modem and network cables. Actual product may vary with options) Your Gateway computer is packed with it ® into one of their respective companies. 5 Connect the...
8512418 - Gateway Reference Guide
Page 3
Contents Chapter 1: About This Reference 1 About this guide 2 Accessing the online User Guide 2 Gateway contact information 3 Microsoft Certificate of Authenticity 3 Chapter 2: Checking Out Your Computer . . . . . 5 Front 6 Back 8 Chapter 3: Setting Up and Getting Started . . 11 ...up your computer desk and chair 13 Sitting at your computer 13 Avoiding discomfort and injury from repetitive strain . . 14 Preparing power connections 14 Protecting from power source problems 14 Checking the voltage selection 15 Connecting to a broadband modem or network 15 Connecting a dial-up modem 16 ...
Contents Chapter 1: About This Reference 1 About this guide 2 Accessing the online User Guide 2 Gateway contact information 3 Microsoft Certificate of Authenticity 3 Chapter 2: Checking Out Your Computer . . . . . 5 Front 6 Back 8 Chapter 3: Setting Up and Getting Started . . 11 ...up your computer desk and chair 13 Sitting at your computer 13 Avoiding discomfort and injury from repetitive strain . . 14 Preparing power connections 14 Protecting from power source problems 14 Checking the voltage selection 15 Connecting to a broadband modem or network 15 Connecting a dial-up modem 16 ...

8512418 - Gateway Reference Guide
Page 6
Contents Passwords 90 Power 90 Printer 91 Sound 92 Recovering your system 93 Recovering pre-installed software and drivers 94 Using Microsoft System Restore 99 Recovering your system to its factory condition . . . . . 102 Recovering your system using the Windows DVD . . . . 103 Telephone support 104 Before calling Gateway Customer Care 104 Telephone numbers 105 Self-help 106 Tutoring 106 Training 107 Appendix A: Legal Notices 109 Index 119 iv
Contents Passwords 90 Power 90 Printer 91 Sound 92 Recovering your system 93 Recovering pre-installed software and drivers 94 Using Microsoft System Restore 99 Recovering your system to its factory condition . . . . . 102 Recovering your system using the Windows DVD . . . . 103 Telephone support 104 Before calling Gateway Customer Care 104 Telephone numbers 105 Self-help 106 Tutoring 106 Training 107 Appendix A: Legal Notices 109 Index 119 iv

8512418 - Gateway Reference Guide
Page 12
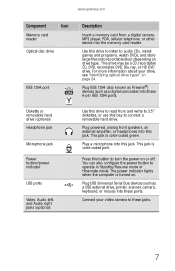
Front CHAPTER 2: Checking Out Your Computer Memory card reader DVD/CD drive IEEE 1394/ FireWire™ port Diskette or removable hard drive (optional) Headphone jack Microphone jack Power button/ power indicator USB ports DVD/CD drive (optional) Video jack (optional) Audio left jack (optional) Audio right jack (optional) 6
Front CHAPTER 2: Checking Out Your Computer Memory card reader DVD/CD drive IEEE 1394/ FireWire™ port Diskette or removable hard drive (optional) Headphone jack Microphone jack Power button/ power indicator USB ports DVD/CD drive (optional) Video jack (optional) Audio left jack (optional) Audio right jack (optional) 6
8512418 - Gateway Reference Guide
Page 13
This jack is color-coded pink. This jack is color-coded green. www.gateway.com Component Icon Memory card reader Optical disc drive IEEE 1394 port Description Insert a memory card from and write to 3.5" diskettes, or use this ...Plug USB (Universal Serial Bus) devices (such as a digital camcorder) into the memory card reader. Diskette or removable hard drive (optional) Headphone jack Microphone jack Power button/power indicator USB ports Video, Audio left, and Audio right jacks (optional) Use this drive to read from a digital camera, MP3 player, PDA, cellular telephone...
This jack is color-coded pink. This jack is color-coded green. www.gateway.com Component Icon Memory card reader Optical disc drive IEEE 1394 port Description Insert a memory card from and write to 3.5" diskettes, or use this ...Plug USB (Universal Serial Bus) devices (such as a digital camcorder) into the memory card reader. Diskette or removable hard drive (optional) Headphone jack Microphone jack Power button/power indicator USB ports Video, Audio left, and Audio right jacks (optional) Use this drive to read from a digital camera, MP3 player, PDA, cellular telephone...
8512418 - Gateway Reference Guide
Page 14
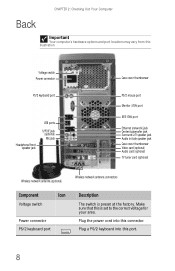
Plug a PS/2 keyboard into this port. 8 Voltage switch Power connector PS/2 keyboard port Headphone/front speaker jack USB ports S/PDIF jack (optional) Mic jack Case cover thumbscrew PS/2 mouse port Monitor (VGA) port ...TV tuner card (optional) Wireless network antenna (optional) Wireless network antenna connectors Component Icon Voltage switch Power connector PS/2 keyboard port Description The switch is set to the correct voltage for your area. Plug the power cord into this connector. Make sure that this illustration. CHAPTER 2: Checking Out Your Computer Back Important...
Plug a PS/2 keyboard into this port. 8 Voltage switch Power connector PS/2 keyboard port Headphone/front speaker jack USB ports S/PDIF jack (optional) Mic jack Case cover thumbscrew PS/2 mouse port Monitor (VGA) port ...TV tuner card (optional) Wireless network antenna (optional) Wireless network antenna connectors Component Icon Voltage switch Power connector PS/2 keyboard port Description The switch is set to the correct voltage for your area. Plug the power cord into this connector. Make sure that this illustration. CHAPTER 2: Checking Out Your Computer Back Important...

8512418 - Gateway Reference Guide
Page 17
CHAPTER3 Setting Up and Getting Started • Working safely and comfortably • Preparing power connections • Connecting to a broadband modem or network • Connecting a dial-up modem • Starting your computer • Turning off your computer • Restarting (rebooting) your computer • Using the keyboard • Using the mouse • Using optical drives • Using the memory card reader • Using the diskette drive • Adjusting the volume • Configuring the audio jacks • Installing a printer, scanner, or other device 11
CHAPTER3 Setting Up and Getting Started • Working safely and comfortably • Preparing power connections • Connecting to a broadband modem or network • Connecting a dial-up modem • Starting your computer • Turning off your computer • Restarting (rebooting) your computer • Using the keyboard • Using the mouse • Using optical drives • Using the memory card reader • Using the diskette drive • Adjusting the volume • Configuring the audio jacks • Installing a printer, scanner, or other device 11
8512418 - Gateway Reference Guide
Page 20
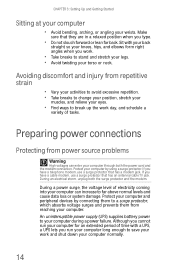
...; Take breaks to your computer can enter your torso or neck. During a power surge, the voltage level of electricity coming into your computer during a power failure. An uninterruptible power supply (UPS) supplies battery power to stand and stretch your legs. • Avoid twisting your computer through both...an extended period of tasks. Make sure that has an antenna/cable TV jack. Preparing power connections Protecting from reaching your wrists. During an electrical storm, unplug both the power cord and the modem connection. CHAPTER 3: Setting Up and Getting Started Sitting at your ...
...; Take breaks to your computer can enter your torso or neck. During a power surge, the voltage level of electricity coming into your computer during a power failure. An uninterruptible power supply (UPS) supplies battery power to stand and stretch your legs. • Avoid twisting your computer through both...an extended period of tasks. Make sure that has an antenna/cable TV jack. Preparing power connections Protecting from reaching your wrists. During an electrical storm, unplug both the power cord and the modem connection. CHAPTER 3: Setting Up and Getting Started Sitting at your ...
8512418 - Gateway Reference Guide
Page 21
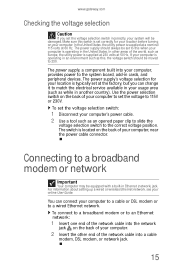
...about setting up a wired or wireless Ethernet network, see your system will be equipped with a built-in cards, and peripheral devices. The power supply should be moved to a broadband modem or network Important Your computer may be damaged. In other end of the world, such as ...sure this when your computer to set the voltage to the correct voltage position. In the United States, the utility power is operating in another country). www.gateway.com Checking the voltage selection Caution If you can connect your computer. 2 Insert the other areas of the network ...
...about setting up a wired or wireless Ethernet network, see your system will be equipped with a built-in cards, and peripheral devices. The power supply should be moved to a broadband modem or network Important Your computer may be damaged. In other end of the world, such as ...sure this when your computer to set the voltage to the correct voltage position. In the United States, the utility power is operating in another country). www.gateway.com Checking the voltage selection Caution If you can connect your computer. 2 Insert the other areas of the network ...
8512418 - Gateway Reference Guide
Page 22
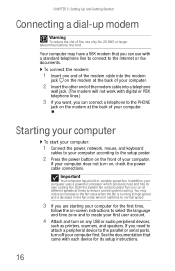
... device to ensure correct system cooling. In addition, your computer for its own cooling fan. If you are starting your computer uses a powerful processor which produces heat and has its setup instructions. 16 Both the system fan and processor fan can run at different speeds at high ...56K modem that came with a standard telephone line to connect to create your computer. Starting your computer To start your computer: 1 Connect the power, network, mouse, and keyboard cables to your computer according to the PHONE jack on the modem at the back of your computer first. If...
... device to ensure correct system cooling. In addition, your computer for its own cooling fan. If you are starting your computer uses a powerful processor which produces heat and has its setup instructions. 16 Both the system fan and processor fan can run at different speeds at high ...56K modem that came with a standard telephone line to connect to create your computer. Starting your computer To start your computer: 1 Connect the power, network, mouse, and keyboard cables to your computer according to the PHONE jack on the modem at the back of your computer first. If...
8512418 - Gateway Reference Guide
Page 23
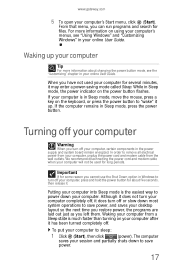
... it does turn off your computer, press and hold the power button for about five seconds, then release it up your computer Tip For more information on using your computer's menus, see the "Customizing" chapter in your computer for files. www.gateway.com 5 To open your computer is in Sleep mode, ...move the mouse, press a key on the keyboard, or press the power button to "wake" it .
... it does turn off your computer, press and hold the power button for about five seconds, then release it up your computer Tip For more information on using your computer's menus, see the "Customizing" chapter in your computer for files. www.gateway.com 5 To open your computer is in Sleep mode, ...move the mouse, press a key on the keyboard, or press the power button to "wake" it .

8512418 - Gateway Reference Guide
Page 24
...turns on again. 2 If your computer does not turn off, press and hold the power button until the computer turns off . 2 To completely disconnect all power (such as for servicing internal components), also disconnect the power cord. Restarting (rebooting) your computer If your computer does not respond to keyboard or... the arrow next to the lock icon, then click Restart. If the computer remains in Sleep mode, press the power button. To turn the computer back on the keyboard or press the power button. CHAPTER 3: Setting Up and Getting Started 2 To "wake" your computer, press a key on . 18 ...
...turns on again. 2 If your computer does not turn off, press and hold the power button until the computer turns off . 2 To completely disconnect all power (such as for servicing internal components), also disconnect the power cord. Restarting (rebooting) your computer If your computer does not respond to keyboard or... the arrow next to the lock icon, then click Restart. If the computer remains in Sleep mode, press the power button. To turn the computer back on the keyboard or press the power button. CHAPTER 3: Setting Up and Getting Started 2 To "wake" your computer, press a key on . 18 ...
8512418 - Gateway Reference Guide
Page 27
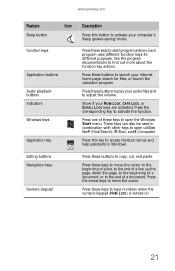
...or SCROLL LOCK keys are activated. See the program documentation to activate the function. Press these buttons to launch your computer's Sleep (power-saving) mode. Press the corresponding key to find out more about the function key actions. Press these keys to type numbers when ...the numeric keypad (NUM LOCK) is turned on. 21 Press one of a document. www.gateway.com Feature Icon Sleep button Function keys Application buttons Audio playback buttons Indicators Windows keys Application key Editing buttons Navigation keys Numeric keypad ...
...or SCROLL LOCK keys are activated. See the program documentation to activate the function. Press these buttons to launch your computer's Sleep (power-saving) mode. Press the corresponding key to find out more about the function key actions. Press these keys to type numbers when ...the numeric keypad (NUM LOCK) is turned on. 21 Press one of a document. www.gateway.com Feature Icon Sleep button Function keys Application buttons Audio playback buttons Indicators Windows keys Application key Editing buttons Navigation keys Numeric keypad ...
8512418 - Gateway Reference Guide
Page 42
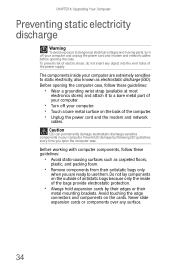
... components over any object into the vent holes of electric shock, do not insert any surface. 34 To prevent risk of the power supply. Do not lay components on the back of antistatic bags because only the inside your computer. Before opening the case. Caution... Your Computer Preventing static electricity discharge Warning To avoid exposure to dangerous electrical voltages and moving parts, turn off your computer and unplug the power cord and modem and network cables before opening the computer case, follow these guidelines: • Wear a grounding wrist strap (available at ...
... components over any object into the vent holes of electric shock, do not insert any surface. 34 To prevent risk of the power supply. Do not lay components on the back of antistatic bags because only the inside your computer. Before opening the case. Caution... Your Computer Preventing static electricity discharge Warning To avoid exposure to dangerous electrical voltages and moving parts, turn off your computer and unplug the power cord and modem and network cables before opening the computer case, follow these guidelines: • Wear a grounding wrist strap (available at ...

8512418 - Gateway Reference Guide
Page 43
... discharge" on page 34. 2 Shut down your computer, then disconnect the power cord and modem, network, and all peripheral device cables. 3 Press the power button for ten seconds to internal components. www.gateway.com Opening the case Your computer case provides easy access to drain any residual... power from your computer. 4 Loosen the two captive thumbscrews on the back edge ...
... discharge" on page 34. 2 Shut down your computer, then disconnect the power cord and modem, network, and all peripheral device cables. 3 Press the power button for ten seconds to internal components. www.gateway.com Opening the case Your computer case provides easy access to drain any residual... power from your computer. 4 Loosen the two captive thumbscrews on the back edge ...

8512418 - Gateway Reference Guide
Page 46
Replacing the color panel To replace the color panel on the back edge of the side panel, then reconnect the cables and power cord. CHAPTER 4: Upgrading Your Computer Replacing the side panel To replace the side panel: 1 Make sure that all of the internal cables are arranged inside ...
Replacing the color panel To replace the color panel on the back edge of the side panel, then reconnect the cables and power cord. CHAPTER 4: Upgrading Your Computer Replacing the side panel To replace the side panel: 1 Make sure that all of the internal cables are arranged inside ...
8512418 - Gateway Reference Guide
Page 50
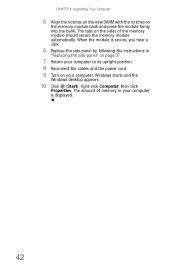
... amount of the memory module should secure the memory module automatically. The tabs on your computer to its upright position. 8 Reconnect the cables and the power cord. 9 Turn on the sides of memory in your computer is secure, you hear a click. 6 Replace the side panel by following the instructions in "Replacing...
... amount of the memory module should secure the memory module automatically. The tabs on your computer to its upright position. 8 Reconnect the cables and the power cord. 9 Turn on the sides of memory in your computer is secure, you hear a click. 6 Replace the side panel by following the instructions in "Replacing...

8512418 - Gateway Reference Guide
Page 51
www.gateway.com Adding or replacing an optical disc drive Tools You need a Phillips screwdriver to be the same. 43 For the location of your original drive. 3 ... a new drive (not replacing an old one), remove the two drive retention screws in Step 6. 4 If you install the new drive. Drive data cable Drive power cable 5 Note any jumper settings on the old drive and set the jumper on page 35. To add replace an optical drive: 1 Remove the side...
www.gateway.com Adding or replacing an optical disc drive Tools You need a Phillips screwdriver to be the same. 43 For the location of your original drive. 3 ... a new drive (not replacing an old one), remove the two drive retention screws in Step 6. 4 If you install the new drive. Drive data cable Drive power cable 5 Note any jumper settings on the old drive and set the jumper on page 35. To add replace an optical drive: 1 Remove the side...
8512418 - Gateway Reference Guide
Page 57
... and processor: 1 Remove the side panel by following the instructions in "Replacing the side panel" on page 37. 13 Reconnect all external cables and the power cord. 14 Turn on your computer. 15 If you are using the new hard drive as your primary drive, install Windows using the operating system... that came with the slots on the inside of the case, then slide the cage into the system board. 11 Connect the drive cables. www.gateway.com 9 Line up the tabs on the right side of the cage with your computer. To avoid scratching the case, place it on page 93...
... and processor: 1 Remove the side panel by following the instructions in "Replacing the side panel" on page 37. 13 Reconnect all external cables and the power cord. 14 Turn on your computer. 15 If you are using the new hard drive as your primary drive, install Windows using the operating system... that came with the slots on the inside of the case, then slide the cage into the system board. 11 Connect the drive cables. www.gateway.com 9 Line up the tabs on the right side of the cage with your computer. To avoid scratching the case, place it on page 93...
8512418 - Gateway Reference Guide
Page 62
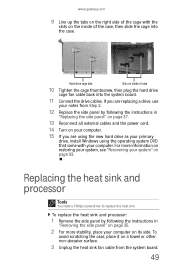
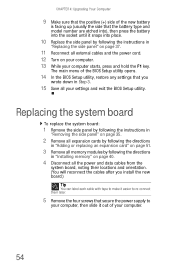
.... 54 CHAPTER 4: Upgrading Your Computer 9 Make sure that the positive (+) side of the new battery is facing up (usually the side that secure the power supply to your computer, then slide it out of the BIOS Setup utility opens. 14 In the BIOS Setup utility, restore any settings that you... panel by following the instructions in "Replacing the side panel" on page 37. 11 Reconnect all external cables and the power cord. 12 Turn on page 40. 4 Disconnect all the power and data cables from the system board, noting their locations and orientation. (You will reconnect the cables after you wrote...
.... 54 CHAPTER 4: Upgrading Your Computer 9 Make sure that the positive (+) side of the new battery is facing up (usually the side that secure the power supply to your computer, then slide it out of the BIOS Setup utility opens. 14 In the BIOS Setup utility, restore any settings that you... panel by following the instructions in "Replacing the side panel" on page 37. 11 Reconnect all external cables and the power cord. 12 Turn on page 40. 4 Disconnect all the power and data cables from the system board, noting their locations and orientation. (You will reconnect the cables after you wrote...


