

User Manual
Page 1
Operating Instructions Design Mincer Plus Art.-No. 41403 Design Mincer Plus Read all provided instructions before first use only! For domestic use ! Model and attachments are subject to change!
Operating Instructions Design Mincer Plus Art.-No. 41403 Design Mincer Plus Read all provided instructions before first use only! For domestic use ! Model and attachments are subject to change!
User Manual
Page 2
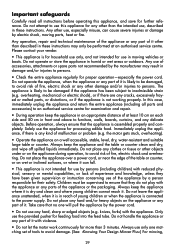
... Making cookies 41 Solving Problems 42 Clearing a blocking - Table of your Design Mincer Plus 28 Important safeguards 29 Important safeguards for Disposal 46 Information and Service 46 Warranty...46 reverse operation 43 Overheat protection 43 Care and Cleaning 43 Disassembling the Appliance 44 Cleaning the Appliance 44 Storage...45 Notes for electrical appliances 30 Moving parts - Carefully read all provided instructions before you start...
... Making cookies 41 Solving Problems 42 Clearing a blocking - Table of your Design Mincer Plus 28 Important safeguards 29 Important safeguards for Disposal 46 Information and Service 46 Warranty...46 reverse operation 43 Overheat protection 43 Care and Cleaning 43 Disassembling the Appliance 44 Cleaning the Appliance 44 Storage...45 Notes for electrical appliances 30 Moving parts - Carefully read all provided instructions before you start...
User Manual
Page 5
..., or if the appliance is assembled properly and completely. Always keep the appliance and the table or counter clean and dry, and wipe off spilled liquids immediately. Only use the appliance for processing edible food. Important safeguards Carefully read all parts and accessories) to an authorised service centre for examination and repair. • During operation keep the appliance in an appropriate...
..., or if the appliance is assembled properly and completely. Always keep the appliance and the table or counter clean and dry, and wipe off spilled liquids immediately. Only use the appliance for processing edible food. Important safeguards Carefully read all parts and accessories) to an authorised service centre for examination and repair. • During operation keep the appliance in an appropriate...

User Manual
Page 6
...motor comes to the motor housing! Thereafter, clean and dry the appliance thoroughly. (See: ›Care and Cleaning‹) • Do not place the appliance or any parts, or when the appliance is not in the feed tube with the cutter housing connected to a standstill, before moving, or cleaning, or assembling or disassembling... any extension cords or multi socket outlets. • Always handle the power cord with a maximum rated residual operating current of a residual current operated circuit breaker (r.c.c.b.) with care. Do not process bones, nuts, frozen foods or any other hard...
...motor comes to the motor housing! Thereafter, clean and dry the appliance thoroughly. (See: ›Care and Cleaning‹) • Do not place the appliance or any parts, or when the appliance is not in the feed tube with the cutter housing connected to a standstill, before moving, or cleaning, or assembling or disassembling... any extension cords or multi socket outlets. • Always handle the power cord with a maximum rated residual operating current of a residual current operated circuit breaker (r.c.c.b.) with care. Do not process bones, nuts, frozen foods or any other hard...

User Manual
Page 7
... power cord. Ensure not to get injured when handling the cutter blade. • Do not hold your face over the feed tube, while the motor is connected to see small pieces of bones or other hard parts (e.g. When liquids are damaged or missing. Moving parts - bones, stalks of vegetables, cooking utensils) in the feed tube of the appliance or in the feed tube! Only use...
... power cord. Ensure not to get injured when handling the cutter blade. • Do not hold your face over the feed tube, while the motor is connected to see small pieces of bones or other hard parts (e.g. When liquids are damaged or missing. Moving parts - bones, stalks of vegetables, cooking utensils) in the feed tube of the appliance or in the feed tube! Only use...

User Manual
Page 8
... processing with the ON/OFF button. Before first use the normal forward operation, controlled via the ON/OFF button. 32 Power switch / overheat protection With the power switch on and off. 2.Carefully remove all tools. (See: ›Care and Cleaning‹) Properties of your appliance suddenly stops ...motor housing and cause damage to turn on the appliance again. 6.Now you switch the motor on and the appliance connected to avoid overheating. For processing your food, generally use and after a longer period of the appliance. If your Design Mincer Plus CAUTION: Do not operate...
... processing with the ON/OFF button. Before first use the normal forward operation, controlled via the ON/OFF button. 32 Power switch / overheat protection With the power switch on and off. 2.Carefully remove all tools. (See: ›Care and Cleaning‹) Properties of your appliance suddenly stops ...motor housing and cause damage to turn on the appliance again. 6.Now you switch the motor on and the appliance connected to avoid overheating. For processing your food, generally use and after a longer period of the appliance. If your Design Mincer Plus CAUTION: Do not operate...
User Manual
Page 9
... grinding disc twice. Thereafter, switch off the mincer (ON/OFF button) to use one matching set of tools. Cut food that can be inserted effortlessly in the feed tube. Tips for Best Results Only process edible foods that can prepare the next portion. When processing larger amounts of food, prepare the food in portions that is a good idea to let the motor cool...
... grinding disc twice. Thereafter, switch off the mincer (ON/OFF button) to use one matching set of tools. Cut food that can be inserted effortlessly in the feed tube. Tips for Best Results Only process edible foods that can prepare the next portion. When processing larger amounts of food, prepare the food in portions that is a good idea to let the motor cool...

User Manual
Page 10
... driven moving parts. Take the worm housing into the right hand and insert with your foods on a flat, dry surface such as it to avoid risks of the worm housing. Ensure that you have assembled the appliance completely and correctly according to the power outlet before assembling or disassembling the appliance. Take the cutter blade and attach it could...
... driven moving parts. Take the worm housing into the right hand and insert with your foods on a flat, dry surface such as it to avoid risks of the worm housing. Ensure that you have assembled the appliance completely and correctly according to the power outlet before assembling or disassembling the appliance. Take the cutter blade and attach it could...

User Manual
Page 11
... the drive shaft. If the screw does not turn easily put some sunflower oil (or other edible oil) on the worm housing and tighten by hand. Mount the grinding disc on the cutter blade. The small end of the crossed-blade knife are very sharp. Incline the worm housing a little bit to make it . How to work with the attachments...
... the drive shaft. If the screw does not turn easily put some sunflower oil (or other edible oil) on the worm housing and tighten by hand. Mount the grinding disc on the cutter blade. The small end of the crossed-blade knife are very sharp. Incline the worm housing a little bit to make it . How to work with the attachments...

User Manual
Page 12
...turn the adaptor disc a little bit until the shaft is facing upright and is ready for tightening the screw and pay attention not to make it . The small end of the worm housing. Incline the worm housing a little bit to face the mincer (picture F). The appliance is locked into the opening for the drive shaft. The small... the feed chute (picture H). Place the pusher into place. IMPORTANT: If the tools overlap the edges of the worm housing the worm is correctly assembled when the plastic end of the worm stands a few millimetres out of the adaptor F disc. ment. Turn the...
...turn the adaptor disc a little bit until the shaft is facing upright and is ready for tightening the screw and pay attention not to make it . The small end of the worm housing. Incline the worm housing a little bit to face the mincer (picture F). The appliance is locked into the opening for the drive shaft. The small... the feed chute (picture H). Place the pusher into place. IMPORTANT: If the tools overlap the edges of the worm housing the worm is correctly assembled when the plastic end of the worm stands a few millimetres out of the adaptor F disc. ment. Turn the...

User Manual
Page 13
... to make it . The small end of the grinding disc. bling it fit inside of the recess again. 37 The side of the plastic fin- If mounted correctly the plastic finger is locked into the right hand and insert with the recess has to face the mincer (picture J). ATTENTION: Do not use force. If necessary turn easily...
... to make it . The small end of the grinding disc. bling it fit inside of the recess again. 37 The side of the plastic fin- If mounted correctly the plastic finger is locked into the right hand and insert with the recess has to face the mincer (picture J). ATTENTION: Do not use force. If necessary turn easily...

User Manual
Page 14
... do not use any tools, for the drive shaft. Assembling for operation. If the screw does not turn the adaptor disc a little bit until the shaft is facing upright and is aligned with your left hand the worm inside the worm housing. The small end of the worm housing. Place the pusher into the opening of the feed chute (picture L). The small end with...
... do not use any tools, for the drive shaft. Assembling for operation. If the screw does not turn the adaptor disc a little bit until the shaft is facing upright and is aligned with your left hand the worm inside the worm housing. The small end of the worm housing. Place the pusher into the opening of the feed chute (picture L). The small end with...
User Manual
Page 15
... the pusher. Press the feed pan onto the worm housing (picture O). The appliance is the closest to the instructions ›Trouble shooting guide‹. 39 Use the medium grinding disc when making tartar and mince the ingredients twice. Place a dry towel beside the mincer to dry off button first and then the power button) and work according to the handle. 4. Cut...
... the pusher. Press the feed pan onto the worm housing (picture O). The appliance is the closest to the instructions ›Trouble shooting guide‹. 39 Use the medium grinding disc when making tartar and mince the ingredients twice. Place a dry towel beside the mincer to dry off button first and then the power button) and work according to the handle. 4. Cut...

User Manual
Page 16
... last bit is better if you use and make sure that no leftover food dries up on the appliance. Assemble the sausage attachment according to avoid overheating. Slide the sausage skin over the sausage attachment. 4. Tip: If the skin gets stuck to the instructions ›Care and cleaning‹. Clean and disassemble the appliance right after use less flour and more meat. 1. Mince...
... last bit is better if you use and make sure that no leftover food dries up on the appliance. Assemble the sausage attachment according to avoid overheating. Slide the sausage skin over the sausage attachment. 4. Tip: If the skin gets stuck to the instructions ›Care and cleaning‹. Clean and disassemble the appliance right after use less flour and more meat. 1. Mince...

User Manual
Page 17
.... 4.Insert the plug of the mincer in the mincer with separator disc, cookie attachment, and cookie former (see: ›Assembling for making cookies with the attached chopper attachments. Process the wrapping mixture in the power outlet, switch ON the appliance (power switch and ON/OFF button), and then use the fine grinding disc. Freeze the wrapping shortly. 7. Cut the wrapping into the feed tube. 5.After processing...
.... 4.Insert the plug of the mincer in the mincer with separator disc, cookie attachment, and cookie former (see: ›Assembling for making cookies with the attached chopper attachments. Process the wrapping mixture in the power outlet, switch ON the appliance (power switch and ON/OFF button), and then use the fine grinding disc. Freeze the wrapping shortly. 7. Cut the wrapping into the feed tube. 5.After processing...
User Manual
Page 18
... cannot start reverse operation, while forward operation is blocked. pushing. Press the red button at the bot- Additionally, you will find solutions in the Remove any problems occur during operation, you can contact your foods. Too hard parts are dark. the indicators are still in the following table. The motor works too slow- processing your vendor. Cut the food in the power outlet. Only process foods...
... cannot start reverse operation, while forward operation is blocked. pushing. Press the red button at the bot- Additionally, you will find solutions in the Remove any problems occur during operation, you can contact your foods. Too hard parts are dark. the indicators are still in the following table. The motor works too slow- processing your vendor. Cut the food in the power outlet. Only process foods...
User Manual
Page 19
... the motor gets stuck again or reverse operation does not work -speed and use smaller portions. Handle with the motor switched off the motor via the ON/OFF button and power switch, then unplug and clean the appliance according to operate the motor in chapter ›Care and Cleaning‹. If the blockage of the worm shaft is sufficient to the instructions in reverse direction for 15...
... the motor gets stuck again or reverse operation does not work -speed and use smaller portions. Handle with the motor switched off the motor via the ON/OFF button and power switch, then unplug and clean the appliance according to operate the motor in chapter ›Care and Cleaning‹. If the blockage of the worm shaft is sufficient to the instructions in reverse direction for 15...
User Manual
Page 20
.... Remove the pusher. Handle with some minutes. 2.Moisture a clean cloth or soft sponge with warm dish-water and a nylon brush. Do not use violence! Stubborn residues on the surfaces can be removed better by turning it clockwise. Disassembling the appliance WARNING! Always switch off the ON/OFF button and power switch, wait until the motor comes to lubricate the grinding discs...
.... Remove the pusher. Handle with some minutes. 2.Moisture a clean cloth or soft sponge with warm dish-water and a nylon brush. Do not use violence! Stubborn residues on the surfaces can be removed better by turning it clockwise. Disassembling the appliance WARNING! Always switch off the ON/OFF button and power switch, wait until the motor comes to lubricate the grinding discs...
User Manual
Page 21
... purpose than operating the appliance. CAUTION: Do not carry the appliance by the cutter blade. 3.Additionally, you can insert some tools in the figure. To move the motor housing, always grasp it at both sides near the bottom. 5.Grasp the motor housing with cutter blade and a grinding disc before storage, (See: ›Assembling the appliance‹) to store the parts and accessories...
... purpose than operating the appliance. CAUTION: Do not carry the appliance by the cutter blade. 3.Additionally, you can insert some tools in the figure. To move the motor housing, always grasp it at both sides near the bottom. 5.Grasp the motor housing with cutter blade and a grinding disc before storage, (See: ›Assembling the appliance‹) to store the parts and accessories...
User Manual
Page 22
... technical support, please contact Gastroback Customer Care Center by inappropriate treatment, over loading or installation mistakes. There is no warranty claim of the purchaser if the damage or defect of the appliance is any further claim and within warranty limits of the law free of charge repaired or substituted. Contact your local disposal company. Information and service Please...
... technical support, please contact Gastroback Customer Care Center by inappropriate treatment, over loading or installation mistakes. There is no warranty claim of the purchaser if the damage or defect of the appliance is any further claim and within warranty limits of the law free of charge repaired or substituted. Contact your local disposal company. Information and service Please...