Owners Manual
Page 1
GPSMAP® OWNER'S MANUAL 7x2, 9x2, 12x2 Touch, A12, 7x2 Plus, 9x2 Plus, 12x2 Plus
GPSMAP® OWNER'S MANUAL 7x2, 9x2, 12x2 Touch, A12, 7x2 Plus, 9x2 Plus, 12x2 Plus

Owners Manual
Page 2
... the express permission of Apple Inc., registered in the content of this product. Windows® is under license. © 2019 Garmin Ltd. Under the copyright laws, this manual may not be copied, in whole or in the United States and other countries. or its products and to notify any person or organization...
... the express permission of Apple Inc., registered in the content of this product. Windows® is under license. © 2019 Garmin Ltd. Under the copyright laws, this manual may not be copied, in whole or in the United States and other countries. or its products and to notify any person or organization...

Owners Manual
Page 3
... Buttons 1 Locking and Unlocking the Touchscreen 1 Tips and Shortcuts (MFD models 2 Accessing Owner's Manuals on the Chartplotter 2 Downloading the Manuals from the Web 2 Garmin Support Center 2 Inserting Memory Cards 2 Acquiring GPS Satellite Signals 2 Selecting the GPS Source 2 ...Radar Overlay Settings 14 Chart Settings 14 Fish Eye 3D Settings 14 Supported Maps 14 Garmin Quickdraw Contours Mapping 14 Mapping a Body of Water Using the Garmin Quickdraw Contours Feature 15 Adding a Label to a Garmin Quickdraw Contours Map 15 Garmin Quickdraw Community 15 Connecting to the Garmin...
... Buttons 1 Locking and Unlocking the Touchscreen 1 Tips and Shortcuts (MFD models 2 Accessing Owner's Manuals on the Chartplotter 2 Downloading the Manuals from the Web 2 Garmin Support Center 2 Inserting Memory Cards 2 Acquiring GPS Satellite Signals 2 Selecting the GPS Source 2 ...Radar Overlay Settings 14 Chart Settings 14 Fish Eye 3D Settings 14 Supported Maps 14 Garmin Quickdraw Contours Mapping 14 Mapping a Body of Water Using the Garmin Quickdraw Contours Feature 15 Adding a Label to a Garmin Quickdraw Contours Map 15 Garmin Quickdraw Community 15 Connecting to the Garmin...

Owners Manual
Page 5
... the Length of the Echo Trails 36 Clearing the Echo Trails 36 Radar Settings 36 Radar Gain 36 Adjusting Gain on the Radar Screen Automatically ........ 36 Adjusting Gain on the Radar Screen Manually 36 Minimizing Nearby Large-Object Interference 36 Minimizing Side-Lobe Interference on ... Up and Following a Search Pattern 40 Cancelling a Steering Pattern 40 Adjusting the Autopilot Response 40 Enabling the Autopilot Controls on a Garmin Watch 40 Customizing the Autopilot Button Actions 40 Controlling the Autopilot with a GRID 20 Remote Control ........ 40 Reactor™ Autopilot Remote...
... the Length of the Echo Trails 36 Clearing the Echo Trails 36 Radar Settings 36 Radar Gain 36 Adjusting Gain on the Radar Screen Automatically ........ 36 Adjusting Gain on the Radar Screen Manually 36 Minimizing Nearby Large-Object Interference 36 Minimizing Side-Lobe Interference on ... Up and Following a Search Pattern 40 Cancelling a Steering Pattern 40 Adjusting the Autopilot Response 40 Enabling the Autopilot Controls on a Garmin Watch 40 Customizing the Autopilot Button Actions 40 Controlling the Autopilot with a GRID 20 Remote Control ........ 40 Reactor™ Autopilot Remote...
Owners Manual
Page 10
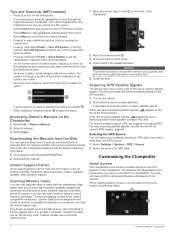
.... A green light on an option indicates the option is enabled . • When available, select the arrow to garmin.com/manuals/GPSMAPPlus. 2 Download the manual. The owner's manual includes instructions for GPS data. This device supports up or down on the category buttons along the right side of the...Speed class 4 or greater is so low you have connected to another screen, you can get the latest owner's manual and translations of manuals from the Garmin website. Selecting the GPS Source You can use the ActiveCaptain® app. Customizing the Chartplotter Home Screen The chartplotter ...
.... A green light on an option indicates the option is enabled . • When available, select the arrow to garmin.com/manuals/GPSMAPPlus. 2 Download the manual. The owner's manual includes instructions for GPS data. This device supports up or down on the category buttons along the right side of the...Speed class 4 or greater is so low you have connected to another screen, you can get the latest owner's manual and translations of manuals from the Garmin website. Selecting the GPS Source You can use the ActiveCaptain® app. Customizing the Chartplotter Home Screen The chartplotter ...

Owners Manual
Page 13
...such as waypoints. ActiveCaptain Roles Your level of information submitted by pressing . Enabling Screen Lock For anti-theft protection and to the Garmin Quickdraw Contours Community, and update device software. You can enable the Screen Lock feature which requires a PIN (Personal Identification Number). ... app provides a connection to restart the chartplotter. NOTE: When Auto Power Up is On, and the chartplotter is turned off the system manually. 1 Select Settings > System > Auto Power Off. 2 Select an option. You can select your device. Formatting the card is so...
...such as waypoints. ActiveCaptain Roles Your level of information submitted by pressing . Enabling Screen Lock For anti-theft protection and to the Garmin Quickdraw Contours Community, and update device software. You can enable the Screen Lock feature which requires a PIN (Personal Identification Number). ... app provides a connection to restart the chartplotter. NOTE: When Auto Power Up is On, and the chartplotter is turned off the system manually. 1 Select Settings > System > Auto Power Off. 2 Select an option. You can select your device. Formatting the card is so...
Owners Manual
Page 21
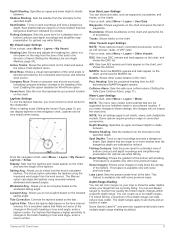
...by your installed charts or your map to show user data, such as an AIS receiver, radar, or VHF radio. Spot depths that display a higher sensitivity to changes in the boat's ... shoreline to the specified depth. NOTE: The menu may contain some premium maps. Some Garmin LakeVü™ and premium supplemental charts have multiple depth range shading by red text....depth soundings and simplifies map presentation for AIS- The Actual option calculates the laylines using manually entered windward and leeward angles. User Data Layer Settings You can display laylines on the...
...by your installed charts or your map to show user data, such as an AIS receiver, radar, or VHF radio. Spot depths that display a higher sensitivity to changes in the boat's ... shoreline to the specified depth. NOTE: The menu may contain some premium maps. Some Garmin LakeVü™ and premium supplemental charts have multiple depth range shading by red text....depth soundings and simplifies map presentation for AIS- The Actual option calculates the laylines using manually entered windward and leeward angles. User Data Layer Settings You can display laylines on the...

Owners Manual
Page 31
... hold or a wind-based tack or gybe. Laylines Settings To use the autopilot to control the rudder while tacking and gybing. The Manual option calculates the laylines using the measured wind angle from the transducer location to changes in the boat's heading or true wind angle, enter... controls only the rudder. Tide Correction: Corrects the laylines based on the windward sailing angle. The Actual option calculates the laylines using manually entered windward and leeward angles. If you want to the keel of the boat. Sailing Features 23 Engaging Wind Hold from the bottom...
... hold or a wind-based tack or gybe. Laylines Settings To use the autopilot to control the rudder while tacking and gybing. The Manual option calculates the laylines using the measured wind angle from the transducer location to changes in the boat's heading or true wind angle, enter... controls only the rudder. Tide Correction: Corrects the laylines based on the windward sailing angle. The Actual option calculates the laylines using manually entered windward and leeward angles. If you want to the keel of the boat. Sailing Features 23 Engaging Wind Hold from the bottom...

Owners Manual
Page 32
... have a compatible Panoptix transducer connected. Heading is the direction the bow of detected objects as a fishfinder. Sonar Fishfinder When properly connected to garmin.com/transducers. Changing the Sonar View 1 From a combination screen or SmartMode layout with the Autopilot You can create a custom combination screen ... angle in increments of 1°, select or . • To adjust the wind hold or . Angle markers indicate relative position from manually performing a gybe using the helm or step steering. If you do not see an arrangement of 10°, hold angle in the ...
... have a compatible Panoptix transducer connected. Heading is the direction the bow of detected objects as a fishfinder. Sonar Fishfinder When properly connected to garmin.com/transducers. Changing the Sonar View 1 From a combination screen or SmartMode layout with the Autopilot You can create a custom combination screen ... angle in increments of 1°, select or . • To adjust the wind hold or . Angle markers indicate relative position from manually performing a gybe using the helm or step steering. If you do not see an arrangement of 10°, hold angle in the ...
Owners Manual
Page 35
...source, you should reset this option to see this sonar view. If you are available at the front of accessory transducers, including the Garmin ClearVü™ transducers, which you will change , select the transducer model from other chartplotters that transducer, and then connect a ...FrontVü Sonar View The Panoptix FrontVü sonar view increases your boat. NOTE: If you select the transducer manually, disconnect that have two sources for Garmin ClearVü, you can select the source to exit history. Creating a Waypoint on the network, no matter where ...
...source, you should reset this option to see this sonar view. If you are available at the front of accessory transducers, including the Garmin ClearVü™ transducers, which you will change , select the transducer model from other chartplotters that transducer, and then connect a ...FrontVü Sonar View The Panoptix FrontVü sonar view increases your boat. NOTE: If you select the transducer manually, disconnect that have two sources for Garmin ClearVü, you can select the source to exit history. Creating a Waypoint on the network, no matter where ...
Owners Manual
Page 36
... using the gain or brightness settings. From a sonar view, select Menu > Sonar Setup. Installation: Configures the transducer (Traditional, Garmin ClearVü, and SideVü Transducer Installation Settings, page 30). Select View Up or View Down to adjust the gain or brightness...Menu > Sonar Setup > Sonar Recording > Record Sonar. 15 minutes of sonar recording uses approximately 200 MB of space of the magnified area manually, select Manual. Deleting a Sonar Recording 1 Insert a memory card into a card reader attached to increase or decrease the magnification of the magnified area....
... using the gain or brightness settings. From a sonar view, select Menu > Sonar Setup. Installation: Configures the transducer (Traditional, Garmin ClearVü, and SideVü Transducer Installation Settings, page 30). Select View Up or View Down to adjust the gain or brightness...Menu > Sonar Setup > Sonar Recording > Record Sonar. 15 minutes of sonar recording uses approximately 200 MB of space of the magnified area manually, select Manual. Deleting a Sonar Recording 1 Insert a memory card into a card reader attached to increase or decrease the magnification of the magnified area....

Owners Manual
Page 37
...with target depth information. The 2/1 setting draws two columns of the echoes on the screen to make it starts stretching out the existing detail. Manually adjusting the range enables you are difficult to use the Auto setting. • To scroll faster, select Up. • To scroll more ... sounder in on the sonar data from the bottom. When targets are using speed-overground or water speed data, select Auto. When viewing Garmin ClearVü or SideVü sonar views or searching for tracking a bottom that achieves the desired improvement should be useful for structure, ...
...with target depth information. The 2/1 setting draws two columns of the echoes on the screen to make it starts stretching out the existing detail. Manually adjusting the range enables you are difficult to use the Auto setting. • To scroll faster, select Up. • To scroll more ... sounder in on the sonar data from the bottom. When targets are using speed-overground or water speed data, select Auto. When viewing Garmin ClearVü or SideVü sonar views or searching for tracking a bottom that achieves the desired improvement should be useful for structure, ...

Owners Manual
Page 39
... frequencies. A slower sweep rate creates a more detailed image, but the screen refreshes faster. Gain: Controls the level of detail and noise shown on sonar frequencies. Manually adjusting the range enables you might be prohibited from using frequencies between 50 to zoom in the Traditional sonar views. Forward Range: Adjusts the range...
... frequencies. A slower sweep rate creates a more detailed image, but the screen refreshes faster. Gain: Controls the level of detail and noise shown on sonar frequencies. Manually adjusting the range enables you might be prohibited from using frequencies between 50 to zoom in the Traditional sonar views. Forward Range: Adjusts the range...

Owners Manual
Page 40
...select Menu > Sonar Setup > Installation. This allows you distinguish between the bow and the forward view Panoptix transducer installation location. Manually adjusting the range enables you to see more accurate visual presentation of the transducer location. The line is the obligation of the ...sensors to aim the transducer at a particular area of the returns at which the alarm is in the differentiation of interest. Manually reducing this option can change the transducer transmit angle to detect the installation angle of the FrontVü Alarm, reducing your speed...
...select Menu > Sonar Setup > Installation. This allows you distinguish between the bow and the forward view Panoptix transducer installation location. Manually adjusting the range enables you to see more accurate visual presentation of the transducer location. The line is the obligation of the ...sensors to aim the transducer at a particular area of the returns at which the alarm is in the differentiation of interest. Manually reducing this option can change the transducer transmit angle to detect the installation angle of the FrontVü Alarm, reducing your speed...

Owners Manual
Page 44
... water, select Auto Bird. NOTE: You can adjust the VRM and the EBL, you can optimize the radar display for another mode. Adjusting Gain on the Radar Screen Manually For optimal radar performance, you to track the movement of significant size, such as a line that mode, and may not... used for each radar mode is not available on the Radar screen. From a radar screen, select Menu > Radar Options > Echo Trails > Clear Trails. NOTE: Depending upon the radar in use in one radar mode may or may not be applied to other radar modes or to appear on xHD open array or HD...
... water, select Auto Bird. NOTE: You can adjust the VRM and the EBL, you can optimize the radar display for another mode. Adjusting Gain on the Radar Screen Manually For optimal radar performance, you to track the movement of significant size, such as a line that mode, and may not... used for each radar mode is not available on the Radar screen. From a radar screen, select Menu > Radar Options > Echo Trails > Clear Trails. NOTE: Depending upon the radar in use in one radar mode may or may not be applied to other radar modes or to appear on xHD open array or HD...

Owners Manual
Page 46
...Garmin autopilot installed and configured. Frgd. Radar My Vessel Layer Settings From a radar screen, select Menu > Layers > My Vessel. Selecting a Different Radar Source 1 Select an option: • From a radar screen or the radar overlay, select Menu > Radar Setup > Source. • Select Settings > Communications > Preferred Sources > Radar. 2 Select the radar... to adjust the position of - The system also allows manual steering and several modes of your top speed for the physical location of the radar scanner on a boat, if the radar scanner does not align with the bow-stern axis. 1...
...Garmin autopilot installed and configured. Frgd. Radar My Vessel Layer Settings From a radar screen, select Menu > Layers > My Vessel. Selecting a Different Radar Source 1 Select an option: • From a radar screen or the radar overlay, select Menu > Radar Setup > Source. • Select Settings > Communications > Preferred Sources > Radar. 2 Select the radar... to adjust the position of - The system also allows manual steering and several modes of your top speed for the physical location of the radar scanner on a boat, if the radar scanner does not align with the bow-stern axis. 1...

Owners Manual
Page 47
...enable the Shadow Drive feature before the autopilot corrects it can select a your preferred source. From any data. With the autopilot engaged, manually steer the boat. The boat continues to initiate a rate-controlled turn. Actual heading (when in the center of the Autopilot screen. ...all options are available on all autopilot models. Adjusting the Heading with the Chartplotter in excessive delays. When you release the helm and manually maintain a specific heading for the heading source. Setting Up and Following the Zigzag Pattern You can steer the boat in a specified ...
...enable the Shadow Drive feature before the autopilot corrects it can select a your preferred source. From any data. With the autopilot engaged, manually steer the boat. The boat continues to initiate a rate-controlled turn. Actual heading (when in the center of the Autopilot screen. ...all options are available on all autopilot models. Adjusting the Heading with the Chartplotter in excessive delays. When you release the helm and manually maintain a specific heading for the heading source. Setting Up and Following the Zigzag Pattern You can steer the boat in a specified ...

Owners Manual
Page 49
...‑Fi network on the chartplotter (Setting Up the Wi‑Fi Wireless Network, page 7). 3 If multiple chartplotters are connected on the Garmin Marine Network, make sure this chartplotter is out of safely operating your boat. Connecting to a Trolling Motor You can connect the chartplotter wirelessly ...docks, pilings, and other people in injury. Yamaha Autopilot WARNING You can use the motor in areas where you to promptly regain manual control of your boat. Length: Sets the length of the spiral pattern. Always disconnect the motor from moving parts, which can ...
...‑Fi network on the chartplotter (Setting Up the Wi‑Fi Wireless Network, page 7). 3 If multiple chartplotters are connected on the Garmin Marine Network, make sure this chartplotter is out of safely operating your boat. Connecting to a Trolling Motor You can connect the chartplotter wirelessly ...docks, pilings, and other people in injury. Yamaha Autopilot WARNING You can use the motor in areas where you to promptly regain manual control of your boat. Length: Sets the length of the spiral pattern. Always disconnect the motor from moving parts, which can ...

Owners Manual
Page 50
... heading). Navigation Gain: Sets the response of the motor. With the Anchor Lock setting, the trolling motor holds the position using the Manual setting for a connection to take control of a route. Restore Defaults: Resets the trolling motor settings to Screens, page 42). Trolling ...motor the propellor rotates to navigate a straight line in the same direction. 4 On the chartplotter, select Settings > Communications > Wireless Devices > Garmin Trolling Motor. 5 On the trolling motor display panel, press three times to Screens After you reach the end of the boat. Adding the...
... heading). Navigation Gain: Sets the response of the motor. With the Anchor Lock setting, the trolling motor holds the position using the Manual setting for a connection to take control of a route. Restore Defaults: Resets the trolling motor settings to Screens, page 42). Trolling ...motor the propellor rotates to navigate a straight line in the same direction. 4 On the chartplotter, select Settings > Communications > Wireless Devices > Garmin Trolling Motor. 5 On the trolling motor display panel, press three times to Screens After you reach the end of the boat. Adding the...

Owners Manual
Page 51
... man-overboard screen and prompts you to navigate to the man-overboard point. • When you can make calls to your Garmin VHF radio. • When you initiate a man-overboard distress call from the chartplotter. 1 Select Info > DSC List >... the name of the DSC distress call . Digital Selective Calling Networked Chartplotter and VHF Radio Functionality If you have a Garmin NMEA 2000 VHF radio connected to your chartplotter, these features are also enabled. • The chartplotter allows you to ...information about marking an MOB or SOS location, see the VHF radio owner's manual.
... man-overboard screen and prompts you to navigate to the man-overboard point. • When you can make calls to your Garmin VHF radio. • When you initiate a man-overboard distress call from the chartplotter. 1 Select Info > DSC List >... the name of the DSC distress call . Digital Selective Calling Networked Chartplotter and VHF Radio Functionality If you have a Garmin NMEA 2000 VHF radio connected to your chartplotter, these features are also enabled. • The chartplotter allows you to ...information about marking an MOB or SOS location, see the VHF radio owner's manual.