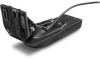
GT Flush Mount Template
Page 1
... Notice It is not recommended that you must follow these instructions for any damages or expenses resulting from a miscut mounting surface arising from a failure to follow these instructions. Use the template that came in the window below. 4 Verify that is larger than the template. Failure to have ... Page Size that the paper size is larger than the template ➍. Notice Garmin is next to Auto-Rotate and Center ➋. 4 Drag the arrow ➌ to the right, to follow these instructions, may result in an incorrectly sized template and therefore an incorrect cutout (too large...
GT Flush Mount Template
Page 2
Transducer Transom Mount Template January 2017 190-02160-05_0C Printed in Taiwan ---- ---
TransomTrolling Motor Mount Transducer Installation Instructions
Page 1
... WARNING See the Important Safety and Product Information guide in the water, you experience difficulty during the installation, contact Garmin Product Support. Read all installation instructions before proceeding with isopropyl alcohol. 3 Apply water-based anti-fouling paint to prevent marine growth. Assembling the Transducer with a Transom Mount Bracket 1 Attach the mount to the transducer with the included À Á star washers , and...
TransomTrolling Motor Mount Transducer Installation Instructions
Page 2
...mount transducer installation in open water free of the transducer, make the adjustments in .) drill bit. • If you have the 4-pin cable, use a 16 mm (5/8 in small increments. bit, drill a pilot hole approximately 10 mm 13Apply marine sealant to the included 12 mm screw, and attach the cable clamp to electrical wires...cable using a pass-through hole, push it through the pass-through hole, and install the cable-entry cover (Installing the Cable-Entry Cover, page 2). • If you are mounting the bracket on the transducer cable, approximately halfway between the transducer ...
TransomTrolling Motor Mount Transducer Installation Instructions
Page 3
... and agree to support.garmin.com for the software update instructions to appear, the device must copy the software update to the transducer . Â Ã 2 Route the cable through the slot on the transducer À mount , until the degradation is inserted. 3 Follow the on a Trolling Motor NOTICE Do not cut the transducer cable. NOTE: You can update the software, you install the device...
TransomTrolling Motor Mount Transducer Installation Instructions
Page 4
Garmin® and the Garmin logo are trademarks of Garmin. or its subsidiaries, registered in the United States and other countries. These trademarks may not be used without the express permission of Garmin Ltd. Windows® is a registered trademark of Microsoft Corporation in the USA and other countries. © 2017 Garmin Ltd. or its subsidiaries support.garmin.com