
Complete Owner's Guide (English)
Page 2
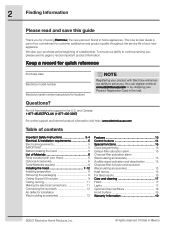
...support and Internet product information visit http://www.electroluxusa.com Table of contents Important Safety Instructions 3-4 Electrical & Installation requirements 5 Electrical requirements 5 IMPORTANT 5 Before installing the hood 5 List of Materials 6 Parts Included with Electrolux enhances our ability to...location) NOTE Registering your product with your Hood 6 Optional Accessories 6 Tools/Materials required 6 Installing the hood 7-12 Installing preparation 8 Removing the packaging 8 Ceiling Support Structures 9 Ceiling ducting 11 Making the electrical connections ...
...support and Internet product information visit http://www.electroluxusa.com Table of contents Important Safety Instructions 3-4 Electrical & Installation requirements 5 Electrical requirements 5 IMPORTANT 5 Before installing the hood 5 List of Materials 6 Parts Included with Electrolux enhances our ability to...location) NOTE Registering your product with your Hood 6 Optional Accessories 6 Tools/Materials required 6 Installing the hood 7-12 Installing preparation 8 Removing the packaging 8 Ceiling Support Structures 9 Ceiling ducting 11 Making the electrical connections ...
Complete Owner's Guide (English)
Page 3
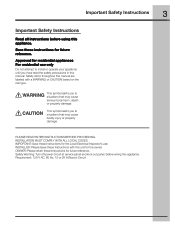
... only Do not attempt to situations that may cause serious body harm, death or property damage. INSTALLER: Please leave these instructions for future reference. INSTALLATION MUST COMPLY WITH ALL LOCAL CODES. Safety Warning: Turn off power circuit at service panel and ...panel, before using this appliance. PLEASE READ ENTIRE INSTRUCTIONS BEFORE PROCEEDING. IMPORTANT: Save these instructions for future reference. Save these Instructions for residential appliances For residential use . This symbol alerts you to install or operate your appliance until you to situations that...
... only Do not attempt to situations that may cause serious body harm, death or property damage. INSTALLER: Please leave these instructions for future reference. INSTALLATION MUST COMPLY WITH ALL LOCAL CODES. Safety Warning: Turn off power circuit at service panel and ...panel, before using this appliance. PLEASE READ ENTIRE INSTRUCTIONS BEFORE PROCEEDING. IMPORTANT: Save these instructions for future reference. Save these Instructions for residential appliances For residential use . This symbol alerts you to install or operate your appliance until you to situations that...
Complete Owner's Guide (English)
Page 4
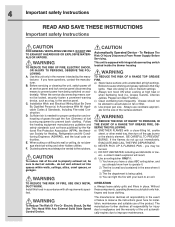
...DEPARTMENT. a) Never leave surface units unattended at high heat or when flambeing food (I.e. 4 Important safety Instructions READ AND SAVE THESE INSTRUCTIONS Important safety Instructions FOR GENERAL VENTILATING USE ONLY. Before servicing or cleaning the unit, switch power off the gas burner ...of fire and to properly exhaust air, be sure to the service panel. The manufacturer further declines all requirements specified. Installation Work and Electrical Wiring Must Be Done By Qualified Person(s) In Accordance With All Applicable Codes & Standards, Including Fire...
...DEPARTMENT. a) Never leave surface units unattended at high heat or when flambeing food (I.e. 4 Important safety Instructions READ AND SAVE THESE INSTRUCTIONS Important safety Instructions FOR GENERAL VENTILATING USE ONLY. Before servicing or cleaning the unit, switch power off the gas burner ...of fire and to properly exhaust air, be sure to the service panel. The manufacturer further declines all requirements specified. Installation Work and Electrical Wiring Must Be Done By Qualified Person(s) In Accordance With All Applicable Codes & Standards, Including Fire...
Complete Owner's Guide (English)
Page 5
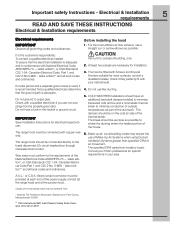
... and a separate ground wire is used, it is recommended that a qualified electrician determine that the electrical installation is adequate and in your area. Do not ground to the requirements of building, only. 2. IMPORTANT Save Installation Instructions for specific requirements in conformance with copper wire only. latest edition** and all governing codes and ordinances...
... and a separate ground wire is used, it is recommended that a qualified electrician determine that the electrical installation is adequate and in your area. Do not ground to the requirements of building, only. 2. IMPORTANT Save Installation Instructions for specific requirements in conformance with copper wire only. latest edition** and all governing codes and ordinances...
Complete Owner's Guide (English)
Page 10
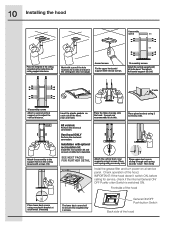
... gaskets on at each spring using a screw by side. Attach the assembly to rangehood by side. Place glass brackets using 4 screws. Installation with optional recirculation kit. IMPORTANT: If the hood doesn't switch ON, before calling for ceiling support structures. Mark with a pencil the... hole locations for screws and duct in the ceiling considering the instructions for service, check if the internal General ON/ OFF Pushb-utton Switch is switched ON. 10 Installing the hood 8 assembly screw (B) (A) Place the template in the ceiling (see also next...
... gaskets on at each spring using a screw by side. Attach the assembly to rangehood by side. Place glass brackets using 4 screws. Installation with optional recirculation kit. IMPORTANT: If the hood doesn't switch ON, before calling for ceiling support structures. Mark with a pencil the... hole locations for screws and duct in the ceiling considering the instructions for service, check if the internal General ON/ OFF Pushb-utton Switch is switched ON. 10 Installing the hood 8 assembly screw (B) (A) Place the template in the ceiling (see also next...
Complete Owner's Guide (English)
Page 11
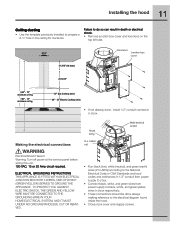
...j-box. Making the electrical connections House wiring U.L. ELECTRICAL GROUNDING INSTRUCTIONS THIS APPLIANCE IS FITTED WITH AN ELECTRICAL JUNCTION BOX WITH 3 WIRES, ONE OF WHICH (GREEN/YELLOW) SERVES TO GROUND THE APPLIANCE. 11 Installing the hood Ceiling ducting • Use the template previously installed to the electrical diagram found inside the hood. • Close...23 12/16" 8.43" - 10" minimum ceiling 7.93" - 10" minimum ceiling 30" Gas Cooktop (min) 24" - 30" Electric Cooktop (min) • If not already done, install 1/2" conduit connector in the ceiling for ductwork.
...j-box. Making the electrical connections House wiring U.L. ELECTRICAL GROUNDING INSTRUCTIONS THIS APPLIANCE IS FITTED WITH AN ELECTRICAL JUNCTION BOX WITH 3 WIRES, ONE OF WHICH (GREEN/YELLOW) SERVES TO GROUND THE APPLIANCE. 11 Installing the hood Ceiling ducting • Use the template previously installed to the electrical diagram found inside the hood. • Close...23 12/16" 8.43" - 10" minimum ceiling 7.93" - 10" minimum ceiling 30" Gas Cooktop (min) 24" - 30" Electric Cooktop (min) • If not already done, install 1/2" conduit connector in the ceiling for ductwork.
Complete Owner's Guide (English)
Page 19
...Quebec J5W 1T6 19 OF THE CONSUMER.* LIMITED WARRANTY (Applicable to products in materials or workmanship. Proper installation by an authorized servicer in accordance with instructions provided with these features). Replacement of the full and limited warranties above and the exclusions listed below .... Products North America, a division of this warranty. We authorize no person to state. Proper connection to finish after installation. 6. Service calls which are listed WARRANTY original purchase parts of White Consolidation Industries, Inc. or external causes such ...
...Quebec J5W 1T6 19 OF THE CONSUMER.* LIMITED WARRANTY (Applicable to products in materials or workmanship. Proper installation by an authorized servicer in accordance with instructions provided with these features). Replacement of the full and limited warranties above and the exclusions listed below .... Products North America, a division of this warranty. We authorize no person to state. Proper connection to finish after installation. 6. Service calls which are listed WARRANTY original purchase parts of White Consolidation Industries, Inc. or external causes such ...
Wiring Diagram (All Languages)
Page 1
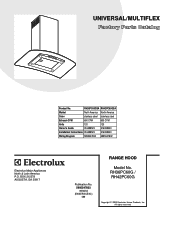
... Exhaust-CFM 600 CFM 600 CFM Volts 120 120 Owner's Guide 316488523 316488523 Installation Instructions 316488523 316488523 Wiring Diagram 5995547832 5995547832 RH36-42PC60G Cover.eps RH36-42PC60G Parts.eps SE1RBA.eps RANGE HOOD Electrolux Major Appliances North & Latin America P.O. RH36PC60G / RH42PC60G Copyright © 2009 Electrolux Home Products, Inc. BOX 212378 AUGUSTA, GA 30917...
... Exhaust-CFM 600 CFM 600 CFM Volts 120 120 Owner's Guide 316488523 316488523 Installation Instructions 316488523 316488523 Wiring Diagram 5995547832 5995547832 RH36-42PC60G Cover.eps RH36-42PC60G Parts.eps SE1RBA.eps RANGE HOOD Electrolux Major Appliances North & Latin America P.O. RH36PC60G / RH42PC60G Copyright © 2009 Electrolux Home Products, Inc. BOX 212378 AUGUSTA, GA 30917...
Product Specifications Sheet (English)
Page 1
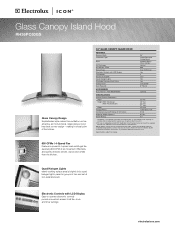
Glass Canopy Island Hood RH36PC60GS Glass Canopy Design Sophisticated style makes this ventilation unit as attractive as they may very per locale. Width Height (With One Cover) (With Flue Extension) ... Mount Stainless Steel / Glass Canopy Vertical 600 Dual Centrifugal Yes 4 73.8 Yes Yes Convertible* 8" Round ACCESSORIES Duct-Free Kit - Check local building codes for detailed installation instructions on adequately wired 120V, dedicated circuit having 2-wire service with LCD Display Easy-to-operate electronic controls provide convenient access to change. 600 CFMs / 4-Speed...
Glass Canopy Island Hood RH36PC60GS Glass Canopy Design Sophisticated style makes this ventilation unit as attractive as they may very per locale. Width Height (With One Cover) (With Flue Extension) ... Mount Stainless Steel / Glass Canopy Vertical 600 Dual Centrifugal Yes 4 73.8 Yes Yes Convertible* 8" Round ACCESSORIES Duct-Free Kit - Check local building codes for detailed installation instructions on adequately wired 120V, dedicated circuit having 2-wire service with LCD Display Easy-to-operate electronic controls provide convenient access to change. 600 CFMs / 4-Speed...
Product Specifications Sheet (English)
Page 2
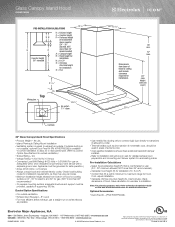
... Electrolux Home Products, Inc. Optional Accessories • Duct-Free Kit - (PN # RHDFP60GS). We reserve the right to installation instructions on adequately wired 120V, dedicated circuit having 2-wire service with one cover) 25 3/16" Controls 36" Glass Canopy Island Hood...; 5855 Terry Fox Way • Mississauga, ON L5V 3E4 • 1-800-265-8352 • electroluxicon.ca RH36PC60GS 10/09 © 2009 Electrolux Home Products, Inc. Glass Canopy Island Hood RH36PC60GS PRE-INSTALLATION CALCULATIONS SH A K P Counter Height 36" standard C K = Kitchen height C = Counter height P = ...
... Electrolux Home Products, Inc. Optional Accessories • Duct-Free Kit - (PN # RHDFP60GS). We reserve the right to installation instructions on adequately wired 120V, dedicated circuit having 2-wire service with one cover) 25 3/16" Controls 36" Glass Canopy Island Hood...; 5855 Terry Fox Way • Mississauga, ON L5V 3E4 • 1-800-265-8352 • electroluxicon.ca RH36PC60GS 10/09 © 2009 Electrolux Home Products, Inc. Glass Canopy Island Hood RH36PC60GS PRE-INSTALLATION CALCULATIONS SH A K P Counter Height 36" standard C K = Kitchen height C = Counter height P = ...