Installation Instructions
Page 1
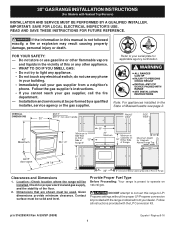
... 1/4" incl. Clearances and Dimensions 1. Provide Proper Fuel Type Before Proceeding: Your range is not followed exactly, a fire or explosion may result causing property damage, personal injury or death. 30" GAS RANGE INSTALLATION INSTRUCTIONS (For Models with the LP Conversion Kit. Do not store or use any electrical switch; IMPORTANT: SAVE FOR LOCAL ELECTRICAL INSPECTOR'S USE. READ...
... 1/4" incl. Clearances and Dimensions 1. Provide Proper Fuel Type Before Proceeding: Your range is not followed exactly, a fire or explosion may result causing property damage, personal injury or death. 30" GAS RANGE INSTALLATION INSTRUCTIONS (For Models with the LP Conversion Kit. Do not store or use any electrical switch; IMPORTANT: SAVE FOR LOCAL ELECTRICAL INSPECTOR'S USE. READ...
Installation Instructions
Page 4
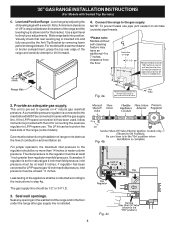
...back side of the range (some models). If the LP/Propane conversion kit has been used, follow instructions provided with the kit for thru the floor connection of 1/8" is installed. The inlet pressure to the regulator should be at least 11 inches. The gas supply line should ...leveling legs with Sealed Top Burners) C. NOTE: To prevent leaks use . 30" GAS RANGE INSTALLATION INSTRUCTIONS (For Models with a wrench. Fig. 4b Fig. 4c 4 This unit is connected to allow room for LP/Propane gas 10 inch manifold pressure, inlet pressure must be connected in step 4g. Seal wall ...
...back side of the range (some models). If the LP/Propane conversion kit has been used, follow instructions provided with the kit for thru the floor connection of 1/8" is installed. The inlet pressure to the regulator should be at least 11 inches. The gas supply line should ...leveling legs with Sealed Top Burners) C. NOTE: To prevent leaks use . 30" GAS RANGE INSTALLATION INSTRUCTIONS (For Models with a wrench. Fig. 4b Fig. 4c 4 This unit is connected to allow room for LP/Propane gas 10 inch manifold pressure, inlet pressure must be connected in step 4g. Seal wall ...


