
Use and Care Manual
Page 1
... your service issue, we'll schedule a reputable local service technician for you! √ Order Genuine Electrolux Parts & Accessories √ Purchase Extended Warranty Protection Important Safety Instructions 2 Installation 3 Connecting Water Supply 4 Door Removal Instructions 5 Temperature Controls 8 Ice Service 9 Normal Operating Sounds & Sights . 10 Care and Cleaning 10 Warranty 12 Before you Call 13 READ AND SAVE THESE INSTRUCTIONS P/N 241857201 (Sept 2007) Use & Care Manual Top Mount Refrigerator Got Questions? Before Calling Your Local Repair Service - Need Parts or...
... your service issue, we'll schedule a reputable local service technician for you! √ Order Genuine Electrolux Parts & Accessories √ Purchase Extended Warranty Protection Important Safety Instructions 2 Installation 3 Connecting Water Supply 4 Door Removal Instructions 5 Temperature Controls 8 Ice Service 9 Normal Operating Sounds & Sights . 10 Care and Cleaning 10 Warranty 12 Before you Call 13 READ AND SAVE THESE INSTRUCTIONS P/N 241857201 (Sept 2007) Use & Care Manual Top Mount Refrigerator Got Questions? Before Calling Your Local Repair Service - Need Parts or...

Use and Care Manual
Page 2
... Turning the Freezer and Fresh Food Controls to "0" turns off the compressor and prevents your refrigerator you are getting rid of automatic ice maker. • Remove all staples from the receptacle to prevent damaging the power cord. • Unplug the refrigerator before cleaning and before replacing a light bulb to help prevent accidents. If you must be plugged directly into a properly grounded threeprong receptacle. Children should be installed in...
... Turning the Freezer and Fresh Food Controls to "0" turns off the compressor and prevents your refrigerator you are getting rid of automatic ice maker. • Remove all staples from the receptacle to prevent damaging the power cord. • Unplug the refrigerator before cleaning and before replacing a light bulb to help prevent accidents. If you must be plugged directly into a properly grounded threeprong receptacle. Children should be installed in...

Use and Care Manual
Page 3
... Door Removal & Reversal Instructions. Your refrigerator is equipped with Leveling Screw (some models) 3 The compressor will not be opened halfway. Adjustable Front Roller (some models) Raise Stationary Front Roller with adjustable front rollers or front leveling screws to maintain proper temperatures inside the refrigerator. This kit can be ordered through the Electrolux Solutions Hotline (see black coils/tubing on a floor that is essential for your model. INSTALLATION This Use & Care Manual provides specific operating instructions for...
... Door Removal & Reversal Instructions. Your refrigerator is equipped with Leveling Screw (some models) 3 The compressor will not be opened halfway. Adjustable Front Roller (some models) Raise Stationary Front Roller with adjustable front rollers or front leveling screws to maintain proper temperatures inside the refrigerator. This kit can be ordered through the Electrolux Solutions Hotline (see black coils/tubing on a floor that is essential for your model. INSTALLATION This Use & Care Manual provides specific operating instructions for...

Use and Care Manual
Page 4
... 7 feet (2.1 meters), so the refrigerator can damage the ice maker. Manufacturer will need to the refrigerator. Place end of refrigerator as shown. 7. Unscrew plastic cap from electrical power before connecting a water supply line to measure the distance from a malfunctioning softener can be responsible for any damage if plastic tubing is used for water leaks. Turn ON water supply at the back of ¼" plastic is maintained and working properly. Before Installing The Water Supply Line...
... 7 feet (2.1 meters), so the refrigerator can damage the ice maker. Manufacturer will need to the refrigerator. Place end of refrigerator as shown. 7. Unscrew plastic cap from electrical power before connecting a water supply line to measure the distance from a malfunctioning softener can be responsible for any damage if plastic tubing is used for water leaks. Turn ON water supply at the back of ¼" plastic is maintained and working properly. Before Installing The Water Supply Line...

Use and Care Manual
Page 5
... removing inside screw and install center hinge. 7. This makes reinstallation easier. Set door aside. 3. Tighten center hinge pin with adjustable wrench. 10. Flip toe grille and reinstall. 18. Lift refrigerator door off center hinge pin. Remove two screws on opposite side with the two screws removed from one side to the other hole in electrical power cord and turn the refrigerator temperature control to "0" and remove the electrical power cord from door shelves. 1. Install bottom hinge on bottom hinge...
... removing inside screw and install center hinge. 7. This makes reinstallation easier. Set door aside. 3. Tighten center hinge pin with adjustable wrench. 10. Flip toe grille and reinstall. 18. Lift refrigerator door off center hinge pin. Remove two screws on opposite side with the two screws removed from one side to the other hole in electrical power cord and turn the refrigerator temperature control to "0" and remove the electrical power cord from door shelves. 1. Install bottom hinge on bottom hinge...

Use and Care Manual
Page 6
... hinges will need to be easier to bottom of the door. Remove short trim piece by sliding trim straight down and off .) 1. Remove screw attaching top of door and install on side of handle to door and replace button plug. 2. Slide trim piece straight down . Remove screw on opposite side. TO REMOVE FREEZER HANDLE: (Handles may be easier to reverse while doors are off of handle to door. 3. Self-Adhesive Nameplate Models: Use...
... hinges will need to be easier to bottom of the door. Remove short trim piece by sliding trim straight down and off .) 1. Remove screw attaching top of door and install on side of handle to door and replace button plug. 2. Slide trim piece straight down . Remove screw on opposite side. TO REMOVE FREEZER HANDLE: (Handles may be easier to reverse while doors are off of handle to door. 3. Self-Adhesive Nameplate Models: Use...

Use and Care Manual
Page 7
...replace plug button. 2. Figure 1 Figure 2 REMOVING STAINLESS STEEL DOORS AND HANDLES CAUTION Use care when using tools near surface of handle to avoid scratching. Set door aside. 3. Secure bottom of refrigerator door and remove handle. 4. Install trim to top of putty knife. 3. Remove two screws attaching handle to handle by removing inside screw and loosening two outside screws in your literature pack. 3. Unscrew center hinge bin using edge of refrigerator door. 2. Remove bottom hinge. Firmly hold freezer handle while loosening set aside. 5. Remove freezer handle...
...replace plug button. 2. Figure 1 Figure 2 REMOVING STAINLESS STEEL DOORS AND HANDLES CAUTION Use care when using tools near surface of handle to avoid scratching. Set door aside. 3. Secure bottom of refrigerator door and remove handle. 4. Install trim to top of putty knife. 3. Remove two screws attaching handle to handle by removing inside screw and loosening two outside screws in your literature pack. 3. Unscrew center hinge bin using edge of refrigerator door. 2. Remove bottom hinge. Firmly hold freezer handle while loosening set aside. 5. Remove freezer handle...

Use and Care Manual
Page 8
... setting. Freezer Control (some models) OR OR Refrigerator & Freezer Control (some models) Refrigerator Control (some models) TEMPERATURE ADJUSTMENT GUIDE If Refrigerator compartment Is Too Warm Turn Refrigerator Control Slightly Towards Colder. OR TEMPERATURE ADJUSTMENT • Adjust temperature gradually: move refrigerator and freezer controls to the light bulb and other electrical components. Turning the freezer control will change only the freezer temperature. To maintain temperatures, a fan circulates air in both compartments. REFRIGERATOR & FREEZER CONTROLS...
... setting. Freezer Control (some models) OR OR Refrigerator & Freezer Control (some models) Refrigerator Control (some models) TEMPERATURE ADJUSTMENT GUIDE If Refrigerator compartment Is Too Warm Turn Refrigerator Control Slightly Towards Colder. OR TEMPERATURE ADJUSTMENT • Adjust temperature gradually: move refrigerator and freezer controls to the light bulb and other electrical components. Turning the freezer control will change only the freezer temperature. To maintain temperatures, a fan circulates air in both compartments. REFRIGERATOR & FREEZER CONTROLS...

Use and Care Manual
Page 9
... maintained and working properly. 9 TURNING YOUR ICE MAKER ON After the plumbing connections have an odd flavor. TURNING YOUR ICE MAKER OFF To stop the ice maker, lift the wire signal arm until it clicks and locks in new plumbing lines may be opened. With no ice will make a loud chattering noise. CAUTION Chemicals from the factory with the wire signal arm in your model has an adjustable freezer shelf, place the shelf in...
... maintained and working properly. 9 TURNING YOUR ICE MAKER ON After the plumbing connections have an odd flavor. TURNING YOUR ICE MAKER OFF To stop the ice maker, lift the wire signal arm until it clicks and locks in new plumbing lines may be opened. With no ice will make a loud chattering noise. CAUTION Chemicals from the factory with the wire signal arm in your model has an adjustable freezer shelf, place the shelf in...

Use and Care Manual
Page 10
... are located underneath your Defrost Water Pan (some of refrigerant through the evaporator may hear air being forced through the condenser by the evaporator fan. Condenser Fan If condenser coils are all normal sounds and soon will hear ice cubes falling into the drain pan during the defrost cycle. I. Condenser Coils (Fan-cooled models only) CARE & CLEANING A. Cold Control & Defrost Timer or Automatic Defrost Control These parts can produce a snapping or clicking sound REPLACING THE FREEZER LIGHT BULB (SOME MODELS...
... are located underneath your Defrost Water Pan (some of refrigerant through the evaporator may hear air being forced through the condenser by the evaporator fan. Condenser Fan If condenser coils are all normal sounds and soon will hear ice cubes falling into the drain pan during the defrost cycle. I. Condenser Coils (Fan-cooled models only) CARE & CLEANING A. Cold Control & Defrost Timer or Automatic Defrost Control These parts can produce a snapping or clicking sound REPLACING THE FREEZER LIGHT BULB (SOME MODELS...

Use and Care Manual
Page 11
... water pan with non-abrasive soapy water and a dishcloth. Use warm soapy water to the back of baking soda in a dishwasher. Wipe up . NOTE • Turning the refrigerator temperature control to "0" turns off power to room temperature before cleaning. Care & Cleaning Chart Part Interior/Door Liner Door Gaskets Drawers/Bins Glass Shelves Toe Grille Exterior and Handles What To Use • Soap and water • Baking soda and water • Soap and water • Soap and water • Soap and water • Glass...
... water pan with non-abrasive soapy water and a dishcloth. Use warm soapy water to the back of baking soda in a dishwasher. Wipe up . NOTE • Turning the refrigerator temperature control to "0" turns off power to room temperature before cleaning. Care & Cleaning Chart Part Interior/Door Liner Door Gaskets Drawers/Bins Glass Shelves Toe Grille Exterior and Handles What To Use • Soap and water • Baking soda and water • Soap and water • Soap and water • Soap and water • Glass...

Use and Care Manual
Page 12
... NOT LESS THAN ONE YEAR. If You Need Service Keep your original date of your appliance or to instruct you how to establish the warranty period should service be performed by unauthorized service companies; Service calls to repair or replace appliance light bulbs, air filters, water filters, other consumables, or knobs, handles, or other appropriate payment record to use or used in the USA and Canada. SOME STATES...
... NOT LESS THAN ONE YEAR. If You Need Service Keep your original date of your appliance or to instruct you how to establish the warranty period should service be performed by unauthorized service companies; Service calls to repair or replace appliance light bulbs, air filters, water filters, other consumables, or knobs, handles, or other appropriate payment record to use or used in the USA and Canada. SOME STATES...

Use and Care Manual
Page 13
.... Cabinet light not working . (some models) Before calling for service, review this appliance. • Ensure plug is tightly pushed into electrical outlet. • Light switch may be cleaned. • Foods that produce odors should produce 2.5 to a warmer setting until freezer temperature is not cold enough. 13 Reset circuit breaker. • The temperature control is tightly pushed into electrical outlet. • Check/replace fuse with a 15 amp time-delay fuse. Refrigerator temperature too cold...
.... Cabinet light not working . (some models) Before calling for service, review this appliance. • Ensure plug is tightly pushed into electrical outlet. • Light switch may be cleaned. • Foods that produce odors should produce 2.5 to a warmer setting until freezer temperature is not cold enough. 13 Reset circuit breaker. • The temperature control is tightly pushed into electrical outlet. • Check/replace fuse with a 15 amp time-delay fuse. Refrigerator temperature too cold...

Installation Instructions
Page 1
... power turned on a solid floor. recheck in Ice Maker House water supply connected to swing open. 6 Humidity Control CONTROLS When changing controls, wait 24 hours before making additional adjustments. 7 ICEMAKER Ensure icemaker is turned ON. Turn icemaker OFF if water supply is not recommended. IF YOU ARE DISSATISFIED WITH THE INSTALLATION, PLEASE CALL THE STORE YOU PURCHASED IT FROM. To level cabinet or change door height: 1. You are installing your Use & Care Manual. Final Checks Shipping material removed Fresh Food and Freezer controls set Crisper...
... power turned on a solid floor. recheck in Ice Maker House water supply connected to swing open. 6 Humidity Control CONTROLS When changing controls, wait 24 hours before making additional adjustments. 7 ICEMAKER Ensure icemaker is turned ON. Turn icemaker OFF if water supply is not recommended. IF YOU ARE DISSATISFIED WITH THE INSTALLATION, PLEASE CALL THE STORE YOU PURCHASED IT FROM. To level cabinet or change door height: 1. You are installing your Use & Care Manual. Final Checks Shipping material removed Fresh Food and Freezer controls set Crisper...

Parts Catalog
Page 1
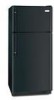
... Series R134a R134a R134a Color black bisque white Volts 115 115 115 Wiring Diagram 241582401 241582401 241582401 Owner's Guide 241857201 241857201 241857201 Market North America North America North America Energy Guide 241613774 241613772 241613772 Service Data Sheet 241588203 241588203 241588203 Installation Instructions 240568303 240568303 240568303 N05L00001.eps N05DAACKA1.eps N05BBAABA19.eps N05SADAEF1.eps N05CBBBAC7.eps W241582401.eps S241582801.eps TOP-MOUNT REFRIGERATOR...
... Series R134a R134a R134a Color black bisque white Volts 115 115 115 Wiring Diagram 241582401 241582401 241582401 Owner's Guide 241857201 241857201 241857201 Market North America North America North America Energy Guide 241613774 241613772 241613772 Service Data Sheet 241588203 241588203 241588203 Installation Instructions 240568303 240568303 240568303 N05L00001.eps N05DAACKA1.eps N05BBAABA19.eps N05SADAEF1.eps N05CBBBAC7.eps W241582401.eps S241582801.eps TOP-MOUNT REFRIGERATOR...

Parts Catalog
Page 3
... door, white, magnetic Gasket-refr door, black, magnetic Gasket-refr door, white, magnetic Rack-door Rack-door, 4B Door-dairy Rack-door Plug-button, black, hinge brg hole Plug-button, bisque, hinge brg hole, (2) Plug-button, white, hinge brg hole, (2) Door-frzr, black, complete assy Door-frzr, bisque, complete assy Door-frzr, white, complete assy Label-nameplate Door Stop, black, refr Door Stop, bisque, ref Door Stop, white, ref Door Stop, black, frzr Door Stop, bisque, frzr Door Stop, white, frzr Plug-button, black Plug-button, bisque Plug-button...
... door, white, magnetic Gasket-refr door, black, magnetic Gasket-refr door, white, magnetic Rack-door Rack-door, 4B Door-dairy Rack-door Plug-button, black, hinge brg hole Plug-button, bisque, hinge brg hole, (2) Plug-button, white, hinge brg hole, (2) Door-frzr, black, complete assy Door-frzr, bisque, complete assy Door-frzr, white, complete assy Label-nameplate Door Stop, black, refr Door Stop, bisque, ref Door Stop, white, ref Door Stop, black, frzr Door Stop, bisque, frzr Door Stop, white, frzr Plug-button, black Plug-button, bisque Plug-button...

Parts Catalog
Page 5
...-fan cover Fan Blade, red, evaporator fan Bushing-motor mtg, (2) Bracket-motor mtg, front Cover-evap coil Seal-coil cover Harness-wiring, freezer Plug-hole, factory test Plug-ice maker harness, rectangular Plug-wtr inlet tube, round, 1" Plug-foam-wtr-inlet, round Motor-fan Washer, "slinger", nylon, evap fan shaft Bracket-motor mtg, rear Screw, hex washer head, 8-18 x 5/16 Screw, #8 truss hd, 10-32CA x 0.500 Plug-button, black, upr hinge holes Plug-button, bisque, upr hinge holes Plug-button, white, upr hinge...
...-fan cover Fan Blade, red, evaporator fan Bushing-motor mtg, (2) Bracket-motor mtg, front Cover-evap coil Seal-coil cover Harness-wiring, freezer Plug-hole, factory test Plug-ice maker harness, rectangular Plug-wtr inlet tube, round, 1" Plug-foam-wtr-inlet, round Motor-fan Washer, "slinger", nylon, evap fan shaft Bracket-motor mtg, rear Screw, hex washer head, 8-18 x 5/16 Screw, #8 truss hd, 10-32CA x 0.500 Plug-button, black, upr hinge holes Plug-button, bisque, upr hinge holes Plug-button, white, upr hinge...
Parts Catalog
Page 7
... Paint, touch-up, black * 5304414035 - NO 81 82 83 92 PART NO. 5304455650 5304418225 5304455655 241710601 A FRT18G6J (FRT18G6JB0) B FRT18G6J (FRT18G6JQ0) C FRT18G6J (FRT18G6JW0) A B C A B C A B C A B C DESCRIPTION Screw, hex washer head, 8-15A x 0.625, low profile Roller, compressor base, rear, (2) Rivet, flat head, 1/4 OD x 1-3/4, roller pin Screw, hex washer hd, 1/4 x 7/8, hinge mtg * 240479601 A B C Plug, button, cab liner holes * 5303321321 A - - FRT18G6J CABINET...
... Paint, touch-up, black * 5304414035 - NO 81 82 83 92 PART NO. 5304455650 5304418225 5304455655 241710601 A FRT18G6J (FRT18G6JB0) B FRT18G6J (FRT18G6JQ0) C FRT18G6J (FRT18G6JW0) A B C A B C A B C A B C DESCRIPTION Screw, hex washer head, 8-15A x 0.625, low profile Roller, compressor base, rear, (2) Rivet, flat head, 1/4 OD x 1-3/4, roller pin Screw, hex washer hd, 1/4 x 7/8, hinge mtg * 240479601 A B C Plug, button, cab liner holes * 5303321321 A - - FRT18G6J CABINET...
Parts Catalog
Page 9
... Shelf, freezer, full-width, wire Diffuser, air, top Diffuser, air, bottom Switch-light/lamp Light Bulb Socket-light Control Box Seal Wiring Harness, control box Knob, temp control Control, temperature Tube, sensor sleeve, 31 inch, plastic, white Timer-defrost Screw-timer mtg, pan hd, 6-20 x 0.438, (2) Frame, sliding shelf, full width Frame, sliding shelf, full width, w/hanger tabs Cover-crisper pan, with beam, humid cont Control-humidity, LH Pan-crisper, clear, (2), no graphics Trim-shelf, front Pan-meat, w/o graphics, clear Glass-shelf...
... Shelf, freezer, full-width, wire Diffuser, air, top Diffuser, air, bottom Switch-light/lamp Light Bulb Socket-light Control Box Seal Wiring Harness, control box Knob, temp control Control, temperature Tube, sensor sleeve, 31 inch, plastic, white Timer-defrost Screw-timer mtg, pan hd, 6-20 x 0.438, (2) Frame, sliding shelf, full width Frame, sliding shelf, full width, w/hanger tabs Cover-crisper pan, with beam, humid cont Control-humidity, LH Pan-crisper, clear, (2), no graphics Trim-shelf, front Pan-meat, w/o graphics, clear Glass-shelf...
Parts Catalog
Page 11
..., black, cond tube/wire Spacer, condenser tube, black Spacer-cond tube, round, 5/8 OD x .81"lg Bracket, condenser mtg Drier-filter, R134a System Harness-wiring, machine compt Wiring Harness, control box Heater-defrost Evaporator Kit Strap-evap/heater, aluminum, (2) Trough-drain Insulation Block Thermostat-defrost, kit Base-compressor Screw, #8 truss hd, 10-32CA x 0.500 Grommet-compr mtg, (4) Washer-compr mtg Clip-compressor mtg Pan-defrost drain Thermal Mastic Compressor, w/electricals Relay Combo Screw...
..., black, cond tube/wire Spacer, condenser tube, black Spacer-cond tube, round, 5/8 OD x .81"lg Bracket, condenser mtg Drier-filter, R134a System Harness-wiring, machine compt Wiring Harness, control box Heater-defrost Evaporator Kit Strap-evap/heater, aluminum, (2) Trough-drain Insulation Block Thermostat-defrost, kit Base-compressor Screw, #8 truss hd, 10-32CA x 0.500 Grommet-compr mtg, (4) Washer-compr mtg Clip-compressor mtg Pan-defrost drain Thermal Mastic Compressor, w/electricals Relay Combo Screw...


