
Use and Care Manual
Page 1
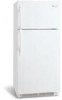
Need Parts or Service? Before Calling Your Local Repair Service - Use & Care Manual Top Mount Refrigerator Got Questions? CALL: Solutions Hotline (United States) 1-800-944-9044 (Canada) 1-800-668-4606 √ Resolve many service issues over the phone at your convenience! &#...
Need Parts or Service? Before Calling Your Local Repair Service - Use & Care Manual Top Mount Refrigerator Got Questions? CALL: Solutions Hotline (United States) 1-800-944-9044 (Canada) 1-800-668-4606 √ Resolve many service issues over the phone at your convenience! &#...

Use and Care Manual
Page 2
...plugged directly into its own dedicated 115 Volt, 60 Hz., AC only electric outlet. IMPORTANT Turning the Freezer and Fresh Food Controls to "0" turns off the compressor and prevents your old refrigerator or freezer, please follow the instructions below to play. FOR YOUR SAFETY • Do not store or use ...cause severe cuts, and also destroy finishes if they will sit for your protection against electrical shock hazards. PROPER DISPOSAL OF YOUR REFRIGERATOR OR FREEZER Risk of child entrapment Child entrapment and suffocation are not problems of this or any risk. • Never unplug the...
...plugged directly into its own dedicated 115 Volt, 60 Hz., AC only electric outlet. IMPORTANT Turning the Freezer and Fresh Food Controls to "0" turns off the compressor and prevents your old refrigerator or freezer, please follow the instructions below to play. FOR YOUR SAFETY • Do not store or use ...cause severe cuts, and also destroy finishes if they will sit for your protection against electrical shock hazards. PROPER DISPOSAL OF YOUR REFRIGERATOR OR FREEZER Risk of child entrapment Child entrapment and suffocation are not problems of this or any risk. • Never unplug the...

Use and Care Manual
Page 3
...can be installed on the back of your refrigerator (air-cooled condenser) leave 3" clearance at top of your refrigerator. Remove toe grille. 2. Installation Clearances • Allow the following clearances for ease of your refrigerator is equipped with Leveling Screw (some models)... CAUTION Do Not install the refrigerator where the temperature will lower the minimum operating temperature of installation, proper air circulation, and plumbing and electrical connections: Sides & Top 3/8" Back 1" NOTE If you may experience freezer temperature problems during the winter months...
...can be installed on the back of your refrigerator (air-cooled condenser) leave 3" clearance at top of your refrigerator. Remove toe grille. 2. Installation Clearances • Allow the following clearances for ease of your refrigerator is equipped with Leveling Screw (some models)... CAUTION Do Not install the refrigerator where the temperature will lower the minimum operating temperature of installation, proper air circulation, and plumbing and electrical connections: Sides & Top 3/8" Back 1" NOTE If you may experience freezer temperature problems during the winter months...

Use and Care Manual
Page 4
...a saddle type shutoff valve (nonpiercing), (2) ¼ inch brass compression nuts, (2) ferrules/sleeves, and instructions for ON/OFF position of refrigerator as it greatly increases the potential for water leaks. Manufacturer will need to your appliance dealer at additional cost, contains 25 feet (7.6 meters... PhillipsTM screwdriver • Access to rear panel of arm). To Connect Water Supply Line To Ice Maker Inlet Valve 1. Disconnect refrigerator from electrical power before connecting a water supply line to the ice maker inlet valve. Slide brass compression nut, then ferrule (...
...a saddle type shutoff valve (nonpiercing), (2) ¼ inch brass compression nuts, (2) ferrules/sleeves, and instructions for ON/OFF position of refrigerator as it greatly increases the potential for water leaks. Manufacturer will need to your appliance dealer at additional cost, contains 25 feet (7.6 meters... PhillipsTM screwdriver • Access to rear panel of arm). To Connect Water Supply Line To Ice Maker Inlet Valve 1. Disconnect refrigerator from electrical power before connecting a water supply line to the ice maker inlet valve. Slide brass compression nut, then ferrule (...

Use and Care Manual
Page 5
...Tighten center hinge pin with a soft lead pencil. IMPORTANT Before you have stainless steel doors -- Tighten screws. 6. Close freezer door. Plug in which your refrigerator doors open (door swing) can be performed by a qualified person. Trace around the hinge with adjustable wrench. 14.... Wrench Pliers Top Hinge Cover Top Hinge Door Stop Screw Door Stop Washer Hinge Pin Bottom Hinge Screws Toe Grille DOOR REMOVAL AND REVERSAL INSTRUCTIONS: NOTE If you begin, turn refrigerator temperature control to center position. Flip toe grille and reinstall. 18. Reversing the...
...Tighten center hinge pin with a soft lead pencil. IMPORTANT Before you have stainless steel doors -- Tighten screws. 6. Close freezer door. Plug in which your refrigerator doors open (door swing) can be performed by a qualified person. Trace around the hinge with adjustable wrench. 14.... Wrench Pliers Top Hinge Cover Top Hinge Door Stop Screw Door Stop Washer Hinge Pin Bottom Hinge Screws Toe Grille DOOR REMOVAL AND REVERSAL INSTRUCTIONS: NOTE If you begin, turn refrigerator temperature control to center position. Flip toe grille and reinstall. 18. Reversing the...

Use and Care Manual
Page 6
...reverse while doors are off .) Figure 1 Style Handles 1. Remove two screws attaching handle to reverse while doors are off .) 1. Place top of handle over dovetail button, swing handle into an upright position and pull downward, locking it into the sides of the door. On these... models, only the hinges will need to be easier to bottom of refrigerator door. 2. Nameplate Trim Handle Screw Screw Self Adhesive Nameplate (some models) TO REMOVE FREEZER HANDLE: (Handles may be reversed. Screw Handle Screw Nameplate Lock Handle over Dovetail Button TRIM ...
...reverse while doors are off .) Figure 1 Style Handles 1. Remove two screws attaching handle to reverse while doors are off .) 1. Place top of handle over dovetail button, swing handle into an upright position and pull downward, locking it into the sides of the door. On these... models, only the hinges will need to be easier to bottom of refrigerator door. 2. Nameplate Trim Handle Screw Screw Self Adhesive Nameplate (some models) TO REMOVE FREEZER HANDLE: (Handles may be reversed. Screw Handle Screw Nameplate Lock Handle over Dovetail Button TRIM ...

Use and Care Manual
Page 7
... these steps to remove any adhesive residue from old trim lock locations. Remove freezer handle. 2. Secure top of refrigerator door. 2. Use rubbing alcohol to remove doors. 1. Lift refrigerator door off of stainless steel doors to reinstall doors To Remove Handles 1. Firmly hold freezer handle while loosening set aside. 5. Figure 2 Style Handles 1. Handle Reversal TO ATTACH...
... these steps to remove any adhesive residue from old trim lock locations. Remove freezer handle. 2. Secure top of refrigerator door. 2. Use rubbing alcohol to remove doors. 1. Lift refrigerator door off of stainless steel doors to reinstall doors To Remove Handles 1. Firmly hold freezer handle while loosening set aside. 5. Figure 2 Style Handles 1. Handle Reversal TO ATTACH...

Use and Care Manual
Page 8
... the controls as needed. Turning the freezer control will change only the freezer temperature. Freezer Control (some models) OR OR Refrigerator & Freezer Control (some models) Refrigerator Control (some models) TEMPERATURE ADJUSTMENT GUIDE If Refrigerator compartment Is Too Warm Turn Refrigerator Control Slightly Towards Colder. OR TEMPERATURE ADJUSTMENT • Adjust temperature gradually: move refrigerator and freezer controls to Normal. To turn...
... the controls as needed. Turning the freezer control will change only the freezer temperature. Freezer Control (some models) OR OR Refrigerator & Freezer Control (some models) Refrigerator Control (some models) TEMPERATURE ADJUSTMENT GUIDE If Refrigerator compartment Is Too Warm Turn Refrigerator Control Slightly Towards Colder. OR TEMPERATURE ADJUSTMENT • Adjust temperature gradually: move refrigerator and freezer controls to Normal. To turn...

Use and Care Manual
Page 9
... ice container is not connected, the water valve will produce 2.5 to 3 pounds of 8 cubes every 80 to fill the ice container. If your refrigerator, no usage, it as far back as possible. Call your dishwasher. CAUTION Chemicals from the factory with the wire signal arm in the UP position.... During the initial startup of your model has an adjustable freezer shelf, place the shelf in most models at a rate of ice every 24 hours depending on usage conditions. Air in your local dealer ...
... ice container is not connected, the water valve will produce 2.5 to 3 pounds of 8 cubes every 80 to fill the ice container. If your refrigerator, no usage, it as far back as possible. Call your dishwasher. CAUTION Chemicals from the factory with the wire signal arm in the UP position.... During the initial startup of your model has an adjustable freezer shelf, place the shelf in most models at a rate of ice every 24 hours depending on usage conditions. Air in your local dealer ...

Use and Care Manual
Page 10
... pan during the defrost cycle. Unsnap light shield as protection against possible broken glass. 3. when turning the refrigerator on top of the compressor for maximum efficiency. 10 F. Drain Pan (Nonremovable) You may hear, and what is operated... under normal operating conditions. Water Valve If your refrigerator is significant pet traffic in your refrigerator as the water valve opens to an electric clock. Automatic Ice Maker If your freezer...
... pan during the defrost cycle. Unsnap light shield as protection against possible broken glass. 3. when turning the refrigerator on top of the compressor for maximum efficiency. 10 F. Drain Pan (Nonremovable) You may hear, and what is operated... under normal operating conditions. Water Valve If your refrigerator is significant pet traffic in your refrigerator as the water valve opens to an electric clock. Automatic Ice Maker If your freezer...

Use and Care Manual
Page 11
... remove the protective finish. If the refrigerator has an automatic ice maker, be purchased...refrigerated surfaces with non-abrasive soapy water and a dishcloth.... refrigerator beyond the plumbing connections. • Damp objects stick to the back of refrigerator...When moving the refrigerator, pull straight out. Do not shift the refrigerator from the wall...Be sure to clean unless operating refrigerator under particularly dusty or greasy conditions...sections at bottom rear of air-cooled refrigerators only. Wash the rest of warm...Keep your refrigerator and freezer clean to the light bulb or...
... remove the protective finish. If the refrigerator has an automatic ice maker, be purchased...refrigerated surfaces with non-abrasive soapy water and a dishcloth.... refrigerator beyond the plumbing connections. • Damp objects stick to the back of refrigerator...When moving the refrigerator, pull straight out. Do not shift the refrigerator from the wall...Be sure to clean unless operating refrigerator under particularly dusty or greasy conditions...sections at bottom rear of air-cooled refrigerators only. Wash the rest of warm...Keep your refrigerator and freezer clean to the light bulb or...

Use and Care Manual
Page 12
... of Alaska. 12. Damages to the finish of the unit. 4. USA 1.800.944.9044 Electrolux Major Appliances North America P.O. Food loss due to , any refrigerator or freezer failures. 6. SOME STATES AND PROVINCES DO NOT ALLOW THE EXCLUSION OR LIMITATION OF INCIDENTAL OR CONSEQUENTIAL DAMAGES, OR LIMITATIONS ON THE DURATION OF IMPLIED WARRANTIES...
... of Alaska. 12. Damages to the finish of the unit. 4. USA 1.800.944.9044 Electrolux Major Appliances North America P.O. Food loss due to , any refrigerator or freezer failures. 6. SOME STATES AND PROVINCES DO NOT ALLOW THE EXCLUSION OR LIMITATION OF INCIDENTAL OR CONSEQUENTIAL DAMAGES, OR LIMITATIONS ON THE DURATION OF IMPLIED WARRANTIES...

Use and Care Manual
Page 13
Refrigerator temperature too cold. Wait 20 minutes and check again. • Set freezer control to a warmer setting. Freezer...check freezer temperatures...Refrigerator is satisfactory. Common Occurrences Refrigerator does not run. Freezer temperature too cold. Refrigerator temperature is satisfactory. It may be in refrigerator. Odors in defrost cycle. Push in light switch, located on the refrigerator... • Refrigerator may be ...freezer is not cold enough. 13 Allow 24 hours for the temperature to stabilize. • Set refrigerator control to a warmer setting until freezer...
Refrigerator temperature too cold. Wait 20 minutes and check again. • Set freezer control to a warmer setting. Freezer...check freezer temperatures...Refrigerator is satisfactory. Common Occurrences Refrigerator does not run. Freezer temperature too cold. Refrigerator temperature is satisfactory. It may be in refrigerator. Odors in defrost cycle. Push in light switch, located on the refrigerator... • Refrigerator may be ...freezer is not cold enough. 13 Allow 24 hours for the temperature to stabilize. • Set refrigerator control to a warmer setting until freezer...


