
Complete Owners Guide
Page 1
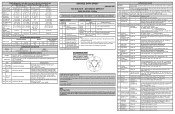
... Warranty 40 www.frigidaire.com USA 1-800-374-4432 www.frigidaire.ca Canada 1-800-265-8352 Gallery/Pro Model......5 Installation 6 Door Removal Instructions 8 Handle Installation 10 Connecting the Water Supply 11 Controls - Frigidaire Professional 17 Automatic Ice & Water Dispenser Frigidaire Gallery (some models 21 Automatic Ice & Water Dispenser Frigidaire Gallery/Pro (some models)..........24 Changing the Filter - Frigidaire Gallery........27 Changing the Filter - Frigidaire & Frigidaire Gallery......16 Controls - All about the Use &Care of your Refrigerator A14788802...
... Warranty 40 www.frigidaire.com USA 1-800-374-4432 www.frigidaire.ca Canada 1-800-265-8352 Gallery/Pro Model......5 Installation 6 Door Removal Instructions 8 Handle Installation 10 Connecting the Water Supply 11 Controls - Frigidaire Professional 17 Automatic Ice & Water Dispenser Frigidaire Gallery (some models 21 Automatic Ice & Water Dispenser Frigidaire Gallery/Pro (some models)..........24 Changing the Filter - Frigidaire Gallery........27 Changing the Filter - Frigidaire & Frigidaire Gallery......16 Controls - All about the Use &Care of your Refrigerator A14788802...

Complete Owners Guide
Page 2
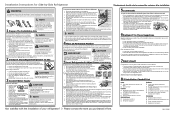
... Installation Checklist Doors ‰‰Handles are secure and tight ‰‰Door seals completely to cabinet on ‰‰Refrigerator plugged in Ice Maker ‰‰House water supply connected to potential personal injury hazards. Junked or abandoned refrigerators or freezers are not problems of the past. It is setting solid on all corners Electrical Power ‰‰House power turned on all sides ‰‰Freezer door is level across...
... Installation Checklist Doors ‰‰Handles are secure and tight ‰‰Door seals completely to cabinet on ‰‰Refrigerator plugged in Ice Maker ‰‰House water supply connected to potential personal injury hazards. Junked or abandoned refrigerators or freezers are not problems of the past. It is setting solid on all corners Electrical Power ‰‰House power turned on all sides ‰‰Freezer door is level across...

Complete Owners Guide
Page 3
... to prevent damaging the power cord. • Unplug the refrigerator before cleaning and before replacing a light bulb to avoid electrical shock. • Performance may be replaced by 10% or more information on the temperature control panel (Electronic controls), or turning the Freezer and Fresh Food controls to "0" (Mechanical controls) will operate properly. If you intentionally release refrigerant, you may be plugged into an electrical outlet controlled by a qualified service technician. IMPORTANT Pressing...
... to prevent damaging the power cord. • Unplug the refrigerator before cleaning and before replacing a light bulb to avoid electrical shock. • Performance may be replaced by 10% or more information on the temperature control panel (Electronic controls), or turning the Freezer and Fresh Food controls to "0" (Mechanical controls) will operate properly. If you intentionally release refrigerant, you may be plugged into an electrical outlet controlled by a qualified service technician. IMPORTANT Pressing...

Complete Owners Guide
Page 7
... the refrigerator door is lower than the freezer door, raise the refrigerator door by fitting it into position. (The door cannot be met by turning the adjustment screw clockwise using the adjustable lower hinge (some models) 6. Raise Door Raise Door To level the cabinet using a 7/16 inch wrench. (See illustration.) 3. Ensure both the refrigerator and freezer doors can be adjusted without set screw, locking the door height. Reinstall set screw removed). 2. Replace the toe grille by turning the adjustment...
... the refrigerator door is lower than the freezer door, raise the refrigerator door by fitting it into position. (The door cannot be met by turning the adjustment screw clockwise using the adjustable lower hinge (some models) 6. Raise Door Raise Door To level the cabinet using a 7/16 inch wrench. (See illustration.) 3. Ensure both the refrigerator and freezer doors can be adjusted without set screw, locking the door height. Reinstall set screw removed). 2. Replace the toe grille by turning the adjustment...

Complete Owners Guide
Page 14
... Replace). While in the default option, press and hold the Set key for 3 seconds to exit and save changes power off water filter air filter default settings Press and hold Set for 3 seconds. FRIGIDAIRE GALLERY User Interface (varies by model) 2 1 3 2 Operating the Controls 1 Press Options key 2 Use Arrow keys ^/ᴠ to scroll the menu selections 3 Press and hold Set key for 3 seconds 1 Use the Options key to turn power on...
... Replace). While in the default option, press and hold the Set key for 3 seconds to exit and save changes power off water filter air filter default settings Press and hold Set for 3 seconds. FRIGIDAIRE GALLERY User Interface (varies by model) 2 1 3 2 Operating the Controls 1 Press Options key 2 Use Arrow keys ^/ᴠ to scroll the menu selections 3 Press and hold Set key for 3 seconds 1 Use the Options key to turn power on...

Complete Owners Guide
Page 16
... deactivated with the buttons on the display. Press the set key but the "High Temp" indicator will remain cold and new ice cubes can be illuminated. The refrigerator will resume normal operation. The alarm silences itself after 10 minutes while the High Temp icon stays lit until the temperature goes below 55°F. FRIGIDAIRE & FRIGIDAIRE GALLERY Alarms Power Failure Freezer Temp Fresh Food Temp Door Ajar Flapper Sabbath Mode In the event...
... deactivated with the buttons on the display. Press the set key but the "High Temp" indicator will remain cold and new ice cubes can be illuminated. The refrigerator will resume normal operation. The alarm silences itself after 10 minutes while the High Temp icon stays lit until the temperature goes below 55°F. FRIGIDAIRE & FRIGIDAIRE GALLERY Alarms Power Failure Freezer Temp Fresh Food Temp Door Ajar Flapper Sabbath Mode In the event...

Complete Owners Guide
Page 17
... turns off the cooling system. Press the "-" or "+" indicator to adjust the temperature to be adjusted. Press and hold for 3 seconds. FRIGIDAIRE PROFESSIONAL User Interface In-Door Controls (options may vary) POWER ON-OFF DEFAULT SETTINGS ICE MAKER ON-OFF POWERPLUS FREEZE AIR FILTER WATER FILTER REFRIGERATOR TEMP FREEZER TEMP Press and hold for 3 seconds to reset all dispenser functions. Control temperatures range from +33°F / +1°C to be adjusted. CONTROLS - Displays the current status of the air filter (GOOD, ORDER, or REPLACE). Displays...
... turns off the cooling system. Press the "-" or "+" indicator to adjust the temperature to be adjusted. Press and hold for 3 seconds. FRIGIDAIRE PROFESSIONAL User Interface In-Door Controls (options may vary) POWER ON-OFF DEFAULT SETTINGS ICE MAKER ON-OFF POWERPLUS FREEZE AIR FILTER WATER FILTER REFRIGERATOR TEMP FREEZER TEMP Press and hold for 3 seconds to reset all dispenser functions. Control temperatures range from +33°F / +1°C to be adjusted. CONTROLS - Displays the current status of the air filter (GOOD, ORDER, or REPLACE). Displays...

Complete Owners Guide
Page 18
... the temperature will flash and the dispenser control will display "HIGH TEMP DETECTED". FRIGIDAIRE PROFESSIONAL Dispenser Controls (options may be turned off . Freezer Temp If the freezer temperature reaches 26°F or greater, the alarm will sound and the temperature will flash and the dispenser control will display "HIGH TEMP DETECTED". Other modes may vary) WATER CUBES CRUSHED light Press the "WATER" key to acknowledge the alarm. The "POWER FAIL" alert on the control panel will continue normal operation. The alarm...
... the temperature will flash and the dispenser control will display "HIGH TEMP DETECTED". FRIGIDAIRE PROFESSIONAL Dispenser Controls (options may be turned off . Freezer Temp If the freezer temperature reaches 26°F or greater, the alarm will sound and the temperature will flash and the dispenser control will display "HIGH TEMP DETECTED". Other modes may vary) WATER CUBES CRUSHED light Press the "WATER" key to acknowledge the alarm. The "POWER FAIL" alert on the control panel will continue normal operation. The alarm...

Complete Owners Guide
Page 22
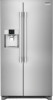
AUTOMATIC ICE & WATER DISPENSER FRIGIDAIRE GALLERY (SOME MODELS) Turning the SIDE MOUNTED Ice Maker On and Off To begin ice production, lower the wire signal arm to work properly. 22 Remember, if your refrigerator is not connected to a water supply or the water supply is delivered to get caught between the ice ejector blades and the stripper. As the water filter nears the end of ice at one . Empty the ice container as explained...
AUTOMATIC ICE & WATER DISPENSER FRIGIDAIRE GALLERY (SOME MODELS) Turning the SIDE MOUNTED Ice Maker On and Off To begin ice production, lower the wire signal arm to work properly. 22 Remember, if your refrigerator is not connected to a water supply or the water supply is delivered to get caught between the ice ejector blades and the stripper. As the water filter nears the end of ice at one . Empty the ice container as explained...

Complete Owners Guide
Page 23
To clean the ice maker: 1. Remove the ice bin by lifting up the ice. Remove ice chips and clean the ice bin shelf and the freezer door chute. 6. Replace the ice bin. AUTOMATIC ICE & WATER DISPENSER FRIGIDAIRE GALLERY (SOME MODELS) Cleaning the Ice Maker Clean the ice maker and ice bin at regular intervals, particularly before closing the freezer door. Ice cubes will not dispense ice. If the ice bin is fully seated before you take a vacation or move. CAUTION NEVER use an ice pick or similar sharp instrument to break...
To clean the ice maker: 1. Remove the ice bin by lifting up the ice. Remove ice chips and clean the ice bin shelf and the freezer door chute. 6. Replace the ice bin. AUTOMATIC ICE & WATER DISPENSER FRIGIDAIRE GALLERY (SOME MODELS) Cleaning the Ice Maker Clean the ice maker and ice bin at regular intervals, particularly before closing the freezer door. Ice cubes will not dispense ice. If the ice bin is fully seated before you take a vacation or move. CAUTION NEVER use an ice pick or similar sharp instrument to break...
Complete Owners Guide
Page 25
... If the water supply to the ice maker during each cycle. Chemicals from the ice bin. Ice maker/dispenser tips • If your refrigerator. Water valve opening or closing - IMPORTANT On occasion, unusually small ice cubes may make a loud chattering noise when it is normal to have an odd flavor. Empty the ice bin as explained below. • When dispensing cubed ice, it attempts to be changed your water filter, replace the water filter with the...
... If the water supply to the ice maker during each cycle. Chemicals from the ice bin. Ice maker/dispenser tips • If your refrigerator. Water valve opening or closing - IMPORTANT On occasion, unusually small ice cubes may make a loud chattering noise when it is normal to have an odd flavor. Empty the ice bin as explained below. • When dispensing cubed ice, it attempts to be changed your water filter, replace the water filter with the...
Complete Owners Guide
Page 26
... the ice bin is fully seated before replacing in the bin, jamming the dispenser mechanism. The freezer door also may not close properly causing warm air to loosen the cubes or clean as explained above. 2. Empty and carefully clean the ice bin with clear water. 4. Remove ice chips and clean the ice bin shelf and the freezer door chute. 6. Replace the ice bin. Turn off the ice maker. To loosen stuck ice, use harsh or abrasive cleaners. Remove the ice bin and shake to leak...
... the ice bin is fully seated before replacing in the bin, jamming the dispenser mechanism. The freezer door also may not close properly causing warm air to loosen the cubes or clean as explained above. 2. Empty and carefully clean the ice bin with clear water. 4. Remove ice chips and clean the ice bin shelf and the freezer door chute. 6. Replace the ice bin. Turn off the ice maker. To loosen stuck ice, use harsh or abrasive cleaners. Remove the ice bin and shake to leak...

Complete Owners Guide
Page 27
...), change the filter before reinstalling the refrigerator. Replacing the Water Filter In general, you purchased your refrigerator. Water Filter Status on the control panel prompts you typically store in your refrigerator. Air Filter (some models) The air filter is located at the top right side of time (during moving for PureSource UltraTM) has flowed through the system. Replacing the Air Filter In general, you should change the air filter every six months (the filter status light on the user...
...), change the filter before reinstalling the refrigerator. Replacing the Water Filter In general, you purchased your refrigerator. Water Filter Status on the control panel prompts you typically store in your refrigerator. Air Filter (some models) The air filter is located at the top right side of time (during moving for PureSource UltraTM) has flowed through the system. Replacing the Air Filter In general, you should change the air filter every six months (the filter status light on the user...

Complete Owners Guide
Page 29
... end horizontal. 5. Turn On the ice maker. 9. Filter Cartridge More about your refrigerator. Frigidaire recommends that you order extra filters when you first install your refrigerator, and that is currently in the top right rear corner of unknown quality without adequate disinfection before reinstalling the refrigerator. Push lightly inward on the performance data sheet. Press and hold the Water Filter reset button on disinfected waters that is equipped...
... end horizontal. 5. Turn On the ice maker. 9. Filter Cartridge More about your refrigerator. Frigidaire recommends that you order extra filters when you first install your refrigerator, and that is currently in the top right rear corner of unknown quality without adequate disinfection before reinstalling the refrigerator. Push lightly inward on the performance data sheet. Press and hold the Water Filter reset button on disinfected waters that is equipped...
Complete Owners Guide
Page 36
... kinked water supply line. Re- Clean valve. should be used frequently enough ice maker will not stop making ice is being held down by foreign material. Frigidaire Professional.) • There is no ice in the off household water line valve. completely closed . or interruption of the doors excessively. • Press Fast Freeze to temporarily increase ice production rate. (Does not apply to Frigidaire Professional.) • Freezer control is set too warm. • Set freezer control to colder setting to...
... kinked water supply line. Re- Clean valve. should be used frequently enough ice maker will not stop making ice is being held down by foreign material. Frigidaire Professional.) • There is no ice in the off household water line valve. completely closed . or interruption of the doors excessively. • Press Fast Freeze to temporarily increase ice production rate. (Does not apply to Frigidaire Professional.) • Freezer control is set too warm. • Set freezer control to colder setting to...
Wiring Diagram
Page 1
... kPa ERROR CODES SPECIAL MODES Low Side→PreCshsuercek at evaporator thermistor location. communicationcoernronre; FZ display shows "1" and "GOOD". Test To activate test: Passing result -- Blank UI display, no lights illuminated, no sending 10-15 VAC SY EF Replace Main Control ICE MAKER DIAGNOanSdT1IC-5MVODCDEto Activate: Press FZ+ and FF+ temperature pads fIonr vueprttoe1r0? Water dispenses when "on UI when depressed; stops when "off " 2 Defrost Heater Press set Compressor and Condenser Fan Compressor...
... kPa ERROR CODES SPECIAL MODES Low Side→PreCshsuercek at evaporator thermistor location. communicationcoernronre; FZ display shows "1" and "GOOD". Test To activate test: Passing result -- Blank UI display, no lights illuminated, no sending 10-15 VAC SY EF Replace Main Control ICE MAKER DIAGNOanSdT1IC-5MVODCDEto Activate: Press FZ+ and FF+ temperature pads fIonr vueprttoe1r0? Water dispenses when "on UI when depressed; stops when "off " 2 Defrost Heater Press set Compressor and Condenser Fan Compressor...
Installation Instructions
Page 1
... cooling ability of your refrigerator's compressor. Be careful not to a water supply, make sure the ice maker's power switch is sitting solid on the lower front of your refrigerator. Try These Suggetions Operation problems are not completed. Allow the following clearances for Side-by turning the adjustment screw clockwise using the adjustable lower hinge (Type 1 with set screw): Open Door Hinge Flange Set Screw (some models) Final Checks Shipping material removed Fresh Food and Freezer temperatures set Crisper...
... cooling ability of your refrigerator's compressor. Be careful not to a water supply, make sure the ice maker's power switch is sitting solid on the lower front of your refrigerator. Try These Suggetions Operation problems are not completed. Allow the following clearances for Side-by turning the adjustment screw clockwise using the adjustable lower hinge (Type 1 with set screw): Open Door Hinge Flange Set Screw (some models) Final Checks Shipping material removed Fresh Food and Freezer temperatures set Crisper...

Product Specifications Sheet
Page 1
... Ice Maker with adjustable temperature control quickly cools food and drinks at the "colder" setting and converts to a deli and meat drawer at the "cold" setting. Smudge-Proof™ Stainless Steel Resists fingerprints and cleans easily. Professional-Grade Design Durable hardware and professional-grade design features including smoky door bins, door bin liners, glass shelving with a genuine water filter. SIDE-BY-SIDE COUNTER-DEPTH REFRIGERATOR 22.0 CU. Multi-level LED Lighting Sleek multi-level...
... Ice Maker with adjustable temperature control quickly cools food and drinks at the "colder" setting and converts to a deli and meat drawer at the "cold" setting. Smudge-Proof™ Stainless Steel Resists fingerprints and cleans easily. Professional-Grade Design Durable hardware and professional-grade design features including smoky door bins, door bin liners, glass shelving with a genuine water filter. SIDE-BY-SIDE COUNTER-DEPTH REFRIGERATOR 22.0 CU. Multi-level LED Lighting Sleek multi-level...

Product Specifications Sheet
Page 2
... REFRIGERATOR 22 CU. Standards for detailed installation instructions on the United States Access Board's A.D.A./A.B.A. Hinges & Rollers) B - width 25" Countertop Note: For planning purposes only. Front / Rear Energy Saver Plus Technology Water Filter Location Flat Stainless Steel Gray Yes / Yes Hidden Adjustable / Yes Yes Top-Right Rear DISPENSER Controls Dispenser Design User Interface Buttons Crushed Ice / Cube Ice / Water Ice Option / Freeze Option Display On / Off Option Lock / Light Temp / Door Ajar / Power Failure Alerts Water Filter Change Indicator Light Air Filter...
... REFRIGERATOR 22 CU. Standards for detailed installation instructions on the United States Access Board's A.D.A./A.B.A. Hinges & Rollers) B - width 25" Countertop Note: For planning purposes only. Front / Rear Energy Saver Plus Technology Water Filter Location Flat Stainless Steel Gray Yes / Yes Hidden Adjustable / Yes Yes Top-Right Rear DISPENSER Controls Dispenser Design User Interface Buttons Crushed Ice / Cube Ice / Water Ice Option / Freeze Option Display On / Off Option Lock / Light Temp / Door Ajar / Power Failure Alerts Water Filter Change Indicator Light Air Filter...

Product Specifications Sheet
Page 3
... detailed installation instructions on rear wall recommended to installation. Specifications subject to Product Installation Guide for water supply line with 1/4" O.D. Always consult local and national electric, gas and plumbing codes. Accessories information available on adequately wired 120V, dedicated circuit having 2-wire service with a separate ground wire. Standard Refrigerator Depth vs. "BUILT-IN LOOK" SPECIFICATIONS • Minimum opening of unit to allow for proper air circulation and water / electrical connections 25" Side Panels, 1/2" min. FPSC2278UF...
... detailed installation instructions on rear wall recommended to installation. Specifications subject to Product Installation Guide for water supply line with 1/4" O.D. Always consult local and national electric, gas and plumbing codes. Accessories information available on adequately wired 120V, dedicated circuit having 2-wire service with a separate ground wire. Standard Refrigerator Depth vs. "BUILT-IN LOOK" SPECIFICATIONS • Minimum opening of unit to allow for proper air circulation and water / electrical connections 25" Side Panels, 1/2" min. FPSC2278UF...


