User Manual
Page 5
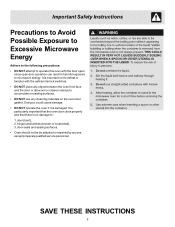
...service personnel. It is important not to defeat or tampler with the door open since open door operation can result in harmful exposure to microwave energy. door (bent), 2. Doing so could cause damage. • DO NOT operate the oven if it is no damage to: 1. SAVE THESE INSTRUCTIONS 5 ... Precautions to Avoid Possible Exposure to Excessive Microwave Energy Adhere to the following precautions: • DO NOT attempt to operate this oven with the safety interlock switches. • DO NOT place any object between the oven front face and the door or allow soil or cleaner residue to...
...service personnel. It is important not to defeat or tampler with the door open since open door operation can result in harmful exposure to microwave energy. door (bent), 2. Doing so could cause damage. • DO NOT operate the oven if it is no damage to: 1. SAVE THESE INSTRUCTIONS 5 ... Precautions to Avoid Possible Exposure to Excessive Microwave Energy Adhere to the following precautions: • DO NOT attempt to operate this oven with the safety interlock switches. • DO NOT place any object between the oven front face and the door or allow soil or cleaner residue to...
User Manual
Page 6
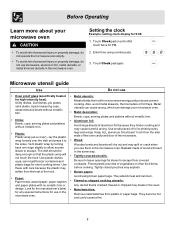
... intended use above both gas and electric cooking equipment 36 inches or less wide. Carefully attend oven when paper, plastic or other combustible materials are placed inside the oven ignite, keep oven door CLOSED, turn the fan on. • Suitable for use as described in this Use &... be HEATED in this oven. • Use this oven ONLY for example, closed jars - Important Safety Instructions When using oven. • READ AND FOLLOW the specific "PRECAUTIONS TO AVOID POSSIBLE EXPOSURE TO EXCESSIVE MICROWAVE ENERGY" on page 5. • Install or locate this oven ONLY in accordance with ...
... intended use above both gas and electric cooking equipment 36 inches or less wide. Carefully attend oven when paper, plastic or other combustible materials are placed inside the oven ignite, keep oven door CLOSED, turn the fan on. • Suitable for use as described in this Use &... be HEATED in this oven. • Use this oven ONLY for example, closed jars - Important Safety Instructions When using oven. • READ AND FOLLOW the specific "PRECAUTIONS TO AVOID POSSIBLE EXPOSURE TO EXCESSIVE MICROWAVE ENERGY" on page 5. • Install or locate this oven ONLY in accordance with ...
User Manual
Page 7
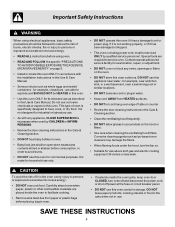
Features & Specifications Microwave features Front View Window Front Vent Grill Bottom View Surface lights Front Interlock system Door assembly 1 2 4 6 7 11 14 15 Turntable ring assembly Turntable Turntable glass Shaft tray Control panel Rear Ventilation filters Control panel (1) Popcorn (2) Beverage (3) Potato... (16) Surface Light ~ Press this pad to add 30 seconds to turn the surface lights on or off. 10 12 13 16 7 Oven specifications Power Supply 120VAC, 60 Hz Input Power 1,550W Cooking Power 1,000W Frequency 2,450 MHz Outer Dimensions (WxHxD) 29.88"x15.75"x ...
Features & Specifications Microwave features Front View Window Front Vent Grill Bottom View Surface lights Front Interlock system Door assembly 1 2 4 6 7 11 14 15 Turntable ring assembly Turntable Turntable glass Shaft tray Control panel Rear Ventilation filters Control panel (1) Popcorn (2) Beverage (3) Potato... (16) Surface Light ~ Press this pad to add 30 seconds to turn the surface lights on or off. 10 12 13 16 7 Oven specifications Power Supply 120VAC, 60 Hz Input Power 1,550W Cooking Power 1,000W Frequency 2,450 MHz Outer Dimensions (WxHxD) 29.88"x15.75"x ...
User Manual
Page 8
... or other food items before cooking. Use these with care because the plastic may break in the microwave oven. 2. Keep ALL aluminum foil at least 1 inch from the side walls of the oven cavity and door of the microwave. • Wood: Wooden bowls and boards will dry out and may split or crack when you...
... or other food items before cooking. Use these with care because the plastic may break in the microwave oven. 2. Keep ALL aluminum foil at least 1 inch from the side walls of the oven cavity and door of the microwave. • Wood: Wooden bowls and boards will dry out and may split or crack when you...
User Manual
Page 11
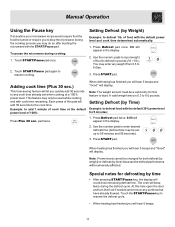
... may enter any portions that the food be set when cooking at a 100% power level. The oven will appear in the display. 2. Press Defrost pad once. 0.0 will beep twice during the defrost ...default power level and cook time determined automatically: 1. Special notes for this time open the door and turn the food if needed and remove any weight from 0.3 to start. Press Defrost ...pad twice. 0:00 will count down remaining defrost time. This feature may do so after starting the microwave with the default 30% power level for both defrost (by weight) or defrost (by Weight) Example...
... may enter any portions that the food be set when cooking at a 100% power level. The oven will appear in the display. 2. Press Defrost pad once. 0.0 will beep twice during the defrost ...default power level and cook time determined automatically: 1. Special notes for this time open the door and turn the food if needed and remove any weight from 0.3 to start. Press Defrost ...pad twice. 0:00 will count down remaining defrost time. This feature may do so after starting the microwave with the default 30% power level for both defrost (by weight) or defrost (by Weight) Example...
User Manual
Page 20
...cloth and mild soap. Care & Cleaning Cleaning suggestions For best performance and for your microwave oven weekly or more often, if needed. • Wash the oven door window with very mild soap and water. Clean your microwave oven: • Keep the inside and out with a wet paper towel, especially after ...cooking. Dry with a soft cloth. Be sure to prevent damage if the oven is not in a 4 cup...
...cloth and mild soap. Care & Cleaning Cleaning suggestions For best performance and for your microwave oven weekly or more often, if needed. • Wash the oven door window with very mild soap and water. Clean your microwave oven: • Keep the inside and out with a wet paper towel, especially after ...cooking. Dry with a soft cloth. Be sure to prevent damage if the oven is not in a 4 cup...
User Manual
Page 21
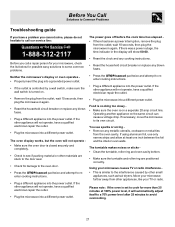
...are stuck to the door seal. • Check for damage to the oven door. • Press the STOP/cancel pad twice and attempt to reenter cooking instructions. • Plug a different appliance into the power outlet. wait 10 seconds, then plug the microwave in again. If there... indicator in the display will not operate, have a qualified electrician repair the outlet. • Plug the microwave into a different power outlet. The oven display works, but the oven will automatically adjust itself to a 70% power level after 25 minutes to avoid overcooking. 21 Operating another appliance...
...are stuck to the door seal. • Check for damage to the oven door. • Press the STOP/cancel pad twice and attempt to reenter cooking instructions. • Plug a different appliance into the power outlet. wait 10 seconds, then plug the microwave in again. If there... indicator in the display will not operate, have a qualified electrician repair the outlet. • Plug the microwave into a different power outlet. The oven display works, but the oven will automatically adjust itself to a 70% power level after 25 minutes to avoid overcooking. 21 Operating another appliance...
Installation Instructions
Page 22
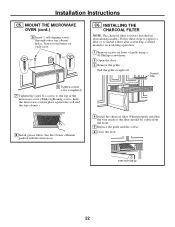
... in place against the wall and the top cabinet.) 8 Install grease filters. When properly installed, the wire mesh of grille using a #1 Phillips screwdriver. 2 Open the door. 3 Remove the grille. MOUNT THE MICROWAVE OVEN (cont.) 5 Insert 2 self-aligning screws through outer top cabinet holes. Installation Instructions C5.
... in place against the wall and the top cabinet.) 8 Install grease filters. When properly installed, the wire mesh of grille using a #1 Phillips screwdriver. 2 Open the door. 3 Remove the grille. MOUNT THE MICROWAVE OVEN (cont.) 5 Insert 2 self-aligning screws through outer top cabinet holes. Installation Instructions C5.


