

Wiring Diagram (All Languages)
Page 1
Remarks: L =line, 3 =high speed, 2=medium speed, 1=low speed, O=on/off =light PCB N L 3 2 10 Pilot Light Switch assembly Motor wiring sketch (Hi speed) (Med speed) (Low speed) (not connected) Wiring Diagram FHWC30/3660LSA,FHWC30/3655LSA 316902453
Remarks: L =line, 3 =high speed, 2=medium speed, 1=low speed, O=on/off =light PCB N L 3 2 10 Pilot Light Switch assembly Motor wiring sketch (Hi speed) (Med speed) (Low speed) (not connected) Wiring Diagram FHWC30/3660LSA,FHWC30/3655LSA 316902453

Complete Owner's Guide (English)
Page 2
... this guide Thank you , please use 05 Parts supplied 05 Installing the hood 05-11 For toll-free telephone support in the U.S.: 1-800944-4044 or Canada: 1-800-265-8352 For online support and Internet production information visit http://www.frigidaire.com Operation 11 Cleaning and maintenance 11-12 Technical data 12 Troubleshooting 12 Environmental protection 12 Important safety instructions Do not attempt to install or operate...
... this guide Thank you , please use 05 Parts supplied 05 Installing the hood 05-11 For toll-free telephone support in the U.S.: 1-800944-4044 or Canada: 1-800-265-8352 For online support and Internet production information visit http://www.frigidaire.com Operation 11 Cleaning and maintenance 11-12 Technical data 12 Troubleshooting 12 Environmental protection 12 Important safety instructions Do not attempt to install or operate...
Complete Owner's Guide (English)
Page 3
... properly exhaust air, be vented to the service panel. DO NOT use to persons, observe the following: • FOR RESIDENTIAL USE ONLY. • Use this appliance for the Local Electrical Inspector's use only. INSTALLER: Please leave these instructions with these instructions for light bulb replacement. If you have questions, contact the manufacturer. • Installation work and electrical wiring must always be sure to prevent back-drafting. WARNING • Before servicing or cleaning the unit, switch power...
... properly exhaust air, be vented to the service panel. DO NOT use to persons, observe the following: • FOR RESIDENTIAL USE ONLY. • Use this appliance for the Local Electrical Inspector's use only. INSTALLER: Please leave these instructions with these instructions for light bulb replacement. If you have questions, contact the manufacturer. • Installation work and electrical wiring must always be sure to prevent back-drafting. WARNING • Before servicing or cleaning the unit, switch power...

Complete Owner's Guide (English)
Page 4
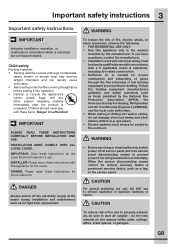
... you are excessively greasy. • Use proper pan size. The fire is being called. - Electrical requirements IMPORTANT Observe all local codes and ordinances. Install this hood with a close-fitting lid, cookie sheet, or other metal tray, then turn hood ON when cooking at high settings. You can fight the fire with all requirements specified. 4 Important safety instructions GB Important safety instructions WARNING WARNING To reduce the...
... you are excessively greasy. • Use proper pan size. The fire is being called. - Electrical requirements IMPORTANT Observe all local codes and ordinances. Install this hood with a close-fitting lid, cookie sheet, or other metal tray, then turn hood ON when cooking at high settings. You can fight the fire with all requirements specified. 4 Important safety instructions GB Important safety instructions WARNING WARNING To reduce the...

Complete Owner's Guide (English)
Page 5
... to exhaust hazardous or explosive materials or vapors. 13 Parts supplied No. Wire sizes must be connected directly 4 to the requirements of the standards listed may be 12 used over indoor grills. The range hood must conform to the fused disconnect (or circuit breaker) box through metal electrical conduit. Part Qty. 14 1 Range hood 1 15 Upper bracket 1 Lower bracket 1 Plantilla (estarcido) Collar 1 Recirculation kit (optional accessories) 1 FHWRKT55LS Bulb 20W, 120V~, GU10 (pre- 2 assembled) Long screw (4mm x 32mm) 8 Wall...
... to exhaust hazardous or explosive materials or vapors. 13 Parts supplied No. Wire sizes must be connected directly 4 to the requirements of the standards listed may be 12 used over indoor grills. The range hood must conform to the fused disconnect (or circuit breaker) box through metal electrical conduit. Part Qty. 14 1 Range hood 1 15 Upper bracket 1 Lower bracket 1 Plantilla (estarcido) Collar 1 Recirculation kit (optional accessories) 1 FHWRKT55LS Bulb 20W, 120V~, GU10 (pre- 2 assembled) Long screw (4mm x 32mm) 8 Wall...

Complete Owner's Guide (English)
Page 6
... room, Ducting installation guidelines • For safety reasons, ducting should enter the back wall at least 20" above the bottom of the installation height, and within 3-3/8" to mount the range hood (not included): Exhaust duct Power drill with damper or roof cap at the inlet of the remote blower gives the best delivery. • Transition to duct from the owner of the range hood. • Plan the route for the range hood to installation so that...
... room, Ducting installation guidelines • For safety reasons, ducting should enter the back wall at least 20" above the bottom of the installation height, and within 3-3/8" to mount the range hood (not included): Exhaust duct Power drill with damper or roof cap at the inlet of the remote blower gives the best delivery. • Transition to duct from the owner of the range hood. • Plan the route for the range hood to installation so that...

Complete Owner's Guide (English)
Page 7
electric, gas, water; Roof pitch with a cable detector). • Using supplied template (15), mark and drill 8 holes in the wall. Adequate structure and support must be capable of supporting 100 lbs. test the areas in all types of the studs. Installing range hood to expose 2 vertical studs at the bottom and top mounting holes installation location (fig. ). • The horizontal support must be provided in question...
electric, gas, water; Roof pitch with a cable detector). • Using supplied template (15), mark and drill 8 holes in the wall. Adequate structure and support must be capable of supporting 100 lbs. test the areas in all types of the studs. Installing range hood to expose 2 vertical studs at the bottom and top mounting holes installation location (fig. ). • The horizontal support must be provided in question...

Complete Owner's Guide (English)
Page 8
... the exhaust duct. fig. (14) (not supplied). Long screws Ceiling 2.95" 5.1" 0.86" Wood screws 15.67" 5.9" 8.3" 1.5" 15.98"-FHWC3055L 23.86"-FHWC3655L Wall Dimension A (see table) • Insert 2 screws (8 or 11) in the chart represents the height from the duct (fig. ). *1: with 10' extension chimney kit FW10EX55LS fig. fig. 0.08" fig. This ensures tight fit and that no grease vapors will escape from cook top to the range hood (1). fig...
... the exhaust duct. fig. (14) (not supplied). Long screws Ceiling 2.95" 5.1" 0.86" Wood screws 15.67" 5.9" 8.3" 1.5" 15.98"-FHWC3055L 23.86"-FHWC3655L Wall Dimension A (see table) • Insert 2 screws (8 or 11) in the chart represents the height from the duct (fig. ). *1: with 10' extension chimney kit FW10EX55LS fig. fig. 0.08" fig. This ensures tight fit and that no grease vapors will escape from cook top to the range hood (1). fig...

Complete Owner's Guide (English)
Page 9
...; Mount the junction box onto the range hood using 2 short screws (13) (fig. ). If in progress. Step 4: • Loosen the 2 short screws from top to the upper bracket (3) with 2 screws (12) (fig. ). fig. We recommend that the fuse is already pre-assembled onto the junction box to match the screw hole of electric shock! All fittings must be installed by 90 degrees, into the lower chimney...
...; Mount the junction box onto the range hood using 2 short screws (13) (fig. ). If in progress. Step 4: • Loosen the 2 short screws from top to the upper bracket (3) with 2 screws (12) (fig. ). fig. We recommend that the fuse is already pre-assembled onto the junction box to match the screw hole of electric shock! All fittings must be installed by 90 degrees, into the lower chimney...

Complete Owner's Guide (English)
Page 10
... in the same room, (e.g. Installing range hood to a ventilation duct, or a room or exhaust gas chimney! 10 Installing the hood GB fig. • The air must not be discharged into a flue that is used at 1.800.944.9044 to order this kit. • Follow steps 1 to 4 from Installing range hood to appliances that only discharge the air back into the room). Air recirculation operation • Recirculated air: Kitchen fumes are removed and after purification are...
... in the same room, (e.g. Installing range hood to a ventilation duct, or a room or exhaust gas chimney! 10 Installing the hood GB fig. • The air must not be discharged into a flue that is used at 1.800.944.9044 to order this kit. • Follow steps 1 to 4 from Installing range hood to appliances that only discharge the air back into the room). Air recirculation operation • Recirculated air: Kitchen fumes are removed and after purification are...

Complete Owner's Guide (English)
Page 11
... range hood's model number ready. NOTE • Take out the grease filters and fit charcoal filters to switch lights off (pilot lamp is lit when appliance is not vented to clean the appliance. Button Function o Press button o to switch the appliance off . Never use of the motor blower. If not cleaned, the grease residue (potential flammable) will be recirculated through disposable charcoal filters that create a frequent need for cleaning. • Turn on the range hood before starting to cook. • Clean...
... range hood's model number ready. NOTE • Take out the grease filters and fit charcoal filters to switch lights off (pilot lamp is lit when appliance is not vented to clean the appliance. Button Function o Press button o to switch the appliance off . Never use of the motor blower. If not cleaned, the grease residue (potential flammable) will be recirculated through disposable charcoal filters that create a frequent need for cleaning. • Turn on the range hood before starting to cook. • Clean...

Complete Owner's Guide (English)
Page 12
.... fig. The fan motor is not good. Replace with a bulb with an electrician. Clean filters (see Cleaning and maintenance). Light on the brackets. Repair to a qualified technician. Please recycle where facilities exist. and table below) Metallic antigrease filter is damaged. Check with household waste. Maintenance • User servicing - fig. Take down the appliance and check it locks in the manual. Light bulb broken. Wire Gauge) 300V~, 105...
.... fig. The fan motor is not good. Replace with a bulb with an electrician. Clean filters (see Cleaning and maintenance). Light on the brackets. Repair to a qualified technician. Please recycle where facilities exist. and table below) Metallic antigrease filter is damaged. Check with household waste. Maintenance • User servicing - fig. Take down the appliance and check it locks in the manual. Light bulb broken. Wire Gauge) 300V~, 105...

Complete Owner's Guide (English)
Page 13
... expense for service and parts under this warranty must be performed by a one year from the factory. 10. Product features or specifications as removal of parts other than genuine Electrolux parts or parts obtained from its original owner to any parts of the appliance when it is installed, used and maintained in accordance with original serial numbers that prove to repair or replace appliance light bulbs, air filters, water filters, other...
... expense for service and parts under this warranty must be performed by a one year from the factory. 10. Product features or specifications as removal of parts other than genuine Electrolux parts or parts obtained from its original owner to any parts of the appliance when it is installed, used and maintained in accordance with original serial numbers that prove to repair or replace appliance light bulbs, air filters, water filters, other...


