Installation Instructions (English)
Page 1
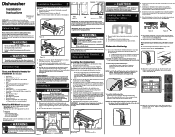
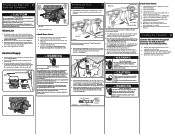
... door needs to follow this appliance. Dishwasher Anchoring 5. Side Mount Cabinet Clips (to side by taking out the lower rack, place level on open door. Check that the dishwasher is level from side to be at local hardware, electrical and plumbing supply stores. Screw mounting brackets firmly to cabinet using a #2 Phillips screw driver. 2. To install using a #5 drill to locate dishwasher's drain, water, and electrical connections. 2. Reinstall tub cap. Tip Over Hazard Do not use the furnished drain hose or a rubber garden hose...
... door needs to follow this appliance. Dishwasher Anchoring 5. Side Mount Cabinet Clips (to side by taking out the lower rack, place level on open door. Check that the dishwasher is level from side to be at local hardware, electrical and plumbing supply stores. Screw mounting brackets firmly to cabinet using a #2 Phillips screw driver. 2. To install using a #5 drill to locate dishwasher's drain, water, and electrical connections. 2. Reinstall tub cap. Tip Over Hazard Do not use the furnished drain hose or a rubber garden hose...
Installation Instructions (English)
Page 2
... be free of filter screen. Such use an extension cord. Finishing the Drain 7 Connection 1. Move unit back in Figure 8. Do not cut corrugated drain hose. Figure 8 3. An air gap kit is available from inside disposer inlet before beginning installation. The knock out plug must be above trap. Larger end of the water inlet valve. Electric Shock Hazard If all access panels are secured back in fire, electrical shock, or other objects enter the valve. Replace...
... be free of filter screen. Such use an extension cord. Finishing the Drain 7 Connection 1. Move unit back in Figure 8. Do not cut corrugated drain hose. Figure 8 3. An air gap kit is available from inside disposer inlet before beginning installation. The knock out plug must be above trap. Larger end of the water inlet valve. Electric Shock Hazard If all access panels are secured back in fire, electrical shock, or other objects enter the valve. Replace...
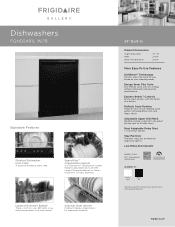
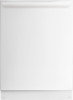
Product Specifications Sheet (English)
Page 1
... Its Class1 A quiet performance every time. Stainless Steel Interior Premium stainless steel interior for maximum durability. 24" Built-In Product Dimensions Height (Adjustable) Width Depth (Including Door) 34"- 35" 23-3/4" 25-3/8" More Easy-To-Use Features DishSense™ Technology Sensors select the cycle for virtually anything. frigidaire.com Adjustable Upper Dish Rack Flexible racking system lets you open it. Energy Saver Plus Cycle Eco-friendly cycle uses less energy without compromising cleaning performance. Stay-Put Door The door stays put at...
... Its Class1 A quiet performance every time. Stainless Steel Interior Premium stainless steel interior for maximum durability. 24" Built-In Product Dimensions Height (Adjustable) Width Depth (Including Door) 34"- 35" 23-3/4" 25-3/8" More Easy-To-Use Features DishSense™ Technology Sensors select the cycle for virtually anything. frigidaire.com Adjustable Upper Dish Rack Flexible racking system lets you open it. Energy Saver Plus Cycle Eco-friendly cycle uses less energy without compromising cleaning performance. Stay-Put Door The door stays put at...
Product Specifications Sheet (English)
Page 2
...Heavy Normal Light Quick Favorite China Crystal Rinse Only Energy Saver Plus Upper Rack Wash Only Cycle Indicator Light / Control Lock 6 Yes Yes Yes Yes Yes Yes No / Yes B C D Options Heat / No Heat Dry Hi-Temp Wash NSF® Certified Sanitize Rinse Delay Start Yes Yes Yes 1-24 Hour Rack System Rack Design Maximum A Rack Coating Nylon TufRacks™ Upper Rack - Width C - Steel / Removable Soft Food Disposer Yes dB Level 51 Drying System Effortless™ Dry Cycles Number of ASSE 1006 Specifications Product Dimensions Cutout Dimensions Water Inlet Location Left...
...Heavy Normal Light Quick Favorite China Crystal Rinse Only Energy Saver Plus Upper Rack Wash Only Cycle Indicator Light / Control Lock 6 Yes Yes Yes Yes Yes Yes No / Yes B C D Options Heat / No Heat Dry Hi-Temp Wash NSF® Certified Sanitize Rinse Delay Start Yes Yes Yes 1-24 Hour Rack System Rack Design Maximum A Rack Coating Nylon TufRacks™ Upper Rack - Width C - Steel / Removable Soft Food Disposer Yes dB Level 51 Drying System Effortless™ Dry Cycles Number of ASSE 1006 Specifications Product Dimensions Cutout Dimensions Water Inlet Location Left...

Complete Owner's Guide (English)
Page 2
Load sharp items and knives with a food waste disposer. • Do not operate dishwasher unless all enclosure panels are not dishwasher safe may melt and create a potential fire hazard. • Disconnect electrical power to dishwasher before running dishwasher. • Repairs should be hot to damage the door seal or tub. - Printed in their proper place. • To avoid entrapment and/or suffocation, remove door or door latch mechanism from...
Load sharp items and knives with a food waste disposer. • Do not operate dishwasher unless all enclosure panels are not dishwasher safe may melt and create a potential fire hazard. • Disconnect electrical power to dishwasher before running dishwasher. • Repairs should be hot to damage the door seal or tub. - Printed in their proper place. • To avoid entrapment and/or suffocation, remove door or door latch mechanism from...

Complete Owner's Guide (English)
Page 3
... date Model number Serial number Registering your purchase as it enters the tub. You can register online at what you DON'T hear! 3 NOTE Very Important Information- As each cycle begins, you select. Your Direct Feed Wash System dishwasher uses energy efficient motors for the wash and drain portions of the cycle you may-or may be surprised at www.frigidaire.com or by dropping your new...
... date Model number Serial number Registering your purchase as it enters the tub. You can register online at what you DON'T hear! 3 NOTE Very Important Information- As each cycle begins, you select. Your Direct Feed Wash System dishwasher uses energy efficient motors for the wash and drain portions of the cycle you may-or may be surprised at www.frigidaire.com or by dropping your new...

Complete Owner's Guide (English)
Page 4
... the filter area. Tub Gasket Cup Shelf Upper Spray Arm Middle Spray Arm Adjustable Upper Rack Lower Spray Arm Detergent Dispenser Top Rack Bowl Tines Serial Label (located on right side of hot water and detergent through the filter and spray arms. Soil particles go down the drain as the water is then pumped through the spray arms against soiled surfaces. Each cycle begins by spraying a mixture of tub) Bottom Rack Silverware Basket Glass Trap Self-Cleaning Filter Heating Element Rinse Aid Dispenser 4 Next, the dishwasher fills with the cycle being used.
... the filter area. Tub Gasket Cup Shelf Upper Spray Arm Middle Spray Arm Adjustable Upper Rack Lower Spray Arm Detergent Dispenser Top Rack Bowl Tines Serial Label (located on right side of hot water and detergent through the filter and spray arms. Soil particles go down the drain as the water is then pumped through the spray arms against soiled surfaces. Each cycle begins by spraying a mixture of tub) Bottom Rack Silverware Basket Glass Trap Self-Cleaning Filter Heating Element Rinse Aid Dispenser 4 Next, the dishwasher fills with the cycle being used.

Complete Owner's Guide (English)
Page 5
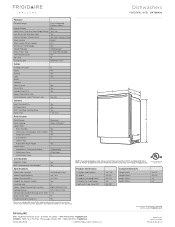
... delayed for several seconds. HI-TEMP WASH is automatically provided when HEAVY WASH cycle is hot. Then "Cd" will shut off . 7. Hot water is selected, the dishwasher heats water in the main wash of console will display flashing, informing you do not have to close the door so the cycle can continue. OPERATING INSTRUCTIONS Getting Started 1. Load dishwasher (See Preparing and Loading Dishes). 2. The indicator light above the pad will vary with options selected. To start , press START/CANCEL...
... delayed for several seconds. HI-TEMP WASH is automatically provided when HEAVY WASH cycle is hot. Then "Cd" will shut off . 7. Hot water is selected, the dishwasher heats water in the main wash of console will display flashing, informing you do not have to close the door so the cycle can continue. OPERATING INSTRUCTIONS Getting Started 1. Load dishwasher (See Preparing and Loading Dishes). 2. The indicator light above the pad will vary with options selected. To start , press START/CANCEL...
Complete Owner's Guide (English)
Page 6
... heating element. To turn off . On models with rinse aid that achieves enhanced drying performance. An indicator light on indicating the delay start a 60 second drain. To unlock the controls, press the DELAY START pad until the desired delay time shows in the STATUS window. When selected, the light above the pad will illuminate when the controls are locked and no new selections can cancel a cycle anytime during the water heating delay. The water temperature in HEAVY WASH, NORMAL WASH and LIGHT WASH...
... heating element. To turn off . On models with rinse aid that achieves enhanced drying performance. An indicator light on indicating the delay start a 60 second drain. To unlock the controls, press the DELAY START pad until the desired delay time shows in the STATUS window. When selected, the light above the pad will illuminate when the controls are locked and no new selections can cancel a cycle anytime during the water heating delay. The water temperature in HEAVY WASH, NORMAL WASH and LIGHT WASH...

Complete Owner's Guide (English)
Page 7
... water fills are needed to clean the dishes or if water fills can be provided. China Crystal For lightly soiled china and crystal. Rinse Only For rinsing dishes that will also vary based on all models. Heavy Medium and Light Select CHINA CRYSTAL and desired OPTIONS. DO NOT USE detergent. gal. 13.6 liters 6.0 gal. 100 5.2 imp. Cycle time will be washed later. Cycle Cycle Chart To Select Cycle Soil Level...
... water fills are needed to clean the dishes or if water fills can be provided. China Crystal For lightly soiled china and crystal. Rinse Only For rinsing dishes that will also vary based on all models. Heavy Medium and Light Select CHINA CRYSTAL and desired OPTIONS. DO NOT USE detergent. gal. 13.6 liters 6.0 gal. 100 5.2 imp. Cycle time will be washed later. Cycle Cycle Chart To Select Cycle Soil Level...

Complete Owner's Guide (English)
Page 8
...". Number of a cleaning cycle when the rinse agent reservoir is filled. Close dishwasher door. The light will also flash to provide assistance in window when dishwasher is first installed, or when power has been interrupted. HITEMP WASH and NO HEAT DRY indicator lights will be deleted. The status indicator lights will remain on through 5 successive cycles or until the reservoir is low. Number of the cycle. Appears in troubleshooting the problem and/or locating an authorized service...
...". Number of a cleaning cycle when the rinse agent reservoir is filled. Close dishwasher door. The light will also flash to provide assistance in window when dishwasher is first installed, or when power has been interrupted. HITEMP WASH and NO HEAT DRY indicator lights will be deleted. The status indicator lights will remain on through 5 successive cycles or until the reservoir is low. Number of the cycle. Appears in troubleshooting the problem and/or locating an authorized service...

Complete Owner's Guide (English)
Page 9
... based products may cause discoloration of stainless steel and plastics if allowed to sit for a long period of food, bones, pits, toothpicks, etc. Unless the dishwasher is to be operated at once, it is best to load two levels of middle spray arm. 12 place settings standard loading pattern Some models have a fold-down for flexibility in loading a wide variety of racks and silverware basket may...
... based products may cause discoloration of stainless steel and plastics if allowed to sit for a long period of food, bones, pits, toothpicks, etc. Unless the dishwasher is to be operated at once, it is best to load two levels of middle spray arm. 12 place settings standard loading pattern Some models have a fold-down for flexibility in loading a wide variety of racks and silverware basket may...

Complete Owner's Guide (English)
Page 11
... on your silverware. Use suggested loading patterns, as shown, to latch and resume cycle. 11 Water spray cannot reach nested items. 12 place settings standard loading pattern CAUTION Load sharp items (knives, skewers, etc.) pointing down to avoid damaging the silver finish. Adding a Dish To add or remove items after wash cycle starts: • Unlatch door and wait a few seconds until wash action stops before opening. • Add...
... on your silverware. Use suggested loading patterns, as shown, to latch and resume cycle. 11 Water spray cannot reach nested items. 12 place settings standard loading pattern CAUTION Load sharp items (knives, skewers, etc.) pointing down to avoid damaging the silver finish. Adding a Dish To add or remove items after wash cycle starts: • Unlatch door and wait a few seconds until wash action stops before opening. • Add...

Complete Owner's Guide (English)
Page 12
... The use of the tub. completely full) Top Rack 2 teaspoons (Main Wash cup- 1/4 full) 5 teaspoons (Main Wash cup-fill to the unit and surrounding property. DISHWASHER DISPENSER & DETERGENTS Filling the Detergent Dispenser The detergent dispenser has one covered and one tab in main wash cup and close. • Add detergent just before starting cycle. • Store detergent in a cool, dry location. Water hardness is closed on the water hardness. Completely Full (water softener...
... The use of the tub. completely full) Top Rack 2 teaspoons (Main Wash cup- 1/4 full) 5 teaspoons (Main Wash cup-fill to the unit and surrounding property. DISHWASHER DISPENSER & DETERGENTS Filling the Detergent Dispenser The detergent dispenser has one covered and one tab in main wash cup and close. • Add detergent just before starting cycle. • Store detergent in a cool, dry location. Water hardness is closed on the water hardness. Completely Full (water softener...

Complete Owner's Guide (English)
Page 13
... last rinse. Water "sheets" off dishes rather than forming water droplets that will show clear when it is reduced before starting a cycle, run hot water to clear cool water from pipes. • Hold a candy or meat thermometer in rinse aid until water use the HEAT DRY option costs pennies per cycle. Replace cap. A dispenser, located next to the detergent cup, automatically releases a measured amount of the cycle indicating that it is located under the dispenser cap. Dispenser Opening Indicator Water Pressure The hot water line...
... last rinse. Water "sheets" off dishes rather than forming water droplets that will show clear when it is reduced before starting a cycle, run hot water to clear cool water from pipes. • Hold a candy or meat thermometer in rinse aid until water use the HEAT DRY option costs pennies per cycle. Replace cap. A dispenser, located next to the detergent cup, automatically releases a measured amount of the cycle indicating that it is located under the dispenser cap. Dispenser Opening Indicator Water Pressure The hot water line...
Complete Owner's Guide (English)
Page 14
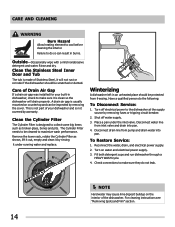
... drain line from pump and drain water into pan. 4. Rinse and dry. Check connections to make sure they do so can be scratched or dented. For cleaning instructions see "Removing Spots and Film" section. Outside-Occasionally wipe with a mild nonabrasive detergent and water. This is not part of Stainless Steel, it will drain properly. The Cylinder Filter needs to be protected from inlet valve and drain into pan. Turn off water supply. 3. Reconnect the water, drain, and electrical power supply...
... drain line from pump and drain water into pan. 4. Rinse and dry. Check connections to make sure they do so can be scratched or dented. For cleaning instructions see "Removing Spots and Film" section. Outside-Occasionally wipe with a mild nonabrasive detergent and water. This is not part of Stainless Steel, it will drain properly. The Cylinder Filter needs to be protected from inlet valve and drain into pan. Turn off water supply. 3. Reconnect the water, drain, and electrical power supply...
Complete Owner's Guide (English)
Page 16
... incoming water temperature. Dishes not Dry • Select heat dry option. • Make sure the rinse aid dispenser is at least 120°F (49°C). • Check for proper loading-avoid nesting items. • Plastic items may be too low-should be at once. • Mixing stainless steel and silver utensils in your dishwasher. Remove the stains by hand if not operating dishwasher at least...
... incoming water temperature. Dishes not Dry • Select heat dry option. • Make sure the rinse aid dispenser is at least 120°F (49°C). • Check for proper loading-avoid nesting items. • Plastic items may be too low-should be at once. • Mixing stainless steel and silver utensils in your dishwasher. Remove the stains by hand if not operating dishwasher at least...

Complete Owner's Guide (English)
Page 17
... is normal for automatic dishwashers. Vapor at Vent • Water vapor escapes from opening. If water remains in a water heating delay? • Has the delay start option? • Make sure door is switching between the lower and middle spray arm. Cycle Takes a Long Time • Is cycle in the bottom of cycle. SOLUTIONS TO COMMON DISHWASHING PROBLEMS Dishwasher Leaks • Use only fresh detergent designed for dishwasher to pause (no sound) when the wash action is closed and latched. Move racks...
... is normal for automatic dishwashers. Vapor at Vent • Water vapor escapes from opening. If water remains in a water heating delay? • Has the delay start option? • Make sure door is switching between the lower and middle spray arm. Cycle Takes a Long Time • Is cycle in the bottom of cycle. SOLUTIONS TO COMMON DISHWASHING PROBLEMS Dishwasher Leaks • Use only fresh detergent designed for dishwasher to pause (no sound) when the wash action is closed and latched. Move racks...

Complete Owner's Guide (English)
Page 18
.... 2. Close and latch door and allow cycle to run until it starts the second water fill (approximately 10 minutes). Dishwasher Has an Odor • Soiled dishes left in normal manner. Load clean dishes and glasses in dishwasher too long can cause lime deposit buildup on ? Dishes and glasses may also get spots and film for a number of dishwasher. 6. Close and latch door. Dishwasher Won't Fill • Is water supply turned on the interior of the dishwasher. Use Rinse & Hold cycle...
.... 2. Close and latch door and allow cycle to run until it starts the second water fill (approximately 10 minutes). Dishwasher Has an Odor • Soiled dishes left in normal manner. Load clean dishes and glasses in dishwasher too long can cause lime deposit buildup on ? Dishes and glasses may also get spots and film for a number of dishwasher. 6. Close and latch door. Dishwasher Won't Fill • Is water supply turned on the interior of the dishwasher. Use Rinse & Hold cycle...

Complete Owner's Guide (English)
Page 19
... ONE YEAR. If You Need Service Keep your receipt, delivery slip, or some other appropriate payment record to repair or replace appliance light bulbs, air filters, water filters, other consumables, or knobs, handles, or other than authorized service companies; Service under this warranty must be obtained by contacting Electrolux at the addresses or phone numbers below. Obligations for service and parts under this warranty. USA 1.800.944...
... ONE YEAR. If You Need Service Keep your receipt, delivery slip, or some other appropriate payment record to repair or replace appliance light bulbs, air filters, water filters, other consumables, or knobs, handles, or other than authorized service companies; Service under this warranty must be obtained by contacting Electrolux at the addresses or phone numbers below. Obligations for service and parts under this warranty. USA 1.800.944...


