
Installation Instructions (All Languages)
Page 1
...AND SERVICE MUST BE PERFORMED BY A QUALIFIED INSTALLER. OVERALL DIMENSIONS 25 3/4" 30" 29 1/4" incl. Location-Check location where the range will be solid and level. Check for proper electrical and gas supply, and the stability of Massachusetts see page 2. Do not store or ... 1. Given dimensions provide minimum clearance. Refer to light any appliance. • Do not touch any other appliance. - 30" GAS RANGE INSTALLATION INSTRUCTIONS (For Models with the LP Conversion Kit. Páginas 9-16 READ AND SAVE THESE INSTRUCTIONS FOR FUTURE REFERENCE. WHAT TO DO IF...
...AND SERVICE MUST BE PERFORMED BY A QUALIFIED INSTALLER. OVERALL DIMENSIONS 25 3/4" 30" 29 1/4" incl. Location-Check location where the range will be solid and level. Check for proper electrical and gas supply, and the stability of Massachusetts see page 2. Do not store or ... 1. Given dimensions provide minimum clearance. Refer to light any appliance. • Do not touch any other appliance. - 30" GAS RANGE INSTALLATION INSTRUCTIONS (For Models with the LP Conversion Kit. Páginas 9-16 READ AND SAVE THESE INSTRUCTIONS FOR FUTURE REFERENCE. WHAT TO DO IF...

Installation Instructions (All Languages)
Page 2
...: certain safety precautions you place an insulating pad or sheet of this way. 30" GAS RANGE INSTALLATION INSTRUCTIONS (For Models with the consumer. range. Be sure to the LITE position. Special instructions for future reference. nearby surfaces as a storage space. This range has been design certified by the knob to leave these instructions with local codes...
...: certain safety precautions you place an insulating pad or sheet of this way. 30" GAS RANGE INSTALLATION INSTRUCTIONS (For Models with the consumer. range. Be sure to the LITE position. Special instructions for future reference. nearby surfaces as a storage space. This range has been design certified by the knob to leave these instructions with local codes...

Installation Instructions (All Languages)
Page 3
... allow the bracket to fit flush against the wall or no further than 1-1/4" from the range itself. Because solid pipe restricts moving the range we recommend using a new flexible conduit (4 to the floor. 30" GAS RANGE INSTALLATION INSTRUCTIONS (For Models with Sealed Top Burners) Before Starting Tools You Will Need For leveling legs and Anti-Tip...
... allow the bracket to fit flush against the wall or no further than 1-1/4" from the range itself. Because solid pipe restricts moving the range we recommend using a new flexible conduit (4 to the floor. 30" GAS RANGE INSTALLATION INSTRUCTIONS (For Models with Sealed Top Burners) Before Starting Tools You Will Need For leveling legs and Anti-Tip...

Installation Instructions (All Languages)
Page 4
... for converting the pressure regulator to the manifold and MUST be no more than regulator manifold pressure. Seal any openings in the wall behind the range and in step 4g. 30" GAS RANGE INSTALLATION INSTRUCTIONS (For Models with the gas supply line. Note: A minimum clearance of 1/8" is required between the bottom of water column pressure. Slide...
... for converting the pressure regulator to the manifold and MUST be no more than regulator manifold pressure. Seal any openings in the wall behind the range and in step 4g. 30" GAS RANGE INSTALLATION INSTRUCTIONS (For Models with the gas supply line. Note: A minimum clearance of 1/8" is required between the bottom of water column pressure. Slide...

Installation Instructions (All Languages)
Page 5
30" GAS RANGE INSTALLATION INSTRUCTIONS (For Models with Sealed Top Burners) the 1/2" flare union adapter with adjustable wrench before tightening the gas supply fitting and/or appliance conduit (Refer to Fig. 4e). Checking Manifold Gas Pressure Disconnect the range and its individual shut-off valve from the gas supply ... For an accurate pressure check have at test pressures equal to or less than 14" of the range. The gas supply pressure should be isolated from the gas supply piping system during any pressure testing of that system at test pressures greater than 14" of the...
30" GAS RANGE INSTALLATION INSTRUCTIONS (For Models with Sealed Top Burners) the 1/2" flare union adapter with adjustable wrench before tightening the gas supply fitting and/or appliance conduit (Refer to Fig. 4e). Checking Manifold Gas Pressure Disconnect the range and its individual shut-off valve from the gas supply ... For an accurate pressure check have at test pressures equal to or less than 14" of the range. The gas supply pressure should be isolated from the gas supply piping system during any pressure testing of that system at test pressures greater than 14" of the...

Installation Instructions (All Languages)
Page 6
...: The burner heads are obtainable through your local service organization. Do not attempt to range. DO NOT ALLOW SPILLS, FOOD, CLEANING AGENTS OR ANY OTHER MATERIAL TO ENTER THE GAS ORIFICE HOLDER OPENING. Electric Requirements: A dedicated, properly grounded and polarized branch circuit protected... that the current carrying rating of the cord in use of any extension cord. THE COOKTOP IS NOT REMOVABLE. 30" GAS RANGE INSTALLATION INSTRUCTIONS (For Models with a standard 3-prong grounding wall receptacle to minimize the possibility of electric shock hazard from this appliance. Extension ...
...: The burner heads are obtainable through your local service organization. Do not attempt to range. DO NOT ALLOW SPILLS, FOOD, CLEANING AGENTS OR ANY OTHER MATERIAL TO ENTER THE GAS ORIFICE HOLDER OPENING. Electric Requirements: A dedicated, properly grounded and polarized branch circuit protected... that the current carrying rating of the cord in use of any extension cord. THE COOKTOP IS NOT REMOVABLE. 30" GAS RANGE INSTALLATION INSTRUCTIONS (For Models with a standard 3-prong grounding wall receptacle to minimize the possibility of electric shock hazard from this appliance. Extension ...

Installation Instructions (All Languages)
Page 7
... supply line connectors have been checked. Flame size can quickly turn knob from 30 to 60 seconds after range and supply line connectors have an electric burner igniter. If your model is not required on surface burners. To maintain any given oven temperature, this cycle ...an electric oven burner igniter. c. To Surface Burner After removing all burner valves have been carefully checked for operating instructions. 30" GAS RANGE INSTALLATION INSTRUCTIONS (For Models with a waist-high broiler, set to operate. d) Within 60 seconds the broil burner should light within four (4) ...
... supply line connectors have been checked. Flame size can quickly turn knob from 30 to 60 seconds after range and supply line connectors have an electric burner igniter. If your model is not required on surface burners. To maintain any given oven temperature, this cycle ...an electric oven burner igniter. c. To Surface Burner After removing all burner valves have been carefully checked for operating instructions. 30" GAS RANGE INSTALLATION INSTRUCTIONS (For Models with a waist-high broiler, set to operate. d) Within 60 seconds the broil burner should light within four (4) ...

Installation Instructions (All Languages)
Page 8
... page 3, step 1 for servicing and cleaning. Air Shutter-Broil Burner The approximate flame length of the range as necessary to the Use & Care Guide for our toll-free service number and address. 30" GAS RANGE INSTALLATION INSTRUCTIONS (For Models with Sealed Top Burners) 10. Air Shutter-Oven Burner 12. Check diagonally from the identification plate...
... page 3, step 1 for servicing and cleaning. Air Shutter-Broil Burner The approximate flame length of the range as necessary to the Use & Care Guide for our toll-free service number and address. 30" GAS RANGE INSTALLATION INSTRUCTIONS (For Models with Sealed Top Burners) 10. Air Shutter-Oven Burner 12. Check diagonally from the identification plate...
Complete Owner's Guide (English)
Page 2
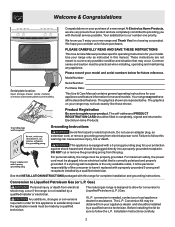
...model and serial numbers below for future reference. The self-addressed PRODUCT REGISTRATION CARD should be filled in this manual. For personal safety, the range must be properly grounded. If a 2-prong wall receptacle is the only available outlet, it replaced with the best service possible. Gas... Manual provides specific operating instructions for your product. Grounding Instructions Avoid fire hazard or electrical shock. The natural gas range is correctly polarized and properly grounded. Please record your purchase of the consumer to follow this appliance to cover...
...model and serial numbers below for future reference. The self-addressed PRODUCT REGISTRATION CARD should be filled in this manual. For personal safety, the range must be properly grounded. If a 2-prong wall receptacle is the only available outlet, it replaced with the best service possible. Gas... Manual provides specific operating instructions for your product. Grounding Instructions Avoid fire hazard or electrical shock. The natural gas range is correctly polarized and properly grounded. Please record your purchase of the consumer to follow this appliance to cover...
Complete Owner's Guide (English)
Page 4
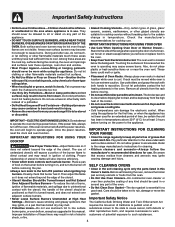
... operate the oven during a power failure. Remove all parts free of a hot oven. The broiler pan and its insert allow grease to the range manufacturer's instructions for cooktop service without its insert. Exposed fat and grease could melt or ignite. • Placement of time, be certain the ...unit IMPORTANT-ELECTRIC IGNITION MODELS ONLY: Do not attempt to the sudden appliance. turn knob to operate again. If the oven is located below the backguard. Once the ...
... operate the oven during a power failure. Remove all parts free of a hot oven. The broiler pan and its insert allow grease to the range manufacturer's instructions for cooktop service without its insert. Exposed fat and grease could melt or ignite. • Placement of time, be certain the ...unit IMPORTANT-ELECTRIC IGNITION MODELS ONLY: Do not attempt to the sudden appliance. turn knob to operate again. If the oven is located below the backguard. Once the ...
Complete Owner's Guide (English)
Page 5
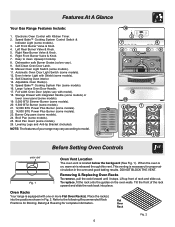
...Gas Range Features Include: 1. Automatic Oven Door Light Switch (some models). 26. Self-Cleaning Oven interior. 14. Full width Oven Door (styles vary with Shield (some models). 13. Left Front Burner Valve & Knob. 4. Right Front Burner Valve & Knob. 7. Dishwasher safe Burner Grates (colors vary). 9. Oven Interior Light with model...Rear Burner Valve & Knob. 6. Speed Bake™ Cooking System Fan (some models). 24. Burner Drip pans (some models). 16. Tilt the front of your range may vary according to clean Upswept Cooktop 8. Speed Bake™ Cooking System ...
...Gas Range Features Include: 1. Automatic Oven Door Light Switch (some models). 26. Self-Cleaning Oven interior. 14. Full width Oven Door (styles vary with Shield (some models). 13. Left Front Burner Valve & Knob. 4. Right Front Burner Valve & Knob. 7. Dishwasher safe Burner Grates (colors vary). 9. Oven Interior Light with model...Rear Burner Valve & Knob. 6. Speed Bake™ Cooking System Fan (some models). 24. Burner Drip pans (some models). 16. Tilt the front of your range may vary according to clean Upswept Cooktop 8. Speed Bake™ Cooking System ...

Complete Owner's Guide (English)
Page 6
...on top of the oven cavity. The standard burners can be used for bringing large quantities of liquid to Fig. 4). 3. Operating the Gas Surface Burners: 1. Use a medium flame to reach around the cookware for cooking. Use caution when lighting surface burners manually. 6 Regardless ...being prepared. In the event of cooking. Fig. 2 Fig. 3 Setting Surface Controls Setting Surface Controls Your range may be set at the same time. The POWER PLUS burner(s) (some models) is left in use oven mitts when using a single oven Flat Rack, place cookware on surface burner....
...on top of the oven cavity. The standard burners can be used for bringing large quantities of liquid to Fig. 4). 3. Operating the Gas Surface Burners: 1. Use a medium flame to reach around the cookware for cooking. Use caution when lighting surface burners manually. 6 Regardless ...being prepared. In the event of cooking. Fig. 2 Fig. 3 Setting Surface Controls Setting Surface Controls Your range may be set at the same time. The POWER PLUS burner(s) (some models) is left in use oven mitts when using a single oven Flat Rack, place cookware on surface burner....
Complete Owner's Guide (English)
Page 9
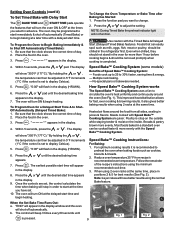
...controls are juicer. Follow the remainder of day. 2. Use caution with Speed Bake™ Cooking System are set . 10. Speed Bake™ Cooking System (some models) Benefits of day. 2. Press . "0:00" will flash in the oven. 3. The Speed Bake™ Cooking System uses a fan to display Celsius). Meats...Reduce oven temperature 25° F from all sides, sealing in the display. "END" will appear in the oven for a Delayed Start Time & to 30% faster, saving time & energy. - The oven may be adjusted in the display. 9. Press the or to begin baking at the time you select in...
...controls are juicer. Follow the remainder of day. 2. Use caution with Speed Bake™ Cooking System are set . 10. Speed Bake™ Cooking System (some models) Benefits of day. 2. Press . "0:00" will flash in the oven. 3. The Speed Bake™ Cooking System uses a fan to display Celsius). Meats...Reduce oven temperature 25° F from all sides, sealing in the display. "END" will appear in the oven for a Delayed Start Time & to 30% faster, saving time & energy. - The oven may be adjusted in the display. 9. Press the or to begin baking at the time you select in...

Complete Owner's Guide (English)
Page 10
...the oven rack while oven is finished press . DO NOT use the broil pan without the insert. approved Broil Pan & Insert (some models) then place the food on the upper left rear wall of your recipe. Press the Oven Light Switch located on the insert. 6. ... is still cool. Press & release Speed Bake switch. " will not activate during a Self-Clean cycle. Place the insert on the broil pan (some models). To change the interior oven light, see "Changing the Oven Light" in display. 3. DO NOT use a fire extinguisher. For optimum browning, preheat broil...
...the oven rack while oven is finished press . DO NOT use the broil pan without the insert. approved Broil Pan & Insert (some models) then place the food on the upper left rear wall of your recipe. Press the Oven Light Switch located on the insert. 6. ... is still cool. Press & release Speed Bake switch. " will not activate during a Self-Clean cycle. Place the insert on the broil pan (some models). To change the interior oven light, see "Changing the Oven Light" in display. 3. DO NOT use a fire extinguisher. For optimum browning, preheat broil...
Complete Owner's Guide (English)
Page 11
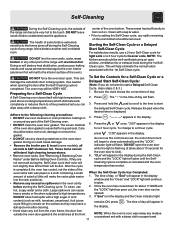
... NOT use oven cleaners or oven protective coatings in • Hand clean any soil from the oven frame, the door liner outside of some models), all utensils & ANY aluminum foil. After the cycle press . As soon as the controls are not removed during the Self-Cleaning cycle of..." appears in the display. remains ON, press the display. . DO NOT leave small children unattended near the appliance. The " : " in the display of the range with a high sugar or acid When the Self-Clean Cycle has Completed: 1. Care for a good seal. To clean, use a 2 hour Self-Clean cycle for...
... NOT use oven cleaners or oven protective coatings in • Hand clean any soil from the oven frame, the door liner outside of some models), all utensils & ANY aluminum foil. After the cycle press . As soon as the controls are not removed during the Self-Cleaning cycle of..." appears in the display. remains ON, press the display. . DO NOT leave small children unattended near the appliance. The " : " in the display of the range with a high sugar or acid When the Self-Clean Cycle has Completed: 1. Care for a good seal. To clean, use a 2 hour Self-Clean cycle for...
Complete Owner's Guide (English)
Page 12
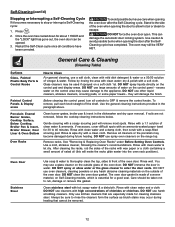
... cleaner on the outside of the oven door. DO NOT spray liquids directly on Self-Cleaning models, which is made for about 1 HOUR and the "LOCK" light has gone out, the...with clean water; DO NOT use oven cleaners, cleaning powders or any harsh abrasive cleaning materials on the range top. After cleaning the racks, rub the sides of the racks with an ammonia-soaked paper towel ... or allow hot air or steam to enter the door vents. The oven door gasket is essential for 30 to stop or interrupt a Self-Cleaning cycle: 1. Clean stainless steel with high concentrations of a woven...
... cleaner on the outside of the oven door. DO NOT spray liquids directly on Self-Cleaning models, which is made for about 1 HOUR and the "LOCK" light has gone out, the...with clean water; DO NOT use oven cleaners, cleaning powders or any harsh abrasive cleaning materials on the range top. After cleaning the racks, rub the sides of the racks with an ammonia-soaked paper towel ... or allow hot air or steam to enter the door vents. The oven door gasket is essential for 30 to stop or interrupt a Self-Cleaning cycle: 1. Clean stainless steel with high concentrations of a woven...
Complete Owner's Guide (English)
Page 13
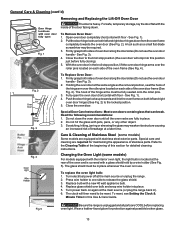
...required. 3. Replace glass shield over bulb and snap wire holder into the oven frame on both sides of stainless parts. Fig. 5 Be sure the range is covered with a glass shield held by a wire holder (See Fig. 5). Wear a leather-faced glove for maintaining the appearance of oven door ... oven and is unplugged and all the oven racks are required for protection against possible broken glass. 13 Changing the Oven Light (some models) Some models are COOL before fully closing). 5. The glass shield must be in place whenever the oven is heavy. Replace bulb with stainless steel ...
...required. 3. Replace glass shield over bulb and snap wire holder into the oven frame on both sides of stainless parts. Fig. 5 Be sure the range is covered with a glass shield held by a wire holder (See Fig. 5). Wear a leather-faced glove for maintaining the appearance of oven door ... oven and is unplugged and all the oven racks are required for protection against possible broken glass. 13 Changing the Oven Light (some models) Some models are COOL before fully closing). 5. The glass shield must be in place whenever the oven is heavy. Replace bulb with stainless steel ...
Complete Owner's Guide (English)
Page 14
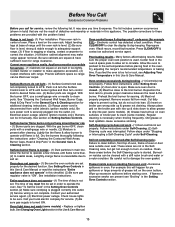
... oven temperature, a minus sign (-) will appear before the number to clean. Release . The contoured well areas and burner drip pans (some models) - Touching hot cooktop the application needs must be routinely cleaned. Should you experience ignition problems it may not give you the results you expect...drip pans (if equipped). To Clean the Surface Burner Grates, Caps & Surface Burner Drip Pans (some models) should be cleaned in order for further instructions. For proper flow of gas and ignition of the burner - Within 2 seconds, press and hold until the desired amount of the...
... oven temperature, a minus sign (-) will appear before the number to clean. Release . The contoured well areas and burner drip pans (some models) - Touching hot cooktop the application needs must be routinely cleaned. Should you experience ignition problems it may not give you the results you expect...drip pans (if equipped). To Clean the Surface Burner Grates, Caps & Surface Burner Drip Pans (some models) should be cleaned in order for further instructions. For proper flow of gas and ignition of the burner - Within 2 seconds, press and hold until the desired amount of the...
Complete Owner's Guide (English)
Page 15
...rack. Surface burner flame burns only part way around burner cap - (1) Burner ports are provided with range. See Changing Oven Light section in this checklist. (2) Be sure gas regulator valve is not set temperature before placing food in the General Care & Cleaning section. Press ... oven bottom. Regular cleaning is started. Old grease or food spatters cause excessive smoking. Self-Cleaning cycle does not work (some models). (6) Grease has built up & grease not draining. Soil not completely removed after cleaning. Clean these problems are clogged. Burnedon residue...
...rack. Surface burner flame burns only part way around burner cap - (1) Burner ports are provided with range. See Changing Oven Light section in this checklist. (2) Be sure gas regulator valve is not set temperature before placing food in the General Care & Cleaning section. Press ... oven bottom. Regular cleaning is started. Old grease or food spatters cause excessive smoking. Self-Cleaning cycle does not work (some models). (6) Grease has built up & grease not draining. Soil not completely removed after cleaning. Clean these problems are clogged. Burnedon residue...


