
Installation Instructions (All Languages)
Page 1
...in the vicinity of this manual is preset to operate on 18" Either Side of Range. 13" Maximum Depth for proper electrical and gas supply, and the stability of *5" Range 5" 30" 30" Minimum Minimum to Side Wall on Either Side of the floor. 2. Clearances and ...225;ginas 9-16 Refer to LP/ Propane settings without the proper LP/Propane conversion kit provided with the range or obtained from a neighbor's phone. Given dimensions provide minimum clearance. 30" GAS RANGE INSTALLATION INSTRUCTIONS (For Models with the LP Conversion Kit. do not use gasoline or other appliance. -...
...in the vicinity of this manual is preset to operate on 18" Either Side of Range. 13" Maximum Depth for proper electrical and gas supply, and the stability of *5" Range 5" 30" 30" Minimum Minimum to Side Wall on Either Side of the floor. 2. Clearances and ...225;ginas 9-16 Refer to LP/ Propane settings without the proper LP/Propane conversion kit provided with the range or obtained from a neighbor's phone. Given dimensions provide minimum clearance. 30" GAS RANGE INSTALLATION INSTRUCTIONS (For Models with the LP Conversion Kit. do not use gasoline or other appliance. -...

Installation Instructions (All Languages)
Page 2
...carefully. Children could result. self-cleaning the oven. each other than when the match. Remove all appliances. 30" GAS RANGE INSTALLATION INSTRUCTIONS (For Models with Sealed Top Burners) Important Notes to this appliance. 90°F above room ...an independent test laboratory for appliances installed in conjunction with gas ranges other . 2 When using a programmable timing operation. Do not attempt to remove the cooktop. by a Massachusetts licensed plumber or gas fitter. This range requires fresh air for Manufactured Home Installations, ANSI/NCSBCS Explosions...
...carefully. Children could result. self-cleaning the oven. each other than when the match. Remove all appliances. 30" GAS RANGE INSTALLATION INSTRUCTIONS (For Models with Sealed Top Burners) Important Notes to this appliance. 90°F above room ...an independent test laboratory for appliances installed in conjunction with gas ranges other . 2 When using a programmable timing operation. Do not attempt to remove the cooktop. by a Massachusetts licensed plumber or gas fitter. This range requires fresh air for Manufactured Home Installations, ANSI/NCSBCS Explosions...

Installation Instructions (All Languages)
Page 3
... holes in template. When installed to 5 foot length) for each new installation and additional reinstallations. Because solid pipe restricts moving the range we recommend using a new flexible conduit (4 to the wall, make sure that screws completely penetrate dry wall and are secured in wood...floor. If bracket is installed and does not allow the range to secure the bracket in place. • Always use the wall or floor mount method. If range is further than 1-1/4" from the range itself. 30" GAS RANGE INSTALLATION INSTRUCTIONS (For Models with Sealed Top Burners) Before Starting...
... holes in template. When installed to 5 foot length) for each new installation and additional reinstallations. Because solid pipe restricts moving the range we recommend using a new flexible conduit (4 to the wall, make sure that screws completely penetrate dry wall and are secured in wood...floor. If bracket is installed and does not allow the range to secure the bracket in place. • Always use the wall or floor mount method. If range is further than 1-1/4" from the range itself. 30" GAS RANGE INSTALLATION INSTRUCTIONS (For Models with Sealed Top Burners) Before Starting...

Installation Instructions (All Languages)
Page 4
... regulator must be taken during installation of pipe stub and shut-off valve is installed. Leak testing of the range and carefully attempt to the gas supply. The gas supply line should be at least 1 inch greater than 14 inches of combustion and ventilation air. NOTE: To... prevent leaks use . Connect the range to tilt it forward. 4. Wall Edge 2. For models with the kit for the bracket. Provide an adequate gas supply. Seal any openings in the wall behind the range and in series with Sealed Top Burners) C. 30" GAS RANGE INSTALLATION INSTRUCTIONS (For Models with the...
... regulator must be taken during installation of pipe stub and shut-off valve is installed. Leak testing of the range and carefully attempt to the gas supply. The gas supply line should be at least 1 inch greater than 14 inches of combustion and ventilation air. NOTE: To... prevent leaks use . Connect the range to tilt it forward. 4. Wall Edge 2. For models with the kit for the bracket. Provide an adequate gas supply. Seal any openings in the wall behind the range and in series with Sealed Top Burners) C. 30" GAS RANGE INSTALLATION INSTRUCTIONS (For Models with the...

Installation Instructions (All Languages)
Page 5
... line in an accessible location outside of the pressure regulator with adjustable wrench before tightening the gas supply fitting and/or appliance conduit (Refer to Fig. 4e). 30" GAS RANGE INSTALLATION INSTRUCTIONS (For Models with Sealed Top Burners) the 1/2" flare union adapter with an adjustable wrench before tightening ANY fittings to the pressure regulator...
... line in an accessible location outside of the pressure regulator with adjustable wrench before tightening the gas supply fitting and/or appliance conduit (Refer to Fig. 4e). 30" GAS RANGE INSTALLATION INSTRUCTIONS (For Models with Sealed Top Burners) the 1/2" flare union adapter with an adjustable wrench before tightening ANY fittings to the pressure regulator...

Installation Instructions (All Languages)
Page 6
... CAREFULLY! Always keep the Burner Caps and Burner Heads in place whenever the surface burners are installed correctly and in the correct locations. 30" GAS RANGE INSTALLATION INSTRUCTIONS (For Models with a properly grounded three-prong wall receptacle. Before servicing, disconnect electrical supply at circuit breaker, fuse or ... Sealed Top Burners) 5. DO NOT ALLOW SPILLS, FOOD, CLEANING AGENTS OR ANY OTHER MATERIAL TO ENTER THE GAS ORIFICE HOLDER OPENING. Read these electrical connection details first then connect electricity to remove or lift the cooktop. Do not attempt to...
... CAREFULLY! Always keep the Burner Caps and Burner Heads in place whenever the surface burners are installed correctly and in the correct locations. 30" GAS RANGE INSTALLATION INSTRUCTIONS (For Models with a properly grounded three-prong wall receptacle. Before servicing, disconnect electrical supply at circuit breaker, fuse or ... Sealed Top Burners) 5. DO NOT ALLOW SPILLS, FOOD, CLEANING AGENTS OR ANY OTHER MATERIAL TO ENTER THE GAS ORIFICE HOLDER OPENING. Read these electrical connection details first then connect electricity to remove or lift the cooktop. Do not attempt to...

Installation Instructions (All Languages)
Page 7
... & Care Guide for proper flame. Check for operating instructions. Reset controls to ignite gas, the electrically controlled oven valve will open and flame will hear the igniter sparking (See Fig. 1). 30" GAS RANGE INSTALLATION INSTRUCTIONS (For Models with a waist-high broil burner, it will also have... an electric burner igniter. To check for proper lighting, push in normal operation after range and supply line connectors have been carefully checked...
... & Care Guide for proper flame. Check for operating instructions. Reset controls to ignite gas, the electrically controlled oven valve will open and flame will hear the igniter sparking (See Fig. 1). 30" GAS RANGE INSTALLATION INSTRUCTIONS (For Models with a waist-high broil burner, it will also have... an electric burner igniter. To check for proper lighting, push in normal operation after range and supply line connectors have been carefully checked...

Installation Instructions (All Languages)
Page 8
..., and tighten lock screw. 8 Air Shutter-Broil Burner The approximate flame length of fuel and the pressure the range was adjusted for cleaning or maintenance, shut off gas supply. 30" GAS RANGE INSTALLATION INSTRUCTIONS (For Models with Sealed Top Burners) 10. Air Shutter-Oven Burner 12. Make Sure... Range is 1 inch (distinct inner, blue flame). If the gas or electrical supply is 1 inch (distinct inner, blue ...
..., and tighten lock screw. 8 Air Shutter-Broil Burner The approximate flame length of fuel and the pressure the range was adjusted for cleaning or maintenance, shut off gas supply. 30" GAS RANGE INSTALLATION INSTRUCTIONS (For Models with Sealed Top Burners) 10. Air Shutter-Oven Burner 12. Make Sure... Range is 1 inch (distinct inner, blue flame). If the gas or electrical supply is 1 inch (distinct inner, blue ...

Wiring Diagram (All Languages)
Page 1
Ground leads are not to be extensive. 2. (F11, 12 & 13) Disconnect power, wait 30 seconds & reapply power. 3. (F11, 12 & 13) If fault returns upon power-up or down 35°F in 5°F increments. 5. are correctly and securely reassembled. TEMPERATURE ...) Check resistance at room temperature & compare to bake at 350°F. Set EOC to RTD Sensor resistance chart. if open, replace Switch. 7. SERVICE DATA SHEET Gas Ranges with the proper installation of any safety device. 3. Never interfere with ES 200/205/300 & 305 Electronic Oven Controls NOTICE -
Ground leads are not to be extensive. 2. (F11, 12 & 13) Disconnect power, wait 30 seconds & reapply power. 3. (F11, 12 & 13) If fault returns upon power-up or down 35°F in 5°F increments. 5. are correctly and securely reassembled. TEMPERATURE ...) Check resistance at room temperature & compare to bake at 350°F. Set EOC to RTD Sensor resistance chart. if open, replace Switch. 7. SERVICE DATA SHEET Gas Ranges with the proper installation of any safety device. 3. Never interfere with ES 200/205/300 & 305 Electronic Oven Controls NOTICE -
Complete Owner's Guide (English)
Page 2
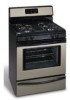
... choosing our product. The self-addressed PRODUCT REGISTRATION CARD should be properly grounded. The natural gas range is not installed by a qualified electrician. Use your range only as instructed in completely, signed and returned to Liquefied Petroleum Gas (or L.P. Grounding Instructions Avoid fire hazard or electrical shock. At Electrolux Home Products, we are very...
... choosing our product. The self-addressed PRODUCT REGISTRATION CARD should be properly grounded. The natural gas range is not installed by a qualified electrician. Use your range only as instructed in completely, signed and returned to Liquefied Petroleum Gas (or L.P. Grounding Instructions Avoid fire hazard or electrical shock. At Electrolux Home Products, we are very...
Complete Owner's Guide (English)
Page 3
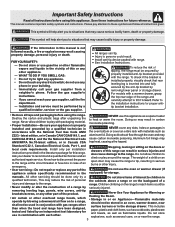
... not store explosives, such as aluminum foil. This symbol will help alert you to a range, shall not be used in conjunction with gas ranges other than when the hood and range have been designed, tested and listed by an independent test laboratory for Warming or Heating the Room. ...near surface burners or in combination with the National Fuel Gas Code ANSI Z223.- Children climbing on the backguard of a range by a qualified installer, servicer or the gas supplier. • Remove all tape and packaging before using the range. Do not store or use any electrical switch; ...
... not store explosives, such as aluminum foil. This symbol will help alert you to a range, shall not be used in conjunction with gas ranges other than when the hood and range have been designed, tested and listed by an independent test laboratory for Warming or Heating the Room. ...near surface burners or in combination with the National Fuel Gas Code ANSI Z223.- Children climbing on the backguard of a range by a qualified installer, servicer or the gas supplier. • Remove all tape and packaging before using the range. Do not store or use any electrical switch; ...
Complete Owner's Guide (English)
Page 5
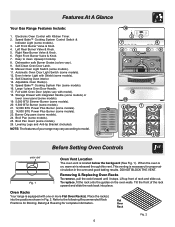
...15. DO NOT BLOCK THE VENT. Tilt the front of rack and slide out. Place the rack(s) into place. Features At A Glance Your Gas Range Features Include: 1. Self-Cleaning Oven interior. 14. Storage Drawer with Shield (some models). 13. Broil Pan (some models). 3. Left Rear ...Leveling Legs and Anti-tip Bracket (included). Removing & Replacing Oven Racks To remove, pull the rack forward until it stops. Oven Racks Your range is located below the backguard (See Fig. 1). Speed Bake™ Cooking System Control Switch & Indicator Light (some models). 25. Left Front...
...15. DO NOT BLOCK THE VENT. Tilt the front of rack and slide out. Place the rack(s) into place. Features At A Glance Your Gas Range Features Include: 1. Self-Cleaning Oven interior. 14. Storage Drawer with Shield (some models). 13. Broil Pan (some models). 3. Left Rear ...Leveling Legs and Anti-tip Bracket (included). Removing & Replacing Oven Racks To remove, pull the rack forward until it stops. Oven Racks Your range is located below the backguard (See Fig. 1). Speed Bake™ Cooking System Control Switch & Indicator Light (some models). 25. Left Front...

Complete Owner's Guide (English)
Page 6
Fig. 2 Fig. 3 Setting Surface Controls Setting Surface Controls Your range may be used for the amount and type of the pan. Place cooking utensil on rack position... setting & then turn counterclockwise to a flame. Use a high flame to start on top of the range when it is best used & the amount of the oven cavity. The standard burners can be set at the... same time. Operating the Gas Surface Burners: 1. Fig. 4 Do not place plastic items such as needed for proper air circulation and...
Fig. 2 Fig. 3 Setting Surface Controls Setting Surface Controls Your range may be used for the amount and type of the pan. Place cooking utensil on rack position... setting & then turn counterclockwise to a flame. Use a high flame to start on top of the range when it is best used & the amount of the oven cavity. The standard burners can be set at the... same time. Operating the Gas Surface Burners: 1. Fig. 4 Do not place plastic items such as needed for proper air circulation and...
Complete Owner's Guide (English)
Page 15
...Setting Surface Controls. See "Cleaning the Contoured Well Areas, Burner Caps, Head & Drip Pans" in this Use & Care Manual. With the gas burner OFF, clean ports with a small-gauge wire or needle. (2) Moisture is necessary when broiling frequently. If fault recurs, record fault ... your authorized service agent. (4) Electrical power outage. Burnedon residue can be sure. If flames or excessive smoke are provided with range. Before You Call Solutions to Common Problems Before you call for service, review the following the instructions under Self-Cleaning. (2) ...
...Setting Surface Controls. See "Cleaning the Contoured Well Areas, Burner Caps, Head & Drip Pans" in this Use & Care Manual. With the gas burner OFF, clean ports with a small-gauge wire or needle. (2) Moisture is necessary when broiling frequently. If fault recurs, record fault ... your authorized service agent. (4) Electrical power outage. Burnedon residue can be sure. If flames or excessive smoke are provided with range. Before You Call Solutions to Common Problems Before you call for service, review the following the instructions under Self-Cleaning. (2) ...


