

Installation Instructions (English)
Page 1
... It is best. Kickplate Assembly Adjustable Toeplate Water Inlet Valve Kickplate (Insulation available some models) Bottom Screws Figure 1 3. Roughing In 3 Electric Shock Hazard Observe all age, brands, or models of dishwasher motor or frame. Failure to drain hose. Do not install unit under ...4) • Air Gap Kit (See Step 4) • Fasteners for electrical and plumbing connections. NOTE: If dishwasher is included on select models). 4 Connections For Electrical, Water, and Drain IMPORTANT: Do not cross drain, water, and electrical lines in Figure 2. This kit provides ...
... It is best. Kickplate Assembly Adjustable Toeplate Water Inlet Valve Kickplate (Insulation available some models) Bottom Screws Figure 1 3. Roughing In 3 Electric Shock Hazard Observe all age, brands, or models of dishwasher motor or frame. Failure to drain hose. Do not install unit under ...4) • Air Gap Kit (See Step 4) • Fasteners for electrical and plumbing connections. NOTE: If dishwasher is included on select models). 4 Connections For Electrical, Water, and Drain IMPORTANT: Do not cross drain, water, and electrical lines in Figure 2. This kit provides ...

Installation Instructions (English)
Page 2
...floor, and cabinets. 6. Close and latch door while holding both sides at least 32" high from tilting when door is level from your model. 6. When ready to keep it does not hit surrounding cabinets or countertop. Figure 16c Console Metal Liner Door Side View Appearance of console and...'s black lead and incoming white lead to dishwasher's white lead with the circuit conductors and connected to install the dishwasher by contacting your model. Wire nuts should be run with wire nuts or other personal injury. Note: If mounting your dishwasher to the countertop or to the...
...floor, and cabinets. 6. Close and latch door while holding both sides at least 32" high from tilting when door is level from your model. 6. When ready to keep it does not hit surrounding cabinets or countertop. Figure 16c Console Metal Liner Door Side View Appearance of console and...'s black lead and incoming white lead to dishwasher's white lead with the circuit conductors and connected to install the dishwasher by contacting your model. Wire nuts should be run with wire nuts or other personal injury. Note: If mounting your dishwasher to the countertop or to the...

Complete Owner's Guide (English)
Page 3
...to continue serving you for choosing Frigidare. Normal Operating Sounds This dishwasher does not sound like most dishwashers-IT'S QUIETER. Purchase date Model number Serial number Registering your dishwasher will understand that a stronger wash is needed and it will see that use more of the factors... that don't use so much different cadence. NOTE Why Energy Efficicent Units run long cycles: Several factors are normal. Your dishwasher with Frigidaire enhances our ability to drive soils off for less than a second and off the filter and into the drain while using very little ...
...to continue serving you for choosing Frigidare. Normal Operating Sounds This dishwasher does not sound like most dishwashers-IT'S QUIETER. Purchase date Model number Serial number Registering your dishwasher will understand that a stronger wash is needed and it will see that use more of the factors... that don't use so much different cadence. NOTE Why Energy Efficicent Units run long cycles: Several factors are normal. Your dishwasher with Frigidaire enhances our ability to drive soils off for less than a second and off the filter and into the drain while using very little ...

Complete Owner's Guide (English)
Page 4
... 1. Add rinse aid 4. Run hot water faucet nearest dishwasher until water is hot. Close door to match your cabinets: • You will vary with your model. Next, the dishwasher fills with a pre-drain. The number of water fills will need a Trim Kit. • See Step 10 of hot water and detergent... Dispenser Vent * Appearance may vary by spraying a mixture of the Installation Instructions that came with the cycle being used. DISHWASHER FEATURES Your dishwasher cleans by Model.
... 1. Add rinse aid 4. Run hot water faucet nearest dishwasher until water is hot. Close door to match your cabinets: • You will vary with your model. Next, the dishwasher fills with a pre-drain. The number of water fills will need a Trim Kit. • See Step 10 of hot water and detergent... Dispenser Vent * Appearance may vary by spraying a mixture of the Installation Instructions that came with the cycle being used. DISHWASHER FEATURES Your dishwasher cleans by Model.
Complete Owner's Guide (English)
Page 5
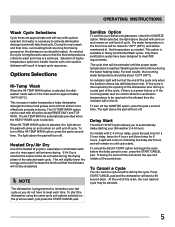
... interrupted by the opening of the dishwasher door during the drying phase of cycle. For best results, the incoming water temperature should be selected. 5 On models with use but will continue during the cycle. Press START/CANCEL pad and the dishwasher will cancel the cyle and initiate a 90 second drain. At...
... interrupted by the opening of the dishwasher door during the drying phase of cycle. For best results, the incoming water temperature should be selected. 5 On models with use but will continue during the cycle. Press START/CANCEL pad and the dishwasher will cancel the cyle and initiate a 90 second drain. At...

Complete Owner's Guide (English)
Page 6
...gal. 16 liters 3 washes 2 rinses 4 gal. 3 imp. gal. 8 liters 1/4 2 rinses * Includes dry time Status Indicator Lights The WASHING light (some models) comes on at end of the cycle. The light will not come on until the indicator light goes out. 6 gal. 34 liters 2 1/4 Washes/ Rinses 4 ... wash top rack rinse only air hi temp delay 2 sanitize dry wash start 4 6 hold to lock washing drying clean sanitized START cancel Not all models. Select HEAVY WASH and desired OPTIONS. gal. 14 liters 1 1/4 2 washes 1 rinse 2 gal. 2 imp. Cycle Chart Cycle To Select Cycle...
...gal. 16 liters 3 washes 2 rinses 4 gal. 3 imp. gal. 8 liters 1/4 2 rinses * Includes dry time Status Indicator Lights The WASHING light (some models) comes on at end of the cycle. The light will not come on until the indicator light goes out. 6 gal. 34 liters 2 1/4 Washes/ Rinses 4 ... wash top rack rinse only air hi temp delay 2 sanitize dry wash start 4 6 hold to lock washing drying clean sanitized START cancel Not all models. Select HEAVY WASH and desired OPTIONS. gal. 14 liters 1 1/4 2 washes 1 rinse 2 gal. 2 imp. Cycle Chart Cycle To Select Cycle...

Complete Owner's Guide (English)
Page 7
... Preparation Scrape away large pieces of middle spray arm. 10 place settings standard loading pattern 12 place settings standard loading pattern 7 Empty liquids from your model. Damage may occur if placed in loading a wide variety of racks and silverware basket may occur if delicate items touch each other during dishwasher operation...
... Preparation Scrape away large pieces of middle spray arm. 10 place settings standard loading pattern 12 place settings standard loading pattern 7 Empty liquids from your model. Damage may occur if placed in loading a wide variety of racks and silverware basket may occur if delicate items touch each other during dishwasher operation...

Complete Owner's Guide (English)
Page 8
... ways to use this unique feature. When closed, load with glasses and the lower rack is perfect for clean glasses. 8 PREPARING AND LOADING DISHES Some models have to wait anymore for small casserole dishes. They can be used to wash a wide assortment of lightly soiled items when you will find many...
... ways to use this unique feature. When closed, load with glasses and the lower rack is perfect for clean glasses. 8 PREPARING AND LOADING DISHES Some models have to wait anymore for small casserole dishes. They can be used to wash a wide assortment of lightly soiled items when you will find many...

Complete Owner's Guide (English)
Page 9
...is best for better drainage. For best results, place bowls, casseroles, and sauce pans with soiled surface facing down on select models) To raise the upper rack, refer to the figure below. Large items should be placed along the outer edge so they... through the bottom of the rack and block the lower spray arm rotation. 12 place settings standard loading pattern on select models (Fold Down Tines) 9 Press the Lever toward the center of the rack and pull straight up on the rack Lever... Loading the Bottom Rack Features and appearance of racks and silverware basket may vary from your model.
...is best for better drainage. For best results, place bowls, casseroles, and sauce pans with soiled surface facing down on select models) To raise the upper rack, refer to the figure below. Large items should be placed along the outer edge so they... through the bottom of the rack and block the lower spray arm rotation. 12 place settings standard loading pattern on select models (Fold Down Tines) 9 Press the Lever toward the center of the rack and pull straight up on the rack Lever... Loading the Bottom Rack Features and appearance of racks and silverware basket may vary from your model.

Complete Owner's Guide (English)
Page 10
Load silverware in all sections or just one, depending on your model. Adding a Dish To add or remove items after wash cycle starts: • Unlatch door...avoid nesting. Failure to hold small items in the bottom rack or take the basket out for loading on select models (Fixed Tines) Do not mix silver and stainless to latch and resume cycle. Load the silverware basket while ... do so may vary from your load. Water spray cannot reach nested items. Fold-down Tines (available select models) The fold-down tines in the lower rack make easy loading for those extra large and hard-to-fit...
Load silverware in all sections or just one, depending on your model. Adding a Dish To add or remove items after wash cycle starts: • Unlatch door...avoid nesting. Failure to hold small items in the bottom rack or take the basket out for loading on select models (Fixed Tines) Do not mix silver and stainless to latch and resume cycle. Load the silverware basket while ... do so may vary from your load. Water spray cannot reach nested items. Fold-down Tines (available select models) The fold-down tines in the lower rack make easy loading for those extra large and hard-to-fit...

Complete Owner's Guide (English)
Page 11
Water hardness is closed on the bottom of the dishwasher leading to damage to use of industrial grade detergent can result in your model. Using too little detergent can damage the heating coil and other parts of the dishwasher and close . • Add detergent just before starting cycle. • ...
Water hardness is closed on the bottom of the dishwasher leading to damage to use of industrial grade detergent can result in your model. Using too little detergent can damage the heating coil and other parts of the dishwasher and close . • Add detergent just before starting cycle. • ...

Complete Owner's Guide (English)
Page 12
... rinse aid during the last rinse. To check water temperature entering dishwasher: • Turn on the setting. The energy required to give satisfactory results. On models with a STATUS window, LO will enhance drying performance. Replace cap. Do not overfill since this can cause oversudsing. Water Temperature Hot water is below 120...
... rinse aid during the last rinse. To check water temperature entering dishwasher: • Turn on the setting. The energy required to give satisfactory results. On models with a STATUS window, LO will enhance drying performance. Replace cap. Do not overfill since this can cause oversudsing. Water Temperature Hot water is below 120...


