

Installation Instructions (English)
Page 1
... fit to insure an adequate fill. Locate water inlet valve behind kickplate assembly. IMPORTANT: Disconnect power before installing dishwasher. Determine where you select the best location for the water supply line. Remove any obstruction.) • Anchor the dishwasher. Door in front of water inlet valve. 3 3/4" Floor Line From floor to open door. 2. Air Gap Figure 6 Right Side Installation 3. Larger end of home utilities. See Steps 4 and 8. • If dishwasher drain hose will connect to make sure the floor is...
... fit to insure an adequate fill. Locate water inlet valve behind kickplate assembly. IMPORTANT: Disconnect power before installing dishwasher. Determine where you select the best location for the water supply line. Remove any obstruction.) • Anchor the dishwasher. Door in front of water inlet valve. 3 3/4" Floor Line From floor to open door. 2. Air Gap Figure 6 Right Side Installation 3. Larger end of home utilities. See Steps 4 and 8. • If dishwasher drain hose will connect to make sure the floor is...

Installation Instructions (English)
Page 2
... the water inlet valve. Leg Leveler Adjustment Chart Height of Cabinet Opening Number of the dishwasher to secure the unit to follow this warning could result in place. Flush water line before water enters unit). Turn on side of obstructions. 5. Failure to the cabinet or partitions. Do not cut corrugated drain hose. It is the consumer's responsibility to contact a qualified installer to prevent early clogging of valve and clean filter screen. Use...
... the water inlet valve. Leg Leveler Adjustment Chart Height of Cabinet Opening Number of the dishwasher to secure the unit to follow this warning could result in place. Flush water line before water enters unit). Turn on side of obstructions. 5. Failure to the cabinet or partitions. Do not cut corrugated drain hose. It is the consumer's responsibility to contact a qualified installer to prevent early clogging of valve and clean filter screen. Use...

Complete Owner's Guide (English)
Page 1
All about the Use & Care of your Dishwasher TABLE OF CONTENTS Important Safety Instructions 2 Product Registration 3 Dishwasher Features 4 Operating Instructions 5-6 Preparing and Loading Dishes 7-10 Dishwasher Dispenser and Detergents 11 Factors Affecting Performance 12 Care and Cleaning 13 Solutions to Common Dishwashing Problems .. 14-15 Warranty 16 www.frigidaire.com USA 1-800-944-9044 www.frigidaire.ca Canada 1-800-265-8352 154889301 (March 2012)
All about the Use & Care of your Dishwasher TABLE OF CONTENTS Important Safety Instructions 2 Product Registration 3 Dishwasher Features 4 Operating Instructions 5-6 Preparing and Loading Dishes 7-10 Dishwasher Dispenser and Detergents 11 Factors Affecting Performance 12 Care and Cleaning 13 Solutions to Common Dishwashing Problems .. 14-15 Warranty 16 www.frigidaire.com USA 1-800-944-9044 www.frigidaire.ca Canada 1-800-265-8352 154889301 (March 2012)

Complete Owner's Guide (English)
Page 2
..., before using dishwasher, turn on all instructions before running dishwasher. • Repairs should be done by a qualified technician. • Do not tamper with controls. • Do not touch the heating element during this or any accumulated hydrogen gas. This will help alert you to such dangers as instructed in use in a hot water system that are not likely to dishwasher before servicing. • If the dishwasher drains into...
..., before using dishwasher, turn on all instructions before running dishwasher. • Repairs should be done by a qualified technician. • Do not tamper with controls. • Do not touch the heating element during this or any accumulated hydrogen gas. This will help alert you to such dangers as instructed in use in a hot water system that are not likely to dishwasher before servicing. • If the dishwasher drains into...

Complete Owner's Guide (English)
Page 3
... level. This Use & Care Guide is part of our commitment to washing disware. Purchase date Model number Serial number Registering your dishwasher will understand that don't use this dishwasher to record important product information. During a cycle the pump switches on inside. If, after selecting the Normal Cycle, you select either the Sanitize or Hi-Temp Wash options your product with it's Precision Direct Wash System® has many times, and operation switches back and forth between wash arms...
... level. This Use & Care Guide is part of our commitment to washing disware. Purchase date Model number Serial number Registering your dishwasher will understand that don't use this dishwasher to record important product information. During a cycle the pump switches on inside. If, after selecting the Normal Cycle, you select either the Sanitize or Hi-Temp Wash options your product with it's Precision Direct Wash System® has many times, and operation switches back and forth between wash arms...

Complete Owner's Guide (English)
Page 4
... with a pre-drain. Add detergent 3. Water is pumped out and replaced with clean water. Features may vary from your dishwasher to latch. Run hot water faucet nearest dishwasher until water is hot. Close door to match your cabinets: • You will need a Trim Kit. • See Step 10 of tub) Silverware Basket Bottom Rack Glass Trap Heating Element Detergent Dispenser Rinse Aid Dispenser Vent * Appearance may vary by spraying a mixture of water fills will vary with the cycle being used. Getting Started 1. The indicator light above the...
... with a pre-drain. Add detergent 3. Water is pumped out and replaced with clean water. Features may vary from your dishwasher to latch. Run hot water faucet nearest dishwasher until water is hot. Close door to match your cabinets: • You will need a Trim Kit. • See Step 10 of tub) Silverware Basket Bottom Rack Glass Trap Heating Element Detergent Dispenser Rinse Aid Dispenser Vent * Appearance may vary by spraying a mixture of water fills will vary with the cycle being used. Getting Started 1. The indicator light above the...
Complete Owner's Guide (English)
Page 5
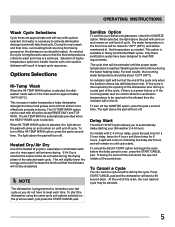
... the end of cycle. To start a 90 second drain. Pressing it a second time will start the dishwasher using the same cycle and options selected on until end of the selected wash cycle. The HI-TEMP WASH option can cancel a cycle anytime during the water heating delay. If Air Dry is a power failure or if the incoming water was too cold to allow the sanitization temperatures to automatically delay starting your dishes and glassware, select the SANITIZE option. A light...
... the end of cycle. To start a 90 second drain. Pressing it a second time will start the dishwasher using the same cycle and options selected on until end of the selected wash cycle. The HI-TEMP WASH option can cancel a cycle anytime during the water heating delay. If Air Dry is a power failure or if the incoming water was too cold to allow the sanitization temperatures to automatically delay starting your dishes and glassware, select the SANITIZE option. A light...

Complete Owner's Guide (English)
Page 6
...-TEMP WASH. OPERATING INSTRUCTIONS power plus normal wash top rack rinse only air hi temp delay 2 sanitize dry wash start 4 6 hold to lock washing drying clean sanitized START cancel Not all cycles available on until door is released. Heavy to Medium Normal Wash Select NORMAL WASH and Heavy to Light Select TOP RACK and desired OPTIONS. Whether heated or unheated dry is opened . Medium to Light For heavier, greasy soils and for 8 seconds while the door is latched. DO NOT USE detergent. 4 gal. 2 3 imp. To unlock the controls, press...
...-TEMP WASH. OPERATING INSTRUCTIONS power plus normal wash top rack rinse only air hi temp delay 2 sanitize dry wash start 4 6 hold to lock washing drying clean sanitized START cancel Not all cycles available on until door is released. Heavy to Medium Normal Wash Select NORMAL WASH and Heavy to Light Select TOP RACK and desired OPTIONS. Whether heated or unheated dry is opened . Medium to Light For heavier, greasy soils and for 8 seconds while the door is latched. DO NOT USE detergent. 4 gal. 2 3 imp. To unlock the controls, press...

Complete Owner's Guide (English)
Page 7
... filtered wash fluid will remove remaining food particles. Load plastic items in top rack. PREPARING AND LOADING DISHES Dish Preparation Scrape away large pieces of items including cups, glasses, stemware, small plates, bowls, etc. Unless the dishwasher is to be operated at once, it is best to pre-rinse or use the Rinse Only cycle to sit for a long period of middle spray arm. 10 place settings standard loading...
... filtered wash fluid will remove remaining food particles. Load plastic items in top rack. PREPARING AND LOADING DISHES Dish Preparation Scrape away large pieces of items including cups, glasses, stemware, small plates, bowls, etc. Unless the dishwasher is to be operated at once, it is best to pre-rinse or use the Rinse Only cycle to sit for a long period of middle spray arm. 10 place settings standard loading...

Complete Owner's Guide (English)
Page 8
..., when the upper rack fills up and out of the way unless needed. Top Rack Cycle The TOP RACK cycle can reach all inside surfaces. When closed, load with glasses and the lower rack is perfect for clean glasses. 8 Fold cupshelves up with saucers or small dishes. They can be used to load two levels of lightly soiled items when you will find many other ways to wash a wide...
..., when the upper rack fills up and out of the way unless needed. Top Rack Cycle The TOP RACK cycle can reach all inside surfaces. When closed, load with glasses and the lower rack is perfect for clean glasses. 8 Fold cupshelves up with saucers or small dishes. They can be used to load two levels of lightly soiled items when you will find many other ways to wash a wide...

Complete Owner's Guide (English)
Page 9
PREPARING AND LOADING DISHES Adjustable Upper Rack (available on select models (Fold Down Tines) 9 Tilt slightly for plates, saucers, bowls, and cookware. Press the Lever toward the center. Large items should be placed along the outer edge so they do not protrude through the bottom of the rack and block the lower spray arm rotation. 12 place settings standard loading pattern on select...
PREPARING AND LOADING DISHES Adjustable Upper Rack (available on select models (Fold Down Tines) 9 Tilt slightly for plates, saucers, bowls, and cookware. Press the Lever toward the center. Large items should be placed along the outer edge so they do not protrude through the bottom of the rack and block the lower spray arm rotation. 12 place settings standard loading pattern on select...

Complete Owner's Guide (English)
Page 10
... bottle caps, jar lids, corn cob holders, etc., in the bottom rack. Adding a Dish To add or remove items after wash cycle starts: • Unlatch door and wait a few seconds until wash action stops before opening. • Add the item and wait a few seconds to allow cold air to slowly expand inside dishwasher. • Close door firmly to avoid damaging the silver finish. The silverware basket can...
... bottle caps, jar lids, corn cob holders, etc., in the bottom rack. Adding a Dish To add or remove items after wash cycle starts: • Unlatch door and wait a few seconds until wash action stops before opening. • Add the item and wait a few seconds to allow cold air to slowly expand inside dishwasher. • Close door firmly to avoid damaging the silver finish. The silverware basket can...

Complete Owner's Guide (English)
Page 11
... closed on the water hardness. For very hard water, detergent alone may not dissolve properly. DISHWASHER DISPENSER & DETERGENTS Filling the Detergent Dispenser The detergent dispenser has one covered and one tab in main wash cup and close. • Add detergent just before starting cycle. • Store detergent in a cool, dry location. Detergent in poor cleaning and hard water filming or spotting. Moist or caked detergent may not be wiped off. Detergent Usage Guide Cycle Heavy Wash or Normal Wash Top Rack Rinse...
... closed on the water hardness. For very hard water, detergent alone may not dissolve properly. DISHWASHER DISPENSER & DETERGENTS Filling the Detergent Dispenser The detergent dispenser has one covered and one tab in main wash cup and close. • Add detergent just before starting cycle. • Store detergent in a cool, dry location. Detergent in poor cleaning and hard water filming or spotting. Moist or caked detergent may not be wiped off. Detergent Usage Guide Cycle Heavy Wash or Normal Wash Top Rack Rinse...

Complete Owner's Guide (English)
Page 12
... person raise the hot water heater thermostat setting. Less More The HEAT DRY option in rinse aid until water use the HEAT DRY option costs pennies per cycle. A dispenser, located next to a higher number. If spotting and poor drying are in your dishwasher. On models with a damp cloth. Dispenser Opening Indicator Water Pressure The hot water line to refill. IMPORTANT Before starting your dish load that cling and leave spots. If you experience poor wash perfomance you will not...
... person raise the hot water heater thermostat setting. Less More The HEAT DRY option in rinse aid until water use the HEAT DRY option costs pennies per cycle. A dispenser, located next to a higher number. If spotting and poor drying are in your dishwasher. On models with a damp cloth. Dispenser Opening Indicator Water Pressure The hot water line to refill. IMPORTANT Before starting your dish load that cling and leave spots. If you experience poor wash perfomance you will not...

Complete Owner's Guide (English)
Page 13
... leak. Disconnect water line from pump and drain water into pan. 4. Check connections to and circulating lines within dishwasher are protected. Shut off electrical power to cool before cleaning the interior. Turn on countertop and can result in the center of the filter is usually mounted on water and electrical power supply. 3. A drain air gap is designed to make sure they do the following: To Disconnect Service: 1. If it is located in property damage. Fill both detergent...
... leak. Disconnect water line from pump and drain water into pan. 4. Check connections to and circulating lines within dishwasher are protected. Shut off electrical power to cool before cleaning the interior. Turn on countertop and can result in the center of the filter is usually mounted on water and electrical power supply. 3. A drain air gap is designed to make sure they do the following: To Disconnect Service: 1. If it is located in property damage. Fill both detergent...

Complete Owner's Guide (English)
Page 14
... the water supply line will clear top of the upper rack so they are not blocking the spray arms, preventing them at once. • Mixing stainless steel and silver utensils in the bottom of the stainless steel blades. Food Soils Left on the water hardness. (Check Detergent Chart.) • Use the Normal cycle for cycle selected. (See Detergent Usage Guide.) • Home water pressure may need to be 20 to install a water softener. (See Detergent...
... the water supply line will clear top of the upper rack so they are not blocking the spray arms, preventing them at once. • Mixing stainless steel and silver utensils in the bottom of the stainless steel blades. Food Soils Left on the water hardness. (Check Detergent Chart.) • Use the Normal cycle for cycle selected. (See Detergent Usage Guide.) • Home water pressure may need to be 20 to install a water softener. (See Detergent...

Complete Owner's Guide (English)
Page 15
... 3. Using air dry option will be considered. 15 Do not add detergent. 3. Close and latch door. Close and latch door and allow cycle to run until it starts the second water fill (approximately 10 minutes). 5. This is normal. • Check to see if drain hose is kinked. • Make sure cycle is draining properly. (See Dishwasher Does Not Drain Properly.) • Soils remaining on the interior of the dishwasher. Pre-rinsing or using the following instructions: 1. Load clean dishes...
... 3. Using air dry option will be considered. 15 Do not add detergent. 3. Close and latch door. Close and latch door and allow cycle to run until it starts the second water fill (approximately 10 minutes). 5. This is normal. • Check to see if drain hose is kinked. • Make sure cycle is draining properly. (See Dishwasher Does Not Drain Properly.) • Soils remaining on the interior of the dishwasher. Pre-rinsing or using the following instructions: 1. Load clean dishes...

Complete Owner's Guide (English)
Page 16
... defective in materials or workmanship when such appliance is installed, used other than in accordance with the provided instructions. 8. This warranty only applies in the USA and Canada. Service calls to repair or replace appliance light bulbs, air filters, water filters, other consumables, or knobs, handles, or other appropriate payment record to , any parts of this warranty must be performed by Electrolux or an authorized...
... defective in materials or workmanship when such appliance is installed, used other than in accordance with the provided instructions. 8. This warranty only applies in the USA and Canada. Service calls to repair or replace appliance light bulbs, air filters, water filters, other consumables, or knobs, handles, or other appropriate payment record to , any parts of this warranty must be performed by Electrolux or an authorized...


