
Complete Owner's Guide (English)
Page 2
...; Freezer door is level across the top Leveling Refrigerator is level, side-to-side and tilted 1/4" (6mm) front-to-back Toe grille is properly attached to refrigerator Cabinet is setting solid on all corners Electrical Power House power turned on Refrigerator plugged in 24 hours Ice maker is used to alert you to refrigerator No water leaks present at all connections - WARNING WARNING indicates a potentially...
...; Freezer door is level across the top Leveling Refrigerator is level, side-to-side and tilted 1/4" (6mm) front-to-back Toe grille is properly attached to refrigerator Cabinet is setting solid on all corners Electrical Power House power turned on Refrigerator plugged in 24 hours Ice maker is used to alert you to refrigerator No water leaks present at all connections - WARNING WARNING indicates a potentially...

Complete Owner's Guide (English)
Page 3
... temperature control panel (Electronic controls), or turning the Freezer and Fresh Food controls to sudden temperature change. 3 Always grip the plug firmly, and pull straight out from the receptacle to prevent damaging the power cord. • Unplug the refrigerator before cleaning and before replacing a light bulb to avoid electrical shock. • Performance may break suddenly if nicked, scratched, or exposed to "0" (Mechanical controls) will disable your old refrigerator. Operating the refrigerator...
... temperature control panel (Electronic controls), or turning the Freezer and Fresh Food controls to sudden temperature change. 3 Always grip the plug firmly, and pull straight out from the receptacle to prevent damaging the power cord. • Unplug the refrigerator before cleaning and before replacing a light bulb to avoid electrical shock. • Performance may break suddenly if nicked, scratched, or exposed to "0" (Mechanical controls) will disable your old refrigerator. Operating the refrigerator...

Complete Owner's Guide (English)
Page 4
... refrigerator. Installation Installation clearances • Allow the following clearances for models equipped with the door hinge side against a wall, you do not hook up water to the refrigerator, remember to allow additional space so the door can be opened wider. NOTE Raise the front of the refrigerator enough so the doors close freely when opened halfway. Installation This Use & Care Guide provides general operating instructions for the proper operation of your refrigerator...
... refrigerator. Installation Installation clearances • Allow the following clearances for models equipped with the door hinge side against a wall, you do not hook up water to the refrigerator, remember to allow additional space so the door can be opened wider. NOTE Raise the front of the refrigerator enough so the doors close freely when opened halfway. Installation This Use & Care Guide provides general operating instructions for the proper operation of your refrigerator...

Complete Owner's Guide (English)
Page 5
... screw center hinge pin through center hinge into top of door while tightening screws to install top hinge. 17 Flip toe grille and reinstall. 18 Plug in electrical power cord and turn the refrigerator temperature control to opposite side. 15 Lower freezer door onto center hinge pin. 16 Close freezer door. Adjust setting as necessary. 5 Top Hinge Cover Top Hinge Door Stop Screw Door Stop Washer Hinge Pin Bottom Hinge Screws Toe Grille Door removal and reversal instructions: 1 Remove toe grille. 2 Remove top hinge cover. Tighten...
... screw center hinge pin through center hinge into top of door while tightening screws to install top hinge. 17 Flip toe grille and reinstall. 18 Plug in electrical power cord and turn the refrigerator temperature control to opposite side. 15 Lower freezer door onto center hinge pin. 16 Close freezer door. Adjust setting as necessary. 5 Top Hinge Cover Top Hinge Door Stop Screw Door Stop Washer Hinge Pin Bottom Hinge Screws Toe Grille Door removal and reversal instructions: 1 Remove toe grille. 2 Remove top hinge cover. Tighten...

Complete Owner's Guide (English)
Page 8
... connections that your water dispenser works properly, this system must be moved out for more information. 8 To Connect Water Supply Line To Ice Maker Inlet Valve 1. Reconnect refrigerator to your refrigerator is used . To ensure that leak. 8. Copper Water Line with a wrench; The nut and ferrule are already assembled on , lower wire signal arm (side mounted) or set the ice maker's On/Off power switch to soft water, ensure that your household water system. Coil excess water supply line...
... connections that your water dispenser works properly, this system must be moved out for more information. 8 To Connect Water Supply Line To Ice Maker Inlet Valve 1. Reconnect refrigerator to your refrigerator is used . To ensure that leak. 8. Copper Water Line with a wrench; The nut and ferrule are already assembled on , lower wire signal arm (side mounted) or set the ice maker's On/Off power switch to soft water, ensure that your household water system. Coil excess water supply line...
Complete Owner's Guide (English)
Page 9
... from cooling, but does not disconnect the power to the light bulb and other electrical components. If the ice maker is full. For example, if the refrigerator control is not connected, the water valve will change only the freezer temperature. To turn ice maker OFF by lifting the wire signal arm until it clicks and locks in both compartments. Turning your local dealer for information. Turning the refrigerator control will make a loud chattering noise. Cool Down...
... from cooling, but does not disconnect the power to the light bulb and other electrical components. If the ice maker is full. For example, if the refrigerator control is not connected, the water valve will change only the freezer temperature. To turn ice maker OFF by lifting the wire signal arm until it clicks and locks in both compartments. Turning your local dealer for information. Turning the refrigerator control will make a loud chattering noise. Cool Down...

Complete Owner's Guide (English)
Page 11
... in water leaks when the refrigerator is put back into service. Use same wattage when replacing bulb 11 Do not use CHLORIDE or cleaners with bleach to room temperature before cleaning around controls, light bulb or any removable parts in a dishwasher. • Always unplug the electrical power cord from front of the cabinet with wet or damp hands. Soap and water Glass cleaner Mild liquid sprays Allow glass to warm to clean stainless steel...
... in water leaks when the refrigerator is put back into service. Use same wattage when replacing bulb 11 Do not use CHLORIDE or cleaners with bleach to room temperature before cleaning around controls, light bulb or any removable parts in a dishwasher. • Always unplug the electrical power cord from front of the cabinet with wet or damp hands. Soap and water Glass cleaner Mild liquid sprays Allow glass to warm to clean stainless steel...

Complete Owner's Guide (English)
Page 12
Freezer temperature is tightly pushed into electrical outlet. • Light switch may be stuck. Cabinet light not working . (some models) Before calling for service, review this appliance. • Ensure plug is satisfactory. This list includes common occurrences that produce odors should produce 2.5 to be cleaned. • Foods that are not the result of ice in refrigerator. Wait 20 minutes and check again. • Set freezer control to a warmer setting. Allow...
Freezer temperature is tightly pushed into electrical outlet. • Light switch may be stuck. Cabinet light not working . (some models) Before calling for service, review this appliance. • Ensure plug is satisfactory. This list includes common occurrences that produce odors should produce 2.5 to be cleaned. • Foods that are not the result of ice in refrigerator. Wait 20 minutes and check again. • Set freezer control to a warmer setting. Allow...

Complete Owner's Guide (English)
Page 13
... some other appropriate payment record to repair or replace appliance light bulbs, air filters, water filters, other consumables, or knobs, handles, or other than authorized service companies; Obligations for servicing, such as abuse, misuse, inadequate power supply, accidents, fires, or acts of the unit. 4. Service calls to establish the warranty period should service be readily determined. 2. Product that have been removed, altered or cannot be required. CLAIMS...
... some other appropriate payment record to repair or replace appliance light bulbs, air filters, water filters, other consumables, or knobs, handles, or other than authorized service companies; Obligations for servicing, such as abuse, misuse, inadequate power supply, accidents, fires, or acts of the unit. 4. Service calls to establish the warranty period should service be readily determined. 2. Product that have been removed, altered or cannot be required. CLAIMS...

Wiring Diagram (All Languages)
Page 1
... PLATE SHUT-OF F SWITCH LT. Defrost 30 Minutes Every 10 Hours of Compressor Run Time Electronic Timer (ADC) Defrost Up To 24 Minutes Every 6 - 72 Hours of Compressor Run Time CONDENSER FAN MOTOR Watts RPM Amps 2.3 1100 CW Opposite Shaft .15 Running Electrical Thermostat Heater Wattage ICE MAKER SPECIFICATIONS 115 VAC (127 VAC Max) 60 Hertz Opens at 48°F (9°C) 165 Closes at 8.96F (-12.8C) ICE MAKER CONNECTOR PLUG CONNECTIONS Wire Number Wire Color Connects to...
... PLATE SHUT-OF F SWITCH LT. Defrost 30 Minutes Every 10 Hours of Compressor Run Time Electronic Timer (ADC) Defrost Up To 24 Minutes Every 6 - 72 Hours of Compressor Run Time CONDENSER FAN MOTOR Watts RPM Amps 2.3 1100 CW Opposite Shaft .15 Running Electrical Thermostat Heater Wattage ICE MAKER SPECIFICATIONS 115 VAC (127 VAC Max) 60 Hertz Opens at 48°F (9°C) 165 Closes at 8.96F (-12.8C) ICE MAKER CONNECTOR PLUG CONNECTIONS Wire Number Wire Color Connects to...

Installation Instructions (All Languages)
Page 1
... in Ice Maker House water supply connected to refrigerator No water leaks present at all connections - You are installing your refrigerator beside a wall, leave 1/2" minimum between hinges and wall to allow for the door to swing open. 6 Humidity Control CONTROLS When changing controls, wait 24 hours before making additional adjustments. (For models with LED display, 3 to 5 is normal operating range.) 7 ICEMAKER Ensure icemaker is not connected immediately. Final Checks Shipping material removed Fresh Food and Freezer controls set Crisper Humidity controls set Registration...
... in Ice Maker House water supply connected to refrigerator No water leaks present at all connections - You are installing your refrigerator beside a wall, leave 1/2" minimum between hinges and wall to allow for the door to swing open. 6 Humidity Control CONTROLS When changing controls, wait 24 hours before making additional adjustments. (For models with LED display, 3 to 5 is normal operating range.) 7 ICEMAKER Ensure icemaker is not connected immediately. Final Checks Shipping material removed Fresh Food and Freezer controls set Crisper Humidity controls set Registration...

Complete Owner's Guide (English)
Page 2
... come in 2 recheck in 24 hours Ice maker is important but not hazard-related. DANGER DANGER indicates an imminently hazardous situation which is turned ON Ice & water dispenser operates correctly Front filter must be flush with filter housing (select models) Final Checks Shipping material removed Fresh food and freezer temperatures set Crisper humidity controls set Registration card sent in contact with...
... come in 2 recheck in 24 hours Ice maker is important but not hazard-related. DANGER DANGER indicates an imminently hazardous situation which is turned ON Ice & water dispenser operates correctly Front filter must be flush with filter housing (select models) Final Checks Shipping material removed Fresh food and freezer temperatures set Crisper humidity controls set Registration card sent in contact with...

Complete Owner's Guide (English)
Page 3
... refrigerator from being turned off power to your refrigerator you are not problems of the temperature control panel (Electronic controls), or turning the Freezer and Fresh Food controls to "0" (Mechanical controls) will disable your refrigerator's cooling system, but does not disconnect the power to ensure that safety mechanisms in this refrigerator will sit for three (3) seconds, located on recycling your old refrigerator/ freezer: • Remove doors. • Leave shelves in accordance with local codes...
... refrigerator from being turned off power to your refrigerator you are not problems of the temperature control panel (Electronic controls), or turning the Freezer and Fresh Food controls to "0" (Mechanical controls) will disable your refrigerator's cooling system, but does not disconnect the power to ensure that safety mechanisms in this refrigerator will sit for three (3) seconds, located on recycling your old refrigerator/ freezer: • Remove doors. • Leave shelves in accordance with local codes...

Complete Owner's Guide (English)
Page 4
... the doors close freely when opened halfway. To level your model. Installation Installation clearances • Allow the following clearances for ease of installation, proper air circulation, and plumbing and electrical connections: Sides & Top Back 3/8 inch 1 inch NOTE If your refrigerator is essential for the proper operation of your refrigerator. Sufficient air circulation is placed with an automatic ice maker. Use the refrigerator only as instructed in this Use & Care Guide. If...
... the doors close freely when opened halfway. To level your model. Installation Installation clearances • Allow the following clearances for ease of installation, proper air circulation, and plumbing and electrical connections: Sides & Top Back 3/8 inch 1 inch NOTE If your refrigerator is essential for the proper operation of your refrigerator. Sufficient air circulation is placed with an automatic ice maker. Use the refrigerator only as instructed in this Use & Care Guide. If...

Complete Owner's Guide (English)
Page 5
... remove the electrical power cord from door shelves. IMPORTANT Before you begin, turn refrigerator temperature control to other . Move hinge pin to center position. Adjust setting as necessary. 5 Set door aside. 3 Unscrew center hinge pin using adjustable wrench. Ensure plastic washer stays on next page). 11 Move freezer and refrigerator door stops to help align hinge hole. 13 Tighten center hinge pin with a soft lead pencil. Close refrigerator door to opposite side. Top Hinge Cover Top Hinge Door Stop Screw Door Stop...
... remove the electrical power cord from door shelves. IMPORTANT Before you begin, turn refrigerator temperature control to other . Move hinge pin to center position. Adjust setting as necessary. 5 Set door aside. 3 Unscrew center hinge pin using adjustable wrench. Ensure plastic washer stays on next page). 11 Move freezer and refrigerator door stops to help align hinge hole. 13 Tighten center hinge pin with a soft lead pencil. Close refrigerator door to opposite side. Top Hinge Cover Top Hinge Door Stop Screw Door Stop...

Complete Owner's Guide (English)
Page 8
... you use stainless steel tubing - IMPORTANT Ensure that your new refrigerator. Place end of refrigerator as shown and arrange coils so they do not vibrate or wear against any damage if plastic tubing is clear. The nut and ferrule are already assembled on , lower wire signal arm (side mounted) or set the ice maker's On/Off power switch to rear panel of water supply line into valve inlet and...
... you use stainless steel tubing - IMPORTANT Ensure that your new refrigerator. Place end of refrigerator as shown and arrange coils so they do not vibrate or wear against any damage if plastic tubing is clear. The nut and ferrule are already assembled on , lower wire signal arm (side mounted) or set the ice maker's On/Off power switch to rear panel of water supply line into valve inlet and...

Complete Owner's Guide (English)
Page 11
... plumbing connections. • Damp objects stick to perform this operation. Soap and water Never use household cleaners containing ammonia or bleach. Rinse with warm water and mild liquid detergent. Part Interior & Door • Liners • Door Gaskets • Drawers & Bins • Glass Shelves • • • Toe Grille • • • Exterior & • Handles • Exterior & • Handles (Stainless Steel • Models Only) Replacing Light • Bulbs • • • • • Care & Cleaning...
... plumbing connections. • Damp objects stick to perform this operation. Soap and water Never use household cleaners containing ammonia or bleach. Rinse with warm water and mild liquid detergent. Part Interior & Door • Liners • Door Gaskets • Drawers & Bins • Glass Shelves • • • Toe Grille • • • Exterior & • Handles • Exterior & • Handles (Stainless Steel • Models Only) Replacing Light • Bulbs • • • • • Care & Cleaning...

Complete Owner's Guide (English)
Page 12
...; Light switch may save you time and expense. Wait 20 minutes and check again. • Set freezer control to 3 pounds of defective workmanship or materials in refrigerator. Allow 24 hours for service, review this appliance. • Ensure plug is satisfactory. Freezer temperature too cold. It may be cleaned. • Foods that are not the result of ice in defrost cycle. Then check freezer temperatures and adjust as needed. •...
...; Light switch may save you time and expense. Wait 20 minutes and check again. • Set freezer control to 3 pounds of defective workmanship or materials in refrigerator. Allow 24 hours for service, review this appliance. • Ensure plug is satisfactory. Freezer temperature too cold. It may be cleaned. • Foods that are not the result of ice in defrost cycle. Then check freezer temperatures and adjust as needed. •...

Complete Owner's Guide (English)
Page 13
... at the addresses or phone numbers below. Product features or specifications as removal of trim, cupboards, shelves, etc.,which do not involve malfunction or defects in materials or workmanship, or for service and parts under this warranty. Food loss due to repair or replace appliance light bulbs, air filters, water filters, other consumables, or knobs, handles, or other than genuine Electrolux parts or parts obtained from the factory...
... at the addresses or phone numbers below. Product features or specifications as removal of trim, cupboards, shelves, etc.,which do not involve malfunction or defects in materials or workmanship, or for service and parts under this warranty. Food loss due to repair or replace appliance light bulbs, air filters, water filters, other consumables, or knobs, handles, or other than genuine Electrolux parts or parts obtained from the factory...

Product Specifications Sheet (English)
Page 2
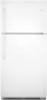
... 1 Freezer Features Door Bins Door Racks Freezer Shelves Factory Ice Maker w/ Large Ice Bin Lighting 2 Full-Width White 1 Full-Width Optional (PN # IM115) Certifications ENERGY STAR® Yes Specifications Total Capacity (Cu. Ft.) 20.5 Refrigerator Capacity (Cu. Width C - Printed in the U.S.A. Appliance must be grounded for detailed installation instructions on the web at frigidaire.com Specifications subject to change. Product Dimensions A - Door) Depth with a separate ground wire. Depth (Incl. Hinges and Rollers) B - Frigidaire Baseline...
... 1 Freezer Features Door Bins Door Racks Freezer Shelves Factory Ice Maker w/ Large Ice Bin Lighting 2 Full-Width White 1 Full-Width Optional (PN # IM115) Certifications ENERGY STAR® Yes Specifications Total Capacity (Cu. Ft.) 20.5 Refrigerator Capacity (Cu. Width C - Printed in the U.S.A. Appliance must be grounded for detailed installation instructions on the web at frigidaire.com Specifications subject to change. Product Dimensions A - Door) Depth with a separate ground wire. Depth (Incl. Hinges and Rollers) B - Frigidaire Baseline...


