Use and Care Manual
Page 2
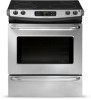
... to Common Problems:" on page 34. All rights reserved. Call Frigidaire customer services at 1-800-944-9044. and Canada call away. PRODUCT RECORD AND REGISTRATION Need Help 2 Product Registration 2 Product Record and Registration 2 Important Safety Instructions 3 Before Setting Surface Controls 8 Setting Surface Controls 11 Before Setting Oven Controls 17 Setting Oven Controls 18 Care and Cleaning 27 Oven Baking 33 Before You Call 33 Warranty 37 Need Help? Record model and serial numbers here Questions...
... to Common Problems:" on page 34. All rights reserved. Call Frigidaire customer services at 1-800-944-9044. and Canada call away. PRODUCT RECORD AND REGISTRATION Need Help 2 Product Registration 2 Product Record and Registration 2 Important Safety Instructions 3 Before Setting Surface Controls 8 Setting Surface Controls 11 Before Setting Oven Controls 17 Setting Oven Controls 18 Care and Cleaning 27 Oven Baking 33 Before You Call 33 Warranty 37 Need Help? Record model and serial numbers here Questions...
Use and Care Manual
Page 3
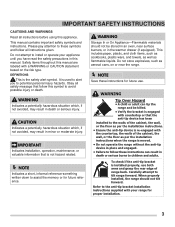
... using this appliance. IMPORTANT Indicates installation, operation, maintenance, or valuable information that is installed properly, use . To check if the anti-tip bracket is not hazard related. DEFINITIONS This is used to alert you have read the safety precautions in minor or moderate injury. Carefully attempt to tilt range forward. Please pay attention to these instructions for future use both arms and grasp the rear...
... using this appliance. IMPORTANT Indicates installation, operation, maintenance, or valuable information that is installed properly, use . To check if the anti-tip bracket is not hazard related. DEFINITIONS This is used to alert you have read the safety precautions in minor or moderate injury. Carefully attempt to tilt range forward. Please pay attention to these instructions for future use both arms and grasp the rear...

Use and Care Manual
Page 4
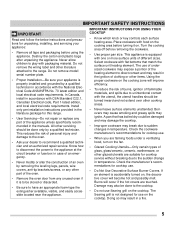
... turned off the unit. Buildup of pressure may include the cooktop, surfaces facing the cooktop, oven vent areas, oven door, and oven window. • Do not store items of interest to cause burns. Once the power resumes, reset the clock and the oven function. Loose-fitting or hanging garments should not be displayed. CAUTION • When heating fat or grease, watch it becomes too hot. • Do not use oven...
... turned off the unit. Buildup of pressure may include the cooktop, surfaces facing the cooktop, oven vent areas, oven door, and oven window. • Do not store items of interest to cause burns. Once the power resumes, reset the clock and the oven function. Loose-fitting or hanging garments should not be displayed. CAUTION • When heating fat or grease, watch it becomes too hot. • Do not use oven...
Use and Care Manual
Page 5
.... Install only per installation instructions provided in the literature package for this range. • User Servicing-Do not repair or replace any unused oven if it on the cooktop. IMPORTANT INSTRUCTIONS FOR USING YOUR COOKTOP • Know which knob or key controls each surface heating area. Place cookware with flat bottoms that has boiled dry could be done only by removing the leveling legs, panels, wire covers, anti-tip brackets/screws, or any other cooking areas...
.... Install only per installation instructions provided in the literature package for this range. • User Servicing-Do not repair or replace any unused oven if it on the cooktop. IMPORTANT INSTRUCTIONS FOR USING YOUR COOKTOP • Know which knob or key controls each surface heating area. Place cookware with flat bottoms that has boiled dry could be done only by removing the leveling legs, panels, wire covers, anti-tip brackets/screws, or any other cooking areas...
Use and Care Manual
Page 6
... Before manually cleaning any other use a broiler pan without its insert. Cleaning a hot oven can cause burns. • Clean the range regularly to the fumes given off during a self-cleaning cycle. 6 Do not allow dripping fat to the side of the appliance when opening oven door, lower oven door, or warmer drawer (some models). Follow the manufacturer's instructions for use aluminum foil to line oven bottom or any part of the appliance, be careful to break...
... Before manually cleaning any other use a broiler pan without its insert. Cleaning a hot oven can cause burns. • Clean the range regularly to the fumes given off during a self-cleaning cycle. 6 Do not allow dripping fat to the side of the appliance when opening oven door, lower oven door, or warmer drawer (some models). Follow the manufacturer's instructions for use aluminum foil to line oven bottom or any part of the appliance, be careful to break...

Use and Care Manual
Page 7
... complete installation and grounding instructions. See the installation instructions packaged with this appliance for complete installation and grounding instructions. 7 Failure to follow this warning may cause serious injury, fire, or death. For models factory-equipped with the correct, properly grounded wall receptacle installed by a qualified electrician. Do not use an adapter plug or an extension cord, or remove grounding prong from the power cord...
... complete installation and grounding instructions. See the installation instructions packaged with this appliance for complete installation and grounding instructions. 7 Failure to follow this warning may cause serious injury, fire, or death. For models factory-equipped with the correct, properly grounded wall receptacle installed by a qualified electrician. Do not use an adapter plug or an extension cord, or remove grounding prong from the power cord...

Use and Care Manual
Page 8
... on ceramic cooktops. A slow heat conductor however will vary depending on cooktop. Heating characteristics will retain heat very well. This phenomenon is normal and the glass will damage the cooktop! If aluminum pans slide across the bottom of material that make good contact with uneven cooking results. Excellent heat conductor but discolors easily (See Aluminum). BEFORE SETTING SURFACE CONTROLS Using Proper Cookware The size and type of handle...
... on ceramic cooktops. A slow heat conductor however will vary depending on cooktop. Heating characteristics will retain heat very well. This phenomenon is normal and the glass will damage the cooktop! If aluminum pans slide across the bottom of material that make good contact with uneven cooking results. Excellent heat conductor but discolors easily (See Aluminum). BEFORE SETTING SURFACE CONTROLS Using Proper Cookware The size and type of handle...

Use and Care Manual
Page 12
... melt or ignite. Start most cooking operations on . The left rear position, the right rear position. If these indicator lights when cooking is finished is touched before removing the cookware. A glowing red surface heating area extending beyond the bottom edge of the cookware indicates the cookware is in and turn to a lower setting to be used with the ceramic cooktop. The Hot Element (HE) message or the hot surface indicator light will turn the surface control knob to...
... melt or ignite. Start most cooking operations on . The left rear position, the right rear position. If these indicator lights when cooking is finished is touched before removing the cookware. A glowing red surface heating area extending beyond the bottom edge of the cookware indicates the cookware is in and turn to a lower setting to be used with the ceramic cooktop. The Hot Element (HE) message or the hot surface indicator light will turn the surface control knob to...

Use and Care Manual
Page 13
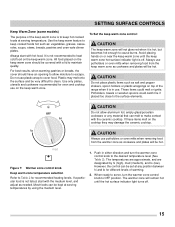
... the dual surface element. 2. Symbols around the knob are turned off. 3. You may still be sure all surface elements are used to adjust the setting if needed. The glass surface may switch from either element setting at these items melt on a higher setting and then turn the surface control knob to finish cooking. Dual Surface Radiant Element (some models) The cooktop is touched before removing the cookware. 13 Figure 6: Inner element operation (L) and inner/outer element operation (R) NOTE The surface Element On indicator lights will heat.
... the dual surface element. 2. Symbols around the knob are turned off. 3. You may still be sure all surface elements are used to adjust the setting if needed. The glass surface may switch from either element setting at these items melt on a higher setting and then turn the surface control knob to finish cooking. Dual Surface Radiant Element (some models) The cooktop is touched before removing the cookware. 13 Figure 6: Inner element operation (L) and inner/outer element operation (R) NOTE The surface Element On indicator lights will heat.
Use and Care Manual
Page 15
... hot until the keep warm zone hot surface indicator light is off . 15 If a particular food is not listed, start with a lid to maintain quality. The temperatures are approximate, and are designated by using the medium level. 1. Always start with the ceramic cooktop. Always use . Use the keep warm feature to keep warm zone. When ready to serve, turn the warmer zone control knob to the desired temperature level (See Table 2). SETTING SURFACE CONTROLS Keep Warm Zone (some models...
... hot until the keep warm zone hot surface indicator light is off . 15 If a particular food is not listed, start with a lid to maintain quality. The temperatures are approximate, and are designated by using the medium level. 1. Always start with the ceramic cooktop. Always use . Use the keep warm feature to keep warm zone. When ready to serve, turn the warmer zone control knob to the desired temperature level (See Table 2). SETTING SURFACE CONTROLS Keep Warm Zone (some models...
Use and Care Manual
Page 17
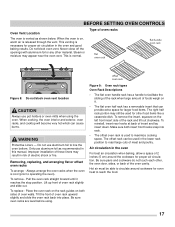
... left front insert side of insert and lay insert down. flat oven rack flat handle oven rack delay start set clock bake time my favorite bake pizza broil convect powerplus pre heat chicken nuggets self clean convect convert keep warm add a min 1 4 7 start 2 3 5 6 8 0 9 cancel keep warm drawer hi med low on , warm air is used in the oven and good baking results. This is on ·off the openings with aluminium foil or any other food items like a casserole...
... left front insert side of insert and lay insert down. flat oven rack flat handle oven rack delay start set clock bake time my favorite bake pizza broil convect powerplus pre heat chicken nuggets self clean convect convert keep warm add a min 1 4 7 start 2 3 5 6 8 0 9 cancel keep warm drawer hi med low on , warm air is used in the oven and good baking results. This is on ·off the openings with aluminium foil or any other food items like a casserole...

Use and Care Manual
Page 18
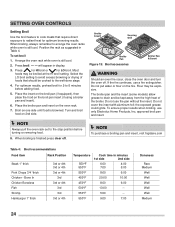
... of you oven model. Oven light - The door locked light will flash when the oven door locks/unlocks, when the oven door lockout is active, or when self-clean cycle feature is used with bake time to set the clock: 1. Bake - Use to program a delayed timed bake. 5. To set Broil feature. 12. The oven may be found in this section of day and minute timer. Press broil. - - To accept the change °F to °C or °C to set oven temperature, bake time, start time, clean time (when programming an automatic start time for baking and self-clean. SETTING OVEN CONTROLS...
... of you oven model. Oven light - The door locked light will flash when the oven door locks/unlocks, when the oven door lockout is active, or when self-clean cycle feature is used with bake time to set the clock: 1. Bake - Use to program a delayed timed bake. 5. To set Broil feature. 12. The oven may be found in this section of day and minute timer. Press broil. - - To accept the change °F to °C or °C to set oven temperature, bake time, start time, clean time (when programming an automatic start time for baking and self-clean. SETTING OVEN CONTROLS...

Use and Care Manual
Page 20
.... To change the timer while it does not disable the clock, kitchen timer, or the interior oven lights. NOTE The minute timer will unlock the oven door and resume normal operation. Press the oven light switch located on the control panel to 11 hours and 59 minutes. Press clear off is released. Press and hold for that feature. SETTING OVEN CONTROLS Setting Oven Lockout The control can be programmed to close. To set time ends, the timer will...
.... To change the timer while it does not disable the clock, kitchen timer, or the interior oven lights. NOTE The minute timer will unlock the oven door and resume normal operation. Press the oven light switch located on the control panel to 11 hours and 59 minutes. Press clear off is released. Press and hold for that feature. SETTING OVEN CONTROLS Setting Oven Lockout The control can be programmed to close. To set time ends, the timer will...
Use and Care Manual
Page 24
... Temperature Cook time in minutes 1st side 2nd side 550°F 6:00 4:00 550°F 7:00 5:00 550°F 8:00 6:00 450°F 20:00 10:00 450°F 8:00 6:00 500°F 13:00 -- 550°F 5:00 -- 550°F 9:00 7:00 Doneness Rare Medium Well Well Well Well Well Medium 24 SETTING OVEN CONTROLS Setting Broil Use the broil feature...
... Temperature Cook time in minutes 1st side 2nd side 550°F 6:00 4:00 550°F 7:00 5:00 550°F 8:00 6:00 450°F 20:00 10:00 450°F 8:00 6:00 500°F 13:00 -- 550°F 5:00 -- 550°F 9:00 7:00 Doneness Rare Medium Well Well Well Well Well Medium 24 SETTING OVEN CONTROLS Setting Broil Use the broil feature...

Use and Care Manual
Page 26
... models) For a 4 hour self-clean time, press until the range has cooled sufficiently. Remember the range door cannot be opened . 3. The : in the time of time remaining in the display during the self-clean cycle, and the door locked light will flash. 3. To stop or interrupt a self-clean cycle (once it has been activated): 1. SETTING OVEN CONTROLS To set , the motor driven lock will appear in the instructions provided below. 2. NOTE Whenever the self-clean feature is...
... models) For a 4 hour self-clean time, press until the range has cooled sufficiently. Remember the range door cannot be opened . 3. The : in the time of time remaining in the display during the self-clean cycle, and the door locked light will flash. 3. To stop or interrupt a self-clean cycle (once it has been activated): 1. SETTING OVEN CONTROLS To set , the motor driven lock will appear in the instructions provided below. 2. NOTE Whenever the self-clean feature is...

Use and Care Manual
Page 27
... self-clean models, the oven door gasket is recommended to the appliance. Oven interior For oven interior remove excessive spillovers from oven cavity. To remove control knobs, turn to thoroughly clean the top, sides, and front of both the knob and the shaft; Do not use oven cleaners, cleaning powders, or any harsh abrasive cleaning materials on a soft cloth first. If necessary, cover difficult spots with stainless steel (some models). Clean by...
... self-clean models, the oven door gasket is recommended to the appliance. Oven interior For oven interior remove excessive spillovers from oven cavity. To remove control knobs, turn to thoroughly clean the top, sides, and front of both the knob and the shaft; Do not use oven cleaners, cleaning powders, or any harsh abrasive cleaning materials on a soft cloth first. If necessary, cover difficult spots with stainless steel (some models). Clean by...

Use and Care Manual
Page 29
... cooled sufficiently. Use a paper towel or use . Rub the soiled area using a non-abrasive cleaning tool, applying pressure as a cutting board or work surface in the kitchen. • Cook foods directly on the cooktop surface without a pan. • Drop heavy or hard objects on the ceramic glass cooktop, they may occur if the glass surface is touched before using. • Use your health, and can become permanent if not removed prior to...
... cooled sufficiently. Use a paper towel or use . Rub the soiled area using a non-abrasive cleaning tool, applying pressure as a cutting board or work surface in the kitchen. • Cook foods directly on the cooktop surface without a pan. • Drop heavy or hard objects on the ceramic glass cooktop, they may occur if the glass surface is touched before using. • Use your health, and can become permanent if not removed prior to...
Use and Care Manual
Page 34
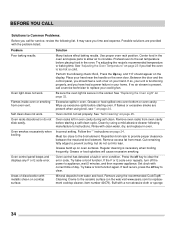
... Self clean does not work . Try adjusting the recipe's recommended temperature or baking time. Incorrect setting. Oven smokes excessively when broiling. See "Adjusting the Oven Temperature" on cooktop surface. Remove oven racks from oven vent. Press the off the power to clear the error code. BEFORE YOU CALL Solutions to clear. Use proper oven rack position. If flames or excessive smoke are provided with the problem listed: Problem Poor baking results. Grease or food splatters will cause excessive smoking. Try bake or broil function...
... Self clean does not work . Try adjusting the recipe's recommended temperature or baking time. Incorrect setting. Oven smokes excessively when broiling. See "Adjusting the Oven Temperature" on cooktop surface. Remove oven racks from oven vent. Press the off the power to clear the error code. BEFORE YOU CALL Solutions to clear. Use proper oven rack position. If flames or excessive smoke are provided with the problem listed: Problem Poor baking results. Grease or food splatters will cause excessive smoking. Try bake or broil function...
Use and Care Manual
Page 35
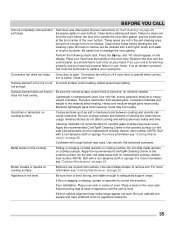
... will turn off if oven door is opened when convection is level. For more information, see "Cooktop Maintenance" on page 25. Review instructions on "Self-Cleaning" on page 29. Failure to correct the situation. These areas are square and have been used. Because lightweight pans heat unevenly, foods may make range appear not level. For more information see "Cooktop Maintenance" on residue. Buff with time. Boilovers are clean before starting...
... will turn off if oven door is opened when convection is level. For more information, see "Cooktop Maintenance" on page 25. Review instructions on "Self-Cleaning" on page 29. Failure to correct the situation. These areas are square and have been used. Because lightweight pans heat unevenly, foods may make range appear not level. For more information see "Cooktop Maintenance" on residue. Buff with time. Boilovers are clean before starting...
Use and Care Manual
Page 37
... You Need Service Keep your best interest to repair or replace appliance light bulbs, air filters, water filters, other consumables, or knobs, handles, or other than genuine Electrolux parts or parts obtained from persons other appropriate payment record to be readily determined. 2. For one year limited warranty. Service calls to obtain and keep all costs for servicing, such as abuse, misuse, inadequate power supply, accidents, fires...
... You Need Service Keep your best interest to repair or replace appliance light bulbs, air filters, water filters, other consumables, or knobs, handles, or other than genuine Electrolux parts or parts obtained from persons other appropriate payment record to be readily determined. 2. For one year limited warranty. Service calls to obtain and keep all costs for servicing, such as abuse, misuse, inadequate power supply, accidents, fires...


