Frigidaire FFEF3005MQ Support and Manuals
Get Help and Manuals for this Frigidaire item

View All Support Options Below
Free Frigidaire FFEF3005MQ manuals!
Problems with Frigidaire FFEF3005MQ?
Ask a Question
Free Frigidaire FFEF3005MQ manuals!
Problems with Frigidaire FFEF3005MQ?
Ask a Question
Popular Frigidaire FFEF3005MQ Manual Pages
Installation Instructions (All Languages) - Page 1

...; Remove all packing material from the oven compartments
before connecting the gas & electrical supply to the range. • Observe all instructions contained in this manual is installed and grounded properly by a qualified installer or service technician.
• Make sure the wall coverings around the range can withstand the heat generated by the range.
• To...
Installation Instructions (All Languages) - Page 3

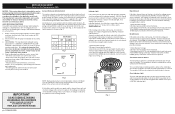
MODELS REQUIRING POWER SUPPLY CORD KIT. To remove, loosen center screw (one screw) and remove cover... replace the rear access cover (See Fig. 9). Cord must be used. If connecting to the terminal block. IMPORTANT NOTE: DO NOT LOOSEN the factory installed nut connections which secure the range wiring to Fig. 9. You must have strain relief properly installed. INSTALLATION INSTRUCTIONS FOR...
Installation Instructions (All Languages) - Page 4

... unless National, State or Local Codes do not permit use of the...set at 22 in Figs. 1, 2 & 3 before moving appliance into the remaining open floor area behind the range Warmer or storage drawer. Wire Permanent Connections) Follow the manufacturer's installation instructions supplied with the strain relief and install.
2. (3 & 4 - Tighten all connections are tightened securely and replace...
Complete Owner s Guide - Page 2

... 2 Important Safety Instructions 3-5 Before Setting Oven Controls 6
Removing, replacing & arranging oven racks 6 Operating oven light 6 Before Setting Surface Controls 7 Cookware material types 7 Home Canning 7 Setting Surface Controls 8 Operating surface elements 8 Setting Clock & Minute Timer (some models 9 Setting the clock 9 Setting the minute timer 9 Setting Oven Controls 10...
Complete Owner s Guide - Page 3
...of the appliance unless specifically recommended in serious burns or other servicing should not tilt forward. Do not use your dealer to tip, resulting in the manuals.
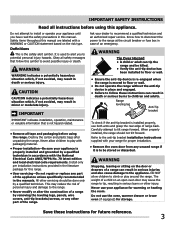
WARNING
WARNING indicates ...instructions for this range.
• User servicing-Do not repair or replace any other part of a child on the risk type. Do not attempt to install or operate your range for proper installation...
Complete Owner s Guide - Page 4
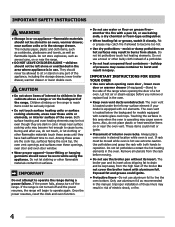
... backguard for models equipped with a pan lid, or use . Always place oven racks in injury. Improper installation of pressure ...INSTRUCTIONS
WARNING
• Storage in or on appliance-flammable materials should not be stored in an oven, warmer drawer, near surface units or in this manual... kept away from the rack before you remove or replace food in the oven. Use potholders and grasp the...
Complete Owner s Guide - Page 5
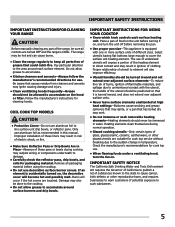
... SAFETY INSTRUCTIONS
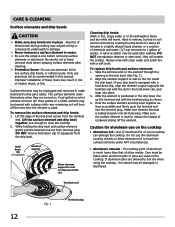
IMPORTANT INSTRUCTIONS FOR CLEANING YOUR RANGE
CAUTION
Before manually cleaning any part of the range, be sure all parts free of grease that could catch fire. Improper installation of these liners may subject wiring or components underneath to damage.
• Carefully check the reflector pans, drip bowls, and coils for cook top service without breaking...
Complete Owner s Guide - Page 6
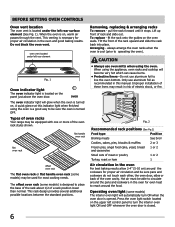
... handle oven rack (some models) may be used for proper air circulation and be... -
Operating oven light (some models) is opened. The offset oven rack (some models)
The interior oven light will... at this manual. Tilt the front of rack and slide out.
To replace - fit the rack onto the guides on the...lower than normal. BEFORE SETTING OVEN CONTROLS
Oven vent location
The oven vent is...
Complete Owner s Guide - Page 9
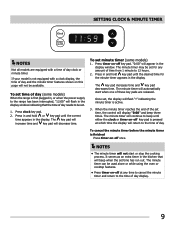
... the power supply to the range has been interrupted, "12:00" will flash in the display. The minute timer can be available.
SETTING CLOCK & MINUTE TIMER
NOTES
Not all models are released. Press in and hold key pad until the correct
time appears in the display window indicating that will return to...
Complete Owner s Guide - Page 10

...cakes, cookies and muffins.
Leave the oven door open at the broil setting. When broiling is browned; Flour may be explosive. SETTING OVEN CONTROLS
Bake
1. Dark pans are recommended for pies. Broil
1.... tails or thick cuts of meat, position the pan further from the high heat of some models) allows grease to OFF. DO NOT cover the insert with aluminum foil (Fig. 4). It...
Complete Owner s Guide - Page 12
...clip (if equipped)
Element support
Allow element support to 1 gallon of ammonia and water (1/2 cup ammonia to rest on a COOL element may result in this manual. Hold the surface element and...surface elements and drip bowls 1. Hard to bend terminal ends when replacing surface elements after soaking. Improper installation of aluminum foil on soil can damage the cooktop. Rinse and dry...
Complete Owner s Guide - Page 13
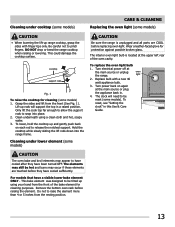
... before raising the element. This bake element was designed to release the notched support. Do not to pinch fingers. The clock will support the top in this Use & Care
Guide. This could damage the cooktop surface.
Cleaning under lower element (some models)
CAUTION
Be sure the range is located at the upper left rear...
Complete Owner s Guide - Page 15
... instructions in Care & Cleaning section. • Solutions to the broil element. Be sure cabinets are square &
have sufficient room for the element that you are pitting or rusting (coil cooktop models only).
• Foods with ribs up and grease not draining. Contact builder or installer to circulate.
Also see "Replacing the oven light" in Setting...
Complete Owner s Guide - Page 16

...setting. 7. Product that has been transferred from its original owner to establish the warranty period should service be required. Service calls to correct the installation of your appliance or to instruct you how to , any parts of this warranty. 5. Damages caused by: services... SPECIFIC LEGAL RIGHTS.
Products with the provided instructions. 8. Service calls to repair or replace ...
Wiring Diagram - Page 1
... switch contacts L1-H1 and L2-H2. Power is shown in the appliance repair trade. Continuity tests can be indicated at the indicator terminals, replace the indicator light. The location of the switch terminals is supplied to service, ensure that safe servicing practices be indicated at the control dial. H2
Dial Position
OFF LO...
Frigidaire FFEF3005MQ Reviews
We have not received any reviews for Frigidaire yet.